Hiring tutorial: Create business objects
Hiring tutorial > Implement the process >
In this lesson, you create custom business objects to organize your process-specific data for the Standard HR Open New Position process.
Business objects represent the business data that is relevant to the process. For each business object, you define parameters to specify the data structure. A parameter is assigned a variable type that can be a simple type or a business object. When you create the user interface, you bind elements of the user interface to the parameters of these business objects.
When you create business objects, follow these guidelines:
- Start business object names with an uppercase letter.
- If the name of the business object consists of more than one word, capitalize the first letter of each word, for example NewPerson.
- Remember that the names of business objects are case sensitive.
- Add documentation details to business objects and parameters to clarify their use to other users. These details display in the context-sensitive help windows when someone selects the business objects for use with variables.
This lesson uses the following concepts:
| Concept | Description |
|---|---|
| business objects | A variable that represents business data that is relevant in the context of a process. |
Procedure
- Create a Person business object:
- In the library, hover over Data and then click the
 icon. Select Business Object.
 - Type Person for the business object name and click Finish.
- In the Parameters section, click the add button.
- Type lastName for the parameter name and keep the variable type as
String. -
Use the following table to create the parameters for the business object:
Parameter Variable Type lastName String firstName String supervisor String startDate Date
Tip: To change the variable type, click Select next to Variable Type to select the Date variable type.payLevel String payType String notes String Save your work.
- In the library, hover over Data and then click the
- Create a Position business object. Use the following table to create the parameters for the business object:
Parameter Variable Type positionType String positionTypeList String (List)
Tip: Select the List check box.The tutorial uses this variable to store the position types that that the hiring manager can select in the coach.
replacement Person
Tip: Click Select for the Variable Type and then click Person from the list. This is the business object that you created in the previous step.jobTitle String iId String Save your work.
- Create the Requisition business object. Use the following table to create the parameters for the business object:
Parameter Variable Type reqNum String requester String empType String empTypeList String (List) empNum Integer approvalNeeded Boolean date Date department String departmentList String (List) location String locationList String (List) gmApproval Boolean gmComments String instanceId String Save your work.
- Open the Standard HR Open New Position process. When you modeled the process, you created variables to model the decision gateway logic and left their types as String. Now, change the type of these variables to the types of the business objects that you created.
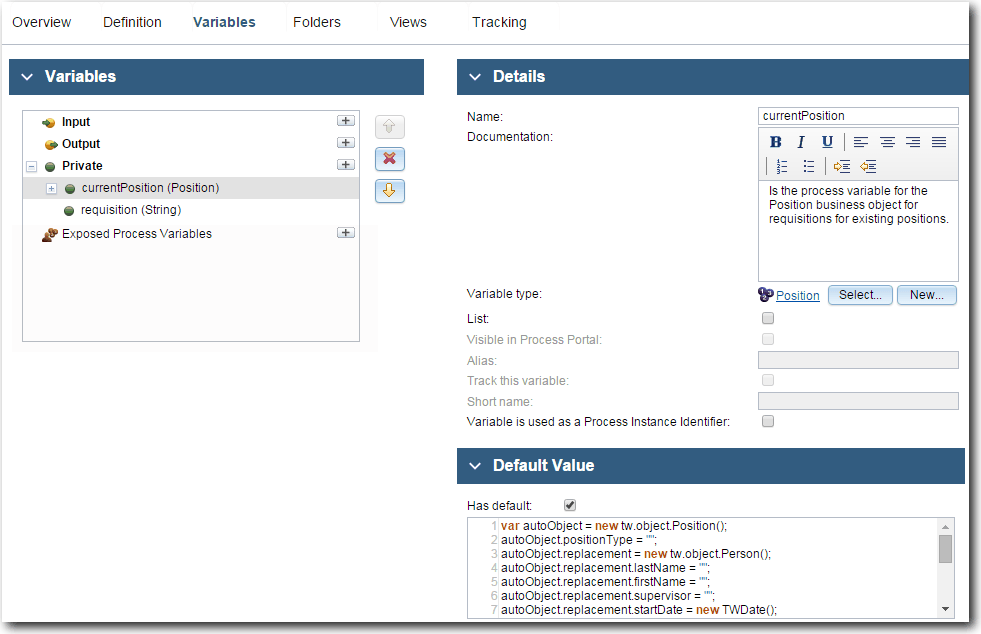
- In the main canvas of the Standard HR Open New Position process, click the Variables tab.
- Select the currentPosition private variable and then change its variable type from String to Position.
- Enable Has default. The properties now have default values.

- Change the variable type of the requisition private variable from String to Requisition.
- Enable Has default.
- Save your work.
- Click the Definition tab to return to the Standard HR Open New Position process diagram.
Summary
You created business objects and then updated the process variables to used these business objects as their type.
In the next lesson, you implement the timer intermediate event.