Good practice – Monitor the Process Federation Server embedded Elasticsearch service by using the Head utility
You can use the open source Head utility to browse your Elasticsearch cluster, view the status and topology of the Elasticsearch cluster, and perform index- and node-level operations. You can also use the Head utility to call the Elasticsearch RESTful API. The Head utility has been tested successfully on Firefox and Internet Explorer browsers in this configuration. Some issues have been seen in Chrome with requests other than HTTP GETs.
Viewing Elasticsearch health and topology
In the Overview tab, you see the status of the cluster, the nodes, and the indexes. Here, you see the primary shards and the replicas for each node, the size of each index on the node, and the number of documents that have been indexed.

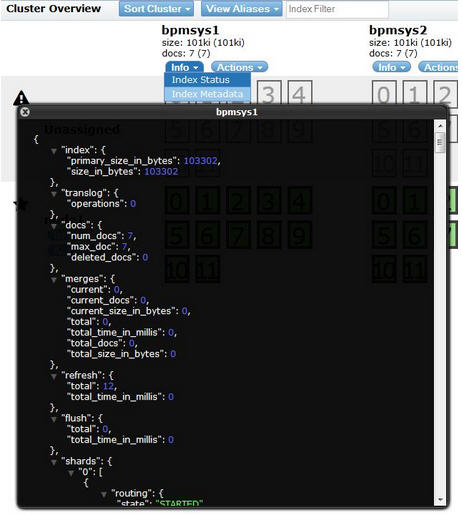
Checking index status
To see more in-depth information about the index, click Info and select Index Status.
Viewing index data
Select the Browser tab to view index documents and their data. To see the details and field values for a specific document, select an index to restrict the tabular view to show only documents from one index and then select a document within the tabular view.

Making REST calls
You can make Elasticsearch REST calls in the Any Request tab, which you do to verify the queries that the Process Federation Server made.

The forwarder application
The Elasticsearch Head utility can work with the HTTP port of the Elasticsearch service. However, because some browsers do not support mixed content on the same page and that the HTTP port does not support authentication, authorization, or secure communications, keep the Elasticsearch HTTP port disabled (the default configuration). As a secure alternative to the Elasticsearch HTTP port, Process Federation Server provides an application, called the forwarder application, that securely forwards REST requests to the Elasticsearch service, acting like a proxy server. However, the forwarder application forwards the requests internally only to the Elasticsearch process that runs on the same server. Before the forwarder application accepts Elasticsearch HTTP requests, it checks the authorization of the user who sent the request.
Note: For single sign-on to work correctly, the host name and port in the URL must be the same for both the Head utility and the forwarder application.
Ensuring security credentials can be shared
To ensure that security credentials can be shared across the Elasticsearch Head utility and the forwarder application, run the Elasticsearch Head utility from the Process Federation Server that also hosts the forwarder application. To run the Head utility from your Process Federation Server Liberty server installation, download the Head utility and then repackage it into a deployable web application archive (WAR file) that can be run on the Process Federation Server Liberty server.
For more information about the Elasticsearch Head utility, see https://github.com/mobz/elasticsearch-head.
Packaging the Head utility
- On https://github.com/mobz/elasticsearch-head, click Download ZIP to download the elasticsearch-head-master.zip file.
2. The files contained within the zip file have a directory structure that looks like this:
-elasticsearch-head-master
– index.html
– dist
– …
Copy the contents of the extracted zip file under elasticsearch-head-master directory into c:\temp\eshead\ directory. The structure will look like this:
– eshead
– index.html
– dist
– …
Notice that all the files under the elasticsearch-head-master directory are now under the new eshead directory.
3. Create a c:\temp\eshead\WEB-INF directory:
– eshead
– index.html
– WEB-INF
– dist
– …
4. Create a web.xml file in the c:\temp\eshead\WEB-INF directory:
– eshead
– index.html
– WEB-INF
-web.xml
– dist
– …
5. Edit the web.xml file and copy the following text into the file:
<?xml version="1.0" encoding="UTF-8"?>
<web-app id="ESHead" xmlns="http://java.sun.com/xml/ns/j2ee"
xmlns:xsi="http://www.w3.org/2001/XMLSchema-instance"
xsi:schemaLocation="http://java.sun.com/xml/ns/j2ee http://java.sun.com/xml/ns/j2ee/web-app_2_4.xsd" version="2.4">
    <display-name>ESHead</display-name>
    <description>ESHead</description>
    <security-constraint>
        <display-name>ESHead</display-name>
        <web-resource-collection>
            <web-resource-name>UIContent</web-resource-name>
            <url-pattern>/*</url-pattern>
        </web-resource-collection>
        <auth-constraint>
            <role-name>esadmin</role-name>
        </auth-constraint>
        <user-data-constraint>
            <transport-guarantee>CONFIDENTIAL</transport-guarantee>
        </user-data-constraint>
    </security-constraint>
    <login-config>
        <auth-method>BASIC</auth-method>
    </login-config>
    <security-role>
        <role-name>esadmin</role-name>
    </security-role>
    <welcome-file-list>
        <welcome-file>index.html</welcome-file>
    </welcome-file-list>
</web-app>
6. Create a .zip file of the c:\temp\eshead\ directory and call it ESHead.war. The zip file will have the following structure:
– index.html
– WEB-INF
-web.xml
– dist
– …
Notice that the structure does not have the elasticsearch-head-master directory.
Setting up the Head utility
To configure Process Federation Server Liberty, complete the following steps:
- Edit the server.xml file.
- Ensure that the forwarder application feature is enabled in the <featureManager> section:
<feature>ibmPfs:federatedForwarder-1.0</feature> - Ensure that the Elasticsearch port is disabled by updating the attributes of the <ibmPfs_elasticSearch> section:
http.enabled=”false” - Add authorized users, groups, or special subjects in the <authorization-roles id=”com.ibm.bpm.federated.forwarder.authorization”> element. For example, to allow all logged-in users to administer, monitor, and search the Elasticsearch data, use the following configuration:
<authorization-roles id="com.ibm.bpm.federated.forwarder.authorization"> <security-role name="bpmadmin"> <special-subject type="ALL_AUTHENTICATED_USERS"/> </security-role> <security-role name="bpmmonitor"> <special-subject type="ALL_AUTHENTICATED_USERS"/> </security-role> <security-role name="bpmuser"> <special-subject type="ALL_AUTHENTICATED_USERS"/> </security-role> </authorization-roles> - Copy the ESHead.war file into the
pfs_install_root/usr/shared/apps directory on your Process Federation Server Liberty server. - Add the following sections to the server.xml file. Note that the location is the name of the .zip file that you created previously; the default directory is \usr\shared\apps directory. The security role that you define must be the same as the role that is defined in the web.xml file (in this example it is “esadmin”). You can also authorize a group or special subject instead of a user.
     <webApplication contextRoot="ESHead" location="ESHead.war">
        <application-bnd>
           <security-role name="esadmin">
              <user name="uid=admin,o=defaultWIMFileBasedRealm"/>
           </security-role>
        </application-bnd>
     </webApplication>
- Ensure the user, group, or special subject is in the bpmadmin and bpmmonitor security roles of the com.ibm.bpm.federated.forwarder.authorization authorization role, as previously described. In this example, all authenticated users have access to the forwarder application, but only the admin user has access to the Head utility.
- Restart Process Federation Server Liberty.
Accessing the Head utility
- Go to https://<host name>:<secure port>/ESHead.
- In the Head utility, enter the location of the administrative forwarder application, for example https://localhost:9443/elasticsearch-admin/
Thanks, Laura. Very interesting will try this today as soon as my PFS is working.
Do you know by any chance what may cause the following messages?
[ERROR ] Error creating a task index document. com.ibm.bpm.elasticsearch.receiver.spi.IndexingException: Index data was not found for indexKeyField=task.tkiid.key indexKey=83074
and
[ERROR ] CWWKG0058E: com.ibm.ws.webcontainer.security.feature.authorizationConfig with the unique identifier com.ibm.bpm.federated.forwarder.authorization is missing required attribute name
Info is very scarce on PFS. Thanks in advance. Vlad
Thanks!
Hi, Vlad.
I spoke with one of our lead IBM BPM developers, David Enyeart, and he said the first error can happen if the underlying IBM BPM task is deleted before PFS indexing occurs. In this case, it would be a benign error because the task does not need to be indexed in PFS anymore.
Regarding the second error, please send David more context of what you were doing along with a full log showing the problem. His email address is enyeart@us.ibm.com.
I hope this helps.
Laura