Hiring tutorial: Create the coaches for the Create Position Request CSHS client-side human service
Hiring tutorial > Create the user interface >
In this lesson, you create the user interface that the hiring manager uses to create a position request. In the Standard HR Open New Position process, the hiring manager completes the submit position request activity. To enable the hiring manager to complete the activity, you create the user interface in IBM® Business Process Manager by using a number of coach views and the variables of the client-side human service.
This lesson uses the following concept:
| Concept | Description |
|---|---|
| coaches | The user interfaces for human services. |
Procedure
- In the Create Position Request CSHS client-side human service:
- Select the Coaches tab and then select the Create position request coach. The coach opens to display the canvas. Because this coach was created as a default, it already contains a number of controls that are based on the variables of the human service and an OK button.
- Delete all of the controls except for the OK button.
- Drop a panel onto the layout area above the OK button.
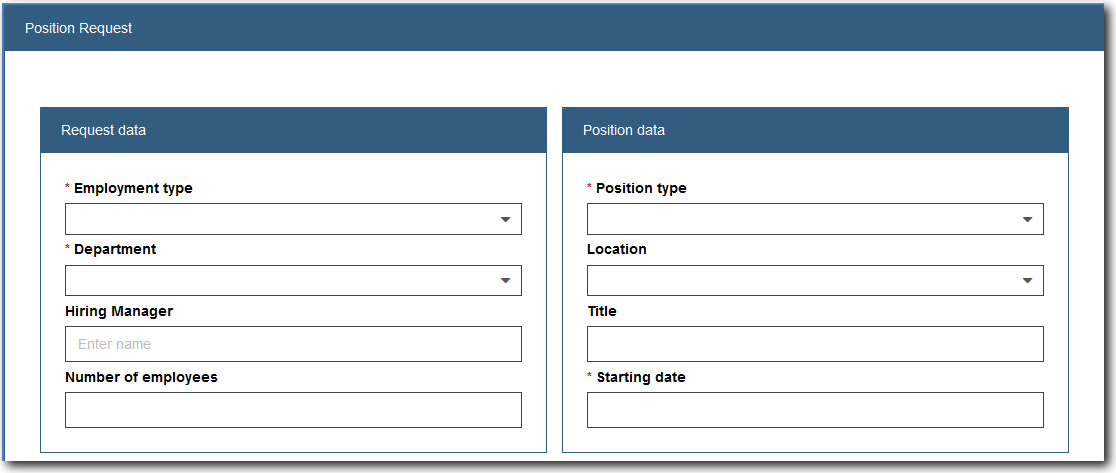
- Rename the panel to Position Request. In the Configuration properties, change the color to Primary.

- Create the form part of the coach:
- In the panel, add a Horizontal Layout control.
- From the palette, add the Requisition CV coach view to the horizontal layout. When you create a coach view, it is added to the palette so that you can add it to other coach views.

- Add the Position CV coach view beside the Requisition CV in the horizontal layout.

- Bind the Requisition CV to
Requisitionand bind the Position CV toPosition. - Select the Requisition CV and open its Positioning properties. Set the Width to 49%. Repeat for the Position CV.
- Set the Requisition configuration option for Position CV
- Select Position CV
- Click Properties > Configuration.
- Click the purple icon beside Requisition

- Click the Select button and select the requisition business object.<img src="/community/images/31/2016/03/gs_tutorial_requisition2.gif" alt="The requisition configuration option"
- Select the OK button. Relabel the button to Next.
- In this coach, you want to view the details in the Requisition CV and Position CV as read-only. However, the coach views have fields that have a visibility of required. If you don’t want the fields to be marked required, create duplicate coaches.
- In the library, right click User Interfaces to view the coach views.
- Right click Requisition CV and click Duplicate. A duplicate coach, Requisition CV 2, is created.<img src="/community/images/31/2016/03/gs_tutorial_activity_duplicate_CV.gif" alt="The Duplicate option"
- Similarly, create a duplicate coach Position CV 2.
- Edit Requisition CV 2 and Position CV 2 and change the visibility of the following fields from required to Same as parent:
Position CV 2 > Position
Position CV 2 > Starting date
Requisition CV 2 > Employment type
Requisition CV 2 > Department type
- Select the Confirm position details coach. In the Select a Template window, start with the default coach and click OK.
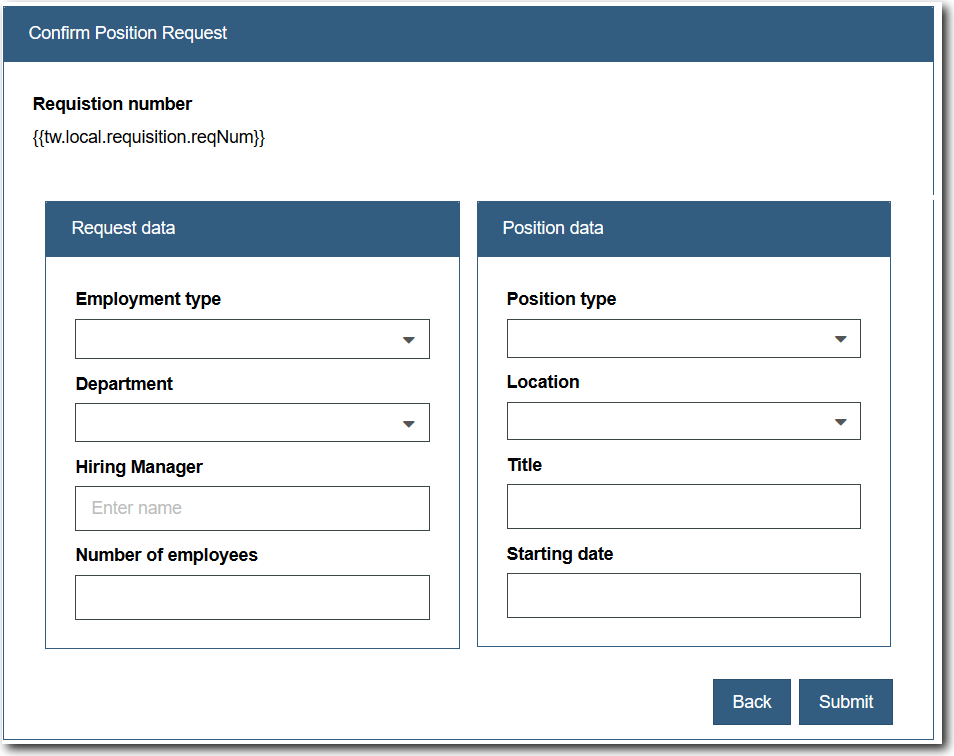
- Drop a panel onto the canvas. Relabel it to Confirm Position Request and change the color style to Primary.
- Add an Output Text control to the Confirm Position Request panel. Change the label to Requisition number and bind it to
requisition.reqNum. - Drop a Horizontal Layout into the Confirm Position Request panel. In its Visibility properties, change its visibility to Read only.
- Add the Requisition CV 2 and Position CV 2 to the horizontal layout. Set their width to 49% each.
- Bind Requisition CV 2 to
Requisitionand bind Position CV 2 toPosition. - Set the Requisition configuration option for Position CV 2.
- Drop a Horizontal Layout below the Confirm Position Request panel. Change its horizontal alignment to right.
- Drag the existing OK button into this section and then add another button. Rename the left button to Back and the right button to Submit.

- Select the Specify Existing Position coach. In the Select a Template window, start with the default coach and click OK.
- Drop a Panel onto the canvas. Relabel it to Existing Position and change the color style to Primary.
- Drop a Horizontal Layout into the panel.
- Drop the Person CV into the horizontal layout and bind it to
currentPosition.replacement. - Add another panel beside the Person CV coach view and relabel it to Position. In its Visibility properties, change its visibility to Read only.
- Add a Text control to the section and relabel it to Position type. Bind it to
currentPosition.positionType. - Add another Text control to the section and relabel it to Title. Bind it to
currentPosition.jobTitle. - Drop a horizontal layout below the Existing Position section. Change its horizontal alignment to left.
- Drag the existing OK button into this section and then add another button. Rename the left button to Back and the right button to Next. Change the color style of the buttons to Primary

Summary
You created the user interface that the hiring manager uses to create a position request.
In the next lesson, you will create the complete the flow for the Create Position Request CSHS client-side human service.