User options
This section describes the User menu and the Settings menu.
User menu
Access the drop-down menu for your user name to access the
Sign Out option. This option ends your Storage Modeller session and returns you to the login page.
If your Storage Modeller session is inactive for more than ten minutes, you receive the alert that is shown in Figure 7.
If your Storage Modeller session is inactive for more than ten minutes, you receive the alert that is shown in Figure 7.
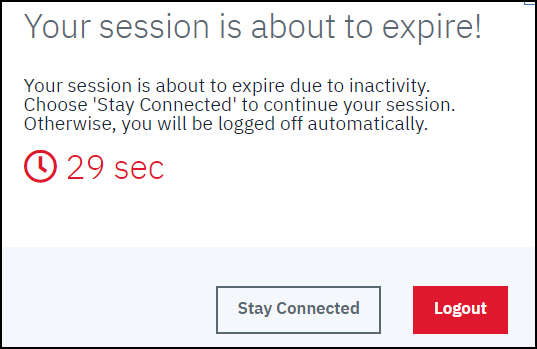
Figure 7 Inactive message, session timeout
Settings menu
Figure 8 on page 6
shows the menu options for the Settings icon.

Figure 8 Drop-down menu for user options
These settings are arranged as vertical tabs in the
Settings icon, See Figure 10 on page 7.
Table 1 on page 7
describes these settings.
The settings menu contains the following options:
▪User Settings. This option enables you to set defaults for your project.
– See
Figure 10 on page 7
to view the entry fields.
– See
Table 1 on page 7
for a detailed explanation of each field.
▪Log. This option displays a log of milestone events in Storage Modeller such as when you share a project with a team mate or send a project through
a workflow Figure 9.
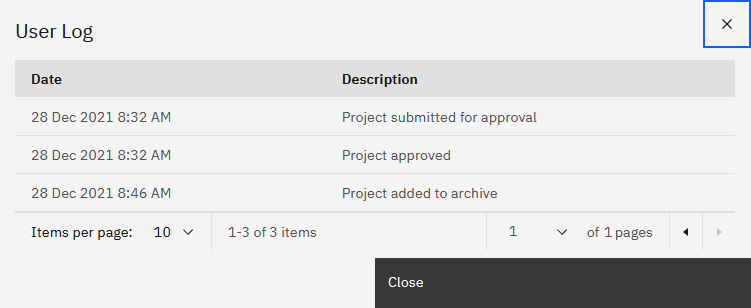
Figure 9 Typical User Log message box
▪Administration. If you are a team administrator, you also see an Administration option. With these options,
advanced users define access lists for a team, naming conventions, and workflow attributes. See
“Administration settings”.
Table 1 Tabs of the User Settings dialog box
|
Tab name
|
Purpose
|
|---|---|
|
Defaults
|
Set defaults for your projects (see
Figure 10):
▪Unit of Measurement form:
Applies the default settings that you specify to your projects.
– Base Unit of Measurement: Binary Base 2 or Decimal Base 10
– Unit of Measurement:
PiB, TiB, or GiB
▪Auto-archiving:
After a defined period of inactivity, Storage Modeller automatically moves a project to the
Archived state.
Note:
By default, only “Active” projects are visible in the Project list (tile or list view). You can change the search filter to also display “Archived” projects. See “Display options in the Projects view”.
An archived project is identified by the
Archived icon (
 ) beside the project name in the Project view (tile or list view). ) beside the project name in the Project view (tile or list view).
You can customize auto-archive behavior, as described in
“Customize the auto-archiving behavior”.
Some of the archiving activity for your projects is tracked in the
“History tab (access history snapshots of a project)”.
This automated feature complements the manual
Move to Archive
action that is described in
“Project action menu”.
▪Naming Conventions Customizations:
Sites display hosts, systems and components in the Canvas of Storage Modeller. (See
“Sites tab (display details on project sites)” on page 31.) When you create a site for a project, Storage Modeller suggests a default name for that site. That suggested default site name is built from the prefix that you specify here
plus a number that is automatically appended to ensure that the name is unique.
|

Figure 10 Default user settings
Customize the auto-archiving behavior
You can customize auto-archiving behavior that is described in
Table 1. You modify the Auto-archiving options in
Figure 10
as follows:
a. Ensure that the
Automatically archive inactive projects
check box is selected.
b. Enter the number of days of inactivity that will trigger auto-archiving.
c. Click Submit to save your changes.
Managing tags
Go to the Tags tab to create and manage the project tags. The tags become keywords that facilitate filtering and searching for types of projects. When you manage many projects in Storage
Modeller, tags can be an invaluable search-aid as discussed in
“Projects perspective”.
Creating tags for use in any project
The tag table is empty until you start adding tags. The projects that you create automatically receive a blue
My Project tag that cannot be modified.
▪Add and configure a tag as follows:

Figure 11 User settings
Adding a tag
The Add tag dialog box is displayed as shown in
Figure 12 on page 9.
b. Enter a tag Name and Description.
c. Set the tag color as follows:
i. Click the color slide (see the red box in
Figure 12 on page 9) and move the selector to the color family that you want, for example, green
color.
ii. In the Color box, move the circle icon to the color intensity that you want to apply to your tag.
Consult the Preview section to see how the tag will look.
iii. Feel free to experiment by selecting and previewing a variety of colors for your tag. Click the
recycle icon to return to a previous color selection.

Figure 12 Adding tags
Editing and Deleting tags
Edit and delete tags through the action menu of each tag’s row in the Tags tab that is shown in
Figure 11 on page 8.
▪To modify an existing tag, click Edit in the action menu. Change name, description and color as needed. Click
Submit to save.
▪To delete an existing tag, click Delete in the action menu.
‘Tags’ for a specific Project
▪When you select Tags in the action menu of a project (see
“Project action menu”), you access the
Select tags for project
dialog box. There, you select existing tags or define new tags to help filter/search for projects in Storage Modeller.
|
Note: Storage Modeller automatically applies the My Project tag to all projects that you create.
|
– Available tags: This section lists the tags that are defined for your
entire set of projects. See “User options”.
– Selected tags: This section lists the tags that are assigned to the
current project. In Figure 13 on page 10, the user clicked
DemoTag in the Available tags section, and the tag jumped to the
Selected tag section. When the user clicks Submit, that tag is assigned to the project.
– Add tag: You click this button to access the
Add Tag dialog box where you define the text and color of a new tag. A green Ready tag was created for this example.
The tags you add here become available to all projects. The Add Tag process is described in
“User options”.)
|
Note: You can edit and delete tags through your User Settings, as described in
“User options”.
|

Figure 13 Selecting tags