Getting started with Managed File Transfer
IBM® MQ Managed File Transfer (MFT) transfers file between systems in a reliable, managed and secured way. File transfer activities are logged and this can be used for activity logging. You can configure Managed File Transfer agents and enable queue managers to perform transfers.
Managed File Transfer (MFT) provides two topologies:
- Single queue manager topology : uses a single queue manager as the agent queue manager, command queue manager, and coordination queue manager. These terms are described in the next section.
- Multiple queue manager topology : uses multiple queue managers that act as the agent queue manager, command queue manager, and coordination queue manager. More specifically, this topology requires at least three queue managers: one acting as the coordination queue manager, one as the Source Agent queue manager (for creating a Managed File transfer agent) and command queue manager, and a third queue manager acting as the Destination Agent Queue Manager (for creating an another File transfer agent) and a command queue manager.
MFT is an integrated component of IBM MQ Advanced. For the latest and complete details of this product, see Managed File Transfer in IBM Knowledge Center.
Components of IBM MQ MFT
There are three main components of IBM MQ Managed File Transfer: Coordination Queue Manager responsible for the collection of agent status, transfer status, and transfer activity information, Command Queue Manager the interface queue manager that bridges the MFT commands and the IBM MQ infrastructure, and Agents that each have their own set of queues associated with a queue manager (agent queue manager) and it is the key for sending and receiving the files, that are transferred (o agents are created on system where files are to be transferred from or to).
This tutorial includes the following exercises:
- Configure the IBM MQ as a Service queue manager(s) to be an MFT
Coordination, Command, and Agent queue manager, and then create MFT Agents (as source or destination
agent). The tutorial provides steps for both of the supported topologies.
- Single Queue Manager Topology: Single queue manager is configured as agents queue manager, commands queue manager, and coordination queue manager.
- Multiple Queue Manager Topology: In this topology multiple queue managers are used.
- Perform a File Transfer.
Prerequisites
In order to proceed with this tutorial, it is vital that you have completed the following prerequisites:
-
Basic knowledge of MFT: to get a basic understanding on how MFT works with IBM MQ, see Managed File Transfer in IBM main documentation.
- Create an IBM MQ as a Service queue manager. If you do not
already have an IBM MQ as a Service queue manager, you can create one
by following Getting started with IBM MQ as a Service. You should have:
- An IBM MQ as a Service queue manager
- Connection details downloaded in a connection_info.txt file (see Retrieving connection_info.txt).
- An admin username and apikey downloaded in a platformApiKey.json file (see Retrieving platformApiKey.json.)
- IBM MQ Client. To complete this tutorial you require the IBM MQ command line tool runmqsc installed and in your PATH. If you do not have these commands, you can get them by installing the IBM MQ Client (see IBM MQ C client).
- IBM MQ MFT Component. To install the IBM MQ MFT component, refer to Installing Managed File Transfer in IBM main documentation.
Setting up your terminal environment
-
Open a terminal window
- This terminal will be the admin terminal, used to configure your coordination queue manager.
-
Specify the queue manager details in an MQSERVER environment variable in the admin terminal by completing the following steps:
-
The runmqsc CLI requires that an environment variable is set to identify the remote queue manager that it should connect to. In the admin terminal, export MQSERVER variable with the following command:
-
For Windows:
SET MQSERVER=CLOUD.ADMIN.SVRCONN/TCP/<HOSTNAME>(<PORT>) -
For Linux®:
export MQSERVER="CLOUD.ADMIN.SVRCONN/TCP/<HOSTNAME>(<PORT>)"
- this is 'hostname' in the file connection_info.txt.<HOSTNAME>
- this is 'listenerPort' in the file connection_info.txt.<PORT>
-
This step is required on any new terminal that will be used for remote administration of a queue manager, such as when using runmqsc CLI.
Step 1: Configure the IBM MQ as a Service queue manager for Managed File Transfer (MFT)
This section guides you to configure an IBM MQ as a Service queue manager as an agent queue manager. There are two widely used topologies for this configuration. You can choose either configuration and then follow the appropriate section:
- Single Queue Manager Topology . In this topology the same queue manager is configured to perform all the MFT operations. You do this by configuring it as Coordination queue manager, Command queue manager, and Agent queue manager. See Single queue manager topology for Managed File Transfer.
- Multiple Queue Manager Topology. In this topology, you create three queue managers to perform MFT operations. They are named them as QMCOORD, QMSRC, and QMDEST. See Multiple queue manager topology for Managed File Transfer.
Step 2: Initiate a File Transfer
In this section, you verify your MFT setup by performing a file transfer. This tutorial demonstrates the file transfer by using MFT CLI. The fteCreateTransfer command creates and starts a new file transfer from the command line. This command can start a file transfer immediately, schedule a file transfer for a future time and date, repeat a scheduled transfer one or more times, and trigger a file transfer based on certain conditions.
For simplicity, in this tutorial you create an immediate transfer. Follow the instructions in Initiating a managed file transfer to initiate a transfer. For more details about fteCreateTransfer, see fteCreateTransfer.
Retrieving connection_info.txt
To retrieve the connection_info.txt file containing queue manager connection details:
- Navigate to your IBM MQ as a Service UI by following the instructions in Getting started with IBM MQ as a Service.
- The queue manager view opens. Select the queue manager you want to retrieve the connection info
from.

- Click Connection information.

- Download this file in JSON text format.
Retrieving platformApiKey.json
To create or reset your administrator api key:
- Navigate to your IBM MQ as a Service UI by following the instructions in Getting started with IBM MQ as a Service.
- The queue manager view opens. Select the queue manager you wish to retrieve the connection info
from:
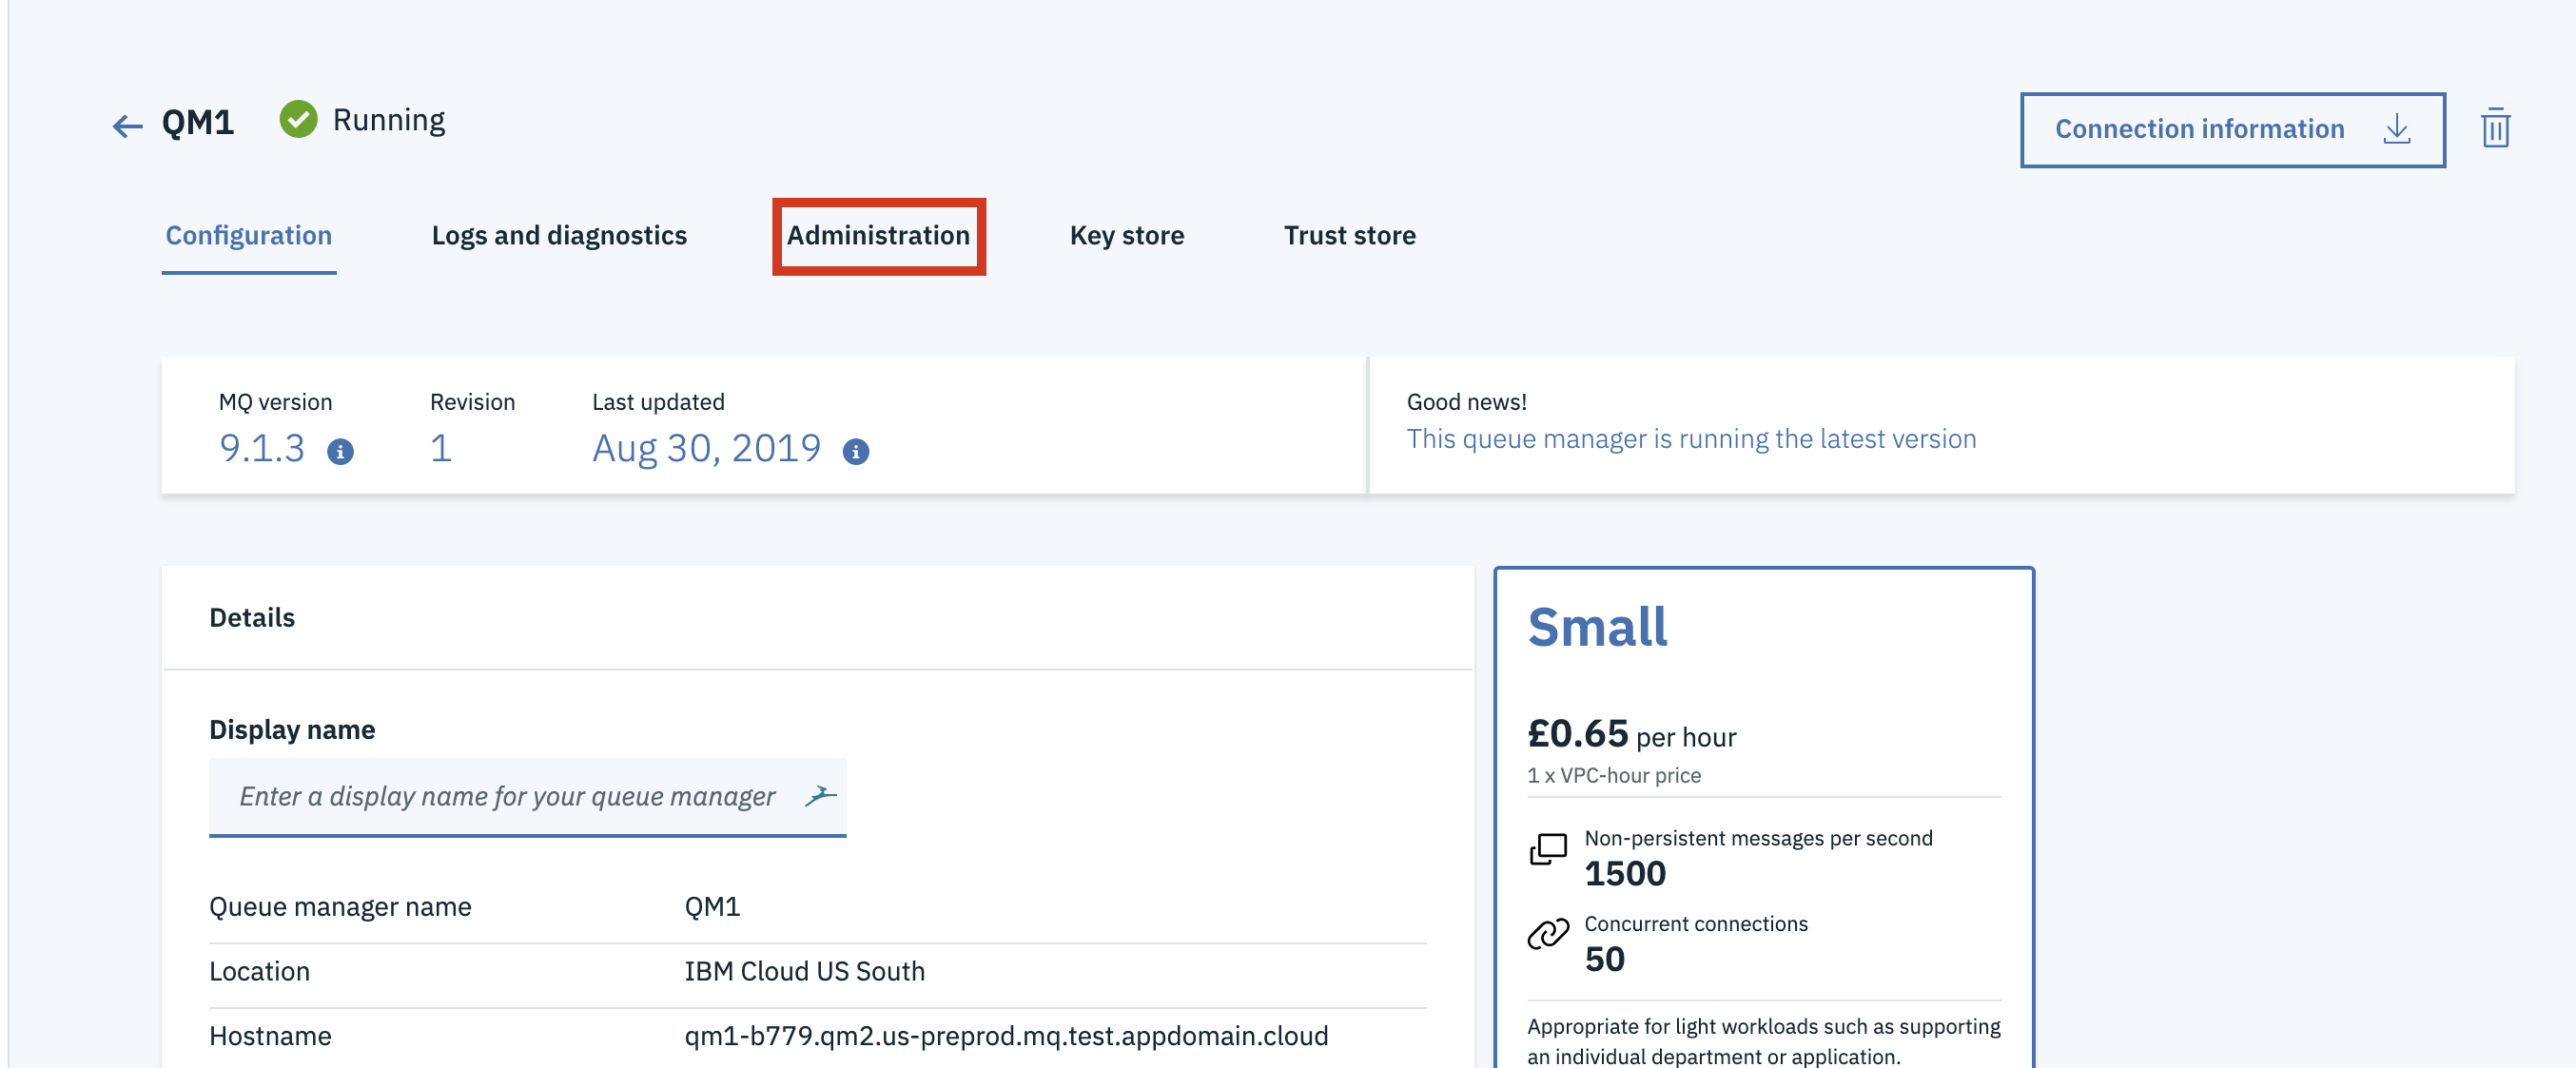
- Next, select the Administration tab:
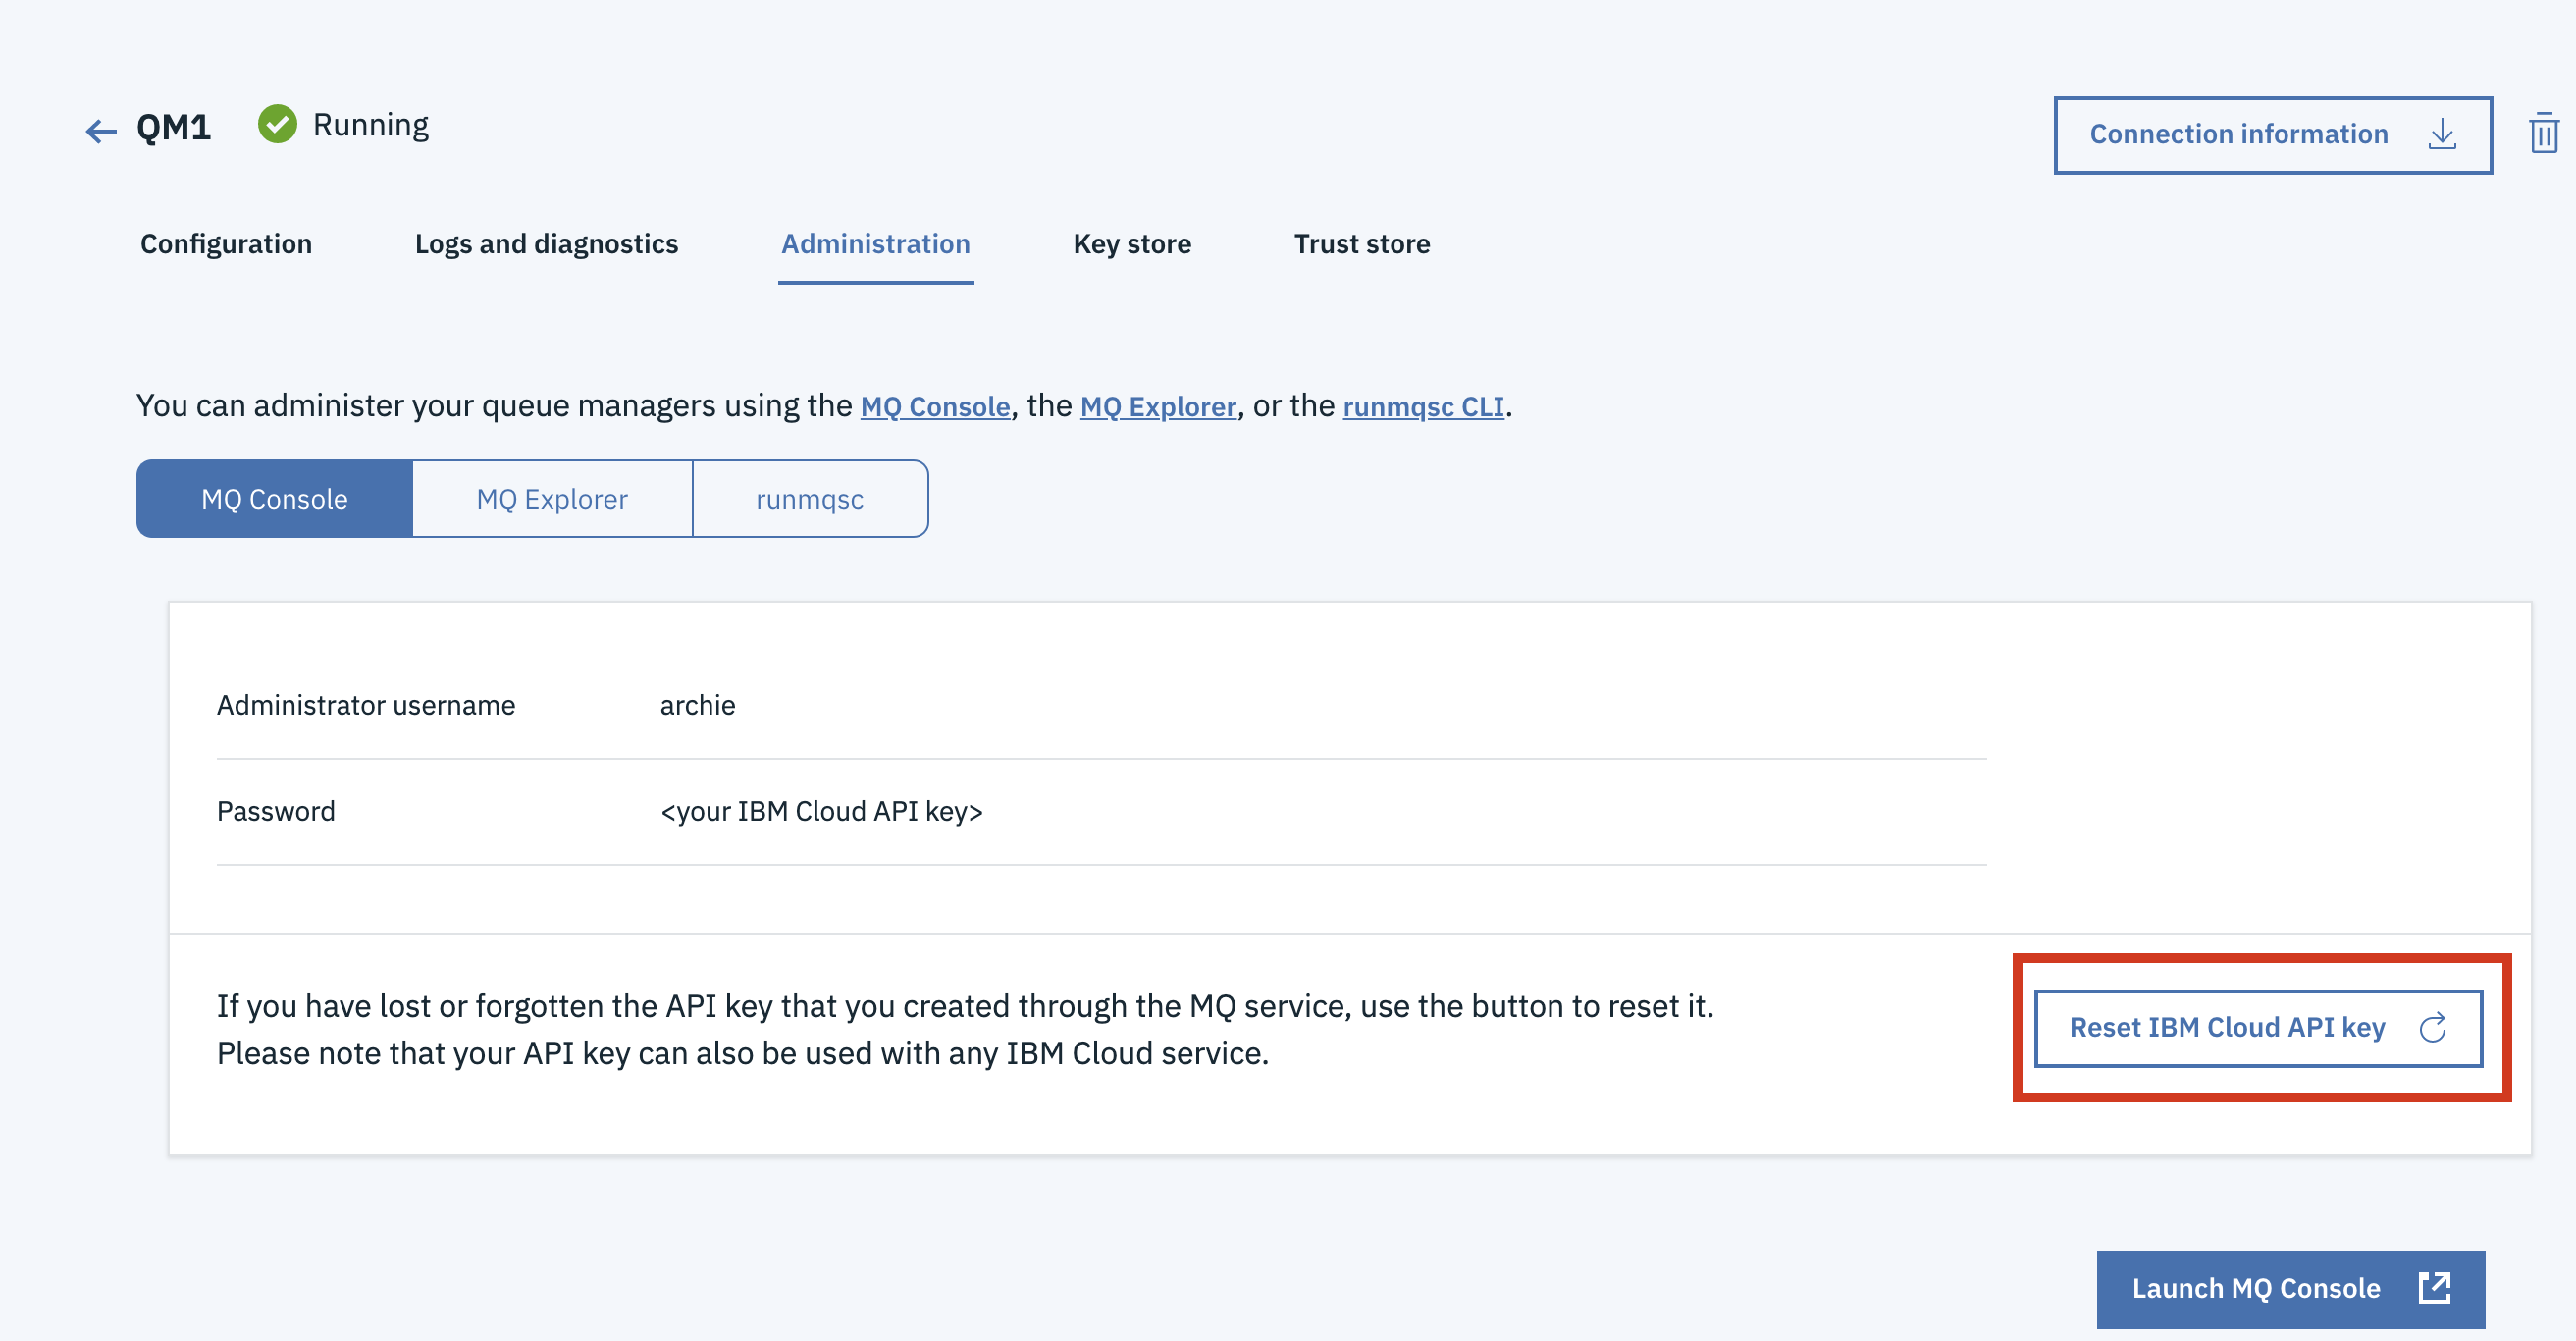
- Click Reset API Key button. The previous admin API key for this IBM MQ Username will no longer be valid.(If the button says Create API Key, then you have not created an api key in this way before. Click the CreateAPI Key button.
- Click Download to download the platformApiKey.json
file containing an admin username and apikey.

IBM MQ C Client
If you do not have the IBM MQ Client command line tool and samples (runmqsc, amqsputc, amqsgetc), you can download it from here.
- Select the latest package.
- Select the IBM MQ C redistributable client for your Operating System by ticking the box on the left of the package as shown below. It should have Redist in the file name. This tutorial was created using the Linux Ubuntu Operating system.
- Select to download via HTTPS, this will allow you to download the client directly through your
browser as shown below.If you do not have this option, try in an alternative browser.

- After clicking on continue, you are redirected to screen shown below. Click on the symbol as
shown by the red circle to begin your download.

- When downloaded, extract the file to a directory of your choice
<PATH_TO_MQCLIENT_DIR>tar -xvzf <IBM-MQC-Redist>.tar.gz <PATH_TO_MQCLIENT_DIR> - Add commands to
path:
export PATH=$PATH:<PATH_TO_MQCLIENT_DIR>/bin:<PATH_TO_MQCLIENT_DIR>/samp/bin