News
Abstract
Quick Start Set-up Steps
Content
Step 1: Create a bucket in IBM Cloud Object Storage
The first step is to create a “bucket” to hold data in the cloud. To do this navigate to https://www.ibm.com/cloud/object-storage using your browser and click “Get started for free”.
If you already have an account and your browser was already logged in, you will be redirected to the page in figure 4; otherwise you will be redirected to the page in figure 2.

Figure 1
If you do not already have an IBM Cloud account, create one, log in, and you will be redirected to the page in figure 3.
If you already have an IBM Cloud, select “Log in”, log in, and you will be redirected to the page in figure 3.
Note: If for some reason the redirections do not work properly you may be redirected to the IBM Cloud Dashboard. If this happens follow the directions in the “Creating an object storage resource from the dashboard” section at the bottom of this how-to guide.
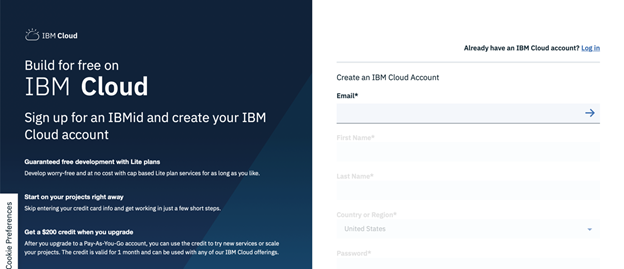
Figure 2
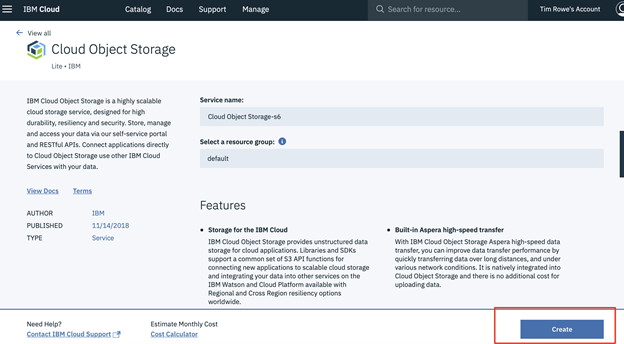
Figure 3
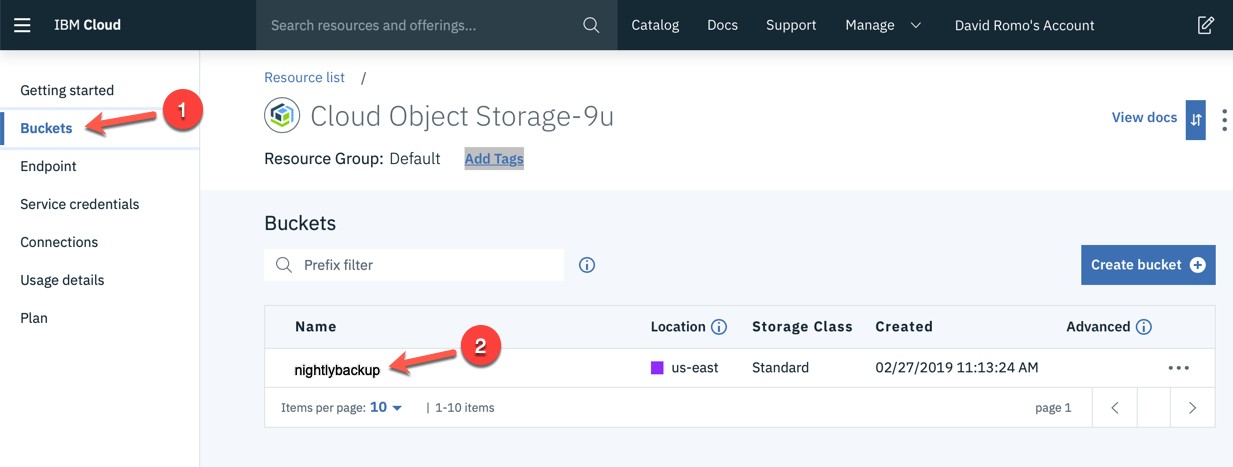
Select “Buckets” from the list of topics on the left-hand side of the page then select the “Create bucket” button.
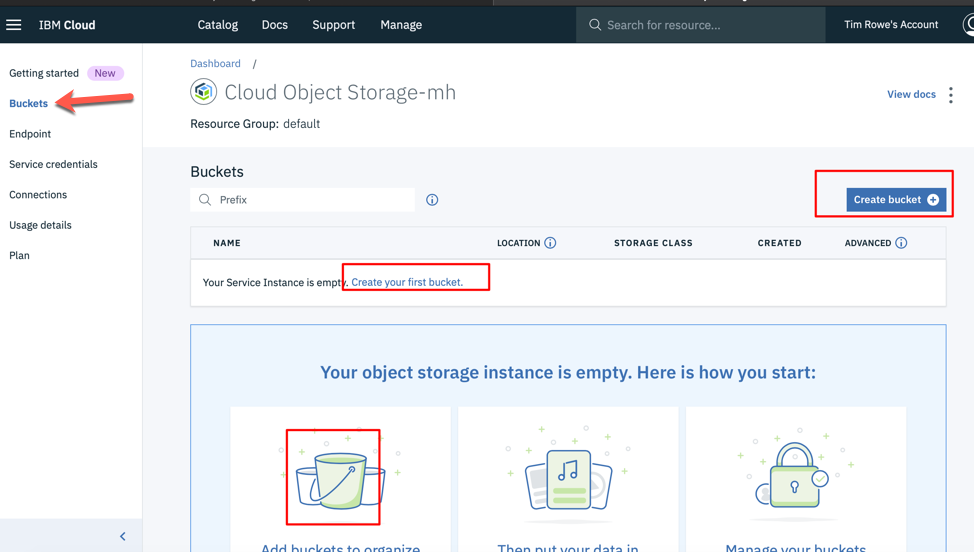
Figure 4
Give the bucket a name and select the “Create bucket” button.

Figure 5
After creating the bucket you will see the following page. Keep this page open in the browser. The information from this page will be needed to create a resource in Cloud Storage Solutions.

Figure 6
Step 2: Create a resource in Cloud Storage Solutions
The next step is to create a resource in Cloud Storage Solutions that corresponds to the bucket you created in the first step.
Run the Work with ICC Resources (WRKCFGICC) command.
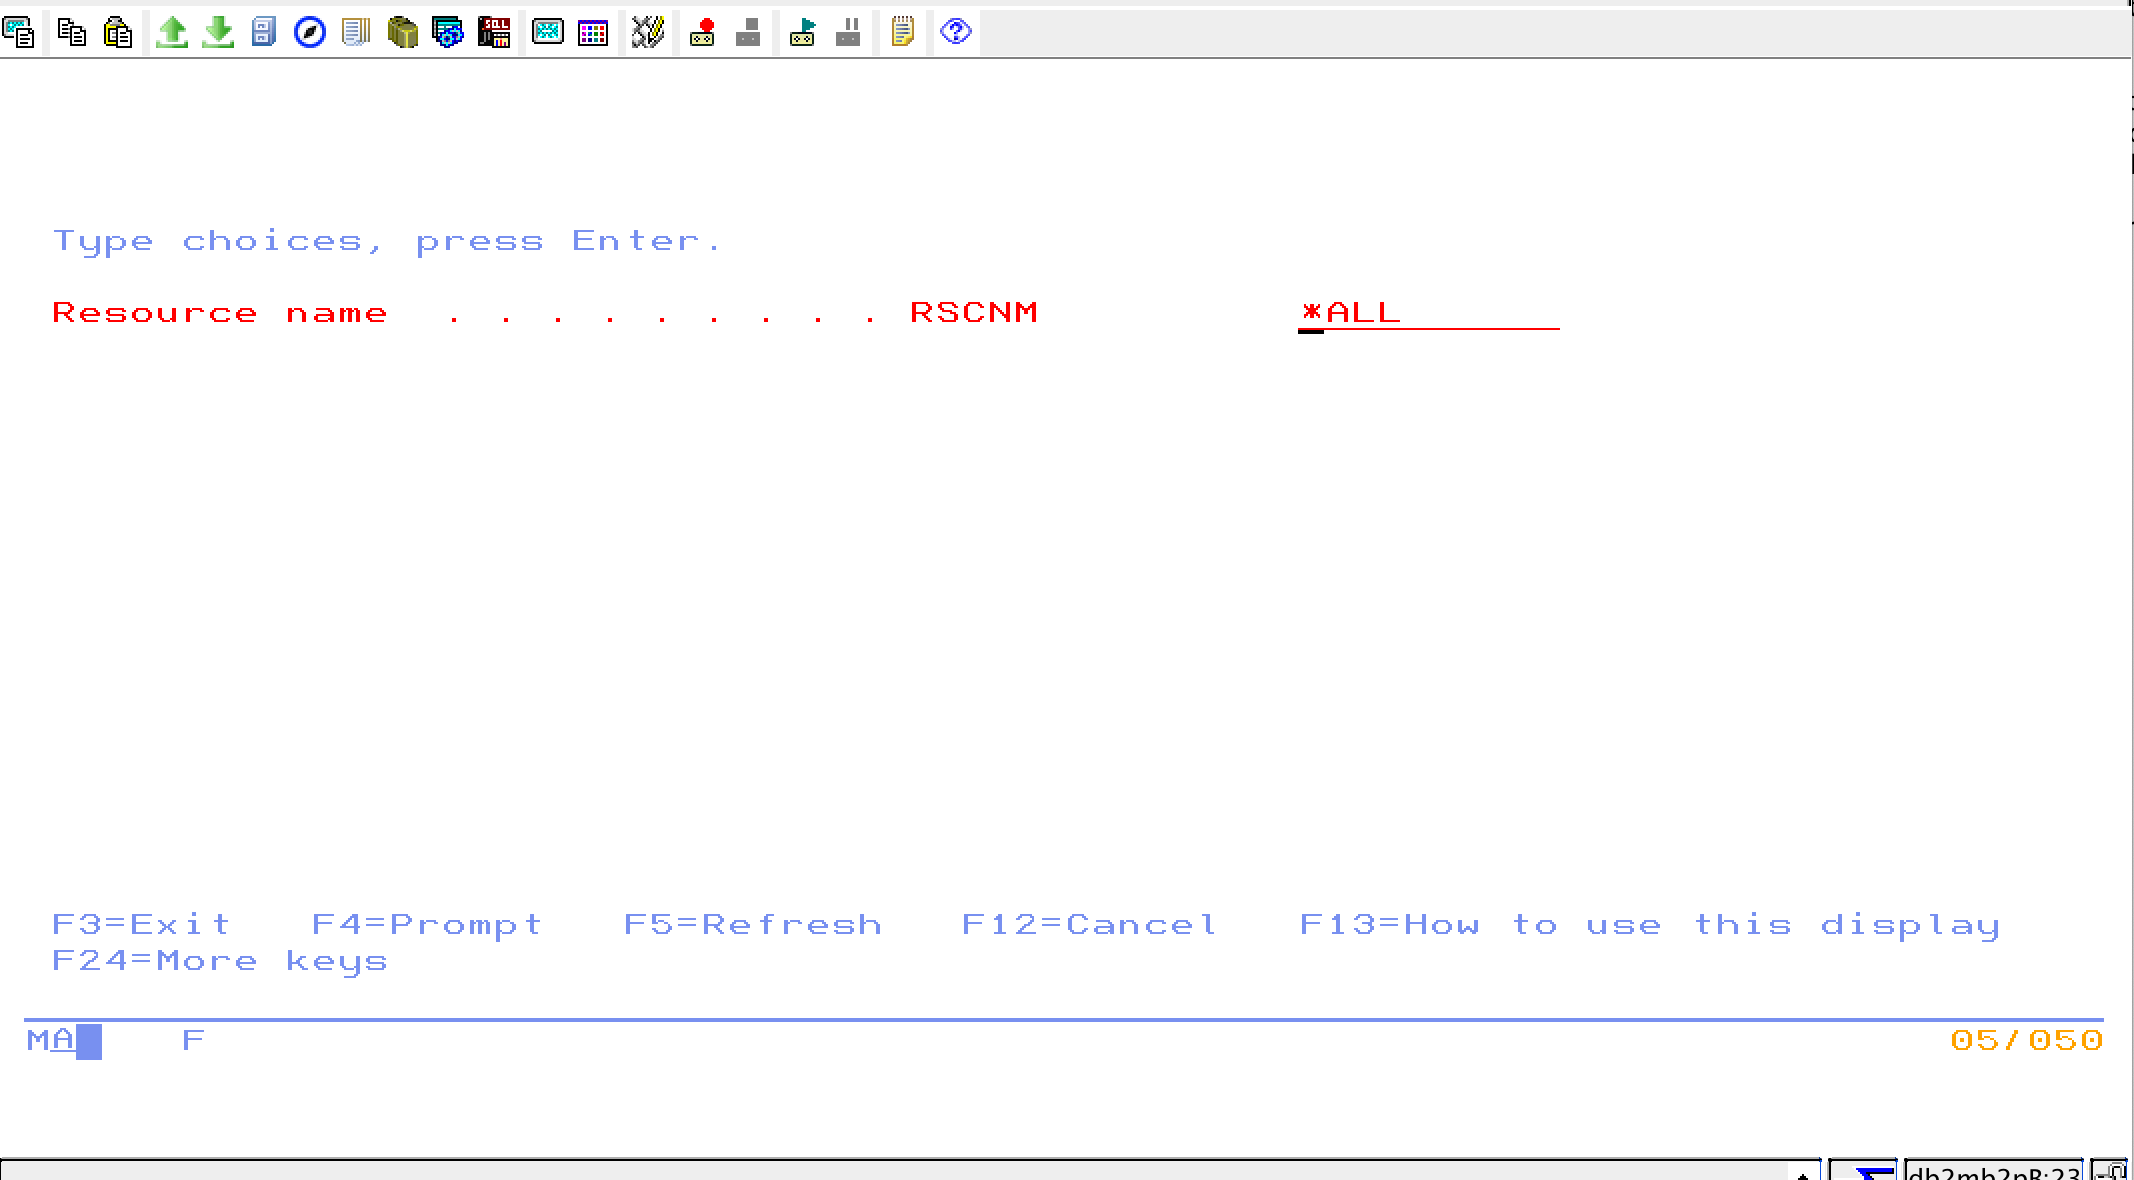
Create a new resource using option 1. Give the resource a name of your choice, use “AWSS3” for the resource type and press <enter>.

|

|
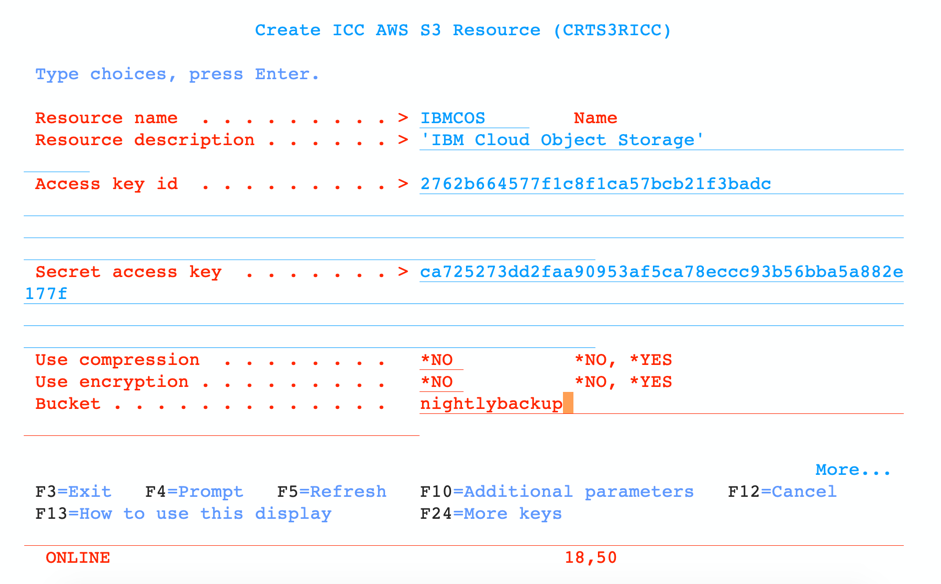
|
Step 3: Configure SSL for Cloud Storage Solutions
IBM Cloud Object Storage only accepts SSL connections so SSL must be enabled for Cloud Storage Solutions. SSL is configured for Cloud Storage Solutions using the IBM i Digital Certificate Manager. Follow the steps at https://www.ibm.com/support/knowledgecenter/en/ssw_ibm_i_72/icc/topics/iccutsk_config_ssl.htm to setup SSL.
Step 4: Try it out
Cloud Storage Solutions is now configured and ready to use. Try out some transfers using the “Copy ICC File to Cloud (CPYTOCLD)” and “Copy ICC File from Cloud (CPYFRMCLD)” commands. To delete a file from the cloud use the “Delete ICC File from Cloud (DLTCLDF)” command.
Creating credentials for a cloud storage resource
|

Select the “View credentials” button. The access key ID and the secret access key are listed in the cos_hmac_keys field in the JSON object. Copy these and paste them into the corresponding fields in the “Create ICC AWS S3 Resource (CRTS3RICC)” screen.

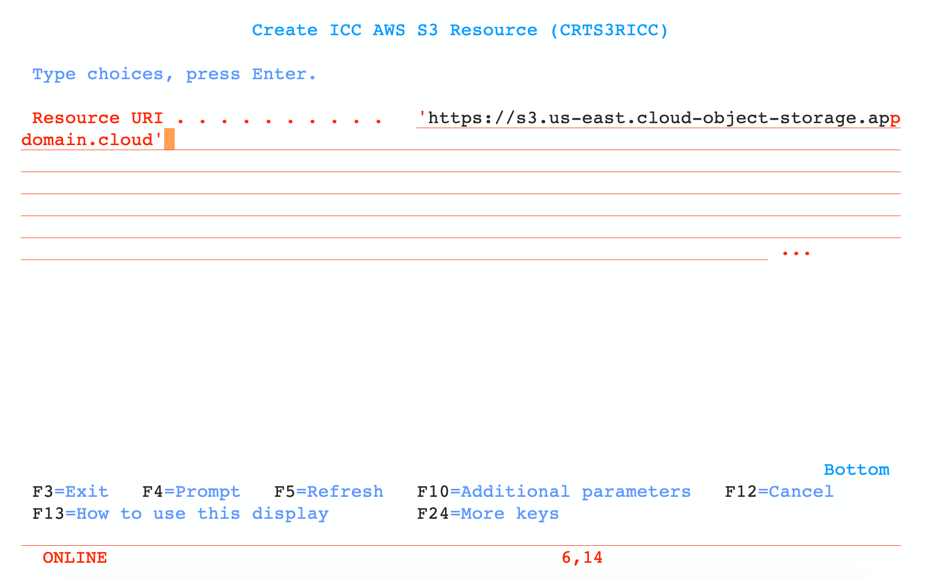
Determining the resource URI for a bucket
|
|

Creating an object storage resource from the dashboard
The following are instructions on how to create an IBM Cloud Object Storage resource starting from the IBM Cloud Dashboard: https://cloud.ibm.com.
Select the ‘Create resource’ button.


Was this topic helpful?
Document Information
Modified date:
07 January 2020
UID
ibm11135312