Removing or replacing a spooling mechanism
Occasionally, only the robotic spooling cable must be removed and replaced. See Locating faulty Components and Resolving Issues.
Note: Watch the video to get an overview of
the entire process:
- Power down the library.Important: Under normal circumstances, when the library is powered off by using the front Power, the robot automatically parks and locks into the Base Module behind the Operator Panel. If you are given a choice during the power down procedure, choose the default park position. To protect the spooling cable or other sensitive parts, the accessor must be in the Base Module before any components are removed from the library. If it is not, follow the procedure for returning the accessor to the base module. See Returning the accessor to the Base Module.
- Refer to Preparing to remove the accessor and spooling mechanism from the Base Module for the steps in preparing your library.
- Remove the left magazine to provide clear access to the spooling mechanism.
- Follow the steps in Removing the accessor and spooling mechanism from the Base Module to remove the accessor, disconnect the spooling cable, and place it in the park position.
- Push down on the lever on the top of the spooling mechanism (1) and
slide about 10 mm towards the center (2) to unlock the mechanism.
Figure 1. Unlocking the spooling mechanism 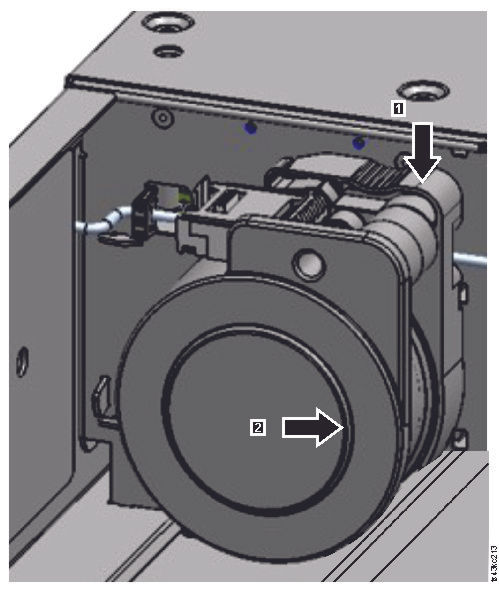
Note: Make sure that the spooling mechanism is unlocked before you try to pull it out. When the mechanism is unlocked, the cutout behind the mechanism is covered, and the mechanism cannot slide any further to the center.Figure 2. Unlocked spooling mechanism - enlarged view 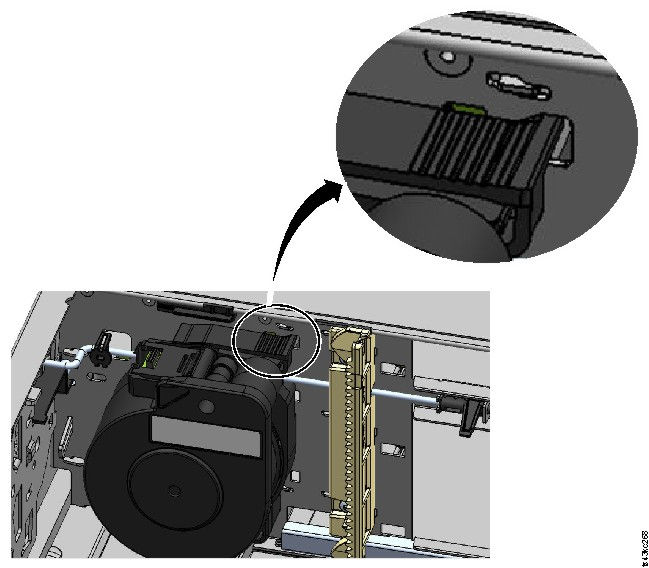
Figure 3. Locked spooling mechanism - enlarged view 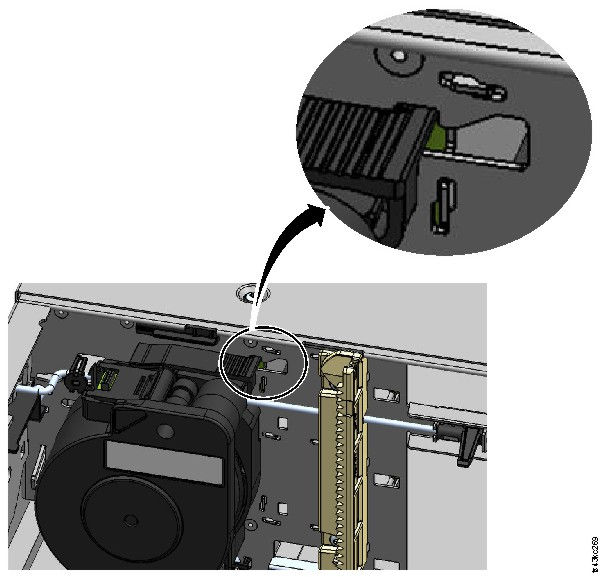
- Pull the spooling mechanism towards the front of the module to remove it.
Figure 4. Removing the spooling mechanism 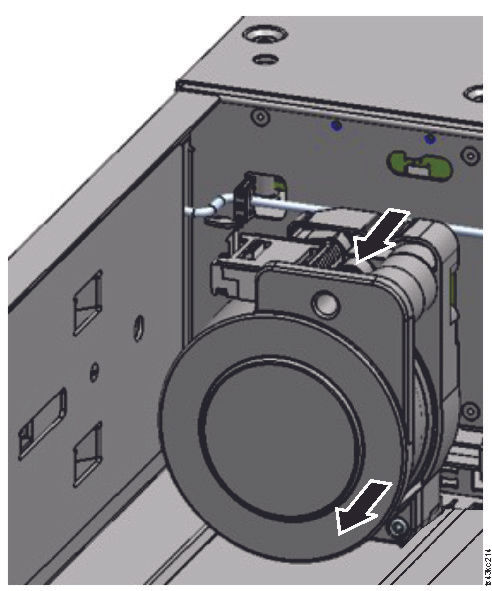
- Reverse the steps to replace the failed spooling mechanism with the new unit.
- Follow the steps in Installing the accessor into the Base Module and After the accessor and spooling mechanism installation to put the library back into service.