Install the IBM z/OS Connect Server zosConnect-3.0 feature image to an offline Red Hat OpenShift Container Platform
How to build and deploy a IBM® z/OS Connect
zosConnect-3.0 API by using a zosConnect-3.0 API project and the z/OS Connect Server image to install
z/OS Connect to an OCI-compliant container platform in a
bastion host (airgapped, disconnected) environment.
About this task
zosConnect-3.0 Applies to zosConnect-3.0.
Containers Applies to z/OS Connect container deployments.

Throughout this topic, Docker is used as an example for image build technology and Red Hat® OpenShift® Container Platform is used as an example for the container deployment. Note, Red Hat OpenShift 4.9 is supported on Linux/s390x and amd64. The z/OS Connect Server and IBM z/OS Connect Designer zosConnect-3.0 images are supported by Open Container Initiative (OCI) compliant runtimes and other OCI-compliant container runtimes and container registries can be used.
- To install and deploy the z/OS Connect API image
in an offline environment, complete the installation steps in Table 1 in sequence. For information about
preparing to install IBM z/OS Connect in offline
airgapped environments, see Preparing for offline (airgapped) installation.Important: The private Container Registry, where your z/OS Connect API image is stored, must be accessible by the Red Hat OpenShift Container Platform cluster.
- To install and deploy the z/OS Connect API image in an online environment, see Install the IBM z/OS Connect Server zosConnect-3.0 feature image to a Red Hat OpenShift Container Platform.
- The z/OS Connect documentation is available in the
IBM Document offline tool should you require an
offline
copy. For more information, see IBM z/OS Connect offline documentation.
| IBM z/OS Connect Server image zosConnect-3.0 installation steps |
|---|
| Download the z/OS Connect Server image. |
| Verify the z/OS Connect Server image (Optional). |
| Build the z/OS Connect API image. |
| Install the z/OS Connect Catalog. |
| Install the IBM z/OS Connect Operator. |
| Configure an image pull secret. |
| Configure environment variables (Optional). |
| Configure Transport Layer Security (TLS networking capability) (Optional). |
Create a ZosConnect Custom Resource instance. |
| Invoke z/OS Connect API. |
The following tasks must be completed.
- Access to an OCI-compliant container platform.
In this procedure, Red Hat OpenShift Container Platform is used as an example.
- For detailed steps about how to install Red Hat OpenShift, see
 Installing Red Hat
OpenShift Container Platform.
Installing Red Hat
OpenShift Container Platform. - Ensure that you have a supported version of Red Hat OpenShift installed. For more information
about Red Hat OpenShift compatibility, see
Supported OpenShift and Kubernetes versions.
- For detailed steps about how to install Red Hat OpenShift, see
- Access to an OCI-compliant container runtime.
In this procedure, Docker is used as an example. For more information about installing Docker, see
Download and Install Docker Desktop. The example commands in the following procedure use docker. If you are using Podman as your container platform, use podman instead of docker in the example commands. - Create a z/OS Connect API project. For more
information, see Developing API provider with zosConnect-3.0. zosConnect-3.0 artifacts (WAR files) can be deployed in a z/OS Connect Server container that is at the same release level or later than the release level of the z/OS Connect Designer that was used to generate the artifacts. For more information, see Developing API provider with zosConnect-3.0 and zosConnect-3.0 artifact compatibility.Restriction: WAR files should not be deployed in a z/OS Connect Server container that is an older release level than the release level of the z/OS Connect Designer.
- Configure the Container Platform cluster with Role Based Access-Control (RBAC) ready for the
deployment of z/OS Connect APIs. For more information about
how to configure
cluster-adminandapplication developerroles for z/OS Connect on Red Hat OpenShift Container Platform, see Authorizing users for z/OS Connect by using role-based access control (RBAC). For more information about RBAC, see
RBAC overview.Important: RBAC must be configured on the cluster before starting the installation procedure. - Verify that the z/OS Connect Server image signature is an optional step. If you need to verify the z/OS Connect signed images, you need to install the following
command-line tools:
-
Gnu Privacy Guard
-
OpenSSL
-
skopeoNote: These command-line tools can usually be installed on Linux by using the package manager.
- If using z/OS Connect policies to adjust how an API request is processed in z/OS Connect, see Configuring IBM z/OS Connect policies. When building the WAR file in Build IBM z/OS Connect API image as part of this procedure, you must include the policy configuration and rules file within the image.
Download a z/OS Connect Server zosConnect-3.0 feature image
Before you begin
The following tasks must be completed.
-
Download and install an OCI-compliant container runtime.
Note: Docker is used as an example container tool. Docker 19.0.3 or higher is supported.Other OCI-compliant container tools, such as Podman are also supported.
- To get access to the z/OS Connect Server image, you must have an IBM entitlement registry key to pull the images from the IBM Cloud Container Registry
icr.io. Refer to your license document for specific instructions on obtaining
the entitlement key.Note: If you don't have the license document with the entitlement key, place a new order for the product in
ShopZ where the additional documentation contains the entitlement key. As an
existing customer, if you already have a license for IBM z/OS Connect Unlimited, no charge is incurred when the new order is placed.
Procedure
Results
docker image ls

REPOSITORY                                  TAG        IMAGE ID    CREATED     SIZE
icr.io/zosconnectunlimited/ibm-zcon-server 3.0.100 6d2af17d10bd 1 days ago 979MBWhat to do next
- Optional
-
z/OS Connect images are signed. You must have downloaded an z/OS Connect Server image before continuing with the installation procedure. For more information on verifying image signatures, see Verify an z/OS Connect Server image signature (Optional).
If you don't need to verify your image signatures, build your z/OS Connect API image by using a z/OS Connect API project and the z/OS Connect Server image that is downloaded in this step. For more information, see Build IBM z/OS Connect API image.
Verify a z/OS Connect image signature (Optional)
Digital signatures provide a way to ensure that an image is both authentic (it originated from the expected source) and has integrity (it is what is expected). z/OS Connect images are signed and this topic describes how to verify the signatures on those images.
Before you begin
The following tasks must be completed.
-
The z/OS Connect public keys must exist on the same machine as the command-line tools.
Copy the following text block exactly as shown into a text editor, and save it in a file namedPRD0012028key.pub.asc:-----BEGIN PGP PUBLIC KEY BLOCK----- mQINBGQU0cUBEACqSHOnQ2HyQRdr0dkcYpehWGz/OSXLpOiKpmgqcvLEm2ZIGpZu pzN5wc57XOxhz5YNodODFysewjqKntgQg1EbQ85g8BmV14iZJZ/8oVMCQGe6yt2G efpD1+qY/QxK+JBB45Y5E6TEudNPzhhNY/9BsImPvHLSD95ikMYHVs2jCIquTXdT UC1fyaXKU5T1qQZd1XxTX+HEaFGIInRHRWvjw2z92LNM35Ul6vJU5R8f8yVZIRAG Y+J8/4qBRd2w23uUupNWQw6QYdW3Q3K6LVZc3K9ykJ8/zNaYBLT/dUXd3L2UYPO7 glWmO3oJynGc0kQczq/ohtCiUtKkXigYZ1feFC0nrFsVa7+Edzao5LOCYNhd9ASM KZBL11VYvQ9pdjeWa4yd/VuTtG6l3GwN1AHXY+dLYdG3lrB0UmTNfyHZoJtIJ+yd cmTZHhfvQ5djjCDwuNxN6NLuAKkzBzUNK3CMi7swKwym7agidMtf4G/WUAy981+P 502RGEtEDO98egA7yEXjGNB0vh7wuqyUKtugsCpGYQhuto42L8nEUogM69JK8Z9J d2xs9PM/N8DEFdOXc73MMYnZejstoZ71t79MyEKw/3flKMADJE3x1xebnOMIj4CI 32Mnc0YHnmeADuYRtbk8omEOQAlWJrCFRUMr8+uSfvUb8QChuhKZDURRKQARAQAB tEBJQk0gei9PUyBDb25uZWN0IEVudGVycHJpc2UgRWRpdGlvbiBVbmxpbWl0ZWQg PHBzaXJ0QHVzLmlibS5jb20+iQI6BBMBCAAkBQJkFNHFAhsPBQsJCAcCBhUKCQgL AgQWAgMBAh4BBQkAAAAAAAoJELBRtMIty7kNhqwP/1YQPQECXMUqno1z0OfQK+Wn +eVQlS8cwvgarpKMv/a3tjFwggJvTaB6TRzdEcBHMSaXqY0+ljnHn7pHWtIQA3uR FZszNWWzsRG9ahlne2NqjIwzCrvIN0BNKL3LSsJWOOptSTSjCxqeg9UmThdtXBu4 8DBCjHSsvtNa0hnSJG2tC5HQ3bnoduU1D7v9jZIP2SEg/lL6iZkKAz1HLxT9oqLL KMpoUAVwRFN/wTFpQy83loxkU+xqXHgcq0htZWWspeqRrTSGkhtqEDcO8Bt3jSQ0 p9U7Bq9chpmEwngN5WwtvxXcrMMerlbaVJ6jLbNnJwERv+Q5N36Wl1hoNffV6Itw LOYp4rfqO6eV5yFmC2gYLq6xMEHHM4q8nUQ1KhmwoARzwXJuRxocDl62kjq2YBOR 6H8WLZmHuE0ba0dp4JR+Wg99no2Sud4dT6Rs/ZylezyJGaFEEK7NNrl+G1JYVbms Ynq6McZVz+Hcqow5k7PsZ4KviFb+F/DlP/lNCDlabFy+IC0gD4gjoKYbyOed+rKc ZUd4DDxLl2KqEUiItn3aIU3epLAf9MtrGd+tugwMQPaq0v2Gep8zntuWew2TWEoy c7C0udUwdjw1q4SwyJzYwiapwz6LCu+dlu7sf2Kxds5USYBWsrTxVzga3/BtRghK V7Pi5/oMEPjk9O7eoOnL =2ZDV -----END PGP PUBLIC KEY BLOCK----
About this task
z/OS Connect images are signed. If you need to verify the image signatures, complete the following procedure.
Enabling signature verification when container images are pulled to a host system can be
automated. For information on automating image signature verification, see ![]() Verifying image signing for Red
Hat Container Registry.
Verifying image signing for Red
Hat Container Registry.
Some of the steps in this procedure use gpg. GPG2 is the extended version of GPG
and gpg2 can be used instead of gpg.
Procedure
Results
Build IBM z/OS Connect API image
About this task
To build a z/OS Connect API image from your
API project, you must use the container platform tool of your choice to build an image
FROM the z/OS Connect Server image.
To prepare your z/OS Connect API project image for a container environment, you must use the z/OS Connect Server image. For more information, see Download z/OS Connect server image.
Procedure
- From the same location as the
Dockerfile, build the z/OS Connect API image locally.By using Docker, the following command is an example where,- example.io is the Container Registry.
- zcon-employees-api is the chosen image name.
- v1.0.0 is the image tag.
Dockerfile.docker build -t example.io/zcon-employees-api:v1.0.0 .Note: The trailing period '.' in the command states to use the current directory as the build context.This z/OS Connect API image is now stored locally in the private container. In this example, the z/OS Connect API image is stored locally in the Docker private container.Important: The z/OS Connect API image is a multi-architecture image and defaults to an architecture that matches the system on which it is built. To build a z/OS Connect API image with a different architecture to your build system, usedocker build --platform <os/arch>to specify the target platform for the build output. For example,docker build --platform linux/amd64 -t example.io/zcon-employees-api:v1.0.0 .For more information, see
Building multi-platform images.
Results
The container runtime, for example Docker, validates a successful push. The z/OS Connect API image is now hosted in the private Container Registry registry to access externally with valid login credentials.
Log in to your private Container Registry to verify the successful push of the z/OS Connect API image.
Install the z/OS Connect Catalog in Red Hat OpenShift with bastion host
If your cluster is in a restricted environment (not connected to the internet), use a bastion host to mirror the z/OS Connect images to a target registry within the restricted environment. The z/OS Connect Catalog is then installed on the cluster, ready for installing the IBM z/OS Connect Operator in the next step.
Before you begin
Before you begin, you need:
- A Red Hat OpenShift Container Platform cluster on s390x or amd64 architecture that is hosted in a restricted (air gap) environment.
- Ensure that you log in as
cluster-admin. If you do not have acluster-adminrole, see Authorizing users for IBM z/OS Connect by using role-based access control (RBAC). - A bastion host that is both connected to the internet and to the restricted network with access to the Red Hat OpenShift Container Platform cluster.
- Install the following prerequisites on the bastion host.
- An OCI-compliant container platform. In this procedure, Red Hat OpenShift CLI (oc) (version 4.4.0 or later) is
used to interface with the Red Hat OpenShift
Platform cluster. For more information, see
Getting started with the OpenShift CLI.
- The IBM/ibm-pak (ibm-pak). The IBM
Catalog Management Plug-in for IBM Cloud Pak®
(IBM/ibm-pak) is used for the deployment of IBM Cloud® Paks in a disconnected (airgapped) environment. It simplifies the
process for discovering required IBM product images and uses
standard tools for registry and cluster access. The IBM/ibm-pak also extends
the Red Hat OpenShift CLI (oc) capability to
streamline the process of delivering installation images to the IBM Cloud Pak in an airgapped environment.
Follow the instructions in the README.md file at
/IBM/IBM-pak to download and install IBM/ibm-pak. Confirm the IBM/ibm-pak is installed by running the following command to see the plug-in usage display on the screen.
oc ibm-pak --help - Download and install an OCI-compliant container runtime. In this procedure,
Dockeris used.You must have a local
Dockertype production-grade registry available to store the IBM Cloud Pak for the z/OS Connect.
- An OCI-compliant container platform. In this procedure, Red Hat OpenShift CLI (oc) (version 4.4.0 or later) is
used to interface with the Red Hat OpenShift
Platform cluster. For more information, see
Procedure
Results
Install the IBM z/OS Connect Operator
Install the IBM z/OS Connect Operator to deploy z/OS Connect APIs in a Container Platform.
About this task
The IBM z/OS Connect Operator is an application that
is deployed to the Red Hat OpenShift Container
Platform, by using Red Hat OpenShift Web Console
OperatorHub. Once installed, the ZosConnect Custom Resource (CR) is available on
the cluster, where the z/OS Connect API deployment
details are defined. The IBM z/OS Connect Operator
watches for the ZosConnect CR, and uses it to create the resources needed for the
deployment of a z/OS Connect API in Red Hat OpenShift Container Platform.
- Default - The
AllNamespacesinstallation mode supports a single IBM z/OS Connect Operator to be installed in the cluster, which watches forZosConnectCR instances that are created in any namespace. - The
OwnNamespaceinstallation mode supports multiple IBM z/OS Connect Operators to be installed in the cluster, however it only watches forZosConnectCR instances that are created in its own namespace.
ZosConnect CR, therefore multiple z/OS Connect API deployments.Procedure
- Verify the IBM z/OS Connect Operator
installation. A message is displayed on the Operators > OperatorHub page, similar to Figure 1, confirming the successful installation of the IBM z/OS Connect Operator to the Red Hat OpenShift Container Platform.
Figure 1. Successful Operator installation 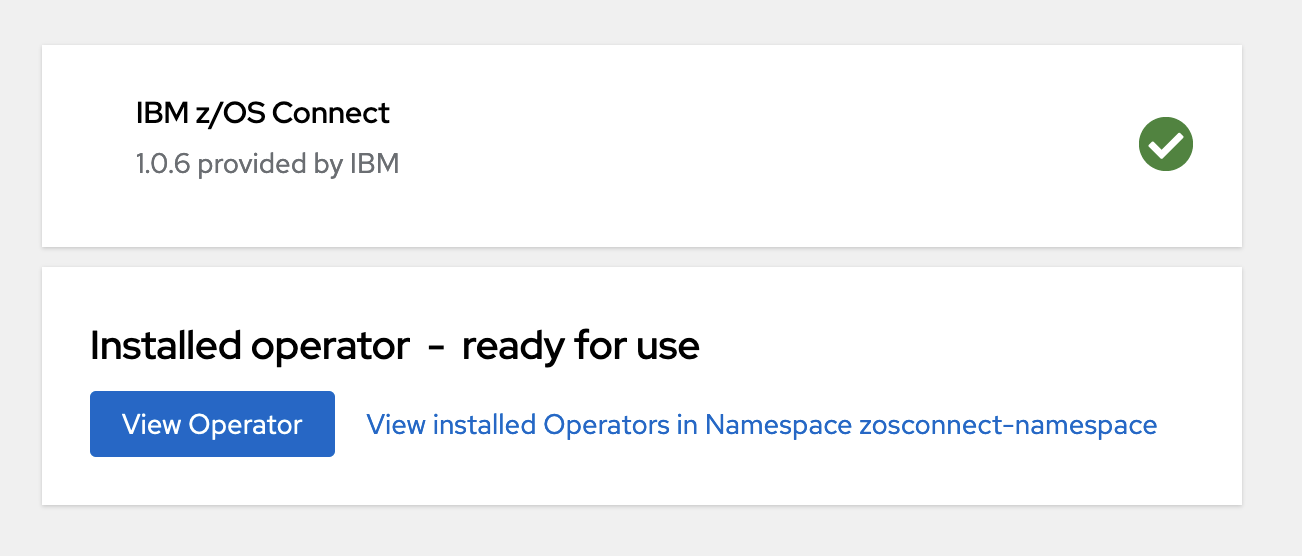 Tip: To view the installation status of the IBM z/OS Connect Operator after the installation procedure is complete, navigate to Operators > Installed Operators, and select your project from the Projects drop-down. IBM z/OS Connect is listed with a status of
Succeeded.
Configure an image pull secret in the Container Platform
About this task
In this task, an image pull secret is created in Red Hat OpenShift Container Platform that contains
the Container Registry location and credentials for the z/OS Connect API built in Build IBM z/OS Connect API image. For more information, see ![]() Using image pull secrets.
Using image pull secrets.
Procedure
Results
What to do next
If your API project requires environment variables for the connection and credential details, go to Configure environment variables (Optional).
If you need to configure TLS, see Configure Transport Layer Security (TLS) in a Container Platform (Optional). For more information
about TLS, see ![]() Self-Serviced End-to-end Encryption Approaches for Applications
Deployed in OpenShift
Self-Serviced End-to-end Encryption Approaches for Applications
Deployed in OpenShift
If you use volumes in a container platform to mount keystores for your z/OS Connect API image to use, see Configure volumes (Optional).
Otherwise, you have completed the preparation steps and are ready to deploy your z/OS Connect API image. For more information, see Create a ZosConnect Custom Resource (CR) instance.
Configure environment variables (Optional)
Use ConfigMap and Secret Objects in a Container
Platform to store the connection and credential configuration values for your z/OS Connect API image to use.
About this task
If the z/OS Connect API image built in Build IBM z/OS Connect API image contains a z/OS Connect API project with connection and credential
environment variables, you must use a ConfigMap, and optionally a
Secret in the Red Hat OpenShift
Container Platform.
The ConfigMap and Secret Objects store the connection and
credential configuration values in the Red Hat OpenShift Container Platform. These are then
mapped to your z/OS Connect API image in the Create a ZosConnect Custom Resource (CR) instance.
The z/OS Connect API project connection and credential configurations are in the ../liberty/config directory.
-
A
ConfigMapis used to store connection information. For example, a ../liberty/config/db2.xml with
To create a<zosconnect_db2Connection id="db2Conn" host="${DB2_HOST}" port="${DB2_PORT}" credentialRef="commonCredentials" />ConfigMap, follow theConfigMapsteps in the following procedure. -
A
Secretis used to store credential information. For example, ../liberty/config/db2.xml with
To create a<zosconnect_credential user="${DB2_USERNAME}" password="${DB2_PASSWORD}" id="commonCredentials" />Secret, follow theSecretsteps in the following procedure.
ConfigMap and
Secret in Red Hat OpenShift.If you require environment variables, complete the procedure in order.
Procedure
Secret- Enter the password credential in the Value field.
In this example, the
DB2_PASSWORDis theValueforDB2_USERNAMEJoeSmith.Note: TheSecretvalues should be encrypted at rest. For more information, see Encrypting Confidential Data at Rest.
- Enter the password credential in the Value field.
What to do next
If you need to configure TLS (secure networking configuration options), see Configure Transport Layer Security (TLS) in a Container Platform
(Optional). For more information, see ![]() Self-Serviced End-to-end Encryption Approaches for Applications
Deployed in OpenShift.
Self-Serviced End-to-end Encryption Approaches for Applications
Deployed in OpenShift.
If you use volumes in a container platform to mount keystores for your z/OS Connect API image to use, see Configure volumes (Optional).
Otherwise, the preparation steps are complete and you are ready to deploy your z/OS Connect API image. For more information, see Create a ZosConnect Custom Resource (CR) instance.
Configure Transport Layer Security (TLS) in a Container Platform (Optional)
Configuring TLS (secure networking configuration options) for a z/OS Connect API deployed to a Container Platform with the IBM z/OS Connect Operator.
Before you begin
This page outlines the secure networking (TLS) configuration options for a z/OS Connect API deployed to a Container Platform with the IBM z/OS Connect Operator.
If your z/OS Connect API requires environment variable configuration for connection and credential details, you must complete the configuration preparation steps before starting this section. For more information, see Configure environment variables (Optional).
About this task
At the end of this topic, you will understand the methods of configuring TLS for a z/OS Connect API deployed to a Container Platform. You will have completed the preparation steps required for the next topic, Create a ZosConnect Custom Resource (CR) instance.
If the platform is Red Hat OpenShift, you will know about the TLS termination types that are offered by Red Hat OpenShift Routes, and might or might not have created a certificateSecret object containing TLS certificates, in preparation for creating a secured Route in the next topic.
If the platform is native Kubernetes, you will know about the TLS configuration method that is offered by Kubernetes Ingress, and will have created a certificateSecret object containing TLS certificates, in preparation for creating a secured Ingress in the next page.
The procedure as part of this page outlines how to create the certificateSecret Secret object for Red Hat OpenShift Routes and native Kubernetes Ingress, if this is required for your chosen configuration.
- Routes
-
In Red Hat OpenShift, a router is deployed to the cluster that functions as the
ingressendpoint for external network traffic. This route exposes the service for an application so that any external device can access it. It can either be secure or unsecured, depending on the network security configuration of your application. The focus of this section is on secured routes as these require additional steps in storing TLS keys and/or certificates.There are three types of secured routes, each defined by the TLS termination type:Edge, which requires an insecure z/OS Connect Server.Passthrough, which requires a secure z/OS Connect Server. For more information, see
Securing IBM
z/OS Connect resources.Re-encrypt, which requires a secure z/OS Connect Server. For more information, see
Securing IBM
z/OS Connect resources.
Note: Where an application is referenced, this is thePodresource on the Container Platform containing the z/OS Connect API.- Edge
With Edge termination, a TLS connection is established between the client and the router, and then terminated at the router. The connection between the router and the application is unencrypted. This is shown by
TLSandclearin the diagram.TheTLSconnection is created with a certificate/key pair in PEM-encoded format, where the certificate is valid for the route host. Also, a separate CA certificate in a PEM-encoded format can be used to complete the certificate chain. In Red Hat OpenShift, the router provides its own certificate/key pair and CA certificate defaults in PEM-encoded format. To provide your own values, see
Replacing the default ingress certificate and add
tls.key, tls.crt and optionally
ca.crt from Table 2 to the
certificateSecret in the procedure. If not specified, the router defaults are
used.As the TLS connection terminates at the router, there is no method of providing trust between the router and the application with Edge. Therefore, the z/OS Connect Server must not have TLS enabled. However, the
Re-encrypttermination type provides this functionality, see Reencrypt.
Table 2. Edge key/value pairs for certificateSecret Key Value Note Required tls.key TLS key in PEM-encoded format as part of certificate/key pairing.
If not specified, the Red Hat OpenShift router defaults are used. Optional tls.crt TLS certificate in PEM-encoded format as part of certificate/key pairing.
If not specified, the Red Hat OpenShift router defaults are used. Optional ca.crt TLS CA certificate in PEM-encoded format that completes the certificate chain.
If not specified, the Red Hat OpenShift router defaults are used. Optional If you are not using the router default values for tls.key, tls.crt, and optionally ca.crt, follow the steps in the procedure to configure the certificateSecret forEdgewith the key/values in the Table 2. This certificateSecret is referenced in thecertificateSecretReffield in step 6.f when creating the z/OS Connect Custom Resource instance. This is where theEdgeroute is created by the IBM z/OS Connect Operator for z/OS Connect API deployment.
- Pass-through
With
Passthroughtermination, encrypted traffic is sent straight to the destination without the router providing TLS termination. Therefore, no key or certificate is required on the route. The application is responsible for serving certificates for the traffic at the endpoint, therefore the z/OS Connect Server must have TLS enabled. Currently, this is the only method that can support requiring client certificates, also known as two-way authentication.
There are no additional configuration steps that are required for TLS when implementing pass-through. You have completed the preparation steps and are ready to for z/OS Connect API deployment. For more information, see Create a ZosConnect Custom Resource (CR) instance.
- Reencrypt
With
Re-encrypttermination, a TLS connection is established between the client and the router, and then terminated at the router. The TLS connection is then reencrypted, establishing a new TLS connection between the router and the application. This is shown byTLS1andTLS2in the diagram respectively.TLS1is created with a certificate/key pair in PEM-encoded format, where the certificate is valid for the route host. Also, a separate CA certificate in a PEM-encoded format can be used to complete the certificate chain. In Red Hat OpenShift, the router provides its own certificate/key pair and CA certificate defaults in PEM-encoded format. To provide your own values, see
Replacing the default ingress certificate and add
tls.key, tls.crt and optionally
ca.crt in the Table 3
to the certificateSecret in the procedure. If not specified, the router defaults
are used.TLS2is created with a separate destination CA certificate in PEM-encoded format. This certificate belongs to the application, therefore the z/OS Connect Server must have TLS enabled. Because the router reencrypts the connection, it acts as an internal consumer and it trusts the internal certificate by the application. To provide this certificate, add destCA.crt the certificateSecret in the procedure.
Table 3. Re-encrypt key/value pairs for certificateSecretRef Key Value Note Required tls.key TLS key in PEM-encoded format as part of certificate/key pairing.
If not specified, the Red Hat OpenShift router defaults are used. Optional tls.crt TLS certificate in PEM-encoded format as part of certificate/key pairing.
If not specified, the Red Hat OpenShift router defaults are used. Optional ca.crt TLS CA certificate in PEM-encoded format that completes the certificate chain.
If not specified, the Red Hat OpenShift router defaults are used. Optional destCA.crt TLS CA certificate of the application in PEM-encoded format.
This certificate is inside the z/OS Connect Server and configured in Config TLS PKCS12. Yes Follow the steps in the procedure to configure the certificateSecret forRe-encryptwith the key/values in the Re-encrypt key/value pairs for certificateSecretRef.This certificateSecret is referenced in the
certificateSecretReffield in step 6.f when creating the z/OS Connect Custom Resource instance.This is where the
Re-encryptroute is created by the IBM z/OS Connect Operator for z/OS Connect API deployment.
- Ingress
-
Note: The IBM z/OS Connect Operator does not support Ingress on Red Hat OpenShift Container Platform.
Ingress resources are Kubernetes-native resources that play the same role as
Red Hat OpenShift Routes. The Kubernetes Ingress
definition only currently supports a single TLS port,
443, and assumesEdgeTLS termination. The TLS connection is created with a certificate/key pair in PEM-encoded format, where the certificate is valid for the ingress host.Table 4. Ingress key/value pairs for certificateSecretRef Key Value Note Required tls.key TLS key in PEM-encoded format as part of certificate/key pairing.
If not specified, the Red Hat OpenShift router defaults are used. Yes tls.crt TLS certificate in PEM-encoded format as part of certificate/key pairing.
If not specified, the Red Hat OpenShift router defaults are used. Yes Follow the steps in the procedure to configure the certificateSecret forIngresswith the key/values in the Ingress key/value pairs certificateSecretRef. This certificateSecret is referenced in thecertificateSecretReffield in step 6.f when creating the z/OS Connect Custom Resource instance.This is where the
Ingressis created by the IBM z/OS Connect Operator for z/OS Connect API deployment.
Procedure
-
Native Kubernetes Ingress
- Install Kubernetes CLI (
kubectl). For more information, see Installing the CLI. - Log in to your Kubernetes cluster.
- Add tls.key and tls.crt to separate files.
- Run the following command to create the secret in the
namespacewhere the z/OS Connect API is to be deployed.Note: Thisnamespaceis the environment where your z/OS Connect APIs are deployed. YourAdministratormight have created it depending on the IBM z/OS Connect OperatorinstallModesconfiguration. If anamespacedoes not exist, you must create one.kubectl create secret <secret-name> --namespace <your_namespace> --key /path/to/tls.key --cert /path/to/tls.crt
- Install Kubernetes CLI (
Results
The certificateSecret is added to the Secrets page and is ready for use in the Operand Routes for the certificateSecretRef field.
You have completed the preparation steps and are ready for z/OS Connect API deployment.
What to do next
If you use volumes in a container platform to mount keystores for your z/OS Connect API image to use, see Configure volumes (Optional).
If you don't use volumes in a container platform, you are ready to deploy your z/OS Connect API. For more information, see Create a ZosConnect Custom Resource (CR) instance.
Configure volumes (Optional)
Use volumes in a container platform to mount keystores for your z/OS Connect API image to use. Volumes are mounted file systems available to pods and their containers.
About this task
In this task, all artifacts that are required for SSL configuration in a z/OS Connect Server are stored in Secret objects in Red Hat OpenShift. This includes keystores, truststores, and certificate passwords. These are mounted to the z/OS Connect API pod through volumes in the Create a ZosConnect Custom Resource (CR) instance section.
The following example shows a configuration file with SSL within a
z/OS Connect Server and keystore elements configured. In
the procedure, CERTIFICATE_PASSWORD, clientKey.p12 and
clientTrust.p12 are stored as Secret Objects in Red Hat OpenShift Container Platform.
<ssl id="sslCertificates" keyStoreRef="clientKeyStore" trustStoreRef="clientTrustStore"/>

<keyStore id="clientKeyStore" password="${CERTIFICATE_PASSWORD}" location="${server.config.dir}/resources/security/clientKey.p12" type="PKCS12"/>
<keyStore id="clientTrustStore" password="${CERTIFICATE_PASSWORD}" location="${server.config.dir}/resources/security/clientTrust.p12" type="PKCS12"/>- clientKey.p12 and clientTrust.p12 are example PKCS12
certificate files that were preconfigured in the procedure How to configure a TLS connection with PKCS12 keystores. The
.p12format is used here for illustration purposes; other certificate formats are also supported. - CERTIFICATE_PASSWORD is the password for the clientKey.p12 and clientTrust.p12 certificates.
Procedure
- Log
in as
zcon-userto the Red Hat OpenShift Container Platform web console. Make sure that you are in the Developer perspective by using the navigation. - Click Secrets in the navigation.
- Select a Project to view the list of Secrets or Create a
Project. If a Project does not exist, you must Create a Project.
- Click Create on the Secrets panel and select Key/value secret.
- Enter a
Secretname.For example,keystore-secret. - Enter the keystore key in the Key field. For example,
clientKey.p12. - Enter the
keystorecontents in the Value field.For example, theclientKey.p12certificate in plain text. - Click Create.
- Click Secrets in the navigation.
- Click Create on the Secrets panel and select Key/value secret.
- Enter a Secret name for the truststore certificate. For example,
truststore-secret - Enter the truststore key in the Key field. For example,
clientTrust.p12 - Enter the
truststorecontents in the Value field.For example,clientTrust.p12certificate in plain text. - Click Create.
To create the CERTIFICATE_PASSWORD, complete the following
steps:
- Click Secrets in the navigation.
- Click Create on the Secrets panel and select Key/value secret.
- Enter a Secret name for the certificate password. For example,
certificate-password. - Enter the certificate key in the Key field. For example,
CERTIFICATE_PASSWORD. - Enter the certificate credential in the Value
field. For example, the
CERTIFICATE_PASSWORDin plain text.
Results
Check the Secrets panel to view the Secret you created.
What to do next
You are ready to deploy your z/OS Connect API. For more information, see Create a ZosConnect Custom Resource (CR) instance.
If you have configured volumes in the container platform, you must also complete the Optional - Volume steps that are part of the Create a ZosConnect Custom Resource (CR) instance steps. These steps ensure that:
- The
CERTIFICATE_PASSWORDis mapped to the z/OS Connect API pod as an environment variable. - The
clientKey.p12andclientTrust.p12files are mounted to the z/OS Connect API pod as volumes at the defined location.
Complete the Create a ZosConnect Custom Resource (CR) instance steps, including the Optional - Volume steps when you reach them in the following procedure.
Create a ZosConnect Custom Resource (CR) instance
Creating a ZosConnect Custom Resource (CR) instance to enable deployment
of your z/OS Connect API project.
About this task
In this section, a z/OS Connect API is deployed to
the Red Hat OpenShift Container Platform. This is
done by creating an instance of the ZosConnect Custom Resource (CR) that is enabled
on the Red Hat OpenShift Cluster by the IBM z/OS Connect Operator.
To create an instance of the ZosConnect CR, you must specify the configuration
details for the z/OS Connect API to be deployed.
The IBM z/OS Connect Operator automatically
creates the necessary resources for the z/OS Connect
API to run as specified in the ZosConnect CR.
ZosConnect CR, therefore multiple z/OS Connect API deployments. Procedure
- Complete the following fields on the Create
ZosConnect page to define the
ZosConnectCustom Resource:-
Operand License Structure
Expand the Operand License Structure section by using
 to the right of the page.
Accept Operand License - Click the check-box, or in later versions of Red Hat OpenShift toggle the radio button to reflect
trueto accept the license.Note: Accept the license for the IBM z/OS Connect Operator to create the resources. - Operand Deployment Expand the Operand Deployment section by using to the
right of the page and complete the fields as detailed in Table 5.
Table 5. Operand Deployment Field Value Note Container Port For HTTP, 9080. For HTTPS, 9443.
This value maps to the available ports defined in a z/OS Connect API. Note: This value must be consistent with the Port and Target Port values in the Operand Service step.Image Enter the image for the z/OS Connect API to deploy. You can find the steps to build a z/OS Connect API image here Build IBM z/OS Connect API image. Pull Policy Defaults to IfNotPresent. The image is updated when it is not already present on the cluster. Pull Secret Name of the Secret to use to pull images from the specified repository. For more information, see Configure an image pull secret in the Container Platform. Replicas Number of Pod replicas to be deployed to the cluster for the z/OS Connect API. Note: This value can be scaled up or down manually after the deployment if needed. More details on Pod replication can be found here.- Optional - Environment variables
- If you completed Configure environment variables (Optional), you must complete the following
steps for the data within the
ConfigMapandSecretobjects to be mapped to the connection and credential tags in the z/OS Connect API image.- Go to the start of the page, switch the view using the Configure via:
YAML view to manually edit the
ZosConnectCR. - Add the values to the spec.deployment.env field in the
ZosConnectCR.Note: Do not save the yaml file. It is done automatically.For example,
spec:
  deployment:
    env:
      - name: DB2_HOST
        valueFrom:
          configMapKeyRef:
            key: DB2_HOST
            name: sample-db2-conn
      - name: DB2_PORT
        valueFrom:
          configMapKeyRef:
            key: DB2_PORT
            name: sample-db2-conn
      - name: DB2_USERNAME
        valueFrom:
          secretKeyRef:
            key: DB2_USERNAME
            name: sample-db2-cred
      - name: DB2_PASSWORD
        valueFrom:
          secretKeyRef:
            key: DB2_PASSWORD
            name: sample-db2-cred
This adds DB2_HOST and DB2_PORT values from thesample-db2-connConfigMapand adds DB2_USERNAME and DB2_PASSWORD values from thesample-db2-credSecret. These environment variables are exported inside the z/OS Connect API image at run time.Note: Substitute the values forsample-db2-connandsample-db2-credto match theConfigMapand orSecretcreated in Configure environment variables (Optional). If you do not require the optionalSecret, remove the respective fields from the example. - Switch the view back to using the Form view using Configure via:
- Go to the start of the page, switch the view using the Configure via:
YAML view to manually edit the
- Optional - Volumes
- If you completed Configure volumes (Optional), you must complete the following steps for
the data within the
Secretobjects to be mapped to the keystore tags in the z/OS Connect API image.- Go to the start of the page, switch the view using the Configure via:
YAML view to manually edit the
ZosConnectCR. - Add an environment variable for the certificate password by using the spec.deployment.env field.
- Add a volume for the keystore and truststore in the spec.deployment.volumes field.
- Mount the volume for the keystore and truststore to the container at defined location by using the spec.deployment.volumeMount field.
- The following example is a sample configuration for the SSL example that is shown in Configure volumes (Optional). Customize these values for your own
configuration.
spec: deployment: env: - name: CERTIFICATE_PASSWORD valueFrom: secretKeyRef: name: certificate-password key: CERTIFICATE_PASSWORD volumes: - name: truststore secret: secretName: truststore-secret - name: keystore secret: secretName: keystore-secret volumeMounts: - mountPath: /opt/ibm/wlp/usr/servers/defaultServer/resources/security/clientTrust.p12 name: truststore subPath: clientTrust.p12 - mountPath: /opt/ibm/wlp/usr/servers/defaultServer/resources/security/clientKey.p12 name: keystore subPath: clientKey.p12 - Switch back to the Form view by selecting Configure via: and verify that the volume mounts and environment variables are correctly configured.
- Go to the start of the page, switch the view using the Configure via:
YAML view to manually edit the
- Operand Service Expand the Operand Service section by using the to the right of
the page.
Table 6. Operand Service Config Field Value Note Port The port is exposed by the container.
For HTTP, 9080For HTTPS, 9443
This allows a Service resource to communicate with the z/OS Connect API for Routes / Ingress. Note: This must be consistent with the Container Port value in the Operand Deployment step.Target Port The port that the operator assigns to containers inside pods. Defaults to the value of Operand Service Port. Type ClusterIP Note: The values for Port and Target Port must match. - Operand Route Important:
- Use the Expose toggle to set the field to true. This displays the Operand Route section and enables the IBM z/OS Connect Operator to create the Route / Ingress resources, which are required for invoking the z/OS Connect.
- If you completed Configure Transport Layer Security (TLS) in a Container Platform (Optional), you must complete values for Termination and Certificate Secret Ref for the operand config to create a secured Route or Ingress.
- The following table defines fields that support both Red Hat OpenShift Routes and native Kubernetes Ingress. Select the fields that apply for your chosen configuration. If you do not require transport security, all of the Operand Route fields can be left blank.
Expand the Operand Route section by using to the right of the page. Table 7. Operand Routes Config Field Value Note Termination (Route)
TLS termination policy for Route. Can be one of the edge, reencrypt, and, passthrough. Define the Red Hat OpenShift Route Transport Layer Security (TLS) termination policy. Required secured Route field. For an insecure Route, do not enter a value.
Insecure Edge Termination Policy (Route)
HTTP traffic policy with TLS enabled for Route. Can be one of Allow, Redirect and None. Defaults to Allow. Path (Route)
(Ingress)
Path to be used for Route or Ingress. This defaults to /. Certificate Secret Ref (Route)
(Ingress)
The name of a secret that already contains TLS key, certificate, and CA to be used for the Route or Ingress. It can also contain a destination CA certificate for Route. The following keys are valid in the secret: ca.crt, destCA.crt, tls.crt, tls.key. Optional for a secured Route field.
Required for a secured Ingress field.
For an insecure Route or Ingress, do not enter a value.
Hostname (Ingress)
Hostname to be used for the Ingress. Required Ingress field. Path Type (Ingress)
Path Type to be used for the Ingress. Can be one of Prefix, Exact, or ImplementationSpecific. Required Ingress field. For more information about Ingress Path Types, see
Ingress Path Types.
-
Operand License Structure
- Click Create to create your
ZosConnectCR instance.Important: To install another z/OS Connect API to the Red Hat OpenShift cluster, repeat the procedure for step 6.The IBM z/OS Connect Operator is designed to manage many
ZosConnectCustom Resource instances, therefore many z/OS Connect API deployments. The following image shows a IBM z/OS Connect Operator managing 3ZosConnectinstances. EachZosConnectinstance is configured with a different z/OS Connect API image. These represent 3 separate z/OS Connect API deployments in Red Hat OpenShift.Figure 2. IBM z/OS Connect Operator with 3 separate ZosConnectinstances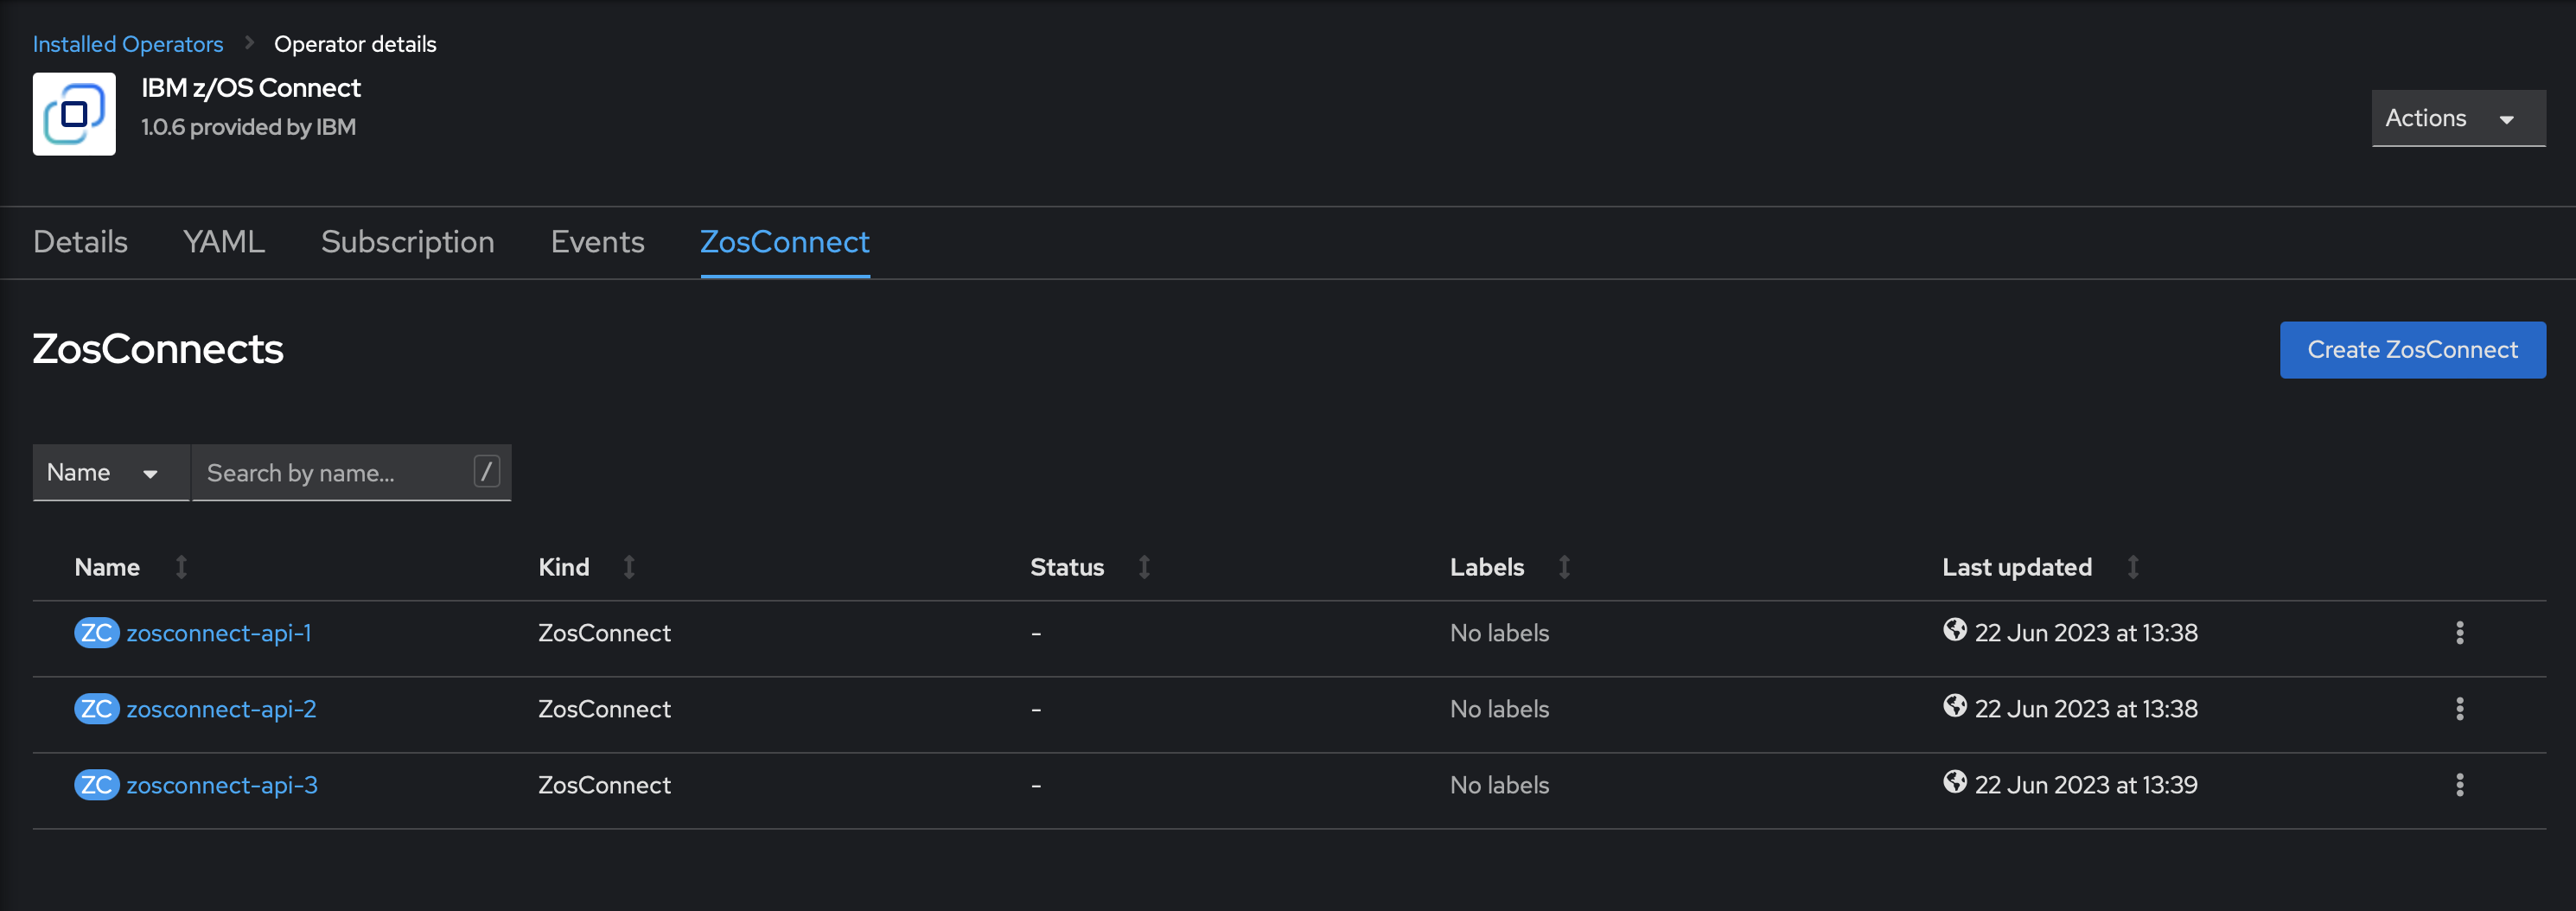
Results
When the ZosConnect Custom Resource is created, the IBM z/OS Connect Operator creates the resources that are
required for your chosen configuration, based on the fields completed in this page.
To view these resources, open the Topology page where the
ZosConnect instance is created. In the example, the name of the
ZosConnect Custom Resource is zosconnect-sample.
Click inside the dotted area to view the resources that are associated with the created
ZosConnect Custom Resource.

The Pod containing the z/OS Connect API is created by the zosconnect-sample-deployment Deployment.
To view this Pod, click zosconnect-sample-deployment, where the
Deployment details are shown. Here you can navigate to the Pods
tab to view the Pod. You see that the Pod Status is Running and
1/1 replicas are Ready. In this example, only 1
Deployment>Replicas was specified for the ZosConnect Custom
Resource.
Invoke z/OS Connect APIs
About this task
In this task, the z/OS Connect API is deployed to the Red Hat OpenShift Container Platform by using a Red Hat OpenShift Route configured earlier in the procedure.
expose
flag in the ZosConnect Custom Resource.Procedure
-
Log in as
zcon-userto the Red Hat OpenShift Container Platform web console. Make sure that you are using the Developer perspective by using the left navigation. -
From the navigation, click Topology.
Select the project where your
ZosConnectinstance is created.For example,zosconnect-sample-deployment. -
Click inside the dotted line around the
ZosConnectinstance.From the panel that opened to the side of the screen, make sure that you are viewing the Resources tab.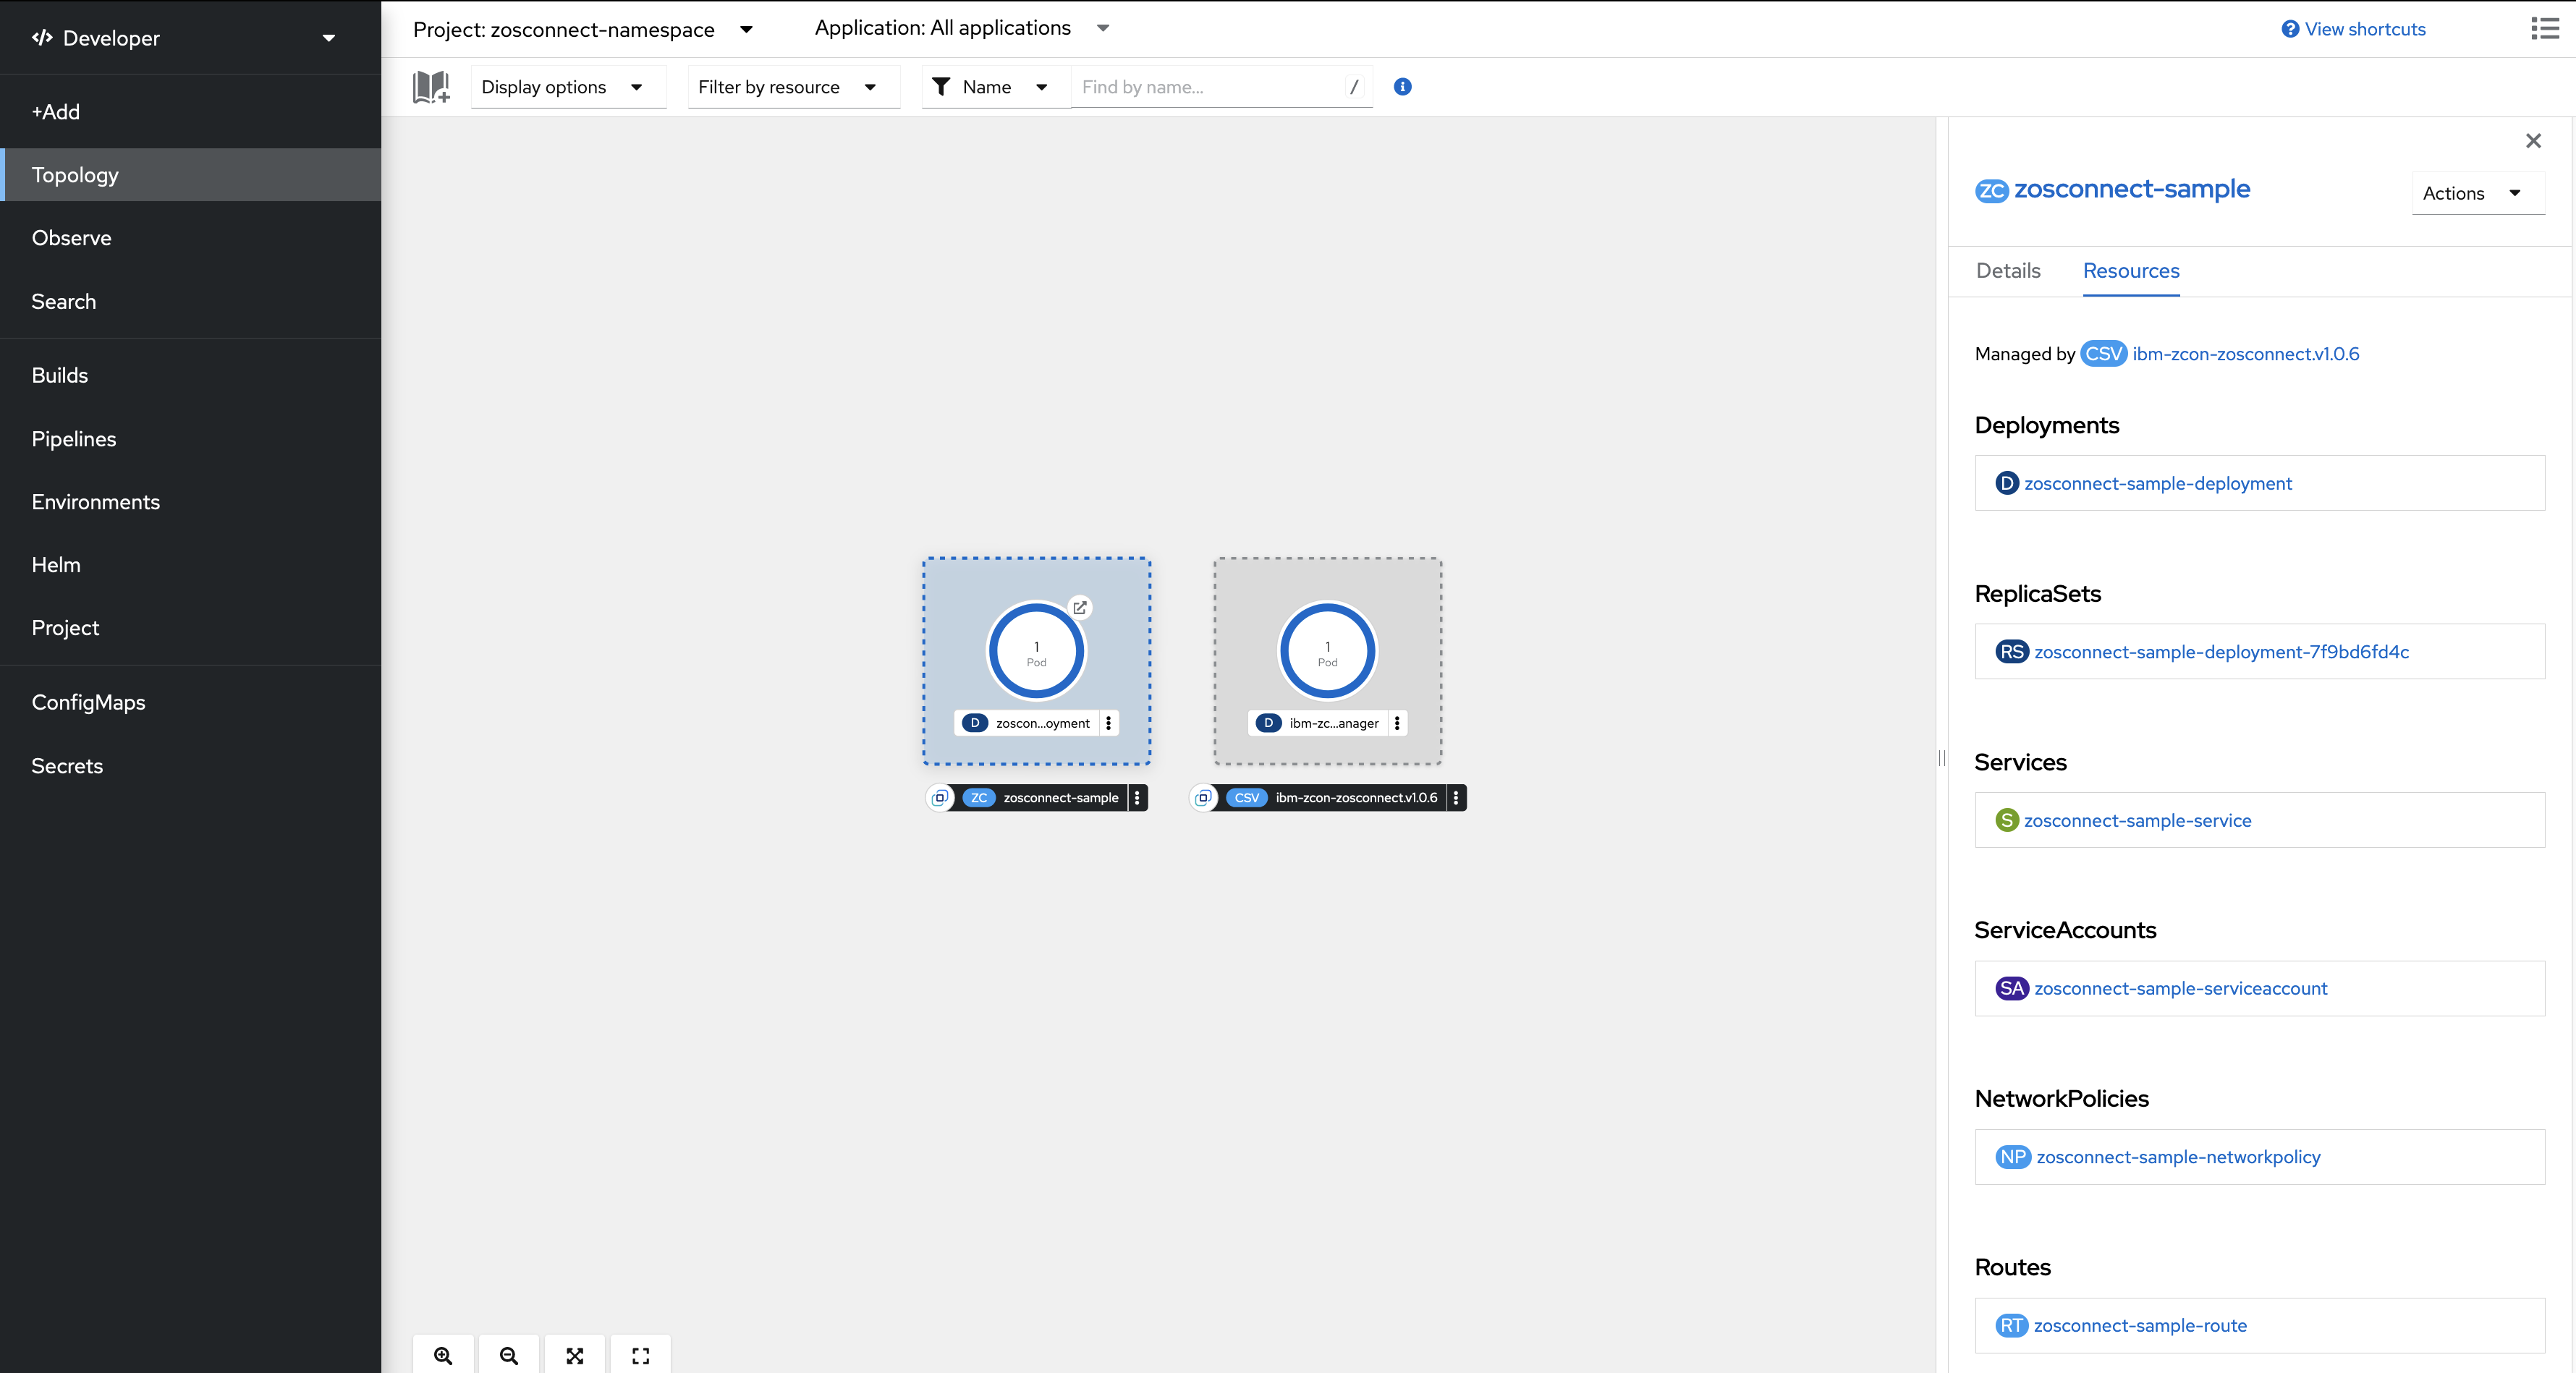
- Click Red Hat OpenShift Route listed in the Resources tab to navigate to the Route > Route details page.
-
Click the link in the Location field to invoke the z/OS Connect API that uses the Red Hat OpenShift Route. The Location value is the external URL path to the Pod. This is expected to return a 404 response. The z/OS Connect API operation URI values need to be appended to this value to invoke the API operations.
- Optional: Append a valid URI for the deployed z/OS Connect API onto the provided Route Location value to invoke the z/OS Connect API operation.
- The Red Hat OpenShift Route returns successfully.