TLS security for IBM MQ channels in IBM MQ as a Service
IBM® MQ as a Service has TLS security on administration and application channels. This guide shows how to download the required certificates for applications to connect to your queue manager.
The application or administration software needs to trust a public certificate for the IBM MQ as a Service queue manager certificate. This can be the issuer certificate, or the individual queue manager certificate. Both are available for download from the IBM MQ as a Service service console.
You need to gather some data from your IBM MQ as a Service queue instance:
- The administration user's username and password.
- An application user's username and password.
- The certificate chain ending in the queue manager certificate, starting from the root CA certificate.
- The description of the queue manager formatted in JSON (called CCDT data).
The following section guides you through gathering the data from the IBM MQ as a Service console, and also guides you through the process of setting up a keystore to manage trusted public certificates on your local machine. Subsequent pages linked from the end of this document show you how to remotely administer using TLS, and also how to connect the C and JMS MQ samples to the queue manager.
The following description alters the CLOUD.ADMIN.SVRCONN channel, allowing the administrator to connect securely. Similarly, the CLOUD.APP.SVRCONN channel is altered, which is used by applications such as the C or JMS samples.
Reference documentation
The following links provide a handy reference for information on how to administer an IBM MQ as a Service queue manager using the standard administration tools. You may choose your preferred tool and follow the instructions in this document.
Tasks on the IBM MQ as a Service queue manager
As mentioned earlier, enabling security on an IBM MQ channel requires configuring a cipher spec, and exchanging public certificates between the queue manager and the client (and for Mutual TLS, also between the client and the queue manager). The configuration of the cipher spec can be done using any of the three standard administration tools. The method for each is described below, so pick your preferred tool and follow the instructions. For access to the user credentials and certificate, the IBM MQ as a Service service console is required.
Using the IBM MQ as a Service console to gather credentials and certificates
- Open the IBM MQ as a Service service console and locate your queue manager.
- Gather the admin user's credentials. Select the Administration tab for your queue manager, you should note the user name, and follow the steps to download the API key (which is the password you will use to connect later). See Configuring administrator access for a queue manager.
- Create an application user for the JMS and C applications. Select the Application credentials tab for your queue manager, and follow the process to add a new application credentials. Save the generated API key, which is the password for applications to connect with. See Configuring access for connecting an application to a queue manager.
- Download the JSON CCDT description of your queue manager. Click the Connection
Info button, and follow the instructions to download the CCDT form of the connection
info. You might also want to download the text version, which is easier to read, and a useful source
of the queue manager name and url.The CCDT file downloaded should look like this:
{
"channel": [
  {
  "name": "CLOUD.ADMIN.SVRCONN",
  "clientConnection": {
    "connection": [
    {
      "host": "myhost.cloud.ibm.com",
      "port": 31605
    }
    ],
    "queueManager": "MQ_ONE"
  },
  "transmissionSecurity": {
    "cipherSpecification": "ANY_TLS12_OR_HIGHER"
  },
  "type": "clientConnection"
  },
  {
  "name": "CLOUD.APP.SVRCONN",
  "clientConnection": {
    "connection": [
    {
      "host": "myhost.cloud.ibm.com",
      "port": 31605
    }
    ],
    "queueManager": "MQ_ONE"
  },
  "transmissionSecurity": {
    "cipherSpecification": "ANY_TLS12_OR_HIGHER"
  },
  "type": "clientConnection"
  }
]
}
Using IBM MQ Console to alter the channels
- Navigate to the Administration tab for your queue manager.
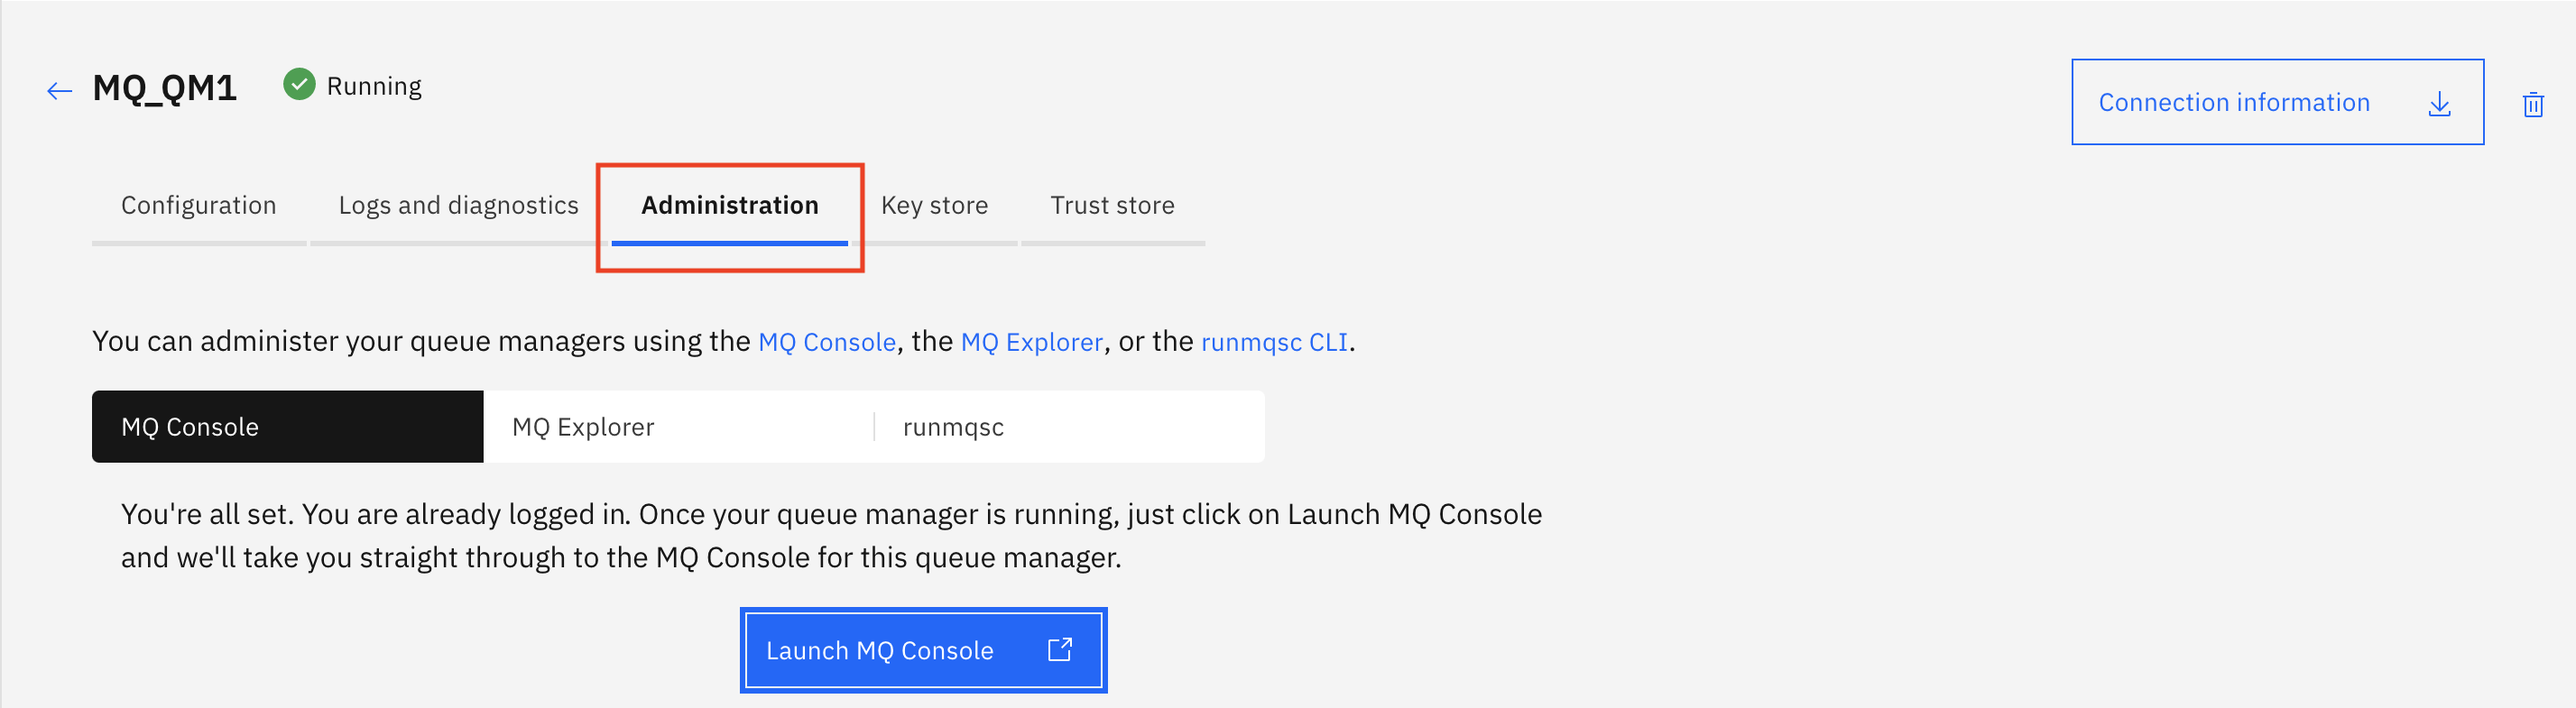
- Ensure 'MQ Console' is selected and then click Launch MQ Console.
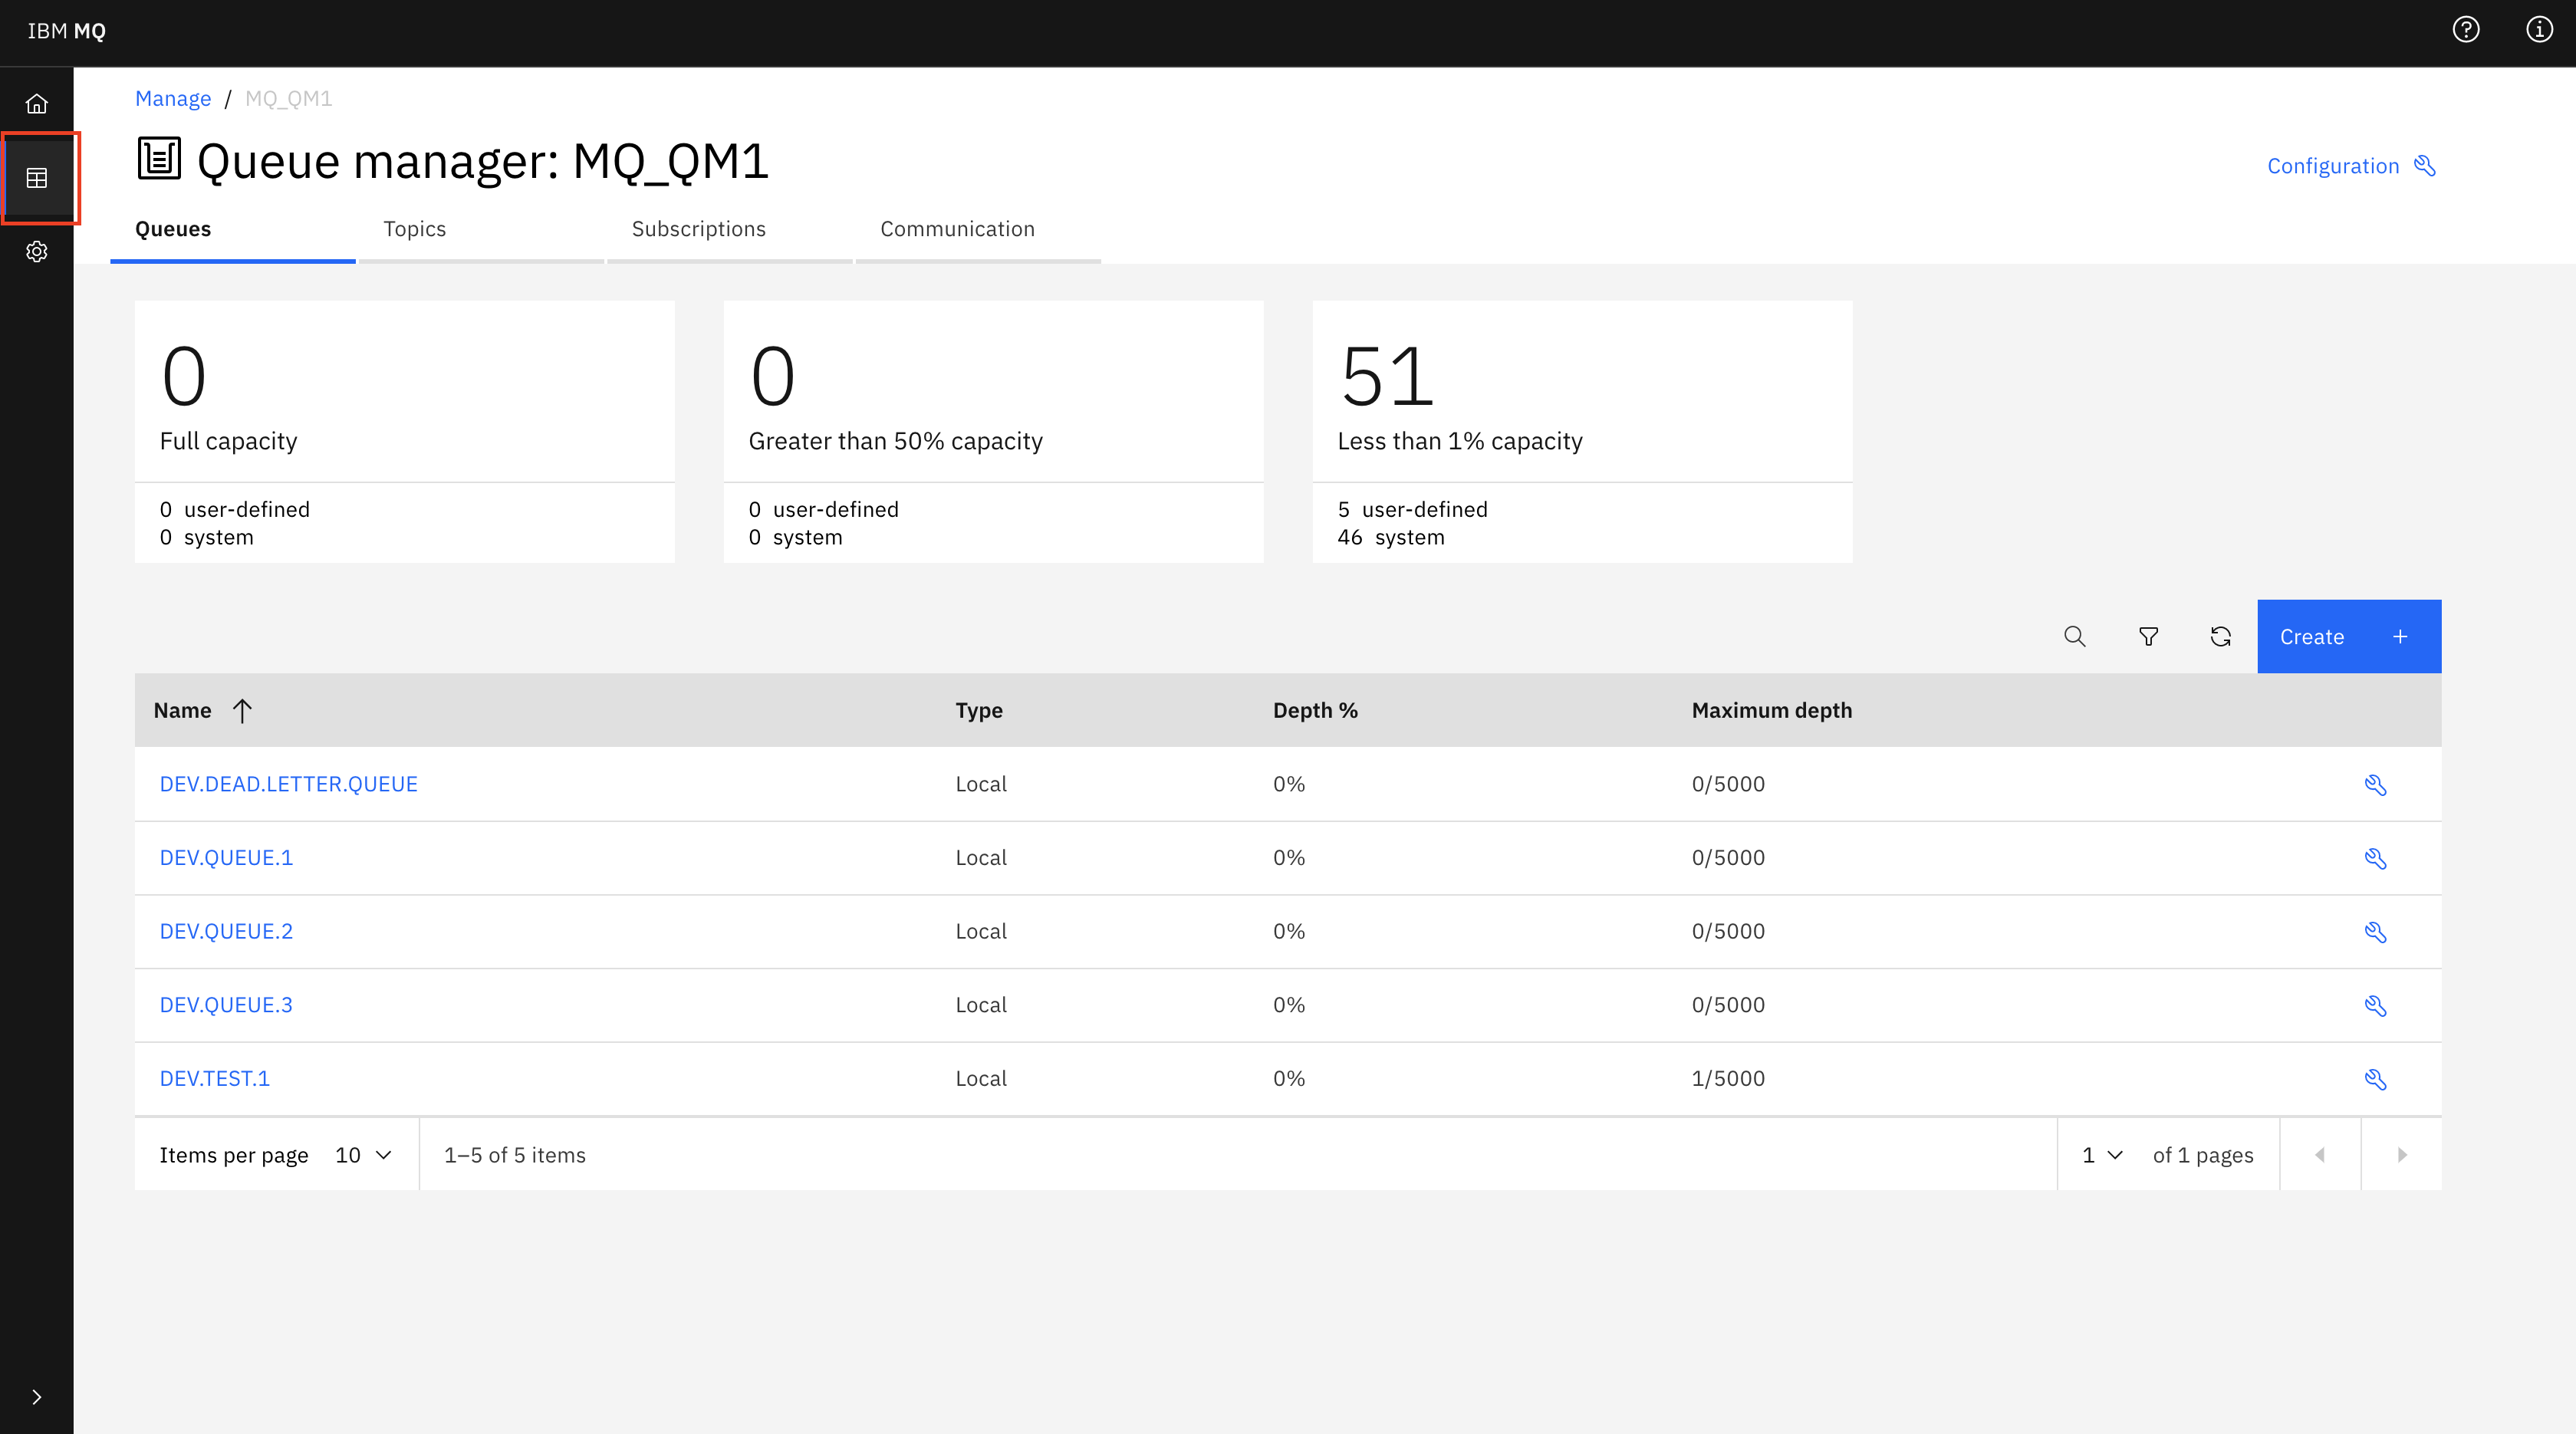
- Click on Manage in the side menu to view your IBM MQ objects.
- Click on Communication then App channels.
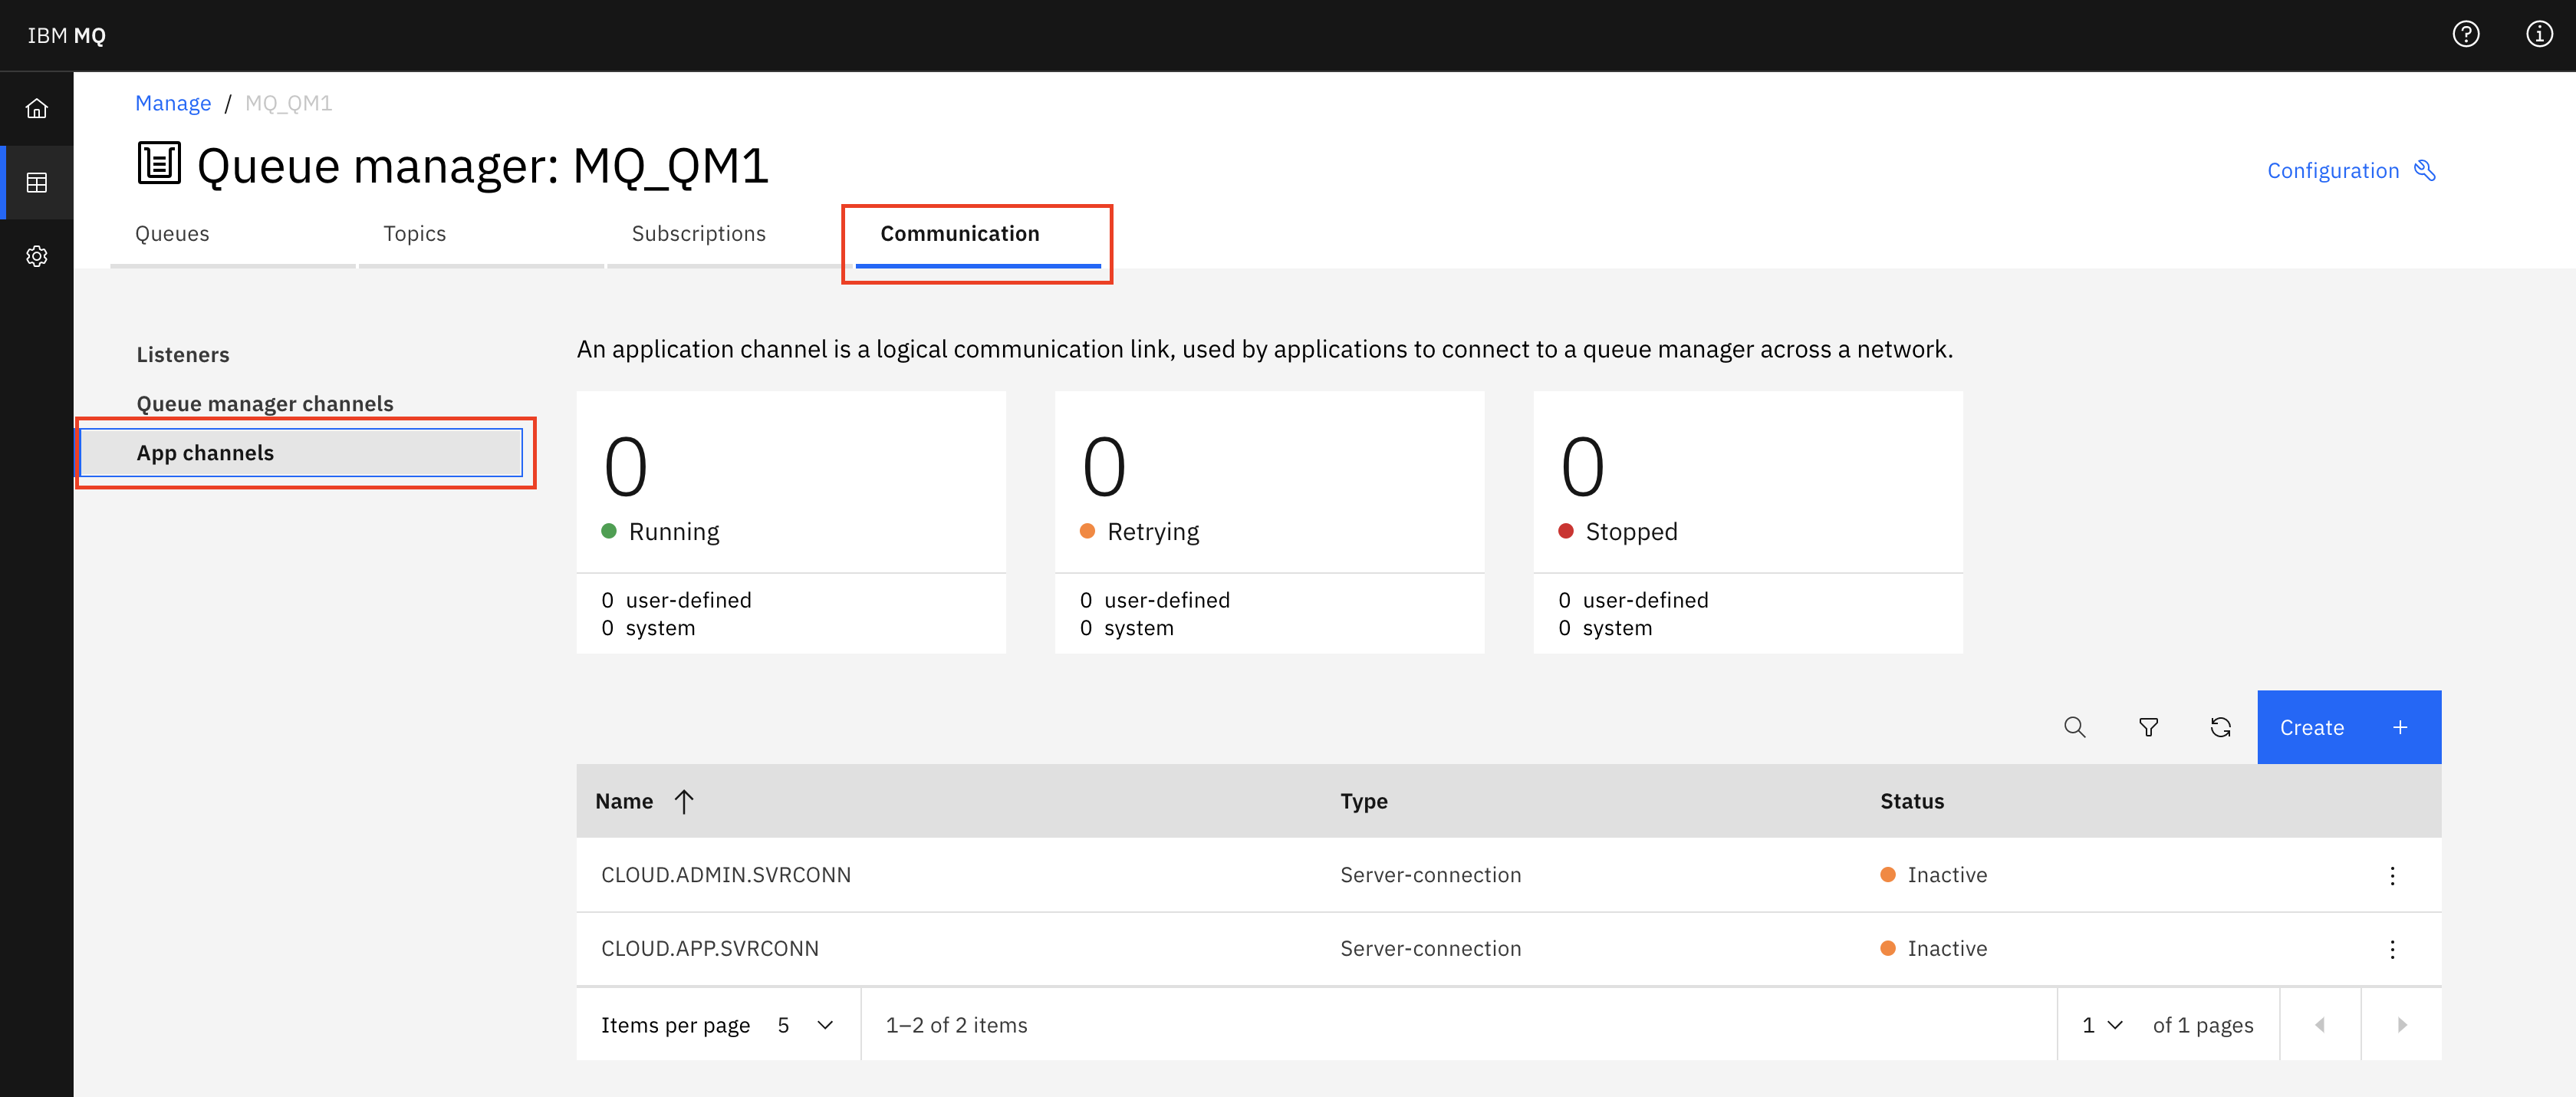
- From the table, click the 3 dots for CLOUD.ADMIN.SVRCONN and select
Configuration.

- Select the Edit button.
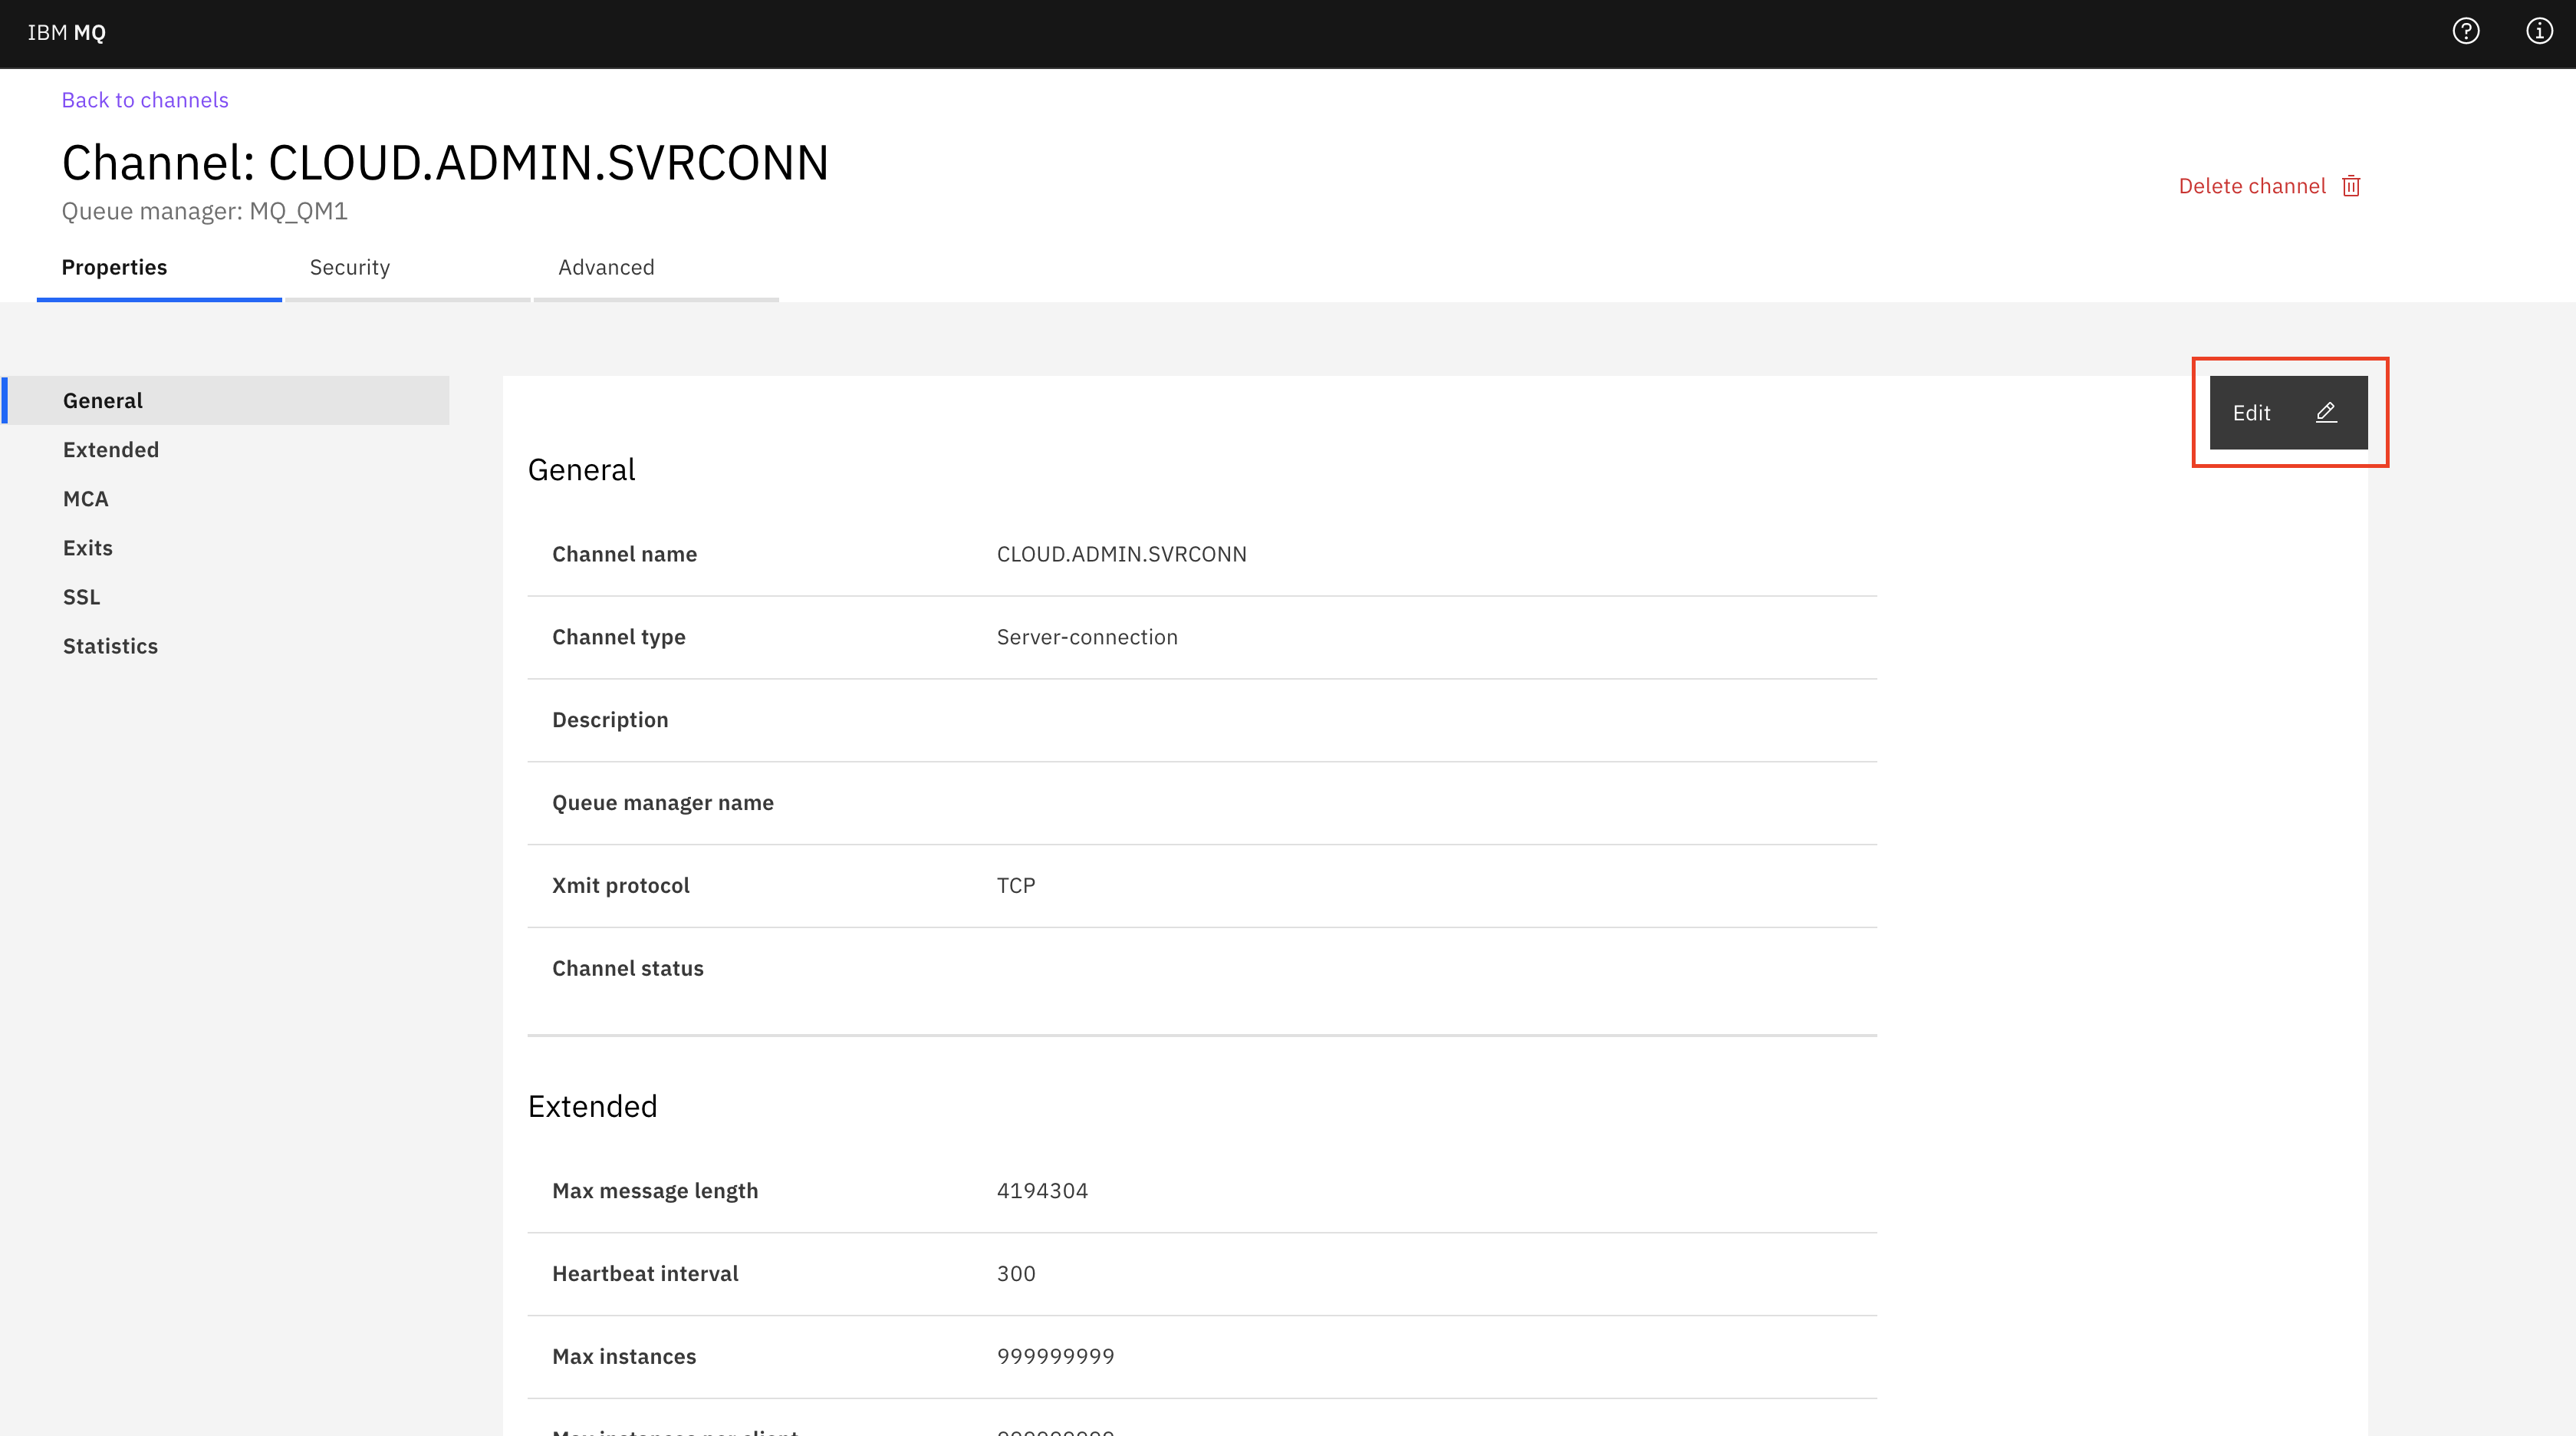
- Select SSL and in the SSL CipherSpec field, check
that the value is
ANY_TLS12_OR_HIGHER. This is not a list, so if you want to choose another cipher spec, please refer to the IBM MQ documentation for Enabling CipherSpecs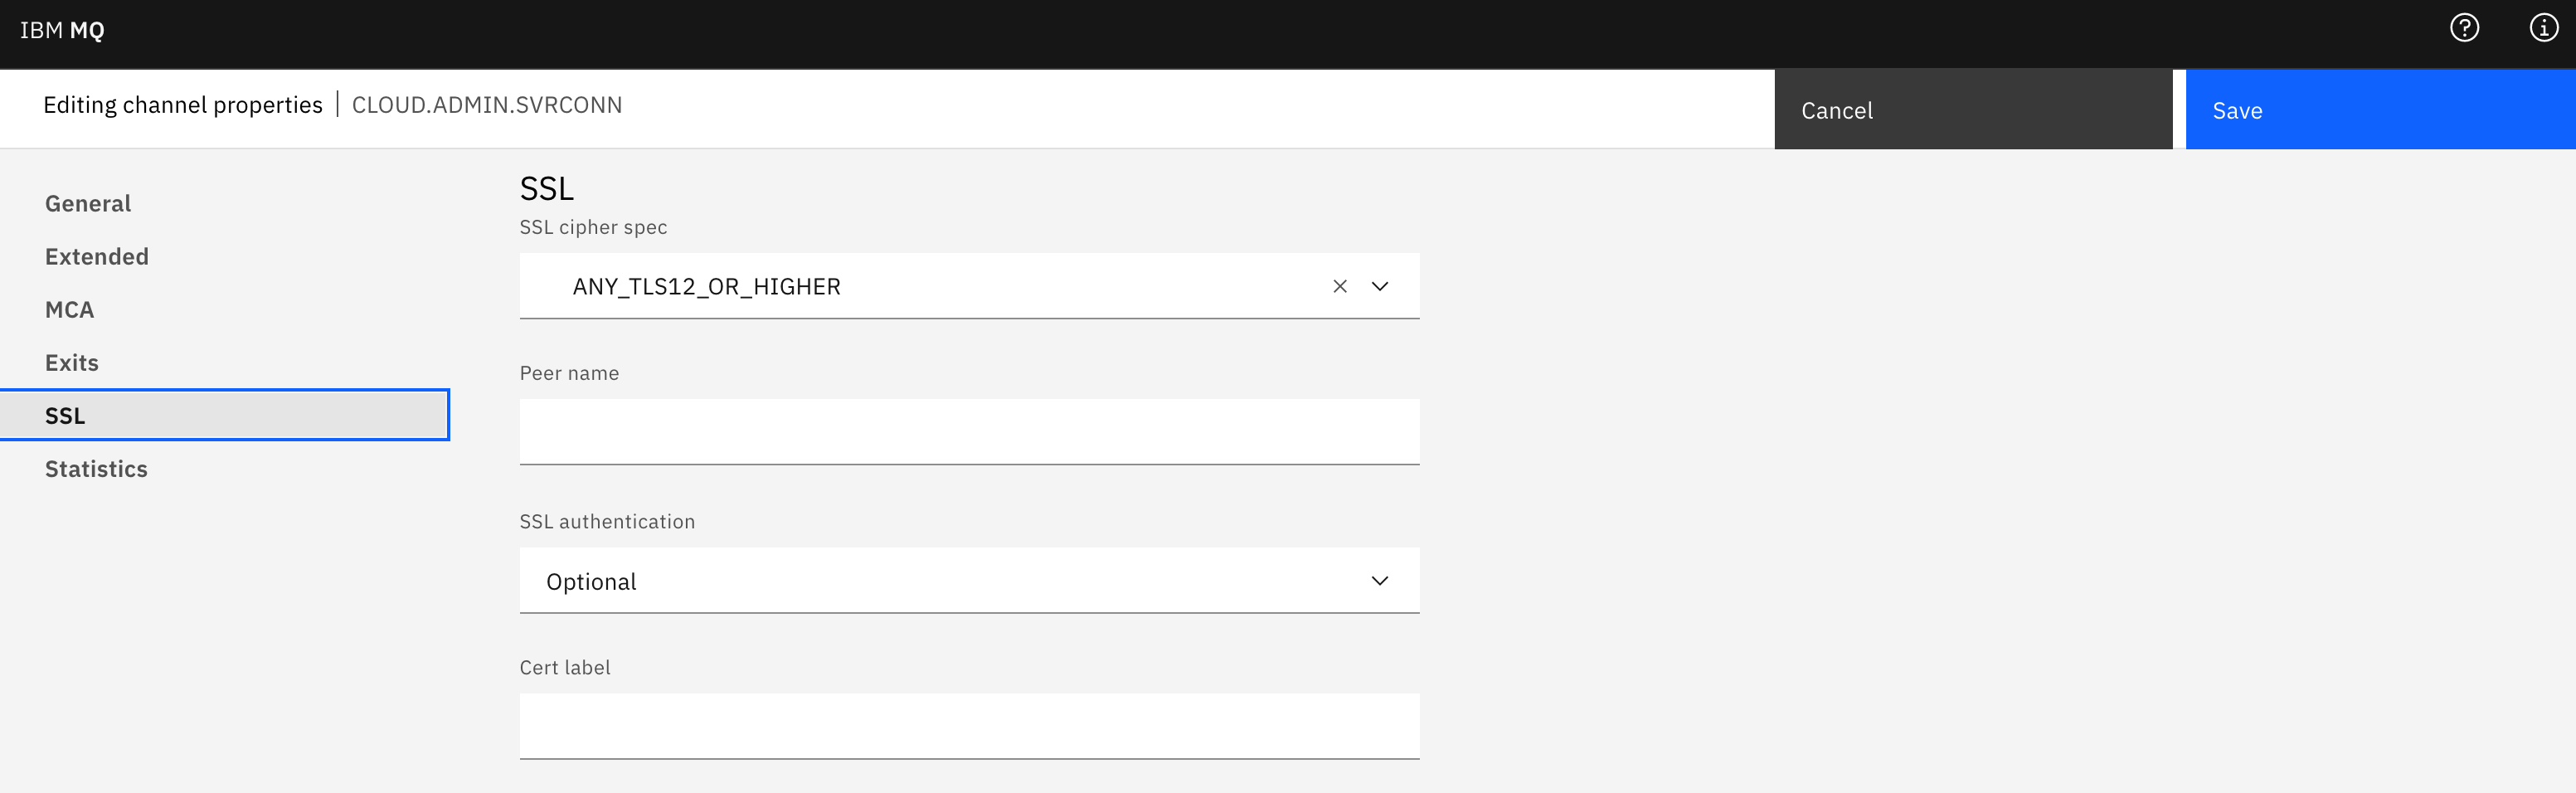
- Click Save
- Repeat the above for the CLOUD.APP.SVRCONN channel.
- Now refresh the queue manager SSL Security if you have altered any channel above:
- On the queue manager page, select Configuration.

- Select the Security tab.
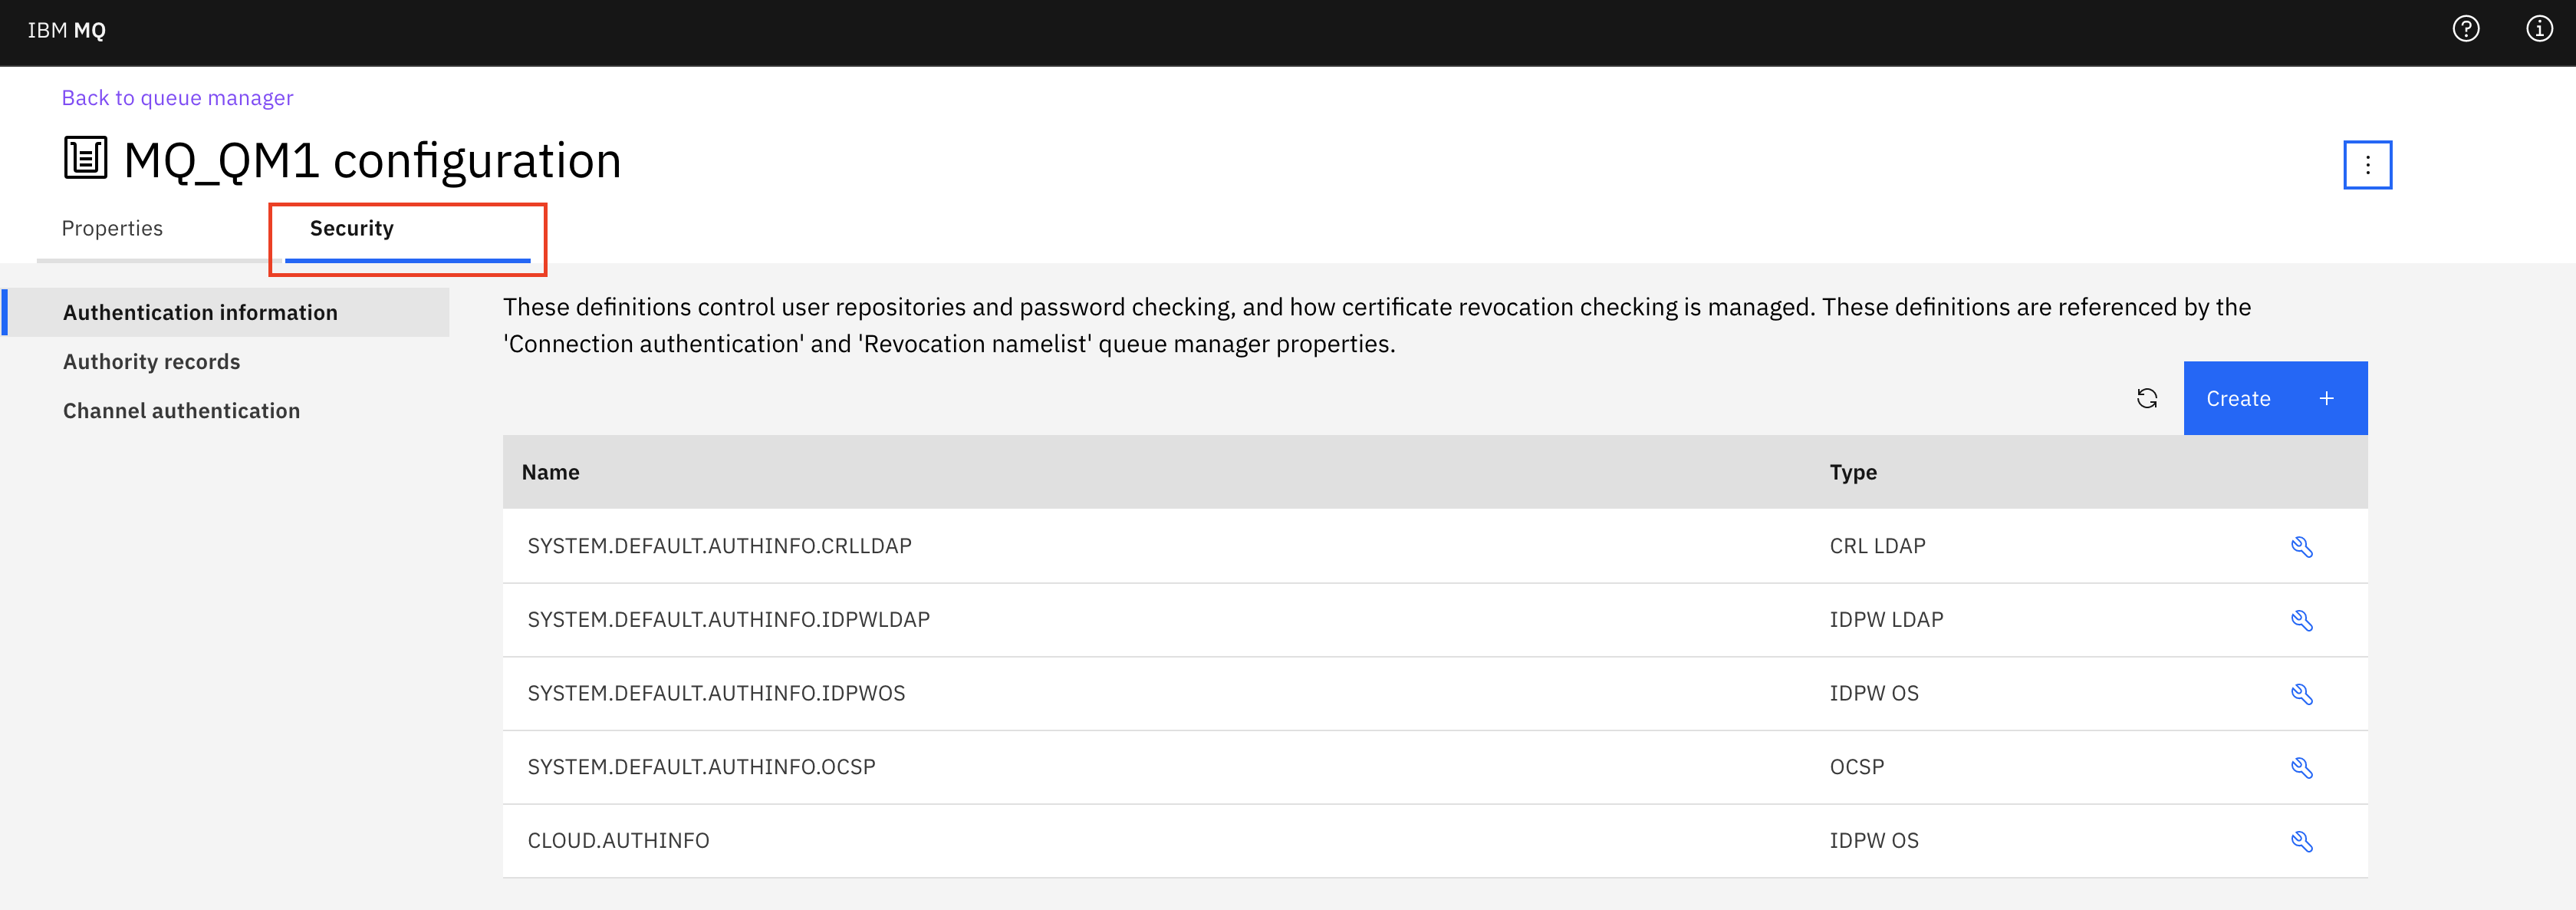
- Select the three dots, then Refresh SSL.
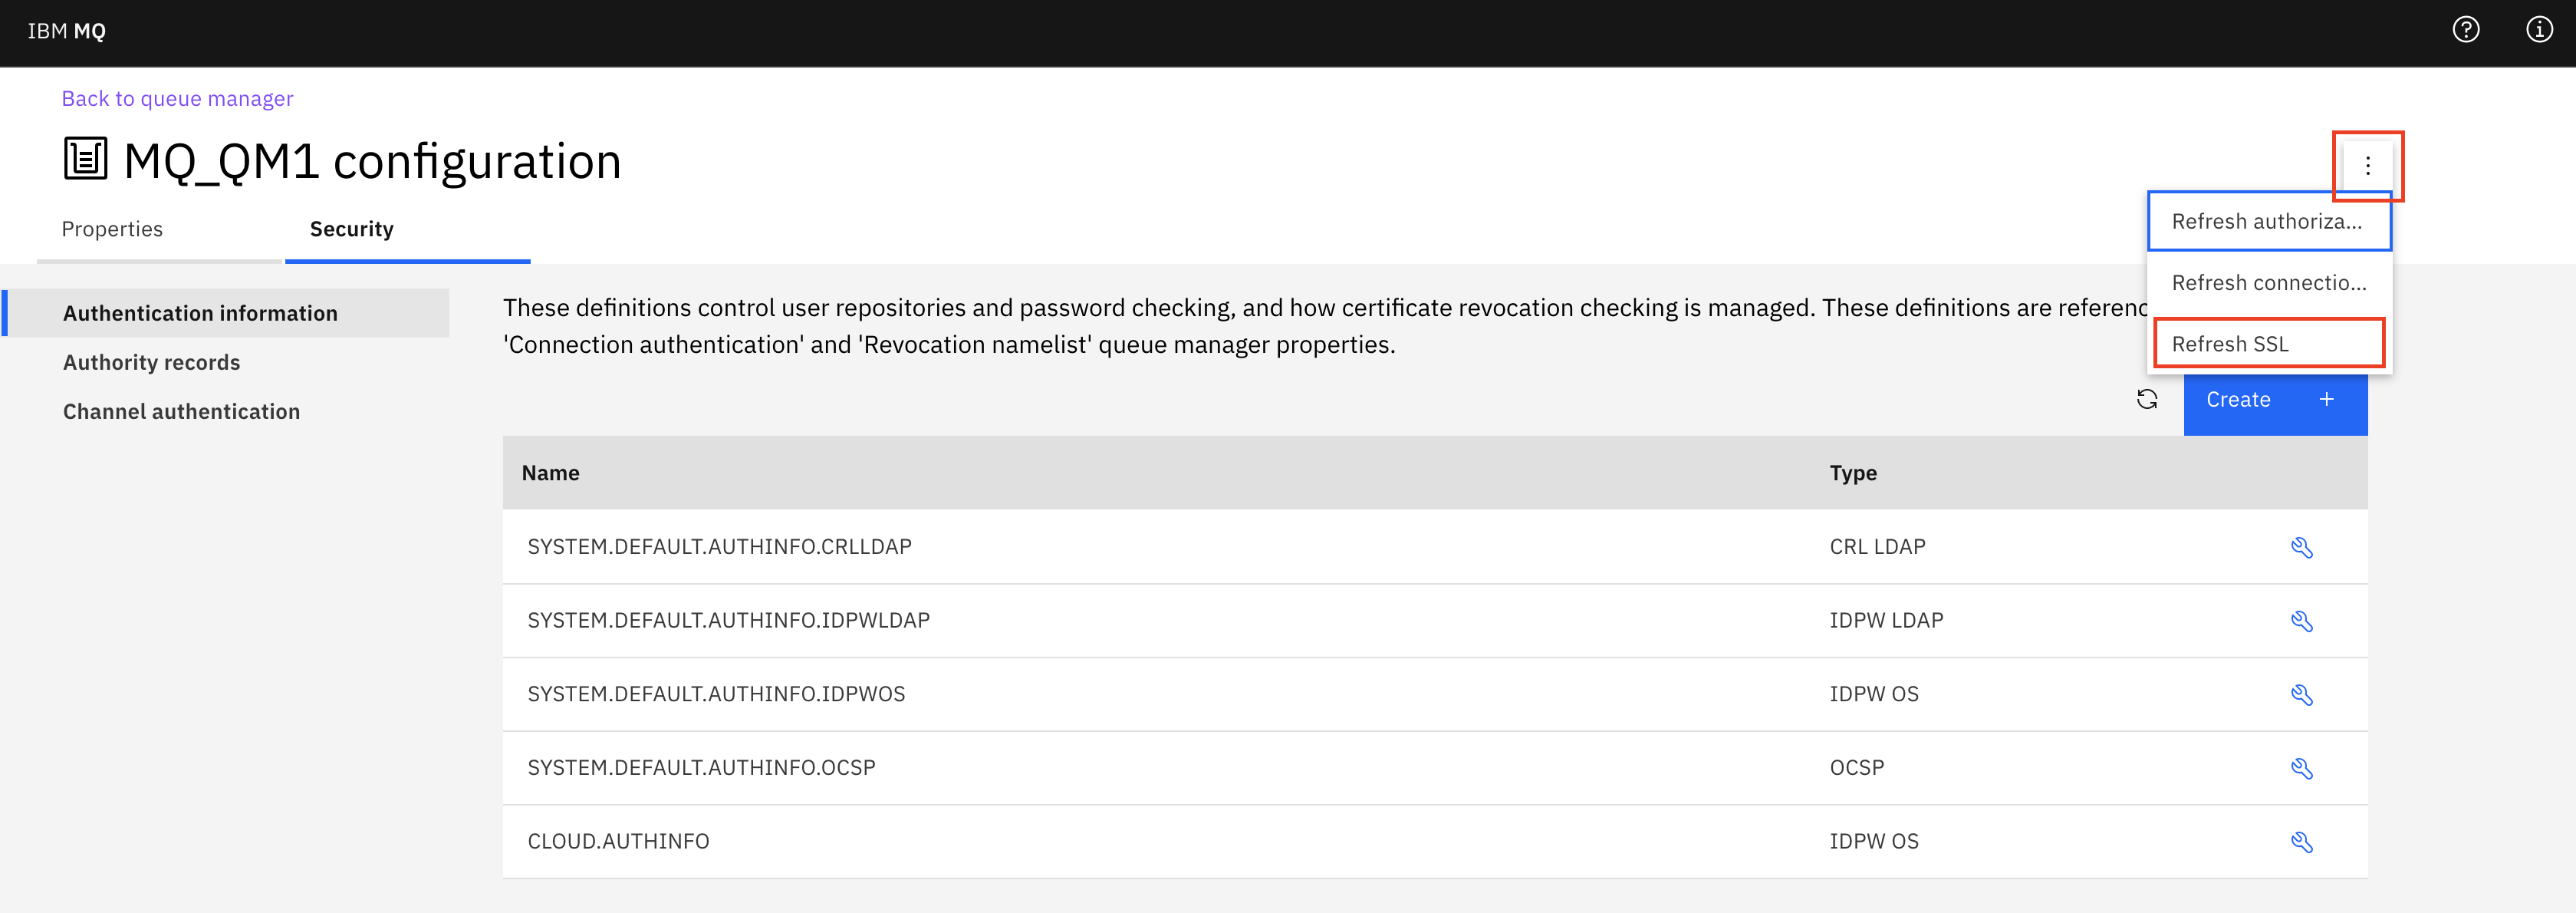
- Confirm by clicking Refresh.
The Cipher spec is now configured.
- On the queue manager page, select Configuration.
Using IBM MQ Explorer to alter the channels
-
Refer to Connect to your queue manager using MQ Explorer and perform the steps to connect to IBM MQ
-
In the IBM MQ Explorer - Navigator:
- Navigate to Queue Managers, expand your queue manager and click on Channels.
- In the Channels panel, double click on CLOUD.ADMIN.SVRCONN.
- In the CLOUD.ADMIN.SVRCONN properties panel, select SSL.
- In the SSL Cipher Spec: field, make sure a cipher spec is selected
(
ANY_TLS12_OR_HIGHER). - Click Apply and then OK.
-
Repeat the above for the channel CLOUD.APP.SVRCONN

-
If you have altered the cipher spec for any channel, refresh the security. Under Queue Managers, right-click on the queue manager and select .
-
This completes enabling TLS encryption on the IBM MQ channels. If you no longer need the IBM MQ Explorer, you can disconnect the connection to queue manager by right clicking on queue manager and selecting Disconnect.
Create a Keystore file
To enable the client process to trust the queue manager, you must download the public certificate that will be presented by the queue manager.
Download the public certificate
The following steps can be used to download the public certificate and create that keystore.
- Click on the Key store tab, and identify the certificate that is marked
as "In use: Queue manager" (by default this is qmgrcert_yyyymm).

Create a Keystore file in PKCS12 format
- Create a client key store using the runmqakm
tool.
$ runmqakm -keydb -create -db key.kdb -pw <your password> -type pkcs12 -expire 0 -stash $ # In some operating systems you may have to update the file permissions to make the keystore readable chmod +rw key.kdb -
Import the queue manager certificate into the key store (this is the qmgrcert you downloaded from the IBM MQ as a Service user interface earlier).
runmqakm -cert -add -db key.kdb -file qmgrcert_yyyymm.pem -label qmgrcert -stashed -type pkcs12 -format ascii - Check your certificates have been
added.
runmqakm -cert -list -db key.kdbNote: The type parameter above is pkcs12. Some samples suggest using kdb, but the resulting key.kdb is not readable by keytool, so for this exercise pkcs12 is preferred.
Create a Keystore file in JKS format on Windows and Linux®
Create a jks key store and copy the public part of queue manager certificate chain into it.
- Create a client key store using the ikeycmd
tool.
$ ikeycmd -keydb -create -db key.jks -pw <your password> -type jks -expire 0 -stash $ # In some operating systems you may have to update the file permissions to make the keystore readable chmod +rw key.jks - Import the queue manager certificate into the key store (this is the qmgrcert you
downloaded from the IBM MQ as a Service user interface
earlier).
$ ikeycmd -cert -add -db key.jks -file qmgrcert_yyyymm.pem -label qmgrcert -pw <your password> - Check your certificates have been
added.
$ ikeycmd -cert -list -db key.jks
Create a Keystore file in JKS format on macOS
Create a jks key store and copy the public part of queue manager certificate chain into it.
- Create a client key store and import the
certificate.
$ keytool -importcert -file qmgrcert_yyyymm.pem -alias qmgrcert -keystore key.jks -storepass <your password> - Check your certificates have been
added.
$ keytool -list -keystore key.jks -storepass <your password>
Next steps
Securing Administration
The next step is to configure the client end of the communication to trust the queue manager certificate. Choose the administration tool that you would like to use and follow the appropriate instructions below.
Securing Application Connections
The next step is to configure your application connection so that it is uses TLS encryption when connecting to the queue manager.