Technical Blog Post
Abstract
Complete the steps in this blog post to install a new Maximo 7.6.1 instance.
Body
Welcome to Maximo Asset Management 7.6.1!
Installing Maximo 7.6.1 and updating from Maximo 7.6 is like installing Maximo 7.6 and updating from Maximo 7.5. It is installed to a new directory.
- Product information and publications: Maximo Asset Management software requirements
- What's New in Maximo Asset Management 7.6.1
- What to download for Maximo Asset Management 7.6.1
- Installing Maximo 7.6.1 on Microsoft Windows Server 2019 and Microsoft Windows Server 2022
- What is supposed to be in the Maximo 7.6.1 installation directory?
- Maximo 7.6.x Designer 431 Report Development Guide (BIRT Reporting) - updated for Maximo 7.6.1
- Maximo Upgrade Resources
- Maximo Upgrade Requirements Matrix includes Industry Solution and add-on versions compatible with Maximo 7.6.1, 7.6.1.1, 7.6.1.2, and 7.6.1.3
- Updates for Maximo Asset Management 7.6.1 feature packs has a complete list of updates for Maximo Asset Management 7.6.1.1 and 7.6.1.2
- Platform Configuration Matrix
- Upgrading to Maximo 7.6.1 from Maximo 7.6.0.x
Maximo Asset Management Feature Packs
- Maximo Asset Management Feature Pack 7.6.1.1
- Maximo Asset Management Feature Pack 7.6.1.2
- Maximo Asset Management Feature Pack 7.6.1.3
- Installing a Feature Pack in Maximo 7.6.x
- Installing an interim fix in Maximo 7.6.x
-
Installing an interim fix for an Industry Solution or Add-on in Maximo Asset Management 7.6.x
Other Resources:
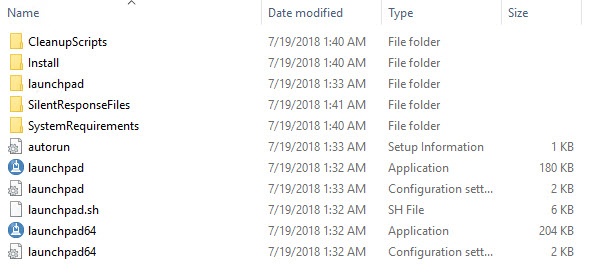
Double-click launchpad64.exe to bring up the Welcome screen.
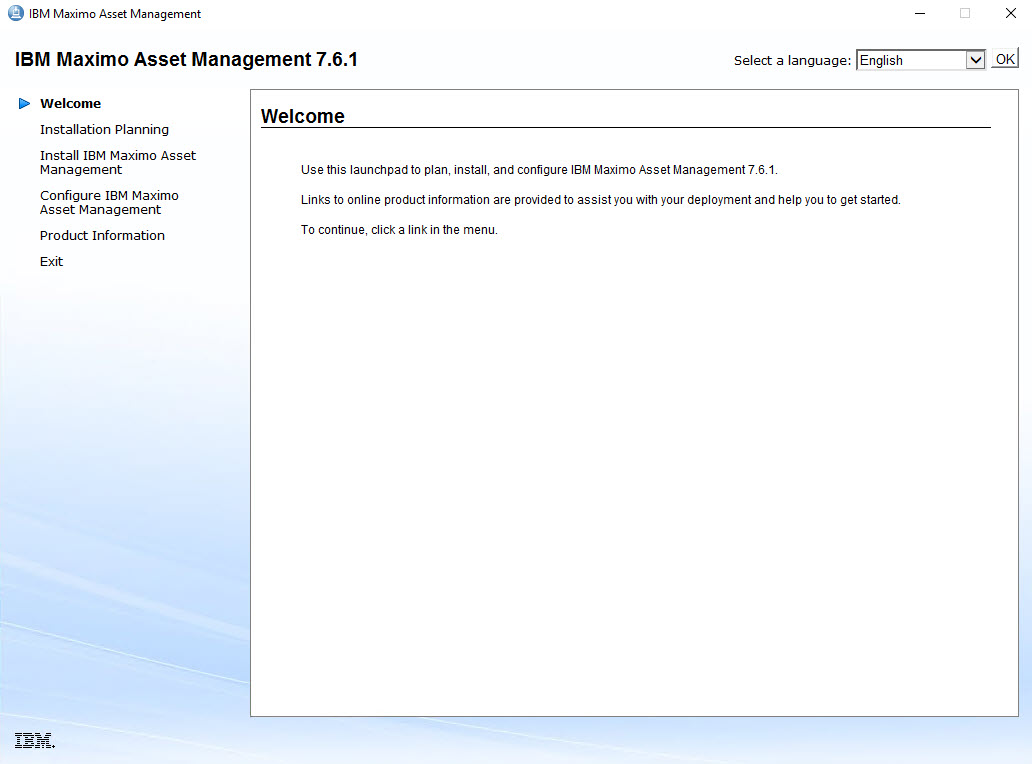
Looking at the left side, click Installation Planning.

Here you can access the installation documentation directly from the IBM website. You need the documentation to install the middleware and Maximo properly. I strongly recommend that you download the documentation.
The prerequisite verification tool is a command line interface (CLI) tool that helps you ensure that you have the proper OS versions and resources available on your target server. (The product installer performs some of these tests as well.)
On the left, select Install IBM Maximo Asset Management.

This screen is where you select whether to install WebSphere, Db2, and Maximo, and from where you launch the installer. Depending on how you choose to install the product, you can download and run the installer from as many as three machines: one each for the WebSphere server, Db2 server, and administrative workstation. You can combine one or more of these installations to a single server. Check that you have sufficient resources available on the server before installing Db2 and WebSphere to the same server, .
From this screen, you can also install a second instance of these products. [I do not cover that option here; it is not yet installed!]
Click Optional components.

From here, you can install the IBM Data Studio, which is used to manage Db2.
Going back to the Install Product screen, I am installing WebSphere, Db2, and Maximo 7.6.1 on a single Microsoft Windows 2016 server, so I make sure all three items are selected, and click Install IBM Maximo Asset Management components.

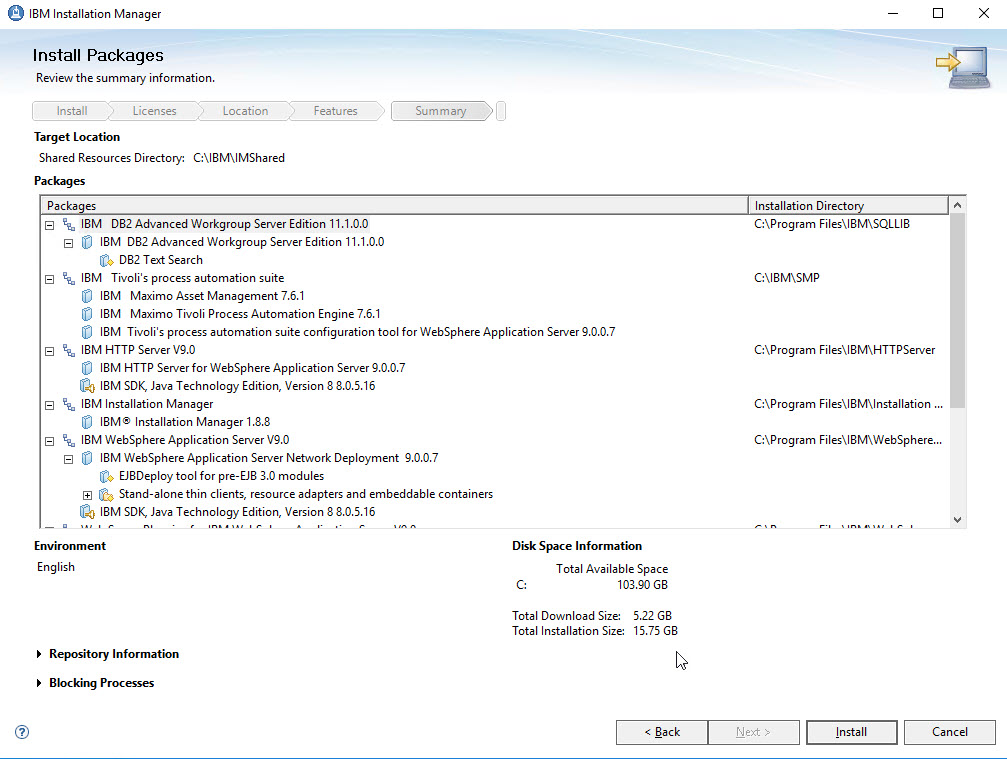
The screen capture shows four packages to be installed:
1. IBM Installation Manager 1.8.8. Installation Manager first installs itself, then Maximo, WebSphere, and Db2. (Db2 uses its own installer, which we built into an Installation Manager package.)
2. Maximo 7.6.1
3. DB2 11.1
4. WebSphere Application Server 9.0.0.7, including IBM HTTP Server, the web server plug-in, the customization toolbo,x and IBM WebSphere Java SDK 1.8. Maximo 7.6.1 requires JDK 1.8.
Clicking Next displays a progress bar, the first of many you see.

Once that is completed, then to the license page.
Accept the terms, and click Next.
Note: My recommendation is to change the directory to (for example) C:\IBM\IMShared.
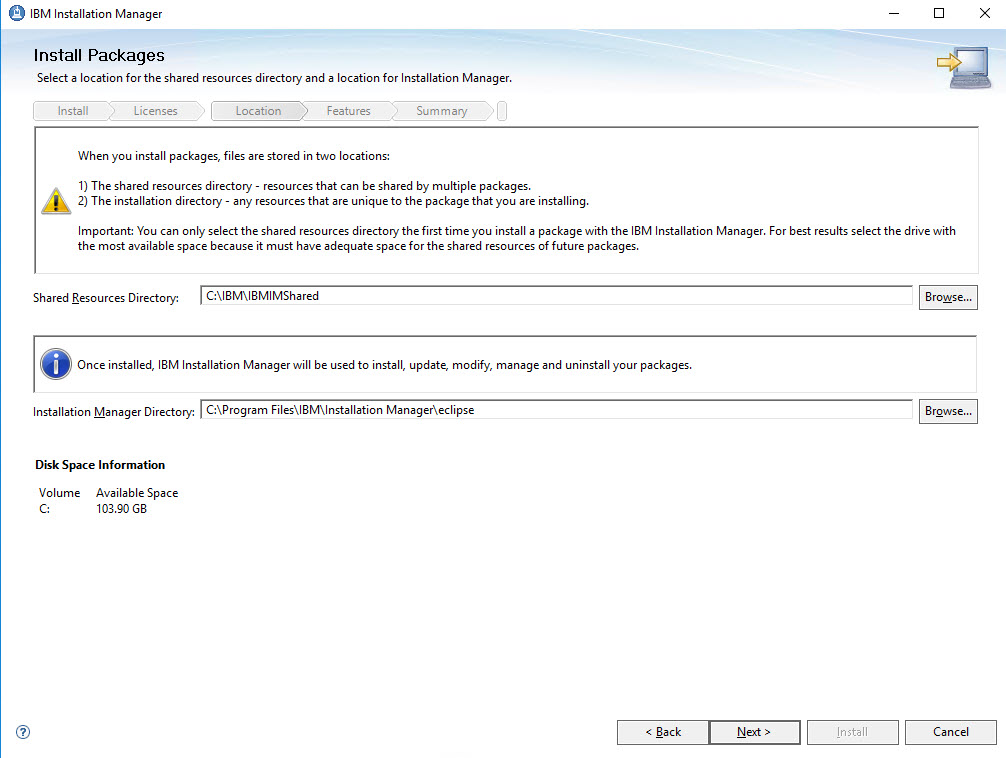
The next screen lets us change where Installation Manager installs. I accept the defaults and click Next.
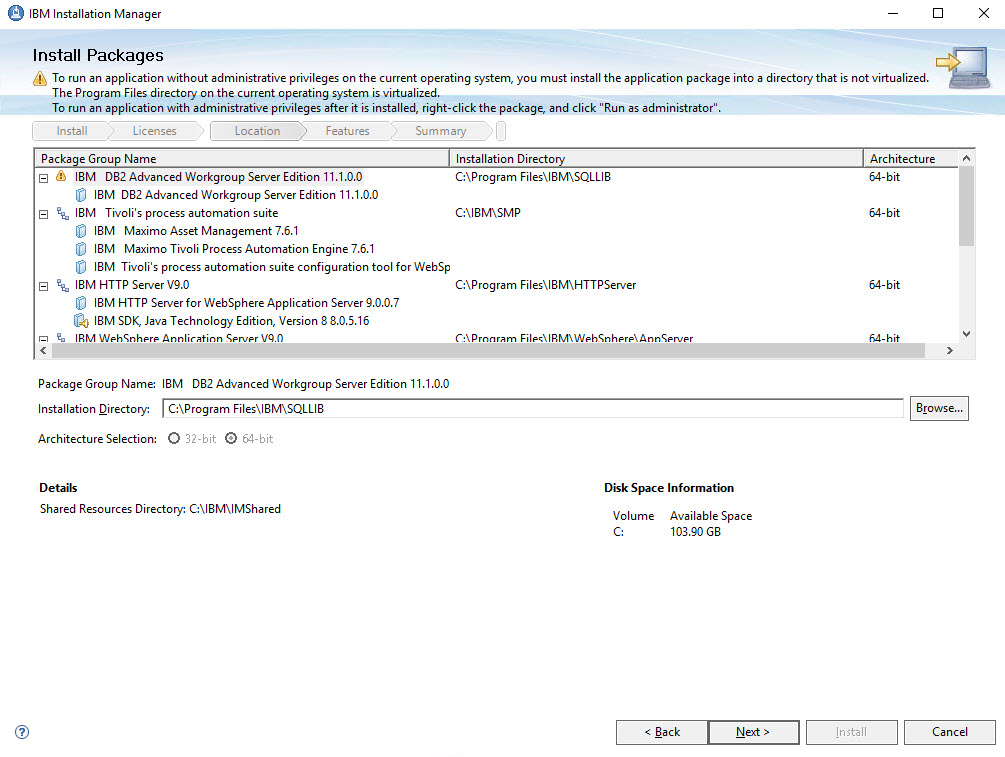
This screen shows, and lets me change, where the products are going to be installed.
Note: My recommendation is to change the directory location so there are no spaces in the file path, for example, C:\IBM\SQLLIB, C:\IBM\WebSphere\AppServer, C:\IBM\HTTPServer, and so on.
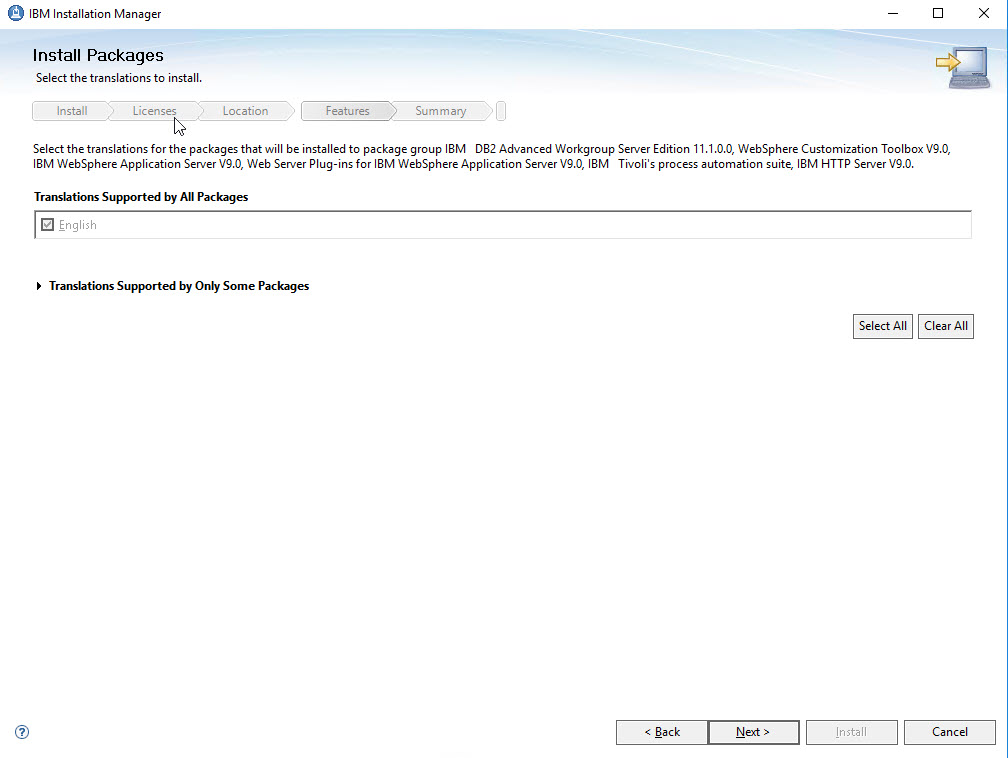
Here we select languages. I am installing to an English language only server, so I click Next.
Here is the summary of packages to be installed.

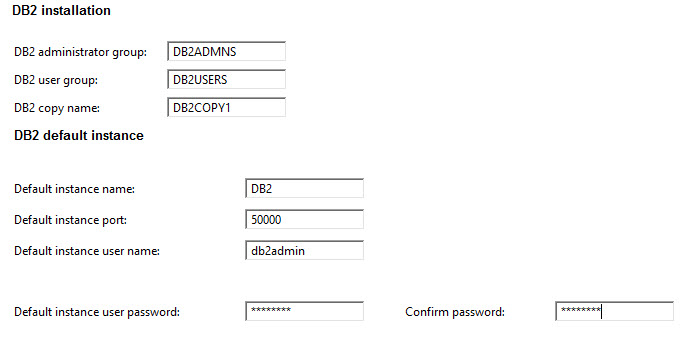
On this page, we complete configuration information for DB2 and WebSphere.
The image here provides a good example of how Installation Manager works. On the left side, you can select items on the left side to modify. Items that must be entered or modified are shown with an asterisk. Or, click Next to go to the next item to be configured. The Install button does not become active until all required information is entered.
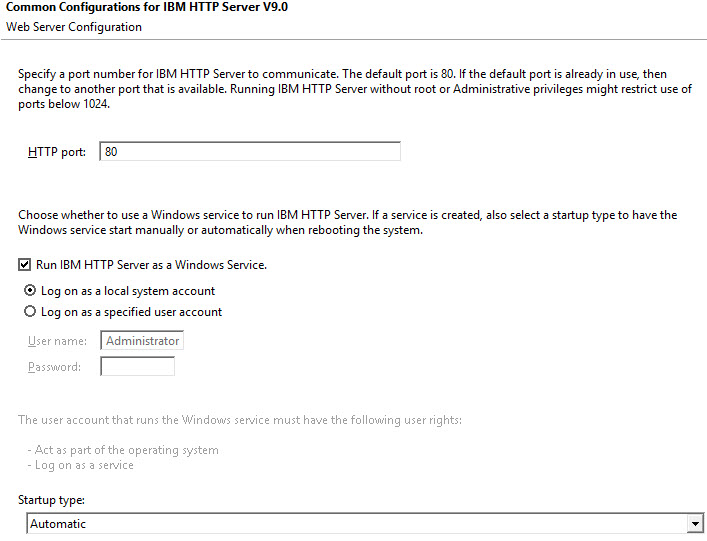
In my case, I accept the defaults for IBM HTTP Server, and enter Db2 password information.
Click Next. The Installation Manager now checks to see that all files are available, and whether there are any blocking processes.

Now the Install button is enabled, so click Install.

When you click the Finish button on the previous screen, Tivoli's Process Automation Suite Configuration tool (the Config Tool for short) launches.

From this screen, you can also configure a new deployment and access the Maximo documentation. There is also a WebSphere cleanup option. Configuring a new deployment will be the subject of a future blog entry or two.
Db2 configuration is done in a later step, when you Configure a New Deployment.
For my installation, I accept all defaults.
On this screen, you can see that most functions are handled by using a wizard interface. You have several options: you can go step-by-step through each of the configuration screens, entering or changing information and clicking the next button. You can also navigate on the left side between different screens. You see field indicators (validation) that flag problems more quickly. Error and progress messages are written to the console area on the bottom of the screen.
Most fields and controls have hover help. In addition, there are (?) icons that indicate item help and section help, depending on where they are placed. Clicking the help text opens contextual assistance without leaving the panel. For page level context help, Click for More Information links to get access to more pages for help. Press the F1 key and go through the Help menu, or click the Help button.
This screen also gives you the option to configure the system for clusters.
Click Next.
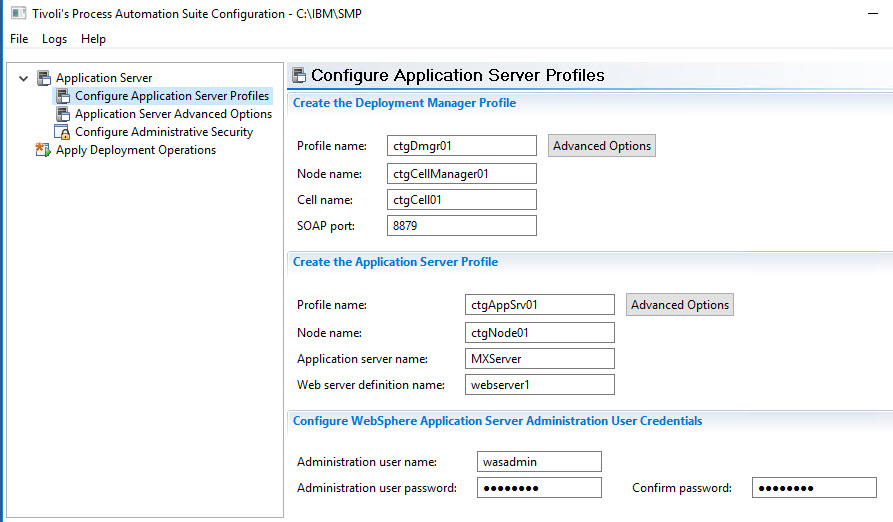
This screen is for configuring the application server profiles. The application servers are both the web application server (default name is MXServer) and the web server (default name is webserver1). You configure WebSphere administrative server security here. Enter a username (default value is wasdmin) and password for access into the WebSphere administrative console. Click Next.
For Windows installations, here you indicate whether the services are to be run as Windows services, and which account is used to run the services. For this document, I accept the default values, and click Next.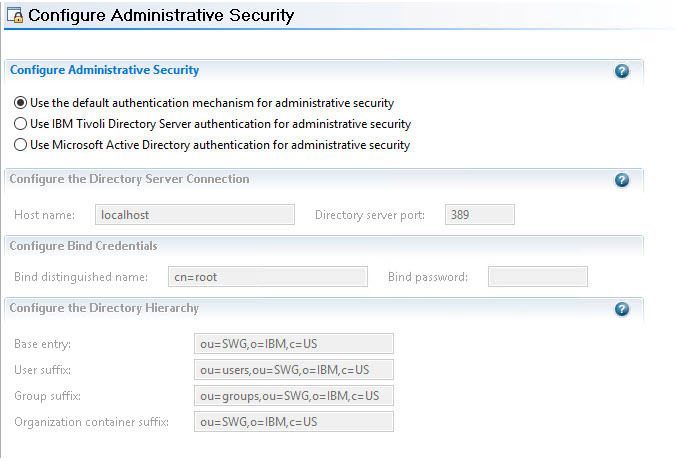
On this screen, configure Administrative security. If you have IBM Security Directory Server or Microsoft Active Directory server, you configure the connection and directory hierarchy here. If you already have users and groups ready to bring into Maximo, enter the hostname, bind credentials, and the base entry, user suffix, group suffix, and organization container suffix here. [You set up the VMMSYNC or LDAPSYNC cron task in Maximo.]
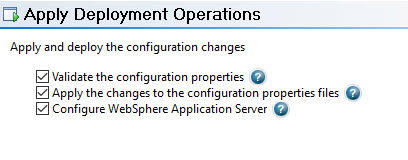
On this screen, validate changes to be made (by clearing the two lower check boxes) before applying any of them.

Click Finish.
And away we go! Some time later...
WebSphere is now prepped and ready to be installed to by the Config Tool.

Click Configure a New Deployment. It brings up the following screen.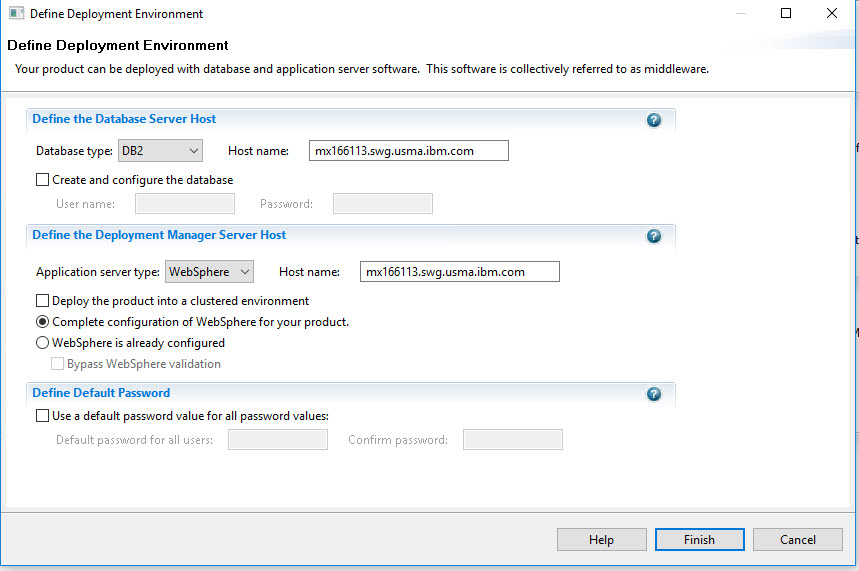
From the Database type dropdown, you can select Db2, Oracle database, or Microsoft SQL Server. Enter the database server's host name.
Exactly what does Create and configure the database mean?
It means it creates the database, necessary users and schema first. Enter the user name and password of a user with administrative rights to the server you put into the Hostname field. If your site's security roles separate Maximo installation from database administration, before running this configuration step, create them first need, or have someone else create them. Instructions for the database administrator to do so are in the installation documentation, found here.
Exactly what does Define the Deployment Manager Server Host mean?
The default value, Complete Configuration of WebSphere for your product, means the Config Tool creates the JMS queues and maximo_host Virtual Host, and tunes the MXServer JVM. Tuning sets the starting and maximum memory values, the thread pools, and generic JVM arguments following Maximo 7.6 best practices.
Check off Deploy the product into a clustered environment deploys Maximo if the clustering is configured, either through the Configuration tool (during Prepare WebSphere Application Server), or done manually. The default value is to complete configuration, to build and deploy the maximo.ear and maximo-x.war files.
If you want to do this manually, you can select WebSphere is already configured, and, if you wish, Bypass WebSphere Validation. Select these options is necessary if you have an existing WebSphere installation or are installing a second Maximo instance to the existing WebSphere installation.
On this screen, you can also define a default password for all users. This is a good option when you're setting up a demo or preview Maximo.
Since I am going the "default everything" route, I enter the password for the Administrator account on the Windows server to which I am installing Maximo, and use a default password for everything, and click Finish.
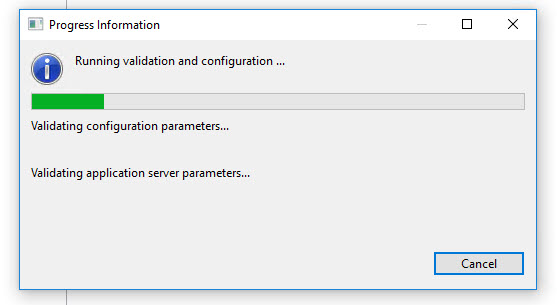
Once the Config Tool has validated the database parameters, it displays this screen. Here, you set your database, application server, security, and base and additional language options (and whether you want to populate the database with demo data); click Next.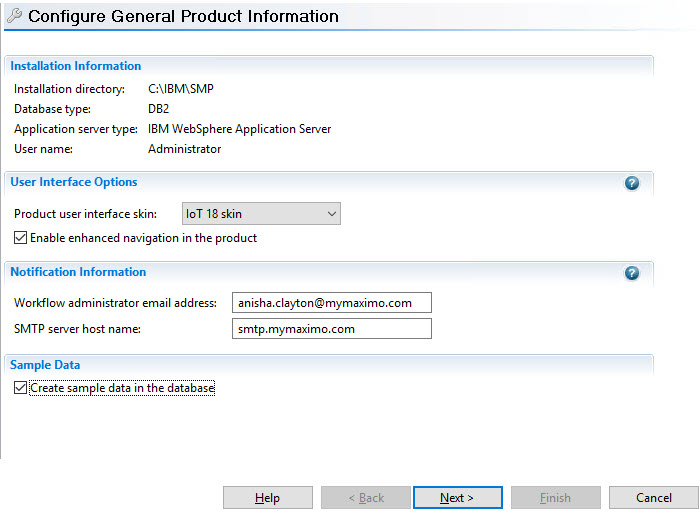
The next two screens are for configuring the database. The options are different for each database (Db2, Oracle database, or Microsoft SQL Server).
Db2:

Once complete, click Next.

On the next screen, enter the passwords for the application server (WebSphere only). Once complete, click Next.

Here you configure WebSphere Application Server security. If you are using Java Platform, Enterprise Edition (JEE) application security, indicate so here, and configure the directory server as well. I am going with native Maximo authentication. Click Next.

In these two following screens you indicate your base language and additional languages you want to install. With English-only, I click Next and Next.

Once completed, the Apply Deployment Operations screen appears. Again, one of the great things about the Configuration Tool is that you can validate everything before you commit it. So, I cleared everything but Validate the configuration properties, and clicked Finish.
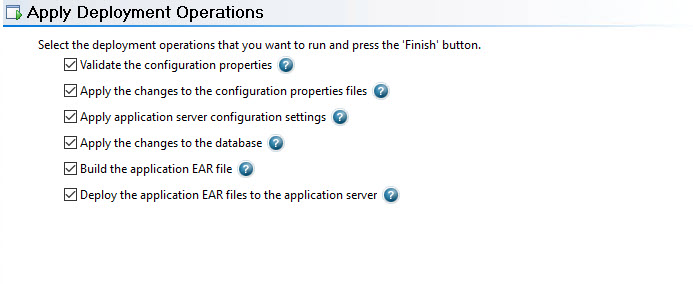

For my configuration, I am creating the Maximo database, populating it with demo data, build the Maximo and Maximo Help ear files, start the Maximo application server (MXServer). Then the Config Tool deploys the maximo.ear and maximo-x.war, and starts the MAXIMO and maximo-x applications. Performing all of these tasks take a while.
Note the information messages as the scroll in the console underneath.
Installation is now complete!
UID
ibm11113945