Technical Blog Post
Abstract
Upgrading to Maximo 7.6.1 from Maximo 7.6.0.x
Body
Upgrading Maximo 7.6.0.x to Maximo 7.6.1 is like upgrading Maximo 7.5.0.x to Maximo 7.6.0.x:
- Install a new SMP directory
- Install new versions of WebSphere and DB2
- WebSphere Application Server:
- Case 1. Installing to a new server. Configure WebSphere with Tivoli's Process Automatic Suite configuration tool
- Case 2. Installing to an existing server on which WebSphere 8.5.5.x is running. Use WebSphere migration tools to re-create existing WebSphere 8.5.5.x profiles in WebSphere 9.0.0.7
- Database:
- Db2: Follow Db2 instructions to upgrade the database server (if on the same server), the instances, and Maximo database
- Microsoft SQL Server or Oracle database: Ensure database version is compatible with Maximo 7.6.1
- For all databases: Use Tivoli's process automatic suite configuration tool to connect to existing Maximo 7.6.0.x database. See the Platform Configuration Matrix.
- Automation Scripting Updates
- Maximo 7.6.1 uses IBM JDK 1.8, and the Mozilla Rhino JavaScript (JS) engine has been replaced with the Oracle Nashorn (V8) engine. See Automation scripts updates required with the JavaScript engine in JDK 1.8.
Environment being upgraded in this blog:
The server name is maxsup097.
Upgrade scenario notes for this blog post:
1. Since I intend to keep these step-by-step instructions limited to Maximo only, this post does not include WebSphere configuration or migration, or any database upgrade steps.
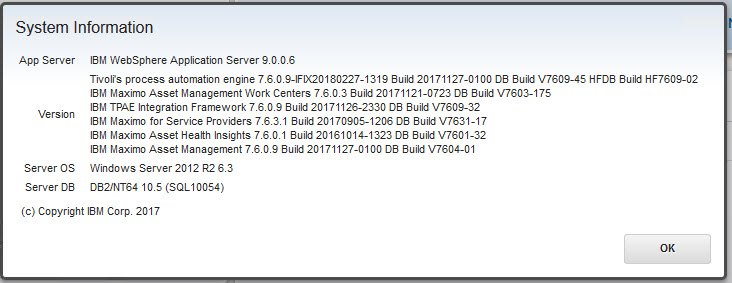
As can be seen in the screen capture, I previously installed WebSphere 9.0.0.6 and deployed Maximo 7.6.0.x to it. I apply WebSphere 9 fix pack 9.0.0.7 to bring it into line with the version distributed with Maximo Asset Management 7.6.1. Also, Maximo 7.6.1 is supported on WebSphere Application Server 8.5.5.13 or later using Java 8 as the default JDK.
However: Use of the version of Tivoli's Process Automatic Suite configuration tool in Maximo 7.6.0.6+ is not supported. Likewise, the version of Tivoli's Process Automatic Suite configuration tool in Maximo 7.6.1 is not supported.
Part 0: Upgrade Microsoft Windows Server 2012 R2 to Windows Server 2016. Do not upgrade the OS unless you must. Instead, stand up a new server. It takes a lot less time. (I did it because I had several Maximo 7.6.0.x instances I wanted to test upgrade against and it was easier for me.)
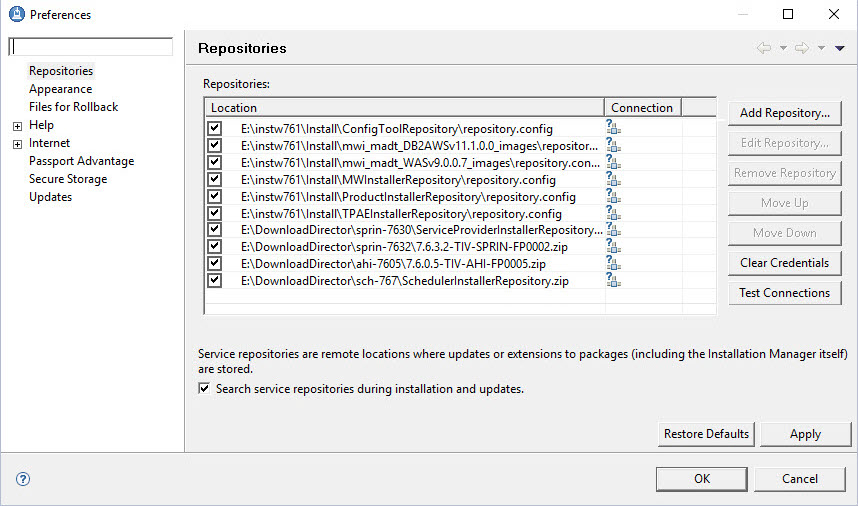
After installing Maximo 7.6.1 but before running the Config Tool, in Installation Manager, I added the following packages to the repository:
- IBM Maximo Asset Health Insights 7.6.0
- Asset Health Insights Feature Pack 7.6.0.5
- IBM Maximo for Service Providers 7.6.3
- Maximo for Service Providers Fix Pack 7.6.3.2
A Detour into Installing Packages through Installation Manager
I did this rather than using the Launchpad to avoid prerequisite errors. While the available versions of both products will install to Maximo 7.6.1, update to the latest fix pack before configuring Maximo. This means you will need to download and add the fix pack repository to Installation Manager after you install the 7.6.x version.
To speed up things, I took a second approach: Bypass the Launchpad and install them at the latest fix pack right off.
For each of the four packages above, I created a directory with a unique, expanded the main package, and moved the repository .zip file into the correct directory, for example:
- Create directory ahi-760
- Download Max_Asset_Health_Insights_760.zip
- Expand .zip into Max_Asset_Health_Insights_760 directory
- Move \Max_Asset_Health_Insights_760\AssetHealthInstallerRepository.zip into \ahi-60.
- Create directory ahi-7605
- Download 7.6.0.5-TIV-AHI-FP0005.zip
- Move 7.6.0.5-TIV-AHI-FP0005.zip into ahi-7605
I don't need to move the feature pack into its own directory. Now I have a directory structure:
- ahi-760
- ahi-7605
- sprin-763
- sprint-7632
The resulting list of repositories:
IBM Maximo Asset Health Insights. There is an extra step you must take after installing AHI. Go to Updating the Maximo Asset Management IoT file. Follow the steps there to download and install the correct IoT configuration files.
IBM Maximo for Transportation 7.6.2: Go to Unable to install Maximo for Transportation 7.6.2. Installing Transportation requires following the steps I describe here.
Detour ends
After the repositories are added, click Apply and OK. Click Install.

Select the add-ons and Industry Solutions and install them to your new Maximo 7.6.1 instance. When installed, keep IBM Tivoli's process automation engine configuration utility selected and click Finish.
Part 2

Click Configure a new Administrative Workstation to point to an existing Asset Management deployment.

On this screen I selected the WebSphere is already configured radio button. Do not check Bypass WebSphere validation.

Here's the blank Database Instance Information form...
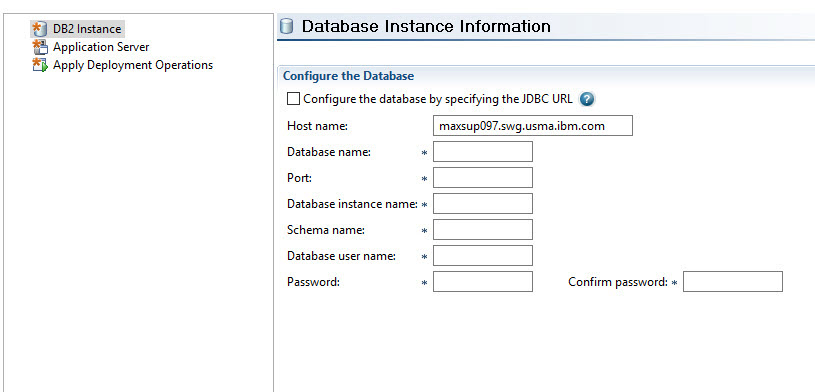
...and here it is filled out, with the cursor carefully placed over the database name, m7609703.
And the same for configuring the Application server:

 No Using Maximo internal authentication:

Next, apply the deployment operations:
 The new Maximo 7.6.1 directory is now configured as the Administrative workstation for the database called m7609703.
Another Detour: Backing up the Administrative Workstation.
At this point in the process, we have not changed the database or web application server yet. Before we upgrade the database, let's go over what files to back up on the administrative workstation.
1. The entire SMP directory. You don't have to back up the EAR files in \SMP\maximo\deployment\default\.
2. The entire Installation Manager shared directory, which contains all of the installed .zipp files. (.zipp is .zip with an extra p.)
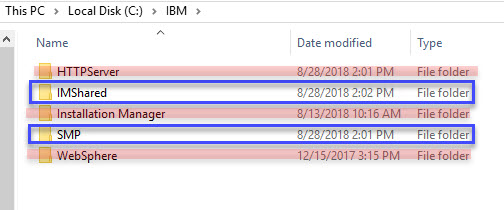
...But not the Installation Manager application directory, [which in this case I put into C:\IBM rather than C:\Program Files\IBM]. If you need to manually roll back or re-create rather than rollb ack to a snapshot of the Admin workstation, you will have to install Installation Manager anyway.
3. The hidden folder C:\ProgramData\IBM\Installation Manager. This folder contains the repository database of all of the products installed by Installation Manager.

End of Detour.
An observation. Taking Maximo 7.6.1 out of it, all I have done so far is to install Maximo, and Configure a new Administrative Workstation to point to an existing Asset Management deployment. These steps can be used independently whenever you need to "move" the admin workstation or it "goes missing" somehow. The only irreplaceable piece of Maximo is the database.
Part 4: Upgrade
While the upgrade is the biggest change that Maximo users see, we have completed most of the work that the Maximo administrators are required to do.
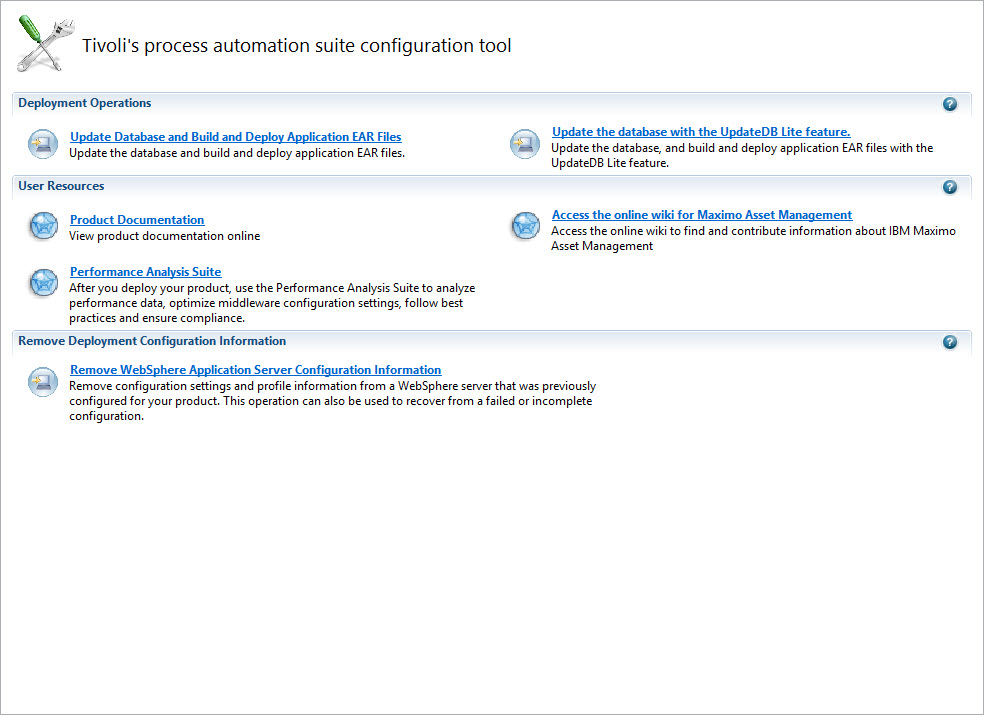
Click Update Database and Build and Deploy Application EAR Files.


Click Next.

You might have an option to Deploy the Application EAR file.
Change the skin to the new one, and enable enhanced navigation:

Click Finish.

After deploying the EAR file, you can log in to Maximo.
UID
ibm11113921