General Page
IBM Navigator for i is a powerful graphical interface for IBM i clients. A primary DNS server can be moved to a different system with just a few steps using IBM Navigator for i.
First, several important DNS concepts used in this article will be introduced.
DNS types
There are two types of DNS - primary DNS and secondary DNS. In general, domain names can work with only one name server - the primary DNS. However, practice has shown that a domain name needs to have at least two name servers assigned in order to be available at any time. In case there is a problem with the primary name server, the secondary name server will be able to answer the online request for a particular domain. This back-up requirement has turned into an accepted Internet standard that prevents domain names from going offline.
Zones and zone files
Zone files contain Resource Records that describe a domain or sub-domain. The format of zone files is an IETF standard defined by RFC 1035. A zone file will mainly include the following types of records:
SOA(Start of Authority): AnSOArecord specifies the DNS server providing authoritative information about an Internet domain, the email of the domain administrator, the domain serial number, and several timers relating to refreshing the zone.NS(Name Server): AnNSrecord maps a domain name to a list of DNS servers authoritative for that domain. Delegations depend onNSrecords.A: IPv4 address record.AAAA: IPv6 address record.CNAME(Canonical Name): ACNAMErecord makes one domain name an alias of another. The aliased domain gets all the sub-domains and DNS records of the original domain.MX(Mail Exchange): AnMXrecord maps a domain name to a list of mail exchange servers for that domain.PTR: APTRrecord maps an IPv4 address to the canonical name for that host.TXT: ATXTrecord allows an administrator to insert arbitrary text into a DNS record.
Among these, SOA and NS records are very important and used in the following method to move a primary name server to a different system.
Listing 1. Example zone file
|
1
2
3
4
5
6
7
8
9
|
example.com. IN SOA ns.example.com. admin.example.com. ( 2003080800 ; sn = serial number 172800 ; ref = refresh = 2d 900 ; ret = update retry = 15m 604800 ; ex = expiry = 1w 3600 ; min = minimum = 1h ) IN NS ns.example.com. IN NS ns1.example.com. |
The above example zone file indicates that the ns.example.com is the primary authoritative server for the domain example.com. The secondary authoritative server 'ns1' will attempt to get a copy of the file every two days and will retry once every 15 minutes until it can successfully retrieve the db.example.com zone file. If 'ns1' is unable to reach the primary authoritative server to download the zone in 1 week, it will no longer provide the answers contained in this zone. 'ns1' will be kept in the cache for 1 hour.
Moving a primary DNS name server to a different system
Note: Assuming there are two systems, the first system/machine is running the original primary DNS server. The second system/machine will run the new primary DNS server.
Step 1. Create a new DNS server
The basic process to move a primary name server to the second system is to create a new DNS server on the second machine and import DB files from the current primary DNS name server DB.
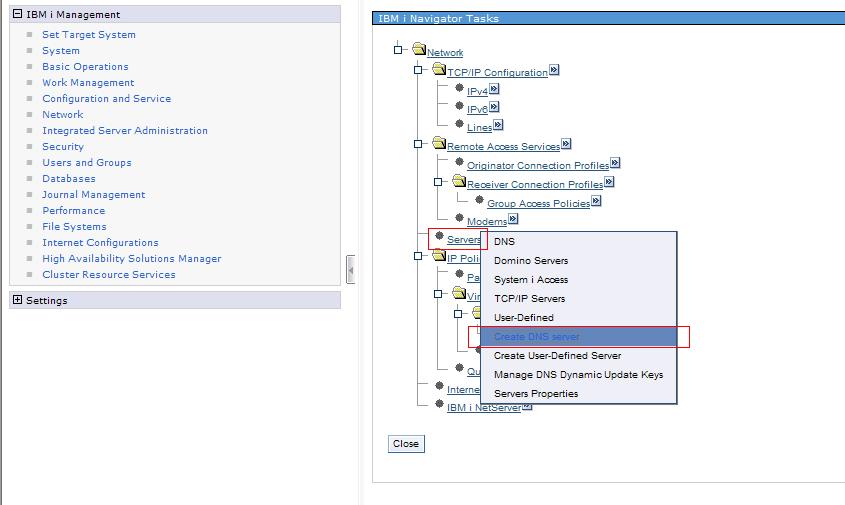
Step 1.1. On the IBM Navigator for i home page, click item Network under the IBM i Management navigation pane, then select All Tasks from the expanded options, or select Show All Network Tasks from the networking options displayed on the welcome page.
Figure 1. IBM Navigator for i main menu (1)

Step 1.2. In IBM i Navigator Tasks, click on the action arrow for Servers, and then select Create DNS Server to open the New DNS Name Server Configuration wizard.
Figure 2. Create DNS server
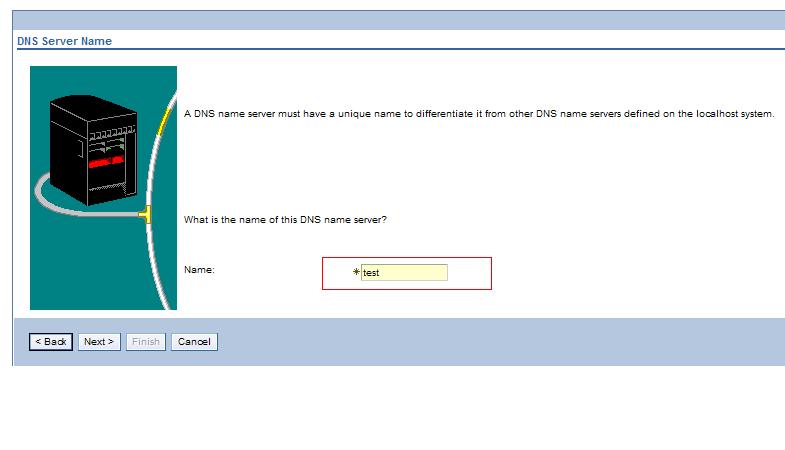
Step 1.3. Fill in the DNS server name (must be unique).
Figure 3. Fill in the DNS server name
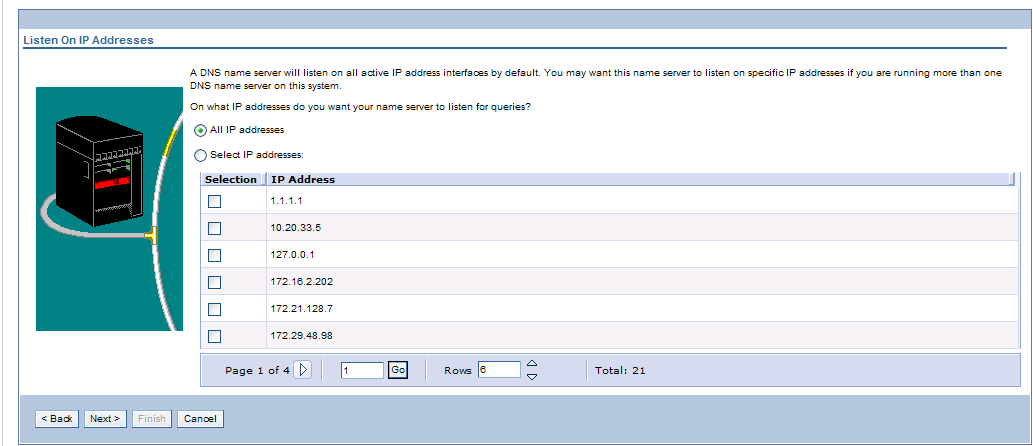
Step 1.4. Select the IP addresses on which the name server will listen for queries. In this case, All IP addresses is selected so the DNS server will listen on all IP addresses.
Figure 4. Listen on IP addresses
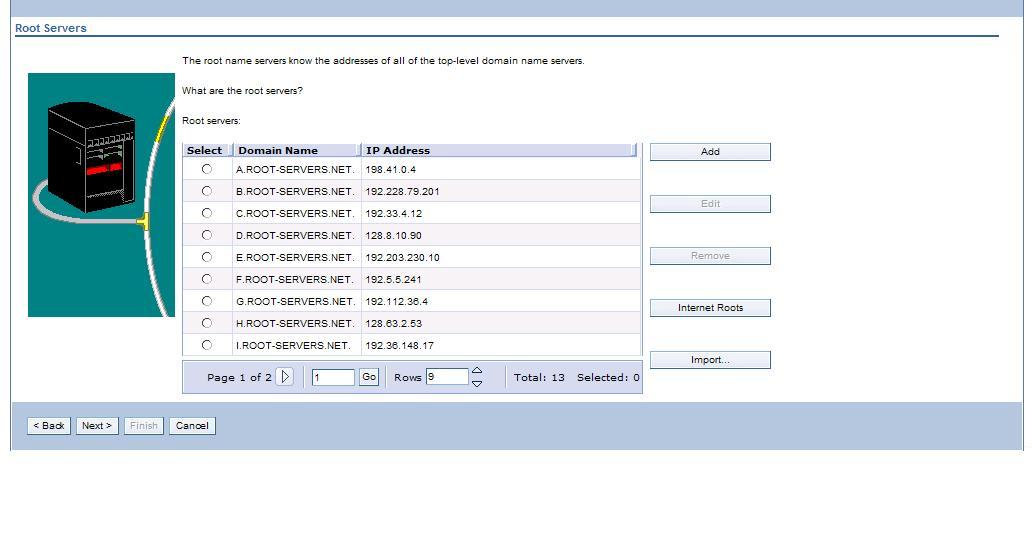
Step 1.5. Add root name servers by clicking Internet Roots. A root name server is a name server for the Domain Name System's root zone. It directly answers requests for records in the root zone and answers other requests returning a list of the designated authoritative name servers for the appropriate top-level domain (TLD). Usually, the user will not need to perform any additional configuration for the root name servers, but can add other root name servers by clicking on Add and inputting the root name server information or using the Import button to select a file containing other root name servers. Follow the wizard prompts to take the defaults for the remaining DNS name server configuration.
Figure 5. Root servers
Step 1.6. After finishing all of the above steps, click Finish on the Summary page of the wizard. The wizard will indicate the new DNS server has been created successfully.
Step 2. Import zone database files
It is recommended to stop the related DNS server until the importing process finishes to ensure the integrity of the imported DB files.
Step 2.1. Transfer associated DB files from the primary DNS name server on the first machine to the new DNS server that was just created on the second machine using FTP or other file transfer methods. The DB files are located at /qibm/UserData/OS400/DNS/yourDNS/ on the first machine. The DB files can be stored in a temporary folder on the second machine. In this example, there is only one DB file (test.com.db) transferred from folder chen.
Note:yourDNS is not the actual folder name. The folder name should be the same as the name of the primary DNS name server.
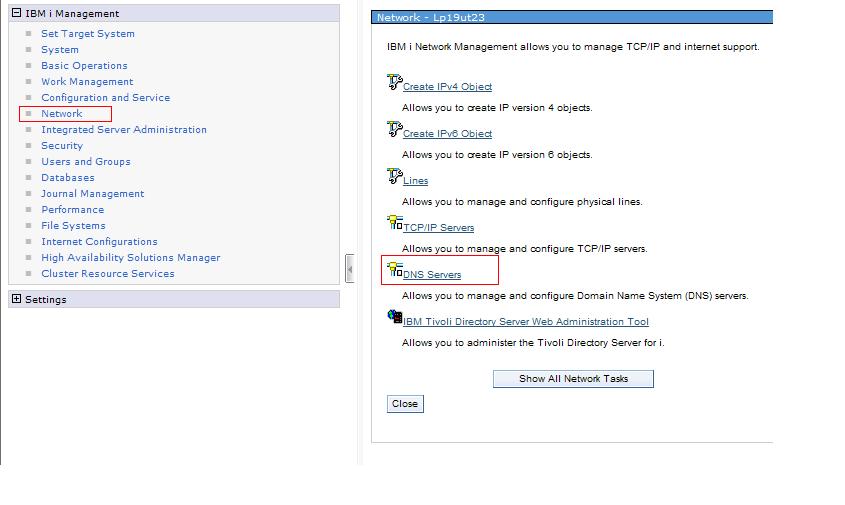
Step 2.2. Go back to the IBM Navigator for i home page, and select Network under the IBM i Management navigation pane. Then select DNS Servers from the expanded options, or from the networking options displayed on the welcome page.
Figure 6. IBM Navigator for i main menu (2)
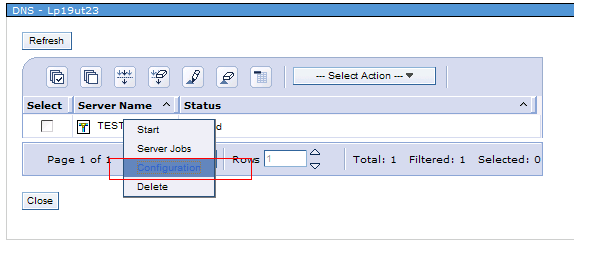
Step 2.3. Click on the action arrow for the name server just created, and select Configuration.
Figure 7. DNS server list
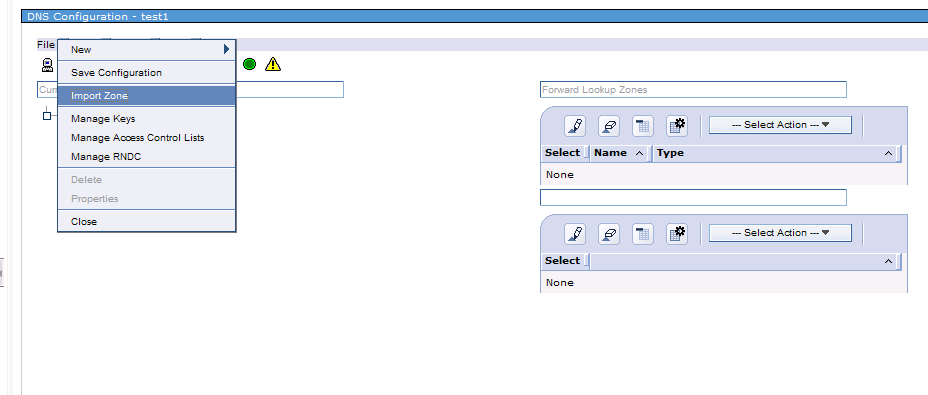
Step 2.4. In the DNS Configuration main menu, click on the action arrow for the File option, and then select Import Zone to open the Import Zone wizard.
Figure 8. DNS configuration main menu (1)
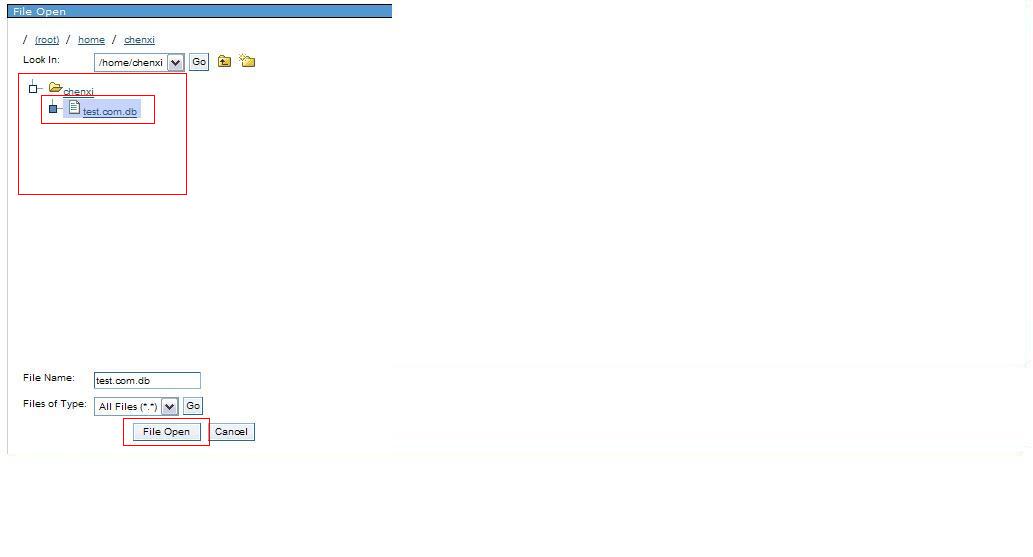
Step 2.5. In the top left corner of the menu is a folder tree window, as shown in Figure 10. Find the folder which stores the zone files, and then click the file to be imported. The file name should be displayed in the filename box in the bottom left corner of window. Make sure it is the correct file, and then click File Open.
Figure 9. File open
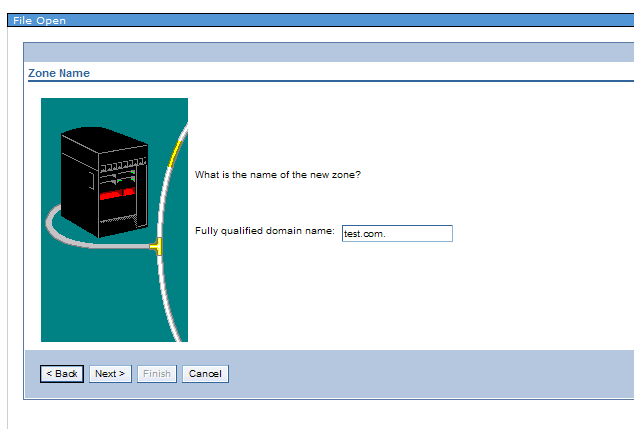
Step 2.6. Fill in the fully qualified domain name (FQDN) field, which should match the zone name in the import zone DB file. In this case, the FQDN is test.com.
Figure 10. Fill in the fully qualified domain name
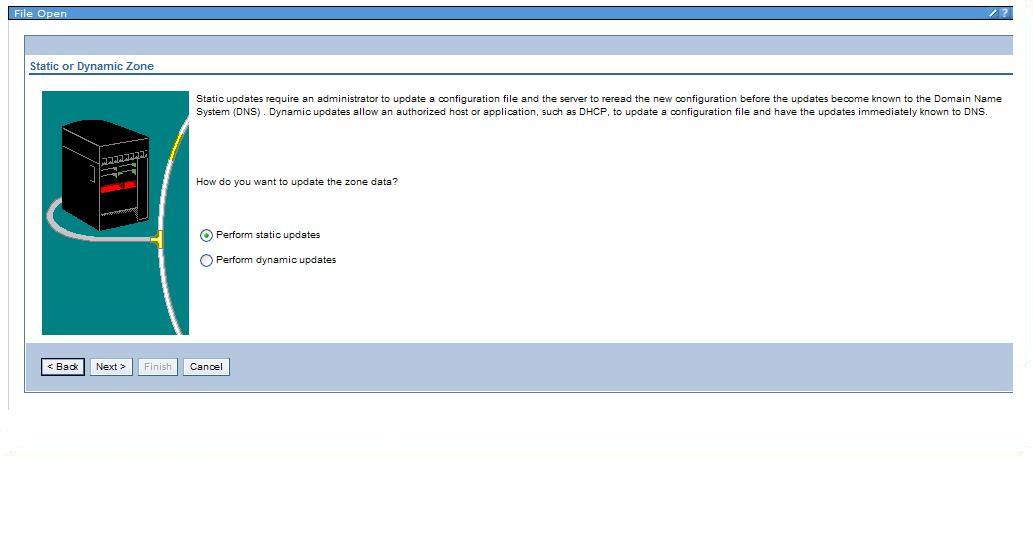
Step 2.7. Select an update method for the new DNS server. Static updates require an administrator to update a configuration file. Dynamic updates allow an authorized host or application, such as DHCP, to update a configuration file. Normally, this method will be the same as it was on the original primary name server, in case any exception happens during zone promotion. In this example, the selected method is static updates.
Figure 11. Select the method to update DNS
Step 2.8. After finishing all of the above steps, click Finish on the Summary page of the wizard. The wizard will indicate the zone file has been imported successfully.
Step 2.9. If there are more DB files to import, repeat steps 2.4-2.7 until all needed DB files have been imported.
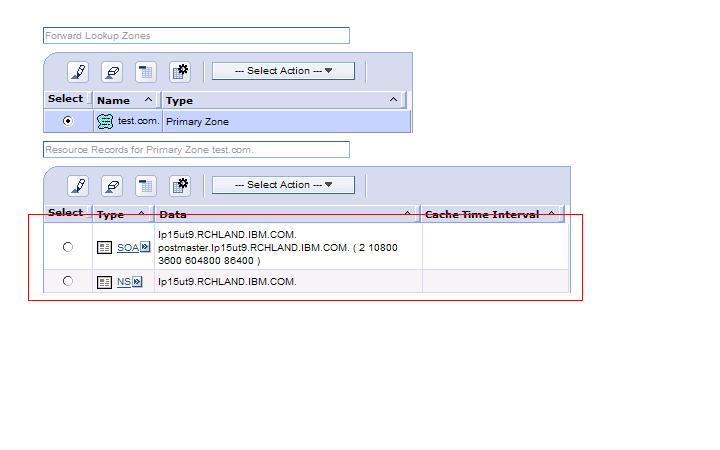
Step 3. Update the SOA and NS records in the zone files on the new DNS server
After importing the zone files, change the SOA from previous primary server to the current host, and delete the previous primary server from NS records. In this case, change the SOA and NS records from lp15ut9 to lp16ut9, where lp15ut9 is the original primary name server and lp16ut9 is the new DNS server.
Figure 12. Original SOA and NS records
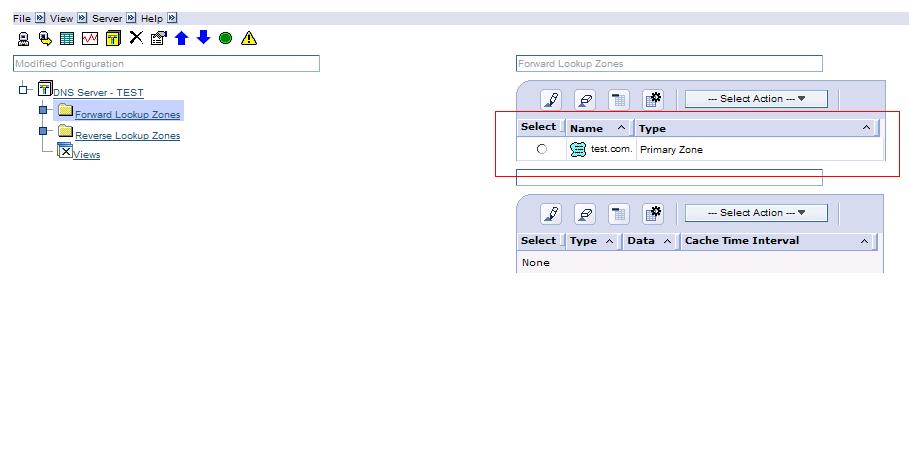
Step 3.1. In the DNS Configuration main menu, based on the zone types, click Forward Lookup Zones or Reverse Lookup Zones to select the zones to modify. In this example, the zone is test.com.
Figure 13. DNS configuration main menu (2)
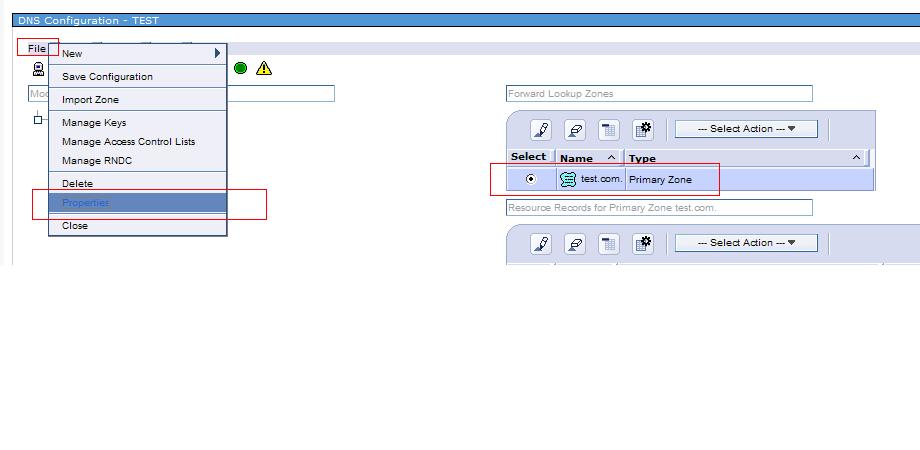
Step 3.2. In the DNS Configuration main menu, click on the action arrow for the File option, and then select Properties.
Figure 14. DNS configuration main menu (3)
Step 3.3. Select Resources from the navigation pane in the Properties Configuration main menu as shown in Figure 15.
Step 3.4. Edit the SOA and NS records in each zone file that was imported. Select each record, and then click Edit to change the record value.
Figure 15. Properties configuration main menu

Step 4. Start the new DNS server
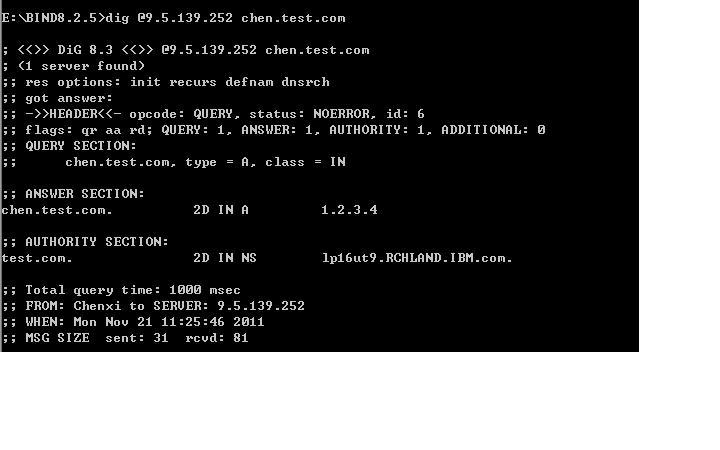
Use nslookup or dig to verify the configuration of the new DNS server.
Listing 2. Dig example assuming the DNS host address is 9.5.139.251
|
1
|
dig @9.5.139.251 chen.test.com |
The dig command should reply with an answer like the one shown in Figure 18.
Figure 16. Results for dig command
Make sure the client's DNS address has been changed once the new DNS server is started. Also, be sure to update the DHCP as well if it is using DDNS.
Any secondary DNS servers will need to be updated to use the new server as its primary server, or add it as an additional primary server, since a secondary DNS server can have multiple primary servers for a zone. The new primary server and original primary server can run at the same time if the secondary DNS server has added the new server as an additional primary server for the zone.
Conclusion
This article describes a procedure to move a primary DNS server to another system. Although moving a primary DNS server from one system to another can be done quickly, the original primary DNS server has to stopped until the database file transfer is finished. A secondary DNS server can answer requests for domain names on the original primary DNS to keep the domain names online while the primary DNS is temporarily unavailable. Moving a primary DNS server only requires a few steps using IBM Navigator for i and is easy for users to follow. Instead of recreating all of the zone files for the new DNS server, this procedure is a simple way to create a new DNS server using existing zone files and configuration from another primary DNS server and ensure that the existing functionality of the original DNS server is replicated on the new primary DNS server.
Resources
Here are some useful resources you can refer to for some detailed information mentioned in the article:
- IBM i Information Center topic on IBM i DNS
- Information about introducing, installing and using IBM Navigator for i
- Domain Names - Implementation and Specification RFC1305
Was this topic helpful?
Document Information
Modified date:
06 August 2021
UID
ibm11127841