Troubleshooting
Problem
This document provides information about configuring an IBM iAccess for Windows SSL connection that leverages the optional Client Authentication.
Resolving The Problem
NOTICE: Access for Windows is no longer supported. Here are the steps for configuring Client Certificates with Access Client Solutions: Using Client Certificates with Access Client Solutions
To establish a secure 5250 session over SSL using IBM i Access for Windows, the Telnet server and IBM i Access Host Servers must be configured to use Secure Sockets. For further information on configuring Secure Sockets and what LPPs must be installed, refer to the IBM i Knowledge Center at the following Web site:
Client Authentication is optional. It is not required to make an SSL connection with encrypted data. Regular SSL connections use one-way authentication and encrypt data in transit. Client Authentication adds two-way authentication during the ssl handshake. If you are just looking to encrypt data across a network, one-way authentication is all you need.
If you want to add Client Authentication into your SSL connections, you first need to create a user certificate before you can use client authentication. Refer to IBM i Technote document N1019315, Creating User Certificate. To link to document N1019315 immediately, click here .
.
This document covers exporting the user certificate, importing the user certificate to the IBM Key Management DB, and configuring PC5250 to use client authentication.
Exporting User Certificate
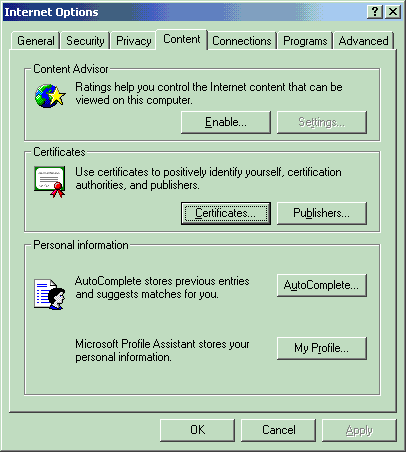
The Web browser being used determines how you export the user certificate. If you are using Microsoft Internet Explorer 6.0 or higher, click on Tools > Internet Options and go to the Content tab.
Click Certificates, and click OK.
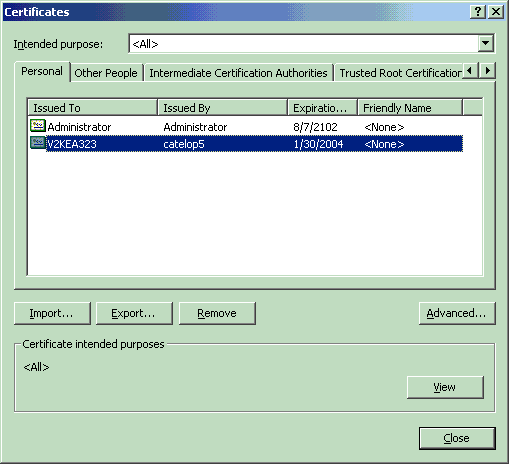
Highlight the certificate you want to export, and click on Export.
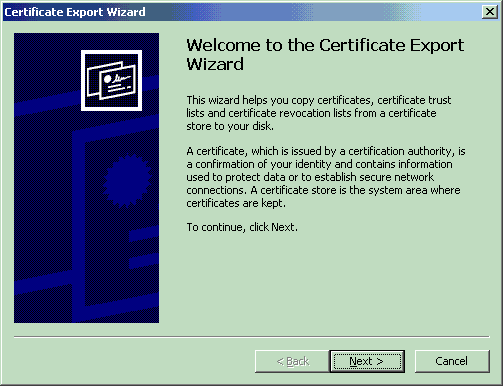
Click Next.
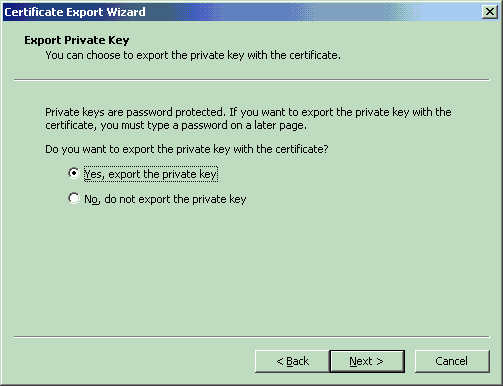
Ensure Yes, export the private key is selected, and click Next.
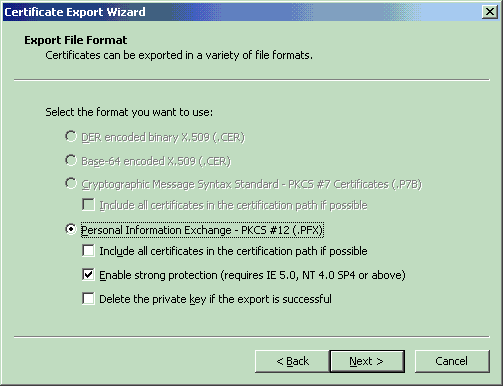
Ensure Personal Information Exchange is selected, and click Next.
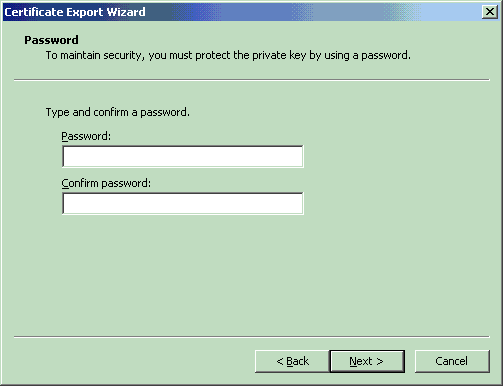
Type a password, confirm the password, and click Next.
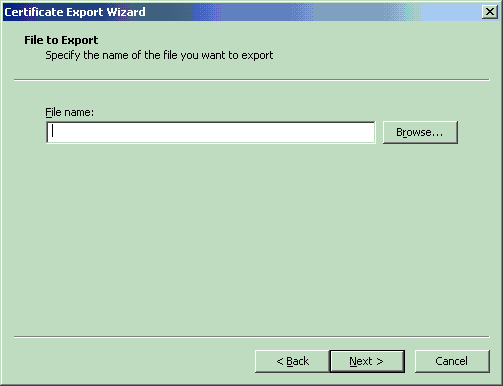
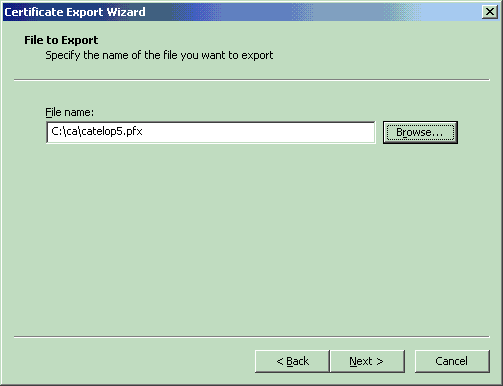
Browse to where you want to export the certificate to type the name you want to save. Ensure the save as type is Personal Information Exchange (*.pfx), and click Next.
Click Next.
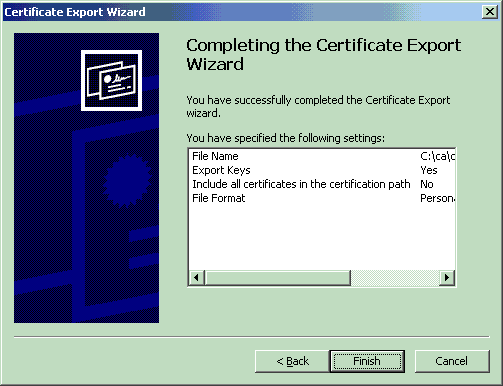
Click Finish.
Click OK.
Importing the User Certificate
Before you can import the certificate make sure you have downloaded the parent Certificate Authority. Refer to IBM i Technote document N1019336, Configuring Access for Windows to Use Secure Sockets. To link to document N1019336 immediately, click here .
.
To open the IBM Key Management click on Start > Programs > IBM i Access for Windows > IBM Key Management.
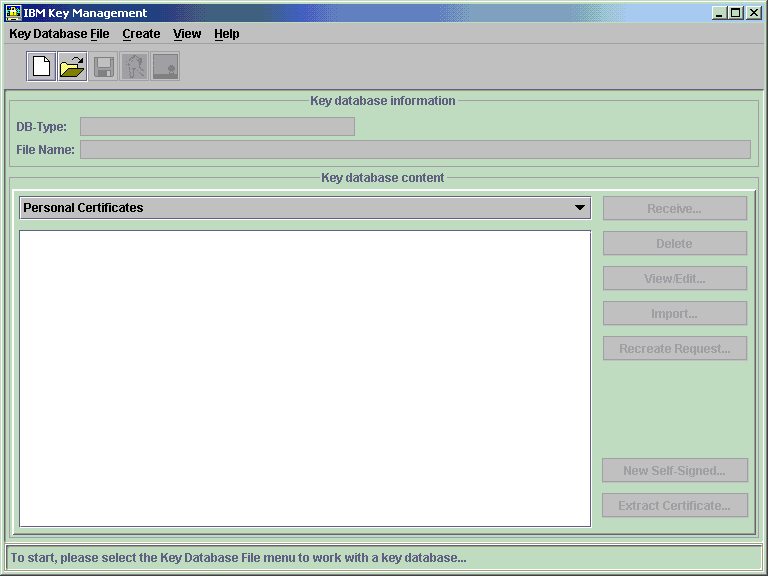
Click on File > Open, and open the cwbssldf.kdb file. The PC operating system determines the location of the cwbssldf.kdb file. On Microsoft Windows 2000 and XP it is located in C:/Document and in the Settings/All Users/Documents/IBM Client Access folder.
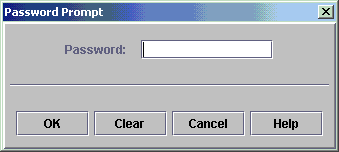
The default password is ca400 (unless it was changed). Click OK.
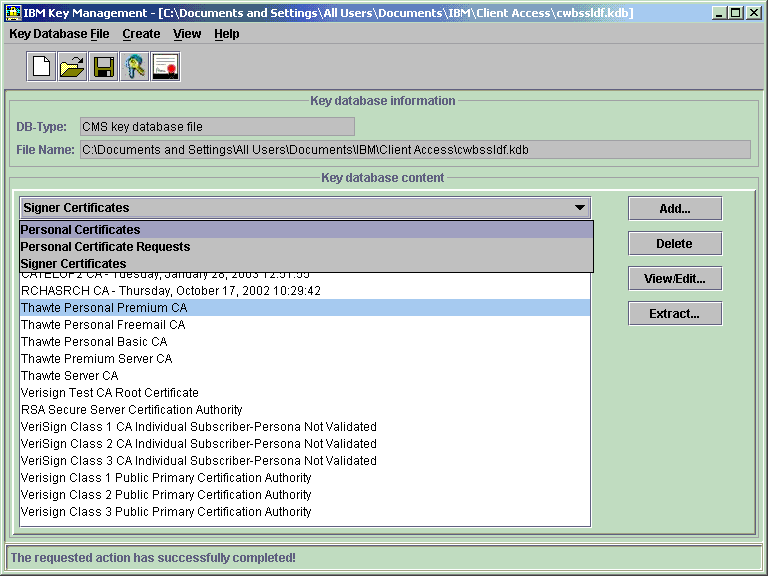
Click on the down arrow, and click on Personal Certificates.
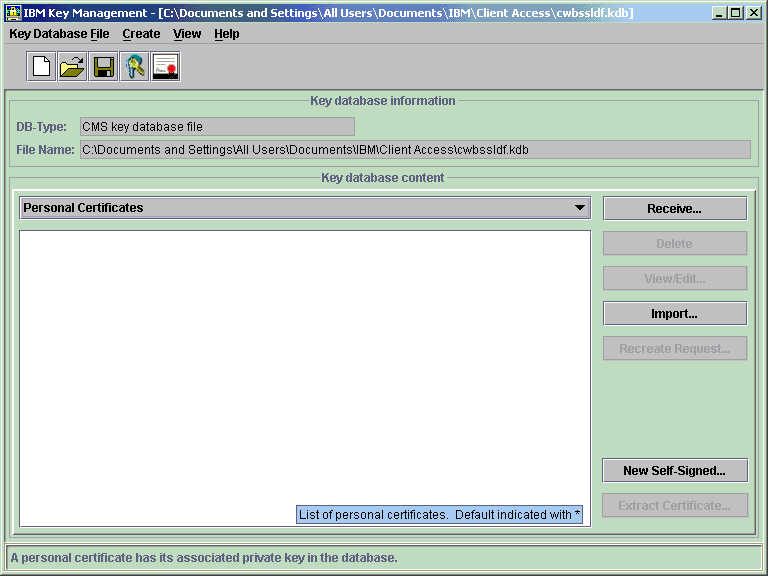
Click on Import.
The Web Browser type will determine the extension to use. If you used Netscape, use an extension of *.p12. If you are using Internet Explorer, change the extension to *.pfx. Click on Browse, and browse to where you exported the certificate.

Click OK.

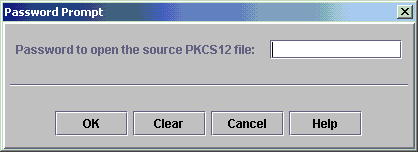
Type in the same password you used when you exported the certificate, and click OK.
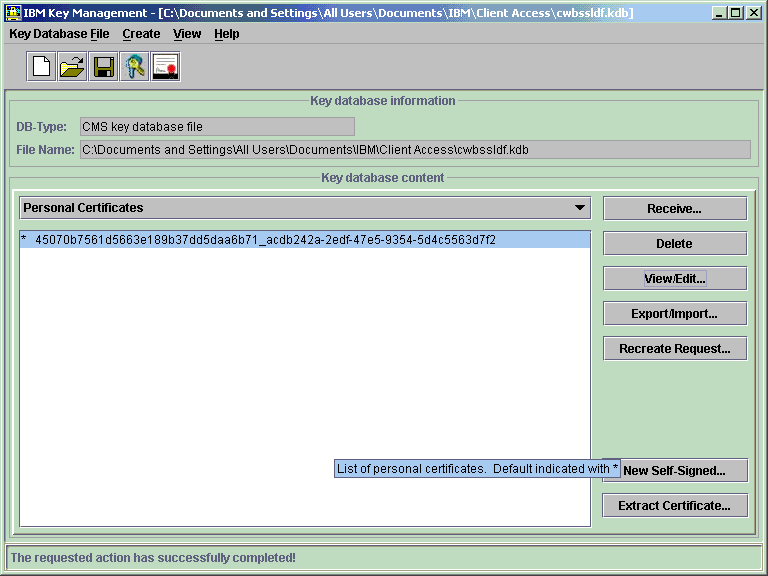
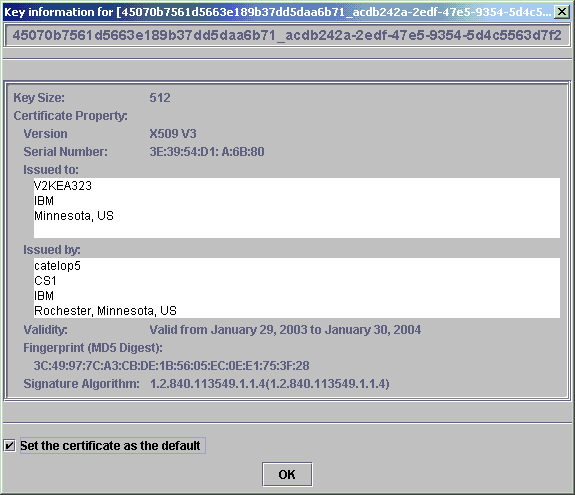
You should have the certificate installed. If you have more than one certificate installed, change which certificate is the default certificate by clicking on the certificate. Then, click on View > Edit.
Check Set the certificate as the default, and click OK.
Configuring PC5250
Before you can use client authentication, ensure the Telnet Server is configured for client authentication. Refer to IBM i Technote document N1010449, Configuring the SSL Telnet and Host Servers for Server Authentication for the First Time. To link to document N1010449 immediately, click here . If Client authentication required is set to No, change it to Yes, and click apply. Recycle the Telnet server for the change to take effect.
If you already have configured a previous PC5250 session to use non-SSL, click on Communication > Configure. If you do not have a PC5250 session configured, create one using Start > Configure or use the Create desktop icon wizard.
Click on Properties.
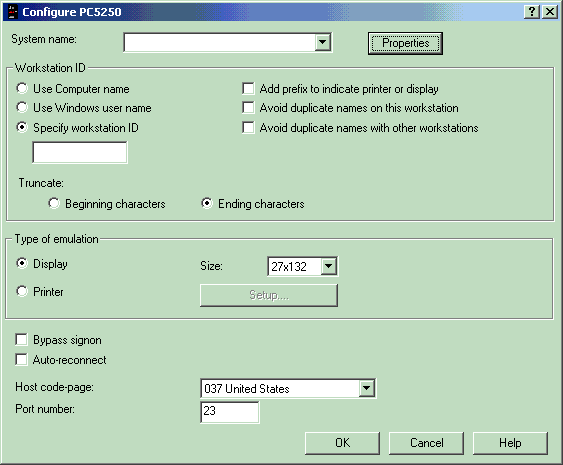
Select Use Secured Sockets Layer (SSL). Under Client certificate to use, if you have multiple user certificates and want the user to select which certificate to use, select Select certificate when connecting; otherwise, select Use Default and click OK.
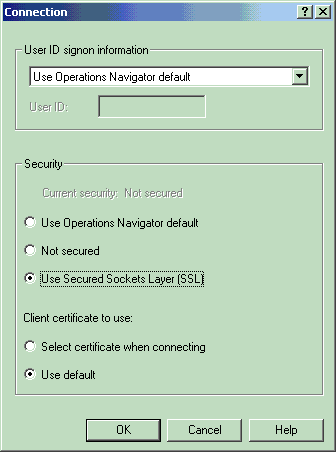
The port should have changed from 23 to 992. Ensure the rest of the PC5250 configuration options are set correctly, and click OK.
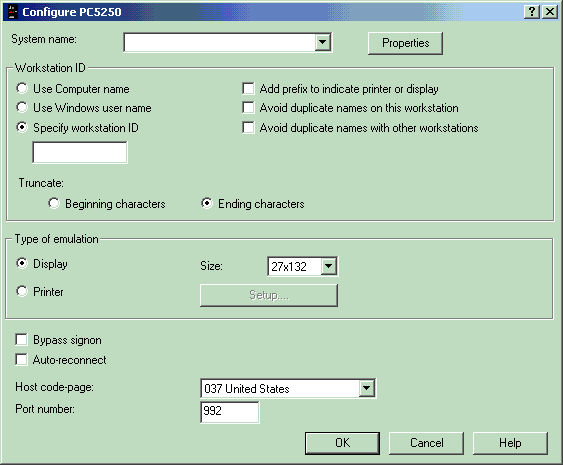
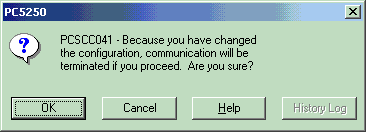
If changing an existing PC5250 session, the below message is issued. If creating a new PC5250 session, the message is not issued. Click OK.
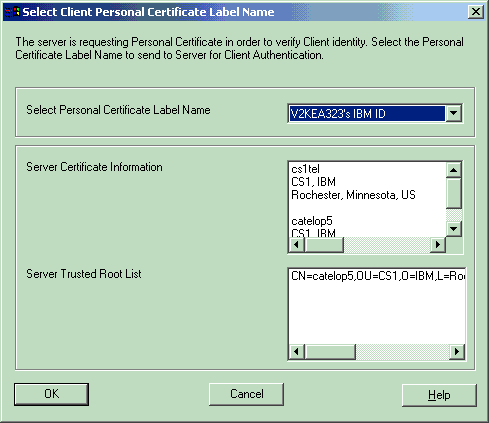
If you selected Select certificate when connecting, you will get the following screen; otherwise, PC5250 will start.
Click the down arrow for Select Personal Certificate Label Name, and you can select which certificate you want to use. Click OK.
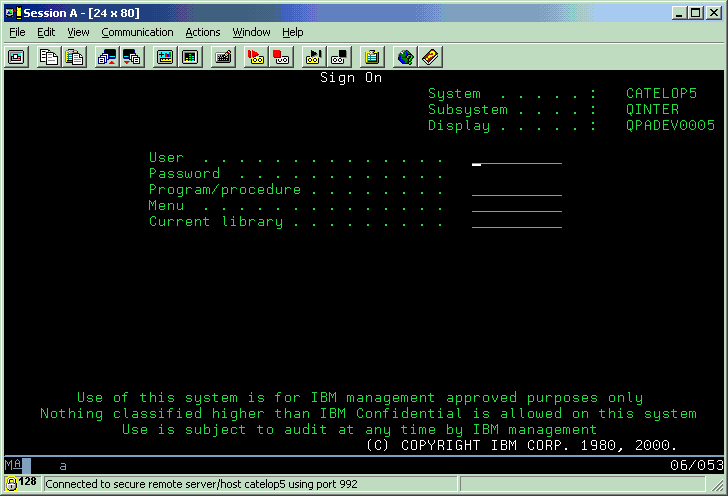
Notice the padlock is locked indicating PC5250 is using Secure Sockets to connect.
For problems connecting iSeries Navigator or PC5250 using Secure Sockets, refer to the IBM i Access User's Guide with the message ID and return code.
Client Authentication is optional. It is not required to make an SSL connection with encrypted data. Regular SSL connections use one-way authentication and encrypt data in transit. Client Authentication adds two-way authentication during the ssl handshake. If you are just looking to encrypt data across a network, one-way authentication is all you need.
If you want to add Client Authentication into your SSL connections, you first need to create a user certificate before you can use client authentication. Refer to IBM i Technote document N1019315, Creating User Certificate. To link to document N1019315 immediately, click here
This document covers exporting the user certificate, importing the user certificate to the IBM Key Management DB, and configuring PC5250 to use client authentication.
Exporting User Certificate
The Web browser being used determines how you export the user certificate. If you are using Microsoft Internet Explorer 6.0 or higher, click on Tools > Internet Options and go to the Content tab.
Click Certificates, and click OK.

Highlight the certificate you want to export, and click on Export.

Click Next.

Ensure Yes, export the private key is selected, and click Next.

Ensure Personal Information Exchange is selected, and click Next.

Type a password, confirm the password, and click Next.

Browse to where you want to export the certificate to type the name you want to save. Ensure the save as type is Personal Information Exchange (*.pfx), and click Next.

Click Next.

Click Finish.

Click OK.

Importing the User Certificate
Before you can import the certificate make sure you have downloaded the parent Certificate Authority. Refer to IBM i Technote document N1019336, Configuring Access for Windows to Use Secure Sockets. To link to document N1019336 immediately, click here
To open the IBM Key Management click on Start > Programs > IBM i Access for Windows > IBM Key Management.

Click on File > Open, and open the cwbssldf.kdb file. The PC operating system determines the location of the cwbssldf.kdb file. On Microsoft Windows 2000 and XP it is located in C:/Document and in the Settings/All Users/Documents/IBM Client Access folder.
The default password is ca400 (unless it was changed). Click OK.

Click on the down arrow, and click on Personal Certificates.

Click on Import.

The Web Browser type will determine the extension to use. If you used Netscape, use an extension of *.p12. If you are using Internet Explorer, change the extension to *.pfx. Click on Browse, and browse to where you exported the certificate.

Click OK.

Type in the same password you used when you exported the certificate, and click OK.

You should have the certificate installed. If you have more than one certificate installed, change which certificate is the default certificate by clicking on the certificate. Then, click on View > Edit.

Check Set the certificate as the default, and click OK.

Configuring PC5250
Before you can use client authentication, ensure the Telnet Server is configured for client authentication. Refer to IBM i Technote document N1010449, Configuring the SSL Telnet and Host Servers for Server Authentication for the First Time. To link to document N1010449 immediately, click here
If you already have configured a previous PC5250 session to use non-SSL, click on Communication > Configure. If you do not have a PC5250 session configured, create one using Start > Configure or use the Create desktop icon wizard.
Click on Properties.

Select Use Secured Sockets Layer (SSL). Under Client certificate to use, if you have multiple user certificates and want the user to select which certificate to use, select Select certificate when connecting; otherwise, select Use Default and click OK.

The port should have changed from 23 to 992. Ensure the rest of the PC5250 configuration options are set correctly, and click OK.

If changing an existing PC5250 session, the below message is issued. If creating a new PC5250 session, the message is not issued. Click OK.

If you selected Select certificate when connecting, you will get the following screen; otherwise, PC5250 will start.
Click the down arrow for Select Personal Certificate Label Name, and you can select which certificate you want to use. Click OK.

Notice the padlock is locked indicating PC5250 is using Secure Sockets to connect.

For problems connecting iSeries Navigator or PC5250 using Secure Sockets, refer to the IBM i Access User's Guide with the message ID and return code.
[{"Type":"MASTER","Line of Business":{"code":"LOB57","label":"Power"},"Business Unit":{"code":"BU058","label":"IBM Infrastructure w\/TPS"},"Product":{"code":"SWG60","label":"IBM i"},"Platform":[{"code":"PF012","label":"IBM i"}],"Version":"7.1.0"}]
Historical Number
29490916
Was this topic helpful?
Document Information
Modified date:
09 October 2023
UID
nas8N1019316