About this task
Note: Check
with your backup application administrator to ensure the number of
drives and cartridges supported by your application.
| |
TS7610 or TS7620 Appliance Express |
TS7650G |
TS7650 Appliance |
|---|
| Maximum number of libraries |
4 |
16 |
12 |
| Maximum number of virtual drives |
256 |
256 (dual-node 512) |
256 (dual-node 512) |
Perform the following
steps to create the library:
- From the toolbar, click the Create new library button.
The Create new library wizard Welcome screen is displayed.
- Click Next. The Library details screen is
displayed.
- In the VT name field, enter a name for the library.
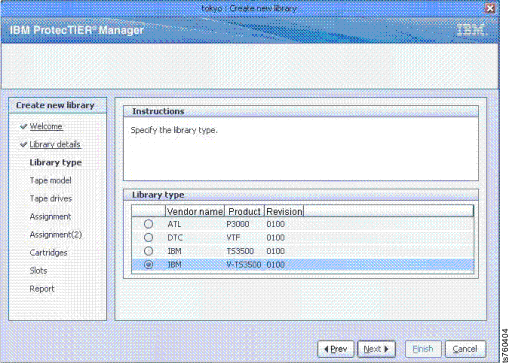
- Click Next. The Library type screen is displayed.
Figure 1. Library type screen
- Select IBM TS3500 0100 as the
type of physical library model that you want the virtual library to
emulate:
- ATL P3000 0100
- IBM TS3500 0100
You can also configure the virtual library models:
- DTC VTF 0100
- IBM V-TS3500 0100
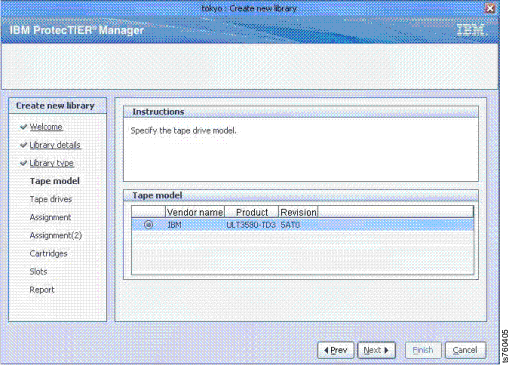
- Click Next. The Tape model screen is displayed.
Figure 2. Tape model screen
- Select the type of tape drive model that you want the virtual
library to emulate. The type of tape drive depends on the library
type chosen:
- IBM ULT3580-TD3 (IBM LTO3)
Note: All tape drives in the library are of this type after your
selection, including tape drives added at a later time.
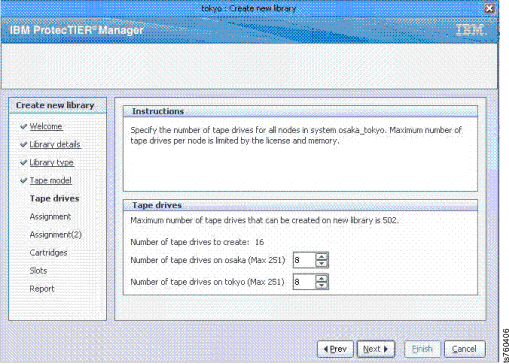
- Click Next. The Tape drives screen is displayed.
Figure 3. Tape drives screen
- In the Number of tape drives field for each node,
enter the number of tape drives to assign to the node. To maximize
load balancing, IBM recommends that you distribute tape drives across
the nodes based on the relative power of the node servers.
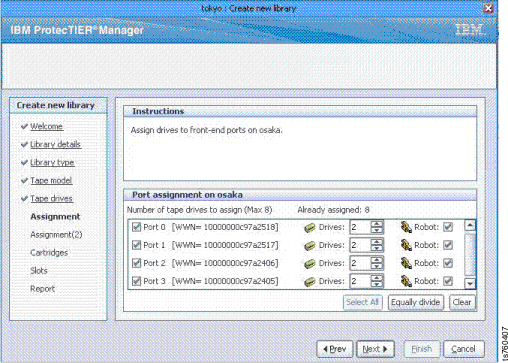
- Click Next. The Assignment screen is displayed.
Figure 4. Port assignment screen
- Select or clear the check boxes next
to each port to define which of the node ports are assigned virtual
devices.
Note: If
you have chosen an IBM library model, all the ports are selected and
enabled. If you have chosen a library model other than IBM, the ports
are not checked. In either case, you must select at least one port
assignment that will have a robot.
- In the Drives fields corresponding
to each selected port, select the number of virtual tape drives that
are assigned to each port.
Note: Optionally, click Select
All to automatically select both ports. Click Equally
divide to evenly divide the number of drives between the
ports.
- Check the Robot check box if you want the library
virtual robot to be accessible through this port.
Note: For
high-availability purposes, ProtecTIER supports
the assignment of the virtual robot to multiple ports.
- Click Next.
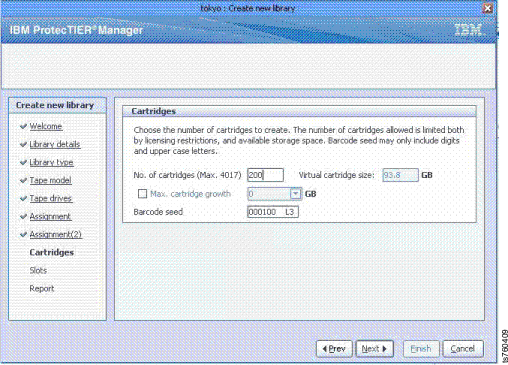
- Click Next. The Cartridges screen is displayed.
Figure 5. Cartridges screen
- In the No. of cartridges field, enter the number
of cartridges that you want to have in the library. The Virtual
cartridge size field automatically displays the system for virtual
cartridges. Capacity is based on the number of cartridges entered,
the total amount of available storage space in your repository, and
the current HyperFactor ratio.
Note: Optionally, select
the Max. cartridge growth check box. When selected, you can
limit the maximum amount of nominal data that a cartridge can contain.
The value of the maximum number of cartridges possible
on a system depends on the amount of storage space available on your
system. The maximum possible cartridge limit is 62,000, but many systems
will have a lower maximum limit because of the storage space available.
- In the Barcode seed field, enter a value for the
barcode seed. The barcode seed is the barcode that is assigned to
the first cartridge created. Every cartridge added after the first
cartridge is assigned a barcode following the initial barcode seed.
Note: The barcode seed must contain only numbers and capital
letters.
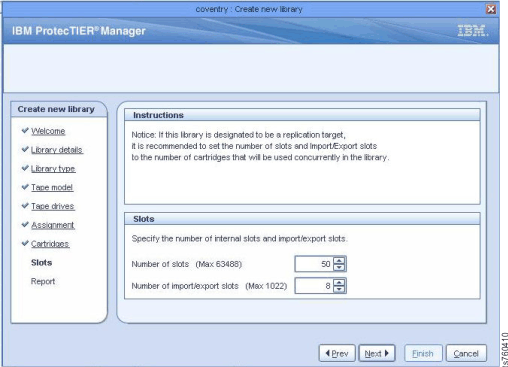
- Click Next. The Slots screen is displayed.
- In the Number of slots field, enter the number of
cartridge slots that you want to have in the library.
Note: The
number of cartridge slots must not be less than the number of cartridges
that you are creating. If you expect to increase the number of cartridges
at a later time, it is recommended that you create additional slots.
- In the Number of import/export slots field,
enter the number of import/export slots that you want to have in the
library.
 You can define up to a maximum of 1022
import/export slots for each library.
- Click Next and Finish.
The Create new library wizard closes.
- Click Yes to continue. The ProtecTIER
system temporarily goes offline to create the library. The library
is displayed in the Systems Management pane.
 You can define up to a maximum of 1022
import/export slots for each library.