Download IBM App Connect Enterprise for Developers and get started with a hands-on experience
To use IBM® App Connect Enterprise for Developers (also known as Developer Edition) without charge, download and install the software, then create and deploy your first integration solution.
You can use the IBM App Connect Enterprise Toolkit to build powerful integration applications, services, and APIs. You can then deploy your integration solutions to the software run time, IBM App Connect Enterprise as a Service, containers, or a combination of environments.
What you need to start this tutorial
To start this tutorial, all you need is your laptop.
If you already installed IBM App Connect Enterprise but want to find out how to use it, go to Step 4: Create and start an integration server.
Step 1. Download IBM App Connect Enterprise for Developers
Duration: 3 - 30 minutes, depending on the speed of your internet connection.
To download IBM App Connect Enterprise for Developers, choose Linux®, macOS, or Windows as your target operating system, provide some details about your interests, and agree to the license.
To download now, click Download.
ACE-WIN64-DEVELOPER.exe, open the
link in a private browser window or clear your browser cache and try again. Provide the requested details and confirm your privacy settings and acceptance of the license. Then select the appropriate download option (for example, ACE-WIN64-DEVELOPER.exe 1.26 GB), and click Download.
Result: The software is downloaded to your computer and you are ready to install IBM App Connect Enterprise for Developers.
Step 2. Install IBM App Connect Enterprise
Duration: A few minutes.
- Install on Windows by completing the following steps:
- Unpack the software, which sets up IBM App Connect Enterprise Toolkit by extracting the downloaded .zip file into a local directory.
- Run the installation file that you downloaded by running the following command with the options
that you require:
ACESetup11.0.n.0.exeFor more information about installing IBM App Connect Enterprise on Windows, see Installing IBM App Connect Enterprise on Windows.
- Install on Linux by completing the following steps:
- Create or navigate to a directory where you have write access.
- Unpack the software, which sets up IBM App Connect Enterprise
Toolkit by running the
following command:
tar -xzvf ace-11.0.n.0.tar.gz - Accept the license and run the installation file that you downloaded by running the command
./ace accept licensefor a single user installation or./ace make registry global accept licensefor a shared installation.For more information about installing IBM App Connect Enterprise on Linux, see Installing IBM App Connect Enterprise on Linux.
- Install on macOS by completing the following steps:
- Open the installation wizard by double-clicking the installation file that you downloaded. The
installation file has a name similar to
IBM App Connect Enterprise 11.0.0.x.pkgbut it might be automatically renamed when you download it. - Follow the instructions in the installation wizard. IBM App Connect Enterprise is installed as a standard mac application with the name IBM App Connect Enterprise in the /Applications folder.
- Open the installation wizard by double-clicking the installation file that you downloaded. The
installation file has a name similar to
Result: IBM App Connect Enterprise for Developers is installed on your computer, and you are ready to test if the installation is successful.
Step 3. Test that installation is successful by starting the IBM App Connect Enterprise Toolkit
Duration: A few minutes.
- Windows: From the Windows Start menu, expand IBM App Connect Enterprise xx.0.0.y Developer Edition (where x denotes the version), then click IBM App Connect Enterprise Toolkit.
- Linux: From the command environment, type ./ace toolkit.
- macOS: Run the application /Applications/IBM App Connect Enterprise to start the toolkit.
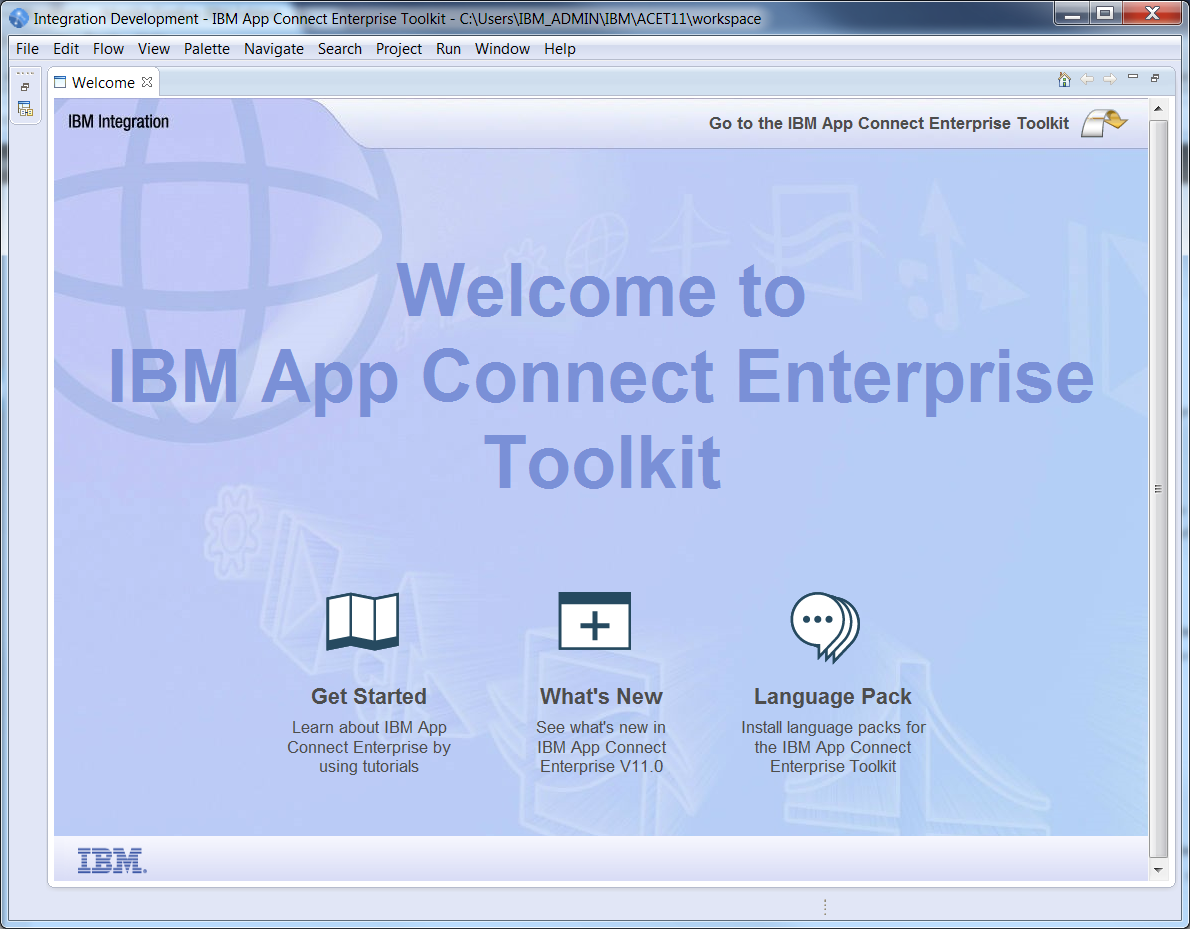
IBM App Connect Enterprise Toolkit opens to display its welcome page.

The welcome page provides access to the Tutorials Gallery, which you can use to get started, what’s new information, and an option to install language packs.
To display the Integration Development perspective, close the welcome page or click Go to the IBM App Connect Enterprise Toolkit.
Result: IBM App Connect Enterprise for Developers is installed on your computer, and you are ready to develop, deploy, and test integration solutions.
Step 4. Create and start an integration server
An integration server is used to deploy and test integration solutions. In this step, you create and start an independent integration server by using a command environment that is provided on Windows, Linux, or macOS by the IBM App Connect Enterprise Console.
- Open the IBM App Connect Enterprise Console on your chosen platform by completing one of
the following options:
- Windows: From the Windows Start menu, expand IBM App Connect Enterprise x.0.0.x Developer Edition, then click IBM App Connect Enterprise Console.
- Linux: Before you can create an integration server, you must
set up a command environment:Locate and run the mqsiprofile.sh script in the directory in which you installed the appropriate product.
. install_dir/server/bin/mqsiprofileYou must include the period and space for this command to work correctly. Add this command to your login profile if you want it to be run at the start of every session.
- macOS: Open the IBM App Connect Enterprise Console by running the
Open
Integration Console
option from the IBM App Connect Enterprise Toolkit menu.
- Before you start an integration server for the first time, you create a working directory. You
can also choose to modify the configuration properties for the integration server.
- To create a work directory for your integration server, run the mqsicreateworkdir command, and specify the
full path to the directory that you want to create. For example, on Windows,
mqsicreateworkdir c:\myaceworkdir\integrationserveripl101This command creates the specified work directory, which contains a configuration file, server.conf.yaml, with default settings for your integration server.
Note: The mqsicreateworkdir command also creates sub directories, which are used by the integration server when it is running. These sub directories include a log directory and a run directory. The log directory contains files of log messages, which you can use to review the status of your integration server. The run directory is where you can place your BAR files before you start your integration server, or while it is running. The resources from the BAR file are extracted and started by the integration server. - Use a YAML editor or plain text editor to open and examine the
server.conf.yaml file. To modify any properties, make your changes, then save
the file.
This example uses the default settings, which include
httpConnectorPort=7800. This setting specifies the port that you can use with the HTTPInput node to send messages to a flow.You can use a YAML editor or plain text editor to open the server.conf.yaml file and examine the settings. For example, you might want to modify the following properties.
- adminRestApiPort
- This property specifies the REST administration port, which is the primary method of communicating with the integration server. The default value is 7600.
- httpConnectorPort
- This property specifies the port that you can use with the HTTPInput node to send messages to a flow. The default value is 7800.
To modify any properties, make your changes, then save the file.
Any changes to the properties take effect when the integration server is started. If you modify these properties after you start the integration server, you must then restart the integration server.
Note: If you choose to use a plain text editor to edit the server.conf.yaml file, ensure that you use a YAML validation tool to validate any changes to the content of your file.For more information about working with the server.conf.yaml file, see Configuring an integration server.
- To create a work directory for your integration server, run the mqsicreateworkdir command, and specify the
full path to the directory that you want to create. For example, on Windows,
- Start the integration server.
Run the IntegrationServer command, and specify the integration server name and the path to the work directory of the integration server, as shown in the following example.
IntegrationServer --name ISIPL101 --work-dir c:\mywrk\myaceworkdir\integrationserveripl101Where
ISIPL101is the name that you want to give the integration server, and c:\mywrk\myaceworkdir\integrationserveripl101 is the work directory that you created earlier for the integration server.When the integration server is ready, you see a message that initialization is complete, such as in the following example.
2021-05-02 15:16:46.164736: Integration server has finished initialization.You can now interact with the running integration server.
- Use the IBM App Connect Enterprise
Toolkit to connect to the integration server.
- In the Integration Explorer view, right-click Integration Servers, then click Connect to an integration server. In the connection details dialog box, enter the hostname and port number for the integration server. Ensure that the port number matches the value of the adminRestApiPort property that is specified in the server.conf.yaml file. In this example, the port number is 7600, and the hostname is localhost. Also, in this example because the integration server is not secured, you do not need to specify the username and password.
- Click Finish. The connection for your integration server is now displayed in the Integration Explorer view in the toolkit.
You are running an integration server, which is ready as a run time for your integration solutions and connected to your IBM App Connect Enterprise Toolkit. Now you can use IBM App Connect Enterprise Toolkit to develop, deploy, and test an integration solution. For more information about creating and starting integration servers, see: Creating an integration server.
Step 5. Explore and test an integration solution in IBM App Connect Enterprise Toolkit
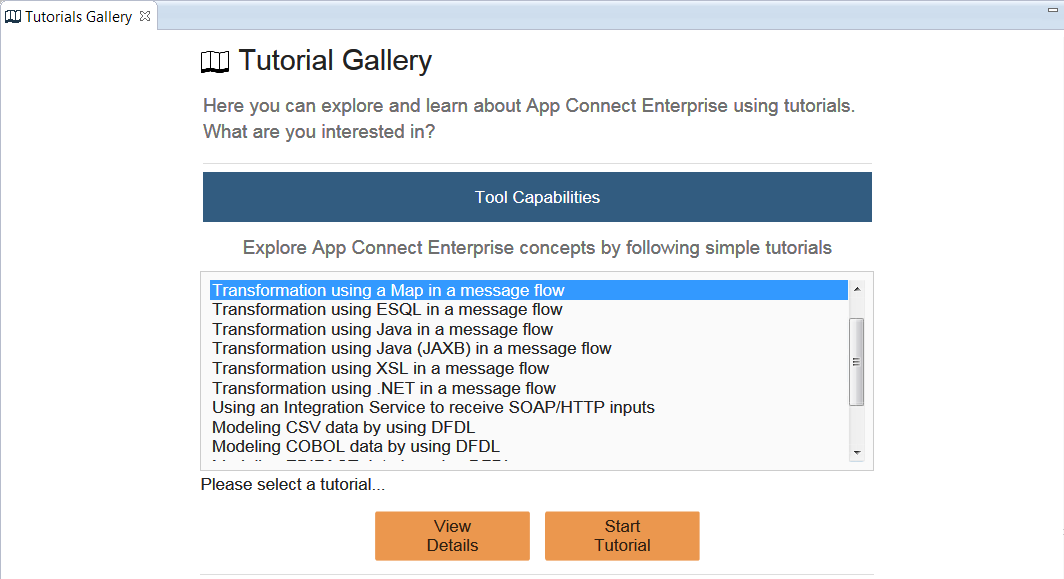
To get started with IBM App Connect Enterprise in a practical way, you can use the tutorials in IBM App Connect Enterprise Toolkit. This Tutorials Gallery is accessed in the same way on Windows. Linux, and macOS. IBM App Connect Enterprise Toolkit retrieves the available tutorials through a connection to a GitHub repository.
- In IBM App Connect Enterprise Toolkit, open the Tutorials Gallery by clicking .
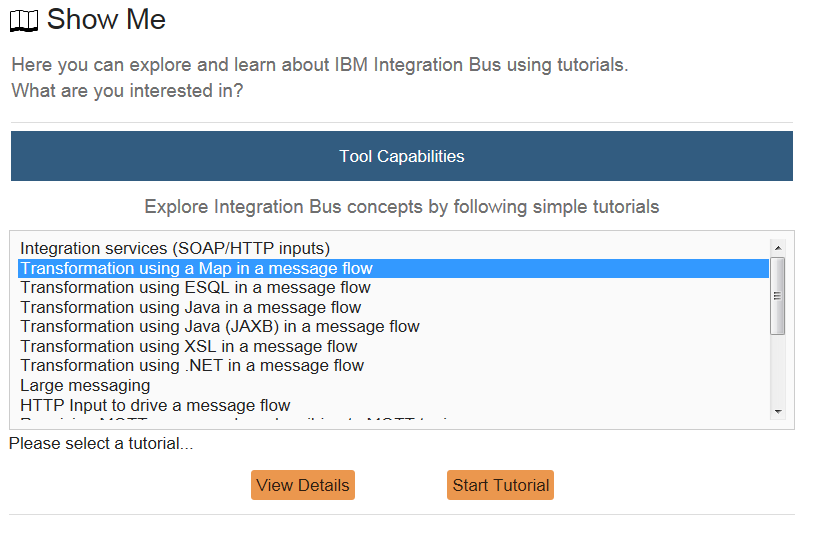
- For this get started example, select the tutorial "Transformation using a map in a message
flow", then click Start Tutorial.
This simple example shows you how to use a Mapping node to transform data by using a map in an App Connect Enterprise message flow.
- To read more about the tutorial, click Show Details.
- To add the
Transformation_Mapapplication to your workspace, click Import on the Create tab.The
Transformation_Mapmessage flow is opened for you.For this example, no other preparation steps are needed.
-
In the
Transformation_Mapapplication in the Application Development view, deploy the Transformation_Map.bar file by dragging it onto the integration server in the Integration Explorer view. - Click the Run tab.
Test the
Transformation_Mapmessage flow by sending data to it by using an HTTP client such as cURL.- Change the directory to the location of your local toolkit Eclipse workspace directory; for
example,
cd C:\workspace. This location is the directory that contains theTransformation_Mapfile, including the input XML file; for example,C:\workspace\Transformation_Map\input.xml. - Enter the following command:
curl -X POST http://localhost:7800/Transformation_Map -d
'@.\Transformation_Map\input.xml'
Note: In some cURL environments, the single quotation marks are not needed, and you can use-d @.\Transformation_Map\input.xmlinstead.
The transformed response message looks like the following example.
In a command window:<SaleEnvelopeA><SaleListA><Statement Style="Full" Type="Monthly"><Customer><Initials>KA</Initials><Name>Braithwaite</Name><Balance>00.50</Balance></Customer><Purchases><Article><Desc>Twister</Desc><Cost>0.48</Cost><Qty>01</Qty></Article><Article><Desc>The Times Newspaper</Desc><Cost>0.32</Cost><Qty>01</Qty></Article></Purchases><Amount Currency="Sterling">0.8</Amount></Statement><Statement Style="Full" Type="Monthly"><Customer><Initials>TJ</Initials><Name>Dunnwin</Name><Balance>81.84</Balance></Customer><Purchases><Article><Desc>The Origin of Species</Desc><Cost>35.74</Cost><Qty>02</Qty></Article><Article><Desc>Microscope</Desc><Cost>57.92</Cost><Qty>01</Qty></Article></Purchases><Amount Currency="Euros">129.41</Amount></Statement></SaleListA></SaleEnvelopeA>Or formatted, such as in a result from Postman.
<SaleEnvelopeA> <SaleListA> <Statement Style="Full" Type="Monthly"> <Customer> <Initials>KA</Initials> <Name>Braithwaite</Name> <Balance>00.50</Balance> </Customer> <Purchases> <Article> <Desc>Twister</Desc> <Cost>0.48</Cost> <Qty>01</Qty> </Article> <Article> <Desc>The Times Newspaper</Desc> <Cost>0.32</Cost> <Qty>01</Qty> </Article> </Purchases> <Amount Currency="Sterling">0.8</Amount> </Statement> <Statement Style="Full" Type="Monthly"> <Customer> <Initials>TJ</Initials> <Name>Dunnwin</Name> <Balance>81.84</Balance> </Customer> <Purchases> <Article> <Desc>The Origin of Species</Desc> <Cost>35.74</Cost> <Qty>02</Qty> </Article> <Article> <Desc>Microscope</Desc> <Cost>57.92</Cost> <Qty>01</Qty> </Article> </Purchases> <Amount Currency="Euros">129.41</Amount> </Statement> </SaleListA> </SaleEnvelopeA> - Change the directory to the location of your local toolkit Eclipse workspace directory; for
example,
You successfully configured, deployed, and tested your first integration solution in the software run time.
What next?

Explore other tutorials.
Explore other tutorials in the Tutorials Gallery of IBM App Connect Enterprise Toolkit or browse the available tutorials.

Explore an enterprise integration scenario (IBM Cloud Garage®)
Explore both the toolkit and designer user experiences, and understand how these experiences can be used together for a compelling end-to-end experience to create a typical enterprise integration scenario. (This lab provides a virtual machine image with the on-premises-based systems that are needed.)
To run integration solutions in App Connect Enterprise as a Service instead of in the software run time, you can deploy integrations to App Connect as a Service.


