Changing how nodes display in views
When you edit views, you can change the appearance of the nodes in the view containers. For example, you can modify the node title, highlight artifacts that meet specific conditions, or change the appearance of the Count node in the view container.
Before you begin
By default, only administrators can create or edit shared views. To request permission to create or edit views, contact your administrator.
About this task
In the following steps, you use the node editor to change the node layout.
Procedure
-
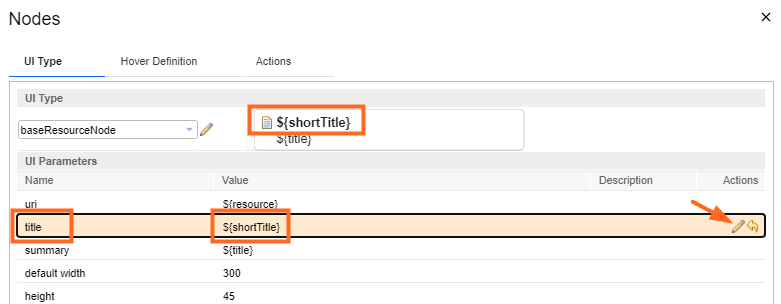
Change the node description.
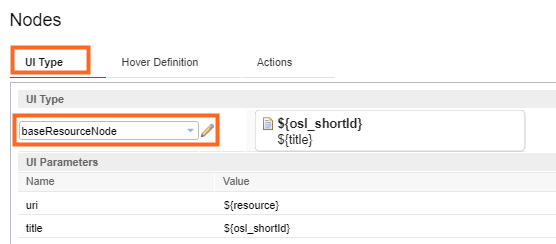
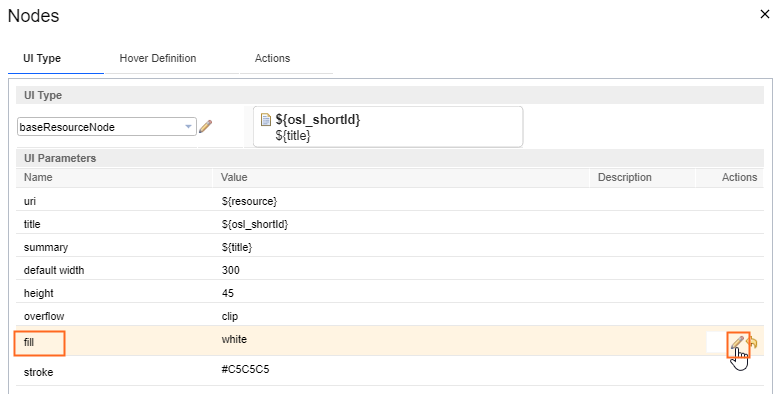
- From the UI Type list, select baseResourceNode.
- Click the pencil icon to edit the parameter for title.
- In the Parameter window, from the Default Value list, select an attribute that you want to display as the description of the node. For example, in the following example, Id is selected for display.
- Click OK.
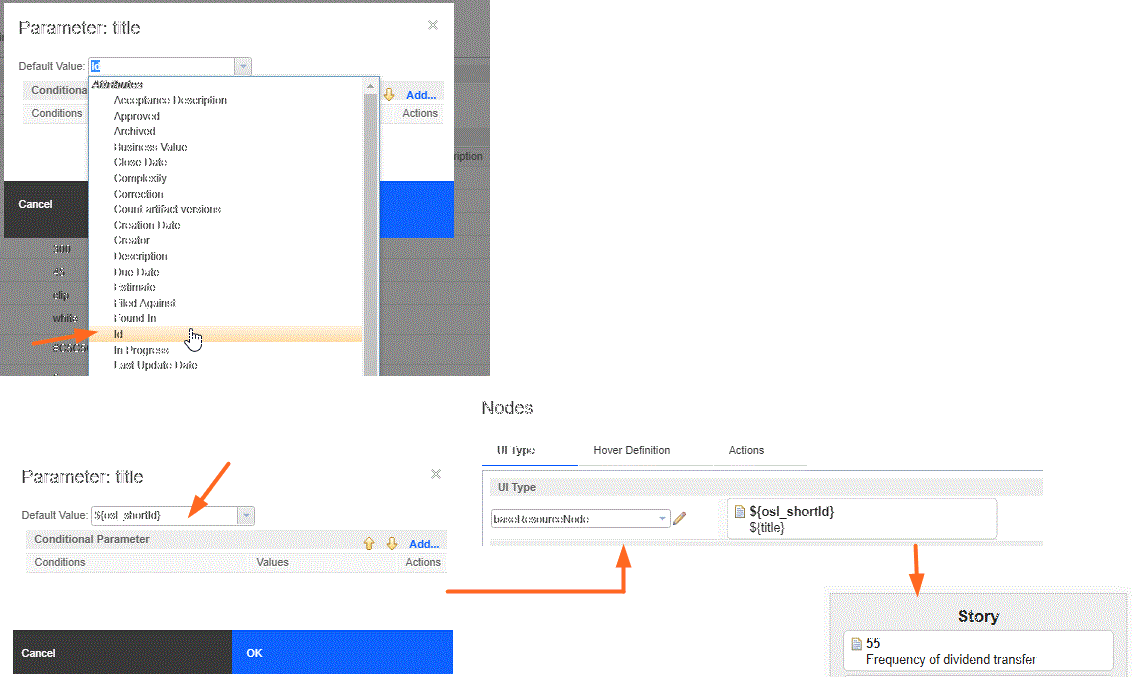
In the above example, the description of the Story node shows the ID on the first line and the title on the second line.
- Create a new UI type. To create a new UI type, click the pencil icon next to the
UI Type list.
- To create a new blank UI type, click Add, enter a UI type ID, and configure the parameters.
- To make a copy of a UI type from the list, select the UI type, and click Duplicate. Enter a UI type ID, and configure the parameters.
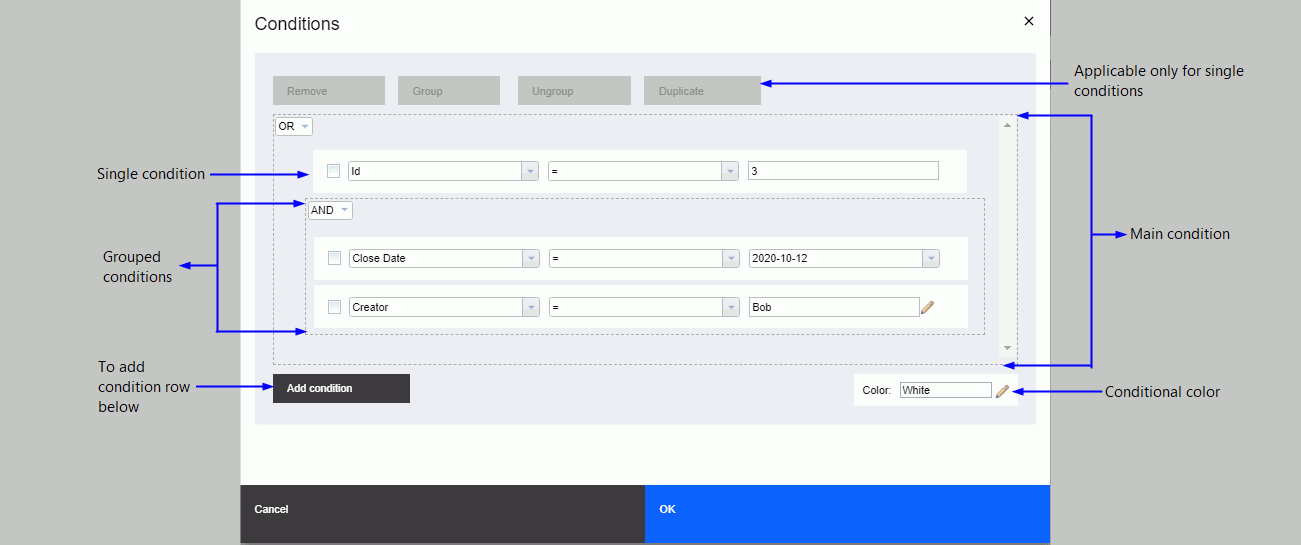
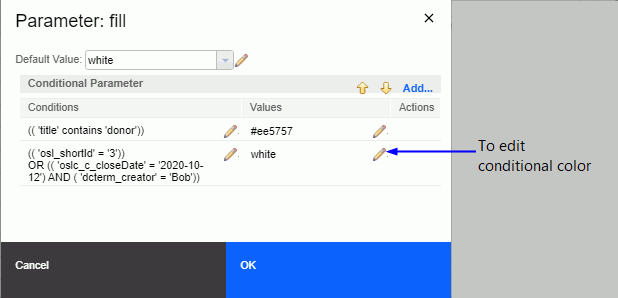
- Use conditional parameters to change the appearance of the nodes when the represented
artifacts meet specific conditions that you define. Complete the following steps to set the node
color in the view based on certain conditions.
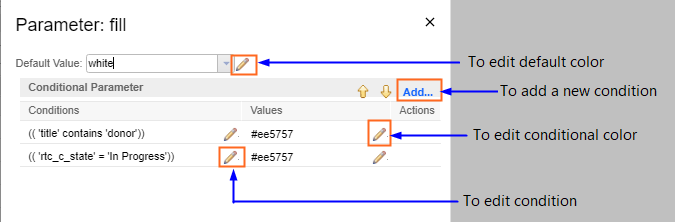
- Click the pencil icon that is next to the fill UI
parameter.
- Click Add.
 The Condition page opens.
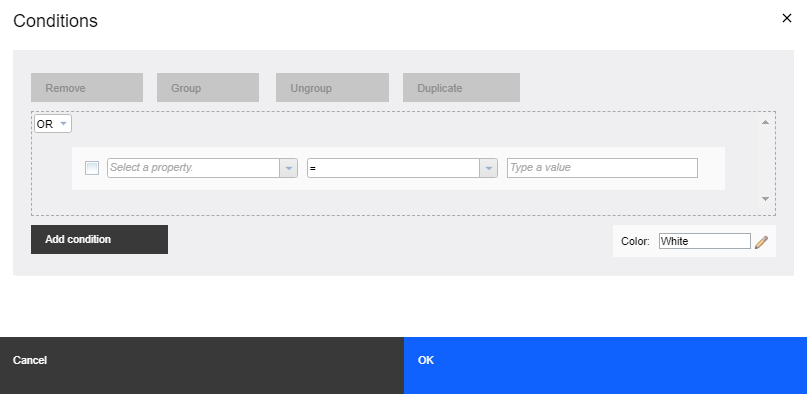
- For example, to set the condition as shown in the following figure, perform the
substeps of step c.
- Click OK. The condition that you created is shown here:
The nodes get highlighted based on the conditions that you configured.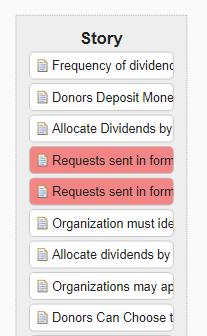
Because your view uses conditional parameters to highlight the artifact status, every time your team members run the view, the nodes colors change according to the conditions that you configured, reflecting the latest status of the project.
- Click the pencil icon that is next to the fill UI
parameter.
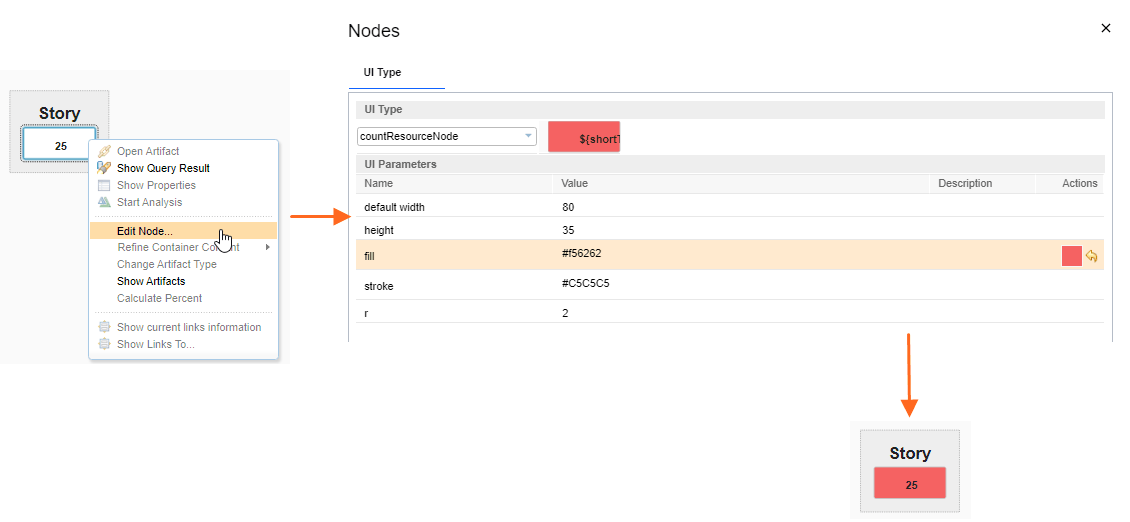
- Configure the appearance of the Count node in views:
- In a view, select a container, and then click Show Count.
- Right-click the Count node, and then select Edit Node.
- In the UI Type tab, change the default width,
height, fill or stroke
properties, and then click OK.