Removing the disk drive backplane from the 8348-21C

Learn how to remove the disk drive backplane in the IBM® Power® System S812LC (8348-21C) system.

Before you begin

Power off the system and place it in the service position. For instructions, see Preparing the system to remove and replace internal parts in the 8348-21C.

Procedure

  1. Attach the electrostatic discharge (ESD) wrist strap.
    Attention:
    • Attach an electrostatic discharge (ESD) wrist strap to the front ESD jack, to the rear ESD jack, or to an unpainted metal surface of your hardware to prevent the electrostatic discharge from damaging your hardware.
    • When you use an ESD wrist strap, follow all electrical safety procedures. An ESD wrist strap is used for static control. It does not increase or decrease your risk of receiving electric shock when using or working on electrical equipment.
    • If you do not have an ESD wrist strap, just prior to removing the product from ESD packaging and installing or replacing hardware, touch an unpainted metal surface of the system for a minimum of 5 seconds.
  2. Remove the fans. For instructions, see Removing the fan in the 8348-21C.
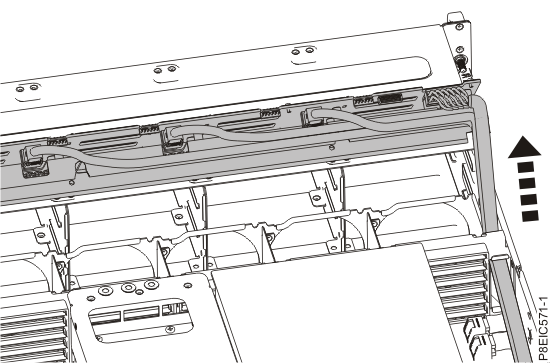
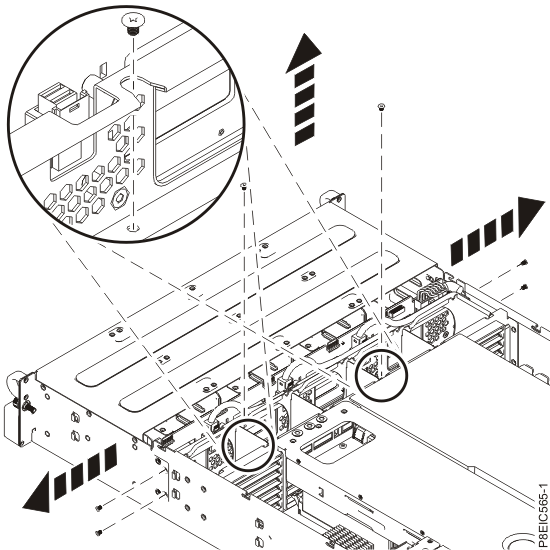
  3. Label and remove the three front drive signal cables from the drives PCIe adapter. Using your thumb, press the release latch on the connector to remove the cable. See Figure 1.
    Figure 1. Disconnecting the drive signal cables
    Disconnecting the drive signal cables
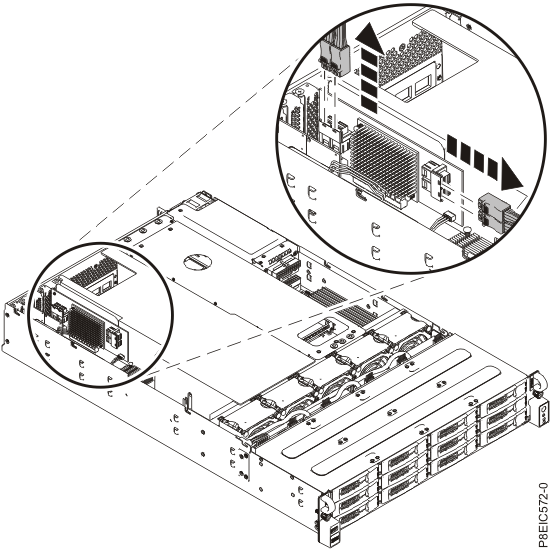
  4. Remove the front drives power cable from the system backplane, as shown in Figure 2. Using your thumb, press the release latch on the connector to remove the cable.
    Figure 2. Disconnecting the front drives power cable
    Disconnecting the front drives power cables
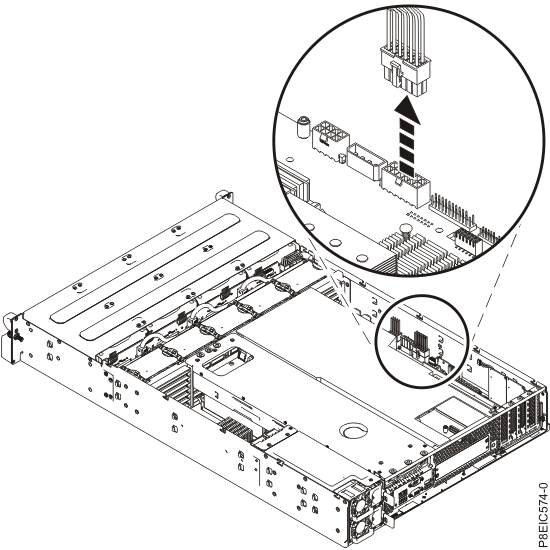
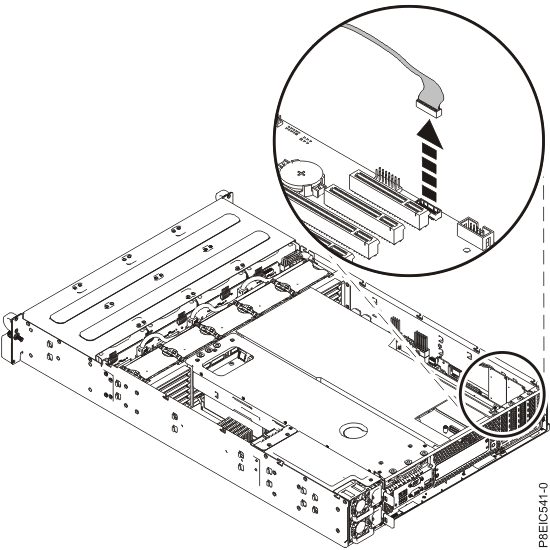
  5. Remove the front fan signal cable from the system backplane, as shown in Figure 3.
    Figure 3. Removing front fan signal cable
    Removing front fan signal cable
  6. Partially remove the front drive trays. They do not need to be fully removed; pull them out about 2 cm (1 in). For instructions, see Removing a front drive in the 8348-21C.
  7. Remove two screws from the bottom of the disk drive backplane as shown in Figure 4.
    Figure 4. Removing the disk drive backplane screws
    Removing the disk drive backplane screws
  8. Remove two or four screws that secure the disk drive backplane, as shown in Figure 4. The one or two screws that must be removed are located closer together on the each side of the chassis; ensure that you remove the indicated screws.
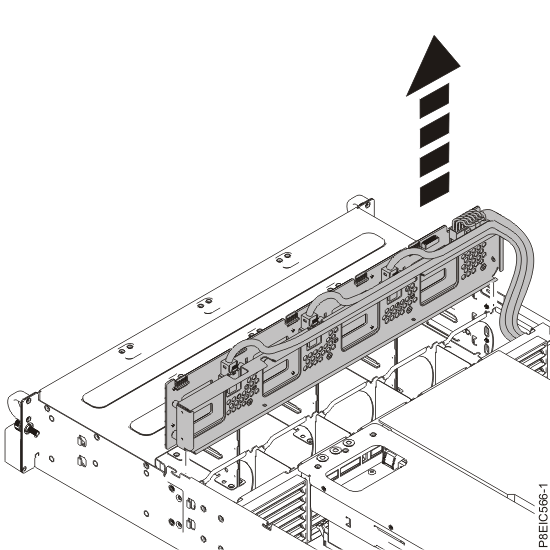
  9. Lift the disk drive backplane straight out from the chassis, as shown in Figure 5.
    Figure 5. Removing the disk drive backplane
    Removing the disk drive backplane
  10. Carefully pass the drive signal cables, drive power cable, and fan control cable through the chassis to remove them, as shown in Figure 6.
    Figure 6. Removing the cables
    Removing the cables
  11. Place the disk drive backplane and cables on the table.


Last updated: Wed, May 24, 2017