Enabling application Advanced Message Security (AMS)
This topic describes enabling Advanced Message Security at the application level.
In an asynchronous messaging system, one process connects to the queue manager to put a message, called a Sender or Publisher, and another independent process connects to the queue manager to consume the message, called a Receiver or Subscriber. These two processes are loosely coupled and have no direct knowledge of one another. The only identity information that the consumer application can access is the identity information in the message itself. If the message is changed in transit or produced by an unauthorized sender, the consumer has no way to detect this situation with a plain text message. In this case, the consuming application trusts the identity of the message but cannot verify its authenticity. Also, this process opens a number of possibilities to intercept and modify the message while in custody of the queue manager.
IBM® MQ Advanced Message Security expands IBM MQ security services to provide security at the 'message' level to protect sensitive data, such as high-value financial transactions and personal information. IBM MQ Advanced Message Security is based on interceptors, that is, outbound messages are intercepted, signed, and optionally encrypted prior to the handoff to queue manager. Inbound messages are received from queue manager to the AMS layer, decrypted and validated as necessary, and then handed off to the receiving application. AMS architecture is capable of cryptographic protection of messages and enforcement of fine-grained protection policies that authorize individual senders and recipients of messages, with few or no changes to the application program logic.
There are two approaches to IBM MQ AMS, known as Application AMS and Queue Manager AMS. This tutorial focuses on Application AMS.
AMS protection policy
Protection policy defines the quality of protection to be used for protecting the messages. AMS provides message protection policies to enable message content to be signed and encrypted. AMS policies are defined by the IBM MQ administrator on the target queues and each queue can have exactly zero or one policy. Policy can specify the algorithms that are used for signing and encryption operations. There are three types of message protection policies:
- Message integrity policy where a digital signature is applied to the message, but the contents of the message remain in the plain text.
- Message privacy policy where the contents of the message are also encrypted. Message privacy policies also include message integrity.
- Confidentiality policy where protection is provided by encryption only with optional key reuse.
When encryption is specified, the policy must also specify all authorized recipients and the sender must have the public key of those recipients in the local keystore.
End-to-End message security
End-to-End protection of the message requires us to consider the following aspects:
- Messages in transit are secured.
- Assurance that messages have originated from the expected source.
- Messages can only be viewed by the intended recipient.
- Assurance that messages have not been altered in transit.
Putting the encryption mechanism into the queue manager itself eliminates the expense of modifying the applications but it does not fully solve the problem. Since the queue manager has the capability of encrypting and decrypting the messages, the recipient has no guarantee that the message that it receives is authentic. For example, in the cases of B2B, the topology is that of a hub and spoke where the clearinghouse serves as the hub and each spoke is a different business partner. In such scenarios for assurance of a tamper-proof and authentic message, an end to end protection will be the desired solution.
Application AMS provides end to end Message-level security by cryptographically binding the sender’s identity, as represented by the distinguished name in an X.509 certificate, to the message. If desired, the message can also be encrypted for specific recipients who are also identified by X.509 certificates. The ability to bind sender and recipient identities to a message and make it tamper-proof facilitates the creation of policies as to who can send or receive messages, and the enforcement of those policies is on a per-message basis.
Before you begin
Before you begin, you must have the following:
- An existing IBM MQ as a Service queue manager (see Creating a queue manager if you don't have one).
- The connection details for your queue manager, see Retrieving connection_info.txt.
- An Admin username and apikey, see Retrieving platformApiKey.json
- An IBM MQ Client, this tutorial uses runmqsc, to install see IBM MQ C Client.
Set up sender and receiver of message
This tutorial uses two users alice and bob for the AMS setup and to demonstrate the end to end message security- alice as a sender of the message and bob as a recipient of the message. In the real world, senders and receivers of messages run on different systems and enforcing the message protection among those senders and receivers of the message using AMS ensures messages are tamper-proof and authentic.
For this tutorial, you need to create these users on IBM MQ as a Service service as User credentials or Application credentials. This tutorial uses Application credentials, that is, you grant permission to application, which allows it to access the queue manager for putting messages, and the username that it uses for this permission is alice. Similarly, you grant permission to the application to access the queue manager for getting messages and the username used for this permission is bob.
- Navigate to your IBM MQ as a Service UI by following the instructions in Getting started with IBM MQ as a Service.
- The queue manager view opens. Select the Application credentials tab.
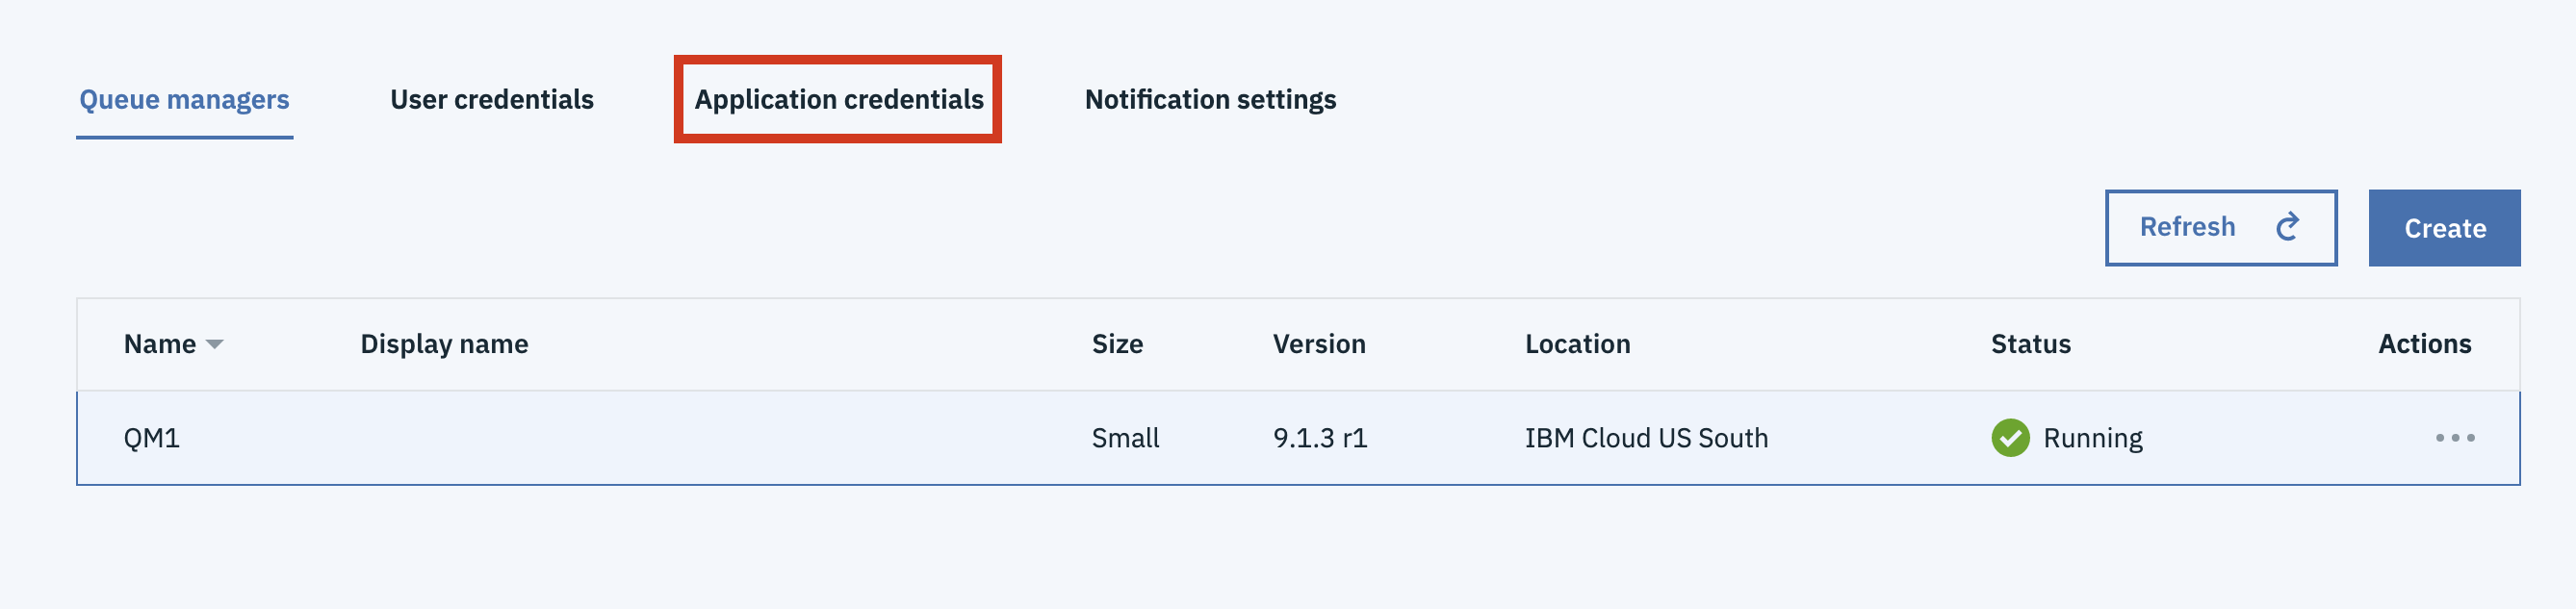
- Now click the Add button and fill in the form as shown in the image for
user alice:
- In the Display name field, enter the value as alice.
- In the Application username, alice will be automatically populated.
- Click Add and generate API key.

- After the user is added, a new apiKey is generated and showed in pop-up window. Click on
Download to download the applicationApiKey.json, save the file as
applicationApiKey<userName>.json (for example, applicationApiKeyalice.json)
to a convenient location.

- Click on Add and fill in the form as shown in the image below for user
bob. In the Display name: field of the form, enter the value as
bob. In the Application username: field of the form, bob is
automatically populated. Click on Add and generate API key.

- After the user is added, a new apiKey is generated and shown in the pop-up window. Click on
Download to download the applicationApiKey.json, save
the file as applicationApiKey<username>.json (for example,
applicationApiKeybob.json) to a convenient location.
Send and receive a message before configuring AMS
As a first step of the AMS configuration, you can check if alice and bob are able to send and receive messages. This helps ensure that the client and the queue manager are able to communicate and exchange messages. In further sections of this tutorial, AMS setup and configuration is explained. At this point, you send and receive a message in plain-text on the target queue using alice as sender and bob as receiver.
-
Open two command shells. One for the user alice and another for the user bob:
- Use one command shell for alice and carry out all the steps for alice on it. From now on, this command shell is known as alice's command shell.
- Use another command shell for bob and carry out all the steps for bob on it. From now on, this command shell is known as bob's command shell.
- alice and bob command shells are required throughout this tutorial. Do not close them until you complete all the steps in this tutorial.
-
Create the following environment variables in alice's command shell.
- On Linux®/macOS:
$ export MQSAMP_USER_ID=alice export MQSERVER="CLOUD.ADMIN.SVRCONN/TCP/<HOSTNAME>(<PORT>)" - On Windows:
$ set MQSAMP_USER_ID=alice set MQSERVER=CLOUD.ADMIN.SVRCONN/TCP/<HOSTNAME>(<PORT>) <HOSTNAME>is 'hostname' in the file connection_info.txt.<PORT>is 'listenerPort' in the file connection_info.txt.
- On Linux®/macOS:
-
Create the following environment variables in bob's command shell.
- On Linux/macOS:
$ export MQSAMP_USER_ID=bob export MQSERVER="CLOUD.ADMIN.SVRCONN/TCP/<HOSTNAME>(<PORT>)" - On Windows:
$ set MQSAMP_USER_ID=bob set MQSERVER=CLOUD.ADMIN.SVRCONN/TCP/<HOSTNAME>(<PORT>) <HOSTNAME>is 'hostname' in the file connection_info.txt.<PORT>is 'listenerPort' in the file connection_info.txt.
- On Linux/macOS:
- From alice's command shell, run the sample program to send a message to the target queue.
amqsputc DEV.QUEUE.1 <your Queue manager name>- Enter the application API key for alice when prompted for a password(this is your 'apiKey' value in the file applicationApiKeyalice.json)
- Type the text of the message, then press
Entertwice to send only a single message.
Tip: Pressing theEnterkey twice will exit the sample application.
-
Check that the user bob is able to retrieve the messages from the target queue.
- From bob's command shell, run the sample program to receive the
message.
amqsgetc DEV.QUEUE.1 <your Queue manager name> - Enter the application API key of bob when prompted for a password (This is your 'apiKey' value in the file applicationApiKeybob.json).
- You can see that the message received
message <Hello>confirms that user bob is able to read the message from the target queue.Note that the message comes back in plain text while reading the queue, as this is how it is stored on the target queue.
- From bob's command shell, run the sample program to receive the
message.
This test confirms that alice and bob can send and receive messages on the target queue. Next step is to create the configuration required by AMS for end to end security. This includes creating keystores and certificates for these users to enforce signing and encryption of messages.
Set up Keystores for alice and bob
Application AMS is based on public/private key encryption with keys stored in standard X.509 certificates, which in turn are stored in a platform-appropriate keystore. These certificates are the same type of certificates that are used for IBM MQ Secure Sockets Layer (SSL) and Transport Layer Security (TLS) encryption, and in fact the application can use the same certificates and keystores for both, if desired. This tutorial creates new keystore and certificates for users alice and bob.
- Create directories for setting up keystores:
For alice: - On Mac: mkdir -p ~/alice/.mqs - On Linux: mkdir -p /home/alice/.mqs - On Windows: mkdir %HOMEDRIVE%\Users\alice\.mqs For bob: - On Mac: mkdir -p ~/bob/.mqs - On Linux: mkdir -p /home/bob/.mqs - On Windows: mkdir %HOMEDRIVE%\Users\bob\.mqs - Create key database:
For alice: - On Mac: runmqakm -keydb -create -db ~/alice/.mqs/alicekey.kdb -pw passw0rd -stash - On Linux: runmqakm -keydb -create -db /home/alice/.mqs/alicekey.kdb -pw passw0rd -stash - On Windows: runmqakm -keydb -create -db %HOMEDRIVE%\Users\alice\.mqs\alicekey.kdb -pw passw0rd -stash For bob: - On Mac: runmqakm -keydb -create -db ~/bob/.mqs/bobkey.kdb -pw passw0rd -stash - On Linux: runmqakm -keydb -create -db /home/bob/.mqs/bobkey.kdb -pw passw0rd -stash - On Windows: runmqakm -keydb -create -db %HOMEDRIVE%\Users\bob\.mqs\bobkey.kdb -pw passw0rd -stash - Make sure the key database is readable (Linux and
macOS only):
Mac: For alice: chmod +r ~/alice/.mqs/alicekey.kdb For bob: chmod +r ~/bob/.mqs/bobkey.kdb Linux: For alice: chmod +r /home/alice/.mqs/alicekey.kdb For bob: chmod +r /home/bob/.mqs/bobkey.kdb - Create a self-signed certificate for user alice:
On Mac: - runmqakm -cert -create -db ~/alice/.mqs/alicekey.kdb -pw passw0rd -label Alice_Cert -dn "cn=alice,O=IBM,c=GB" -default_cert yes On Linux: - runmqakm -cert -create -db /home/alice/.mqs/alicekey.kdb -pw passw0rd -label Alice_Cert -dn "cn=alice,O=IBM,c=GB" -default_cert yes On Windows: - runmqakm -cert -create -db %HOMEDRIVE%\Users\alice\.mqs\alicekey.kdb -pw passw0rd -label Alice_Cert -dn "cn=alice,O=IBM,c=GB" -default_cert yes - Create a self-signed certificate for user bob
On Mac:
    - runmqakm -cert -create -db ~/bob/.mqs/bobkey.kdb -pw passw0rd -label Bob_Cert -dn "cn=bob,O=IBM,c=GB" -default_cert yes

On Linux:
    - runmqakm -cert -create -db /home/bob/.mqs/bobkey.kdb -pw passw0rd -label Bob_Cert -dn "cn=bob,O=IBM,c=GB" -default_cert yes

On Windows:
    - runmqakm -cert -create -db %HOMEDRIVE%\Users\bob\.mqs\bobkey.kdb -pw passw0rd -label Bob_Cert -dn "cn=bob,O=IBM,c=GB" -default_cert yes
Set up protection policy on the target queue
IBM MQ Advanced Message Security uses security policies to specify the cryptographic encryption and signature algorithms for encrypting and authenticating messages that flow through the queues. We need to set an AMS policy on the queue to enable message security.
-
Open a new command shell
-
create MQSERVER environment variable
On Linux and Mac: export MQSERVER="CLOUD.ADMIN.SVRCONN/TCP/<HOSTNAME>(<PORT>)" On Windows: set MQSERVER=CLOUD.ADMIN.SVRCONN/TCP/<HOSTNAME>(<PORT>)<HOSTNAME>- this is 'hostname' in the file connection_info.txt<PORT>- this is 'listenerPort' in the file connection_info.txt
-
Run runmqsc to connect to your remote queue manager:
runmqsc -c -u <ADMIN_MQ_USER> <QUEUE_MANAGER_NAME><ADMIN_MQ_USER>- this is 'mqUsername' in the file platformApiKey.json(refer to Appendix 2 at the bottom of this tutorial)<QUEUE_MANAGER_NAME>- this is 'queueManagerName' in the file connection_info.txt-cinforms runmqsc it should connect to a remote queue manager using the MQSERVER variable
-
The terminal will prompt you for a password.
This is your 'apiKey' value in the file platformApiKey.json (refer to Appendix 2 at the bottom of this tutorial)
-
The terminal will now be waiting for input.
-
Create a new AMS Policy on the target queue
SET POLICY(DEV.QUEUE.1) SIGNALG(SHA1) ENCALG(AES256) SIGNER('CN=alice,O=IBM,C=GB') RECIP('CN=bob,O=IBM,C=GB') ACTION(ADD)- DEV.QUEUE.1 is the policy name and it must match the name of the queue which is to be protected.
- SIGNALG(value) specifies the digital signature algorithm for signing of the messages.
- ENCALG(value) specifies the digital encryption algorithm for encryption of the messages.
- SIGNER(value) is the value of
-dnof Sender(i.e. alice) in this tutorial. - RECIP(value) is the value of
-dnof Receiver(i.e. bob) in this tutorial. - Detailed explanation about SET POLICY command can be found in the main IBM MQ documentation, see SET POLICY (set security policy) .

-
Verify the AMS policy you just defined. To ensure the policy is defined and configured correctly with signing and encryption as in your setup, use the following command:
DISPLAY POLICY(DEV.QUEUE.1)
Create an alias queue to verify message encryption
To demonstrate that the messages are encrypted when stored in a queue, you use an alias queue. Retrieving messages via the alias queue will not trigger the interceptors on the target queue, so the message is retrieved as it is, that is without decryption, and so it gives an accurate view on whether the message is plain text or encrypted.
-
Create an alias queue that targets to a queue
DEFINE QALIAS (DEV.QUEUE.1.ALIAS) TARGET (DEV.QUEUE.1)- DEV.QUEUE.1.ALIAS is our name for the alias queue
- DEV.QUEUE.1 is the target queue we are using in this tutorial

Sharing public keys between alice and bob
When a protection policy is set with encryption, it must also specify all the authorized recipients of the message. Also, the sender of that message must have the public key of those recipients in its local keystore. A policy can also specify authorized senders and this specification is enforced for messages that are signed or encrypted, in this case, receiver must have the public key of the sender to verify the identity of the message. That is, alice must have the public key of bob in their keystore and bob will need the public key of alice in their key store.
This section provides detailed steps to extract the public key for bob and add that to alice's keystore and extract the public key for alice and add that to bob's keystore.
- Extract the public key for bob and add that to alice's
keystore
On Mac: - runmqakm -cert -extract -db ~/bob/.mqs/bobkey.kdb -pw passw0rd -label Bob_Cert -target bob_public.arm - runmqakm -cert -add -db ~/alice/.mqs/alicekey.kdb -pw passw0rd -label Bob_Cert -file bob_public.arm On Linux: - runmqakm -cert -extract -db /home/bob/.mqs/bobkey.kdb -pw passw0rd -label Bob_Cert -target bob_public.arm - runmqakm -cert -add -db /home/alice/.mqs/alicekey.kdb -pw passw0rd -label Bob_Cert -file bob_public.arm On Windows: - runmqakm -cert -extract -db %HOMEDRIVE%\Users\bob\.mqs\bobkey.kdb -pw passw0rd -label Bob_Cert -target bob_public.arm - runmqakm -cert -add -db %HOMEDRIVE%\Users\alice\.mqs\alicekey.kdb -pw passw0rd -label Bob_Cert -file bob_public.arm - Extract the public key for alice and add that to bob's
keystore
On Mac: - runmqakm -cert -extract -db ~/alice/.mqs/alicekey.kdb -pw passw0rd -label Alice_Cert -target alice_public.arm - runmqakm -cert -add -db ~/bob/.mqs/bobkey.kdb -pw passw0rd -label Alice_Cert -file alice_public.arm On Linux: - runmqakm -cert -extract -db /home/alice/.mqs/alicekey.kdb -pw passw0rd -label Alice_Cert -target alice_public.arm - runmqakm -cert -add -db /home/bob/.mqs/bobkey.kdb -pw passw0rd -label Alice_Cert -file alice_public.arm On Windows: - runmqakm -cert -extract -db %HOMEDRIVE%\Users\alice\.mqs\alicekey.kdb -pw passw0rd -label Alice_Cert -target alice_public.arm - runmqakm -cert -add -db %HOMEDRIVE%\Users\bob\.mqs\bobkey.kdb -pw passw0rd -label Alice_Cert -file alice_public.arm -
Verify that alice has bob's certificate (public part) and bob has alice's certificate (public part) in their keystores. This can be done by running the following commands, which prints certificate details:
For alice:
    - On Mac: runmqakm -cert -details -db ~/alice/.mqs/alicekey.kdb -pw passw0rd -label Bob_Cert
    - On Linux: runmqakm -cert -details -db /home/alice/.mqs/alicekey.kdb -pw passw0rd -label Bob_Cert
    - On Windows: runmqakm -cert -details -db %HOMEDRIVE%\Users\alice\.mqs\alicekey.kdb -pw passw0rd -label Bob_Cert

For bob:
    - On Mac: runmqakm -cert -details -db ~/bob/.mqs/bobkey.kdb -pw passw0rd -label Alice_Cert
    - On Linux: runmqakm -cert -details -db /home/bob/.mqs/bobkey.kdb -pw passw0rd -label Alice_Cert
    - On Windows: runmqakm -cert -details -db %HOMEDRIVE%\Users\bob\.mqs\bobkey.kdb -pw passw0rd -label Alice_Cert
Create keystore.conf file for alice and bob
AMS interceptors would expect a configuration file for the user (in this tutorial it is alice and bob) that has details on where the keystore is located and label of the certificate to use. AMS needs them for signing and encrypting messages and for identity checking for end to end protection. AMS expects the configuration file to be named "keystore.conf" and contain details in plain-text form. Each user must have a separate keystore.conf file.
This section guides you in creating the keystore.conf file for alice and bob.
- Create a new file keystore.conf in the .mqs directory
for user alice and copy following contents into it.
On macOS:
cms.keystore=~/alice/.mqs/alicekey
cms.certificate=Alice_Cert
On Linux:
cms.keystore=/home/alice/.mqs/alicekey
cms.certificate=Alice_Cert
On Windows:
cms.keystore=%HOMEDRIVE%\Users\alice\.mqs\alicekey
cms.certificate=Alice_Cert
Replace
%HOMEDRIVE%with the value of it on your computer (for example,C:) - Create a new file keystore.conf in the .mqs directory
of user bob and copy following contents into it.
On macOS:
cms.keystore=~/bob/.mqs/bobkey
cms.certificate=Bob_Cert
On Linux:
cms.keystore=/home/bob/.mqs/bobkey
cms.certificate=Bob_Cert
On Windows:
cms.keystore=%HOMEDRIVE%\Users\bob\.mqs\bobkey
cms.certificate=Bob_Cert
Replace
%HOMEDRIVE%with the value of it on your computer (for example,C:)
Testing End-to-End message protection
IBM MQ Advanced Message Security provides:
- Message Integrity: Enables authentication of inbound traffic on a per-message basis, as well as strict restrictions on which queues those messages can be sent to and which recipients can receive them.
- Message Privacy: Based on the protection policy set on the target queue, AMS encrypts the message even before it is placed on the queue, thus ensuring that its contents are never exposed.
Demonstration of end-to-end message security involves demonstrating message integrity and message privacy. You start by demonstrating message integrity, where you can see that non-authorized users are not allowed to access the protected queue. You then check if the authorized users, from the example, alice and bob can send and receive messages on protected queue. You conclude by demonstrating that messages while at rest in the protected queue are encrypted and not readable.
Message Integrity Check
To demonstrate that message integrity is protected, any attempt to access the protected queue without complying to the signing or encryption policy should fail. To test this, we run the sender program without setting the environment variable MQS_KEYSTORE_CONF. By doing so, AMS will fail to find the keystore and certificate to use for signing. You can observe that alice is able to establish connection with the queue manager, but an attempt to open the protected queue will fail as this is the point where the AMS interceptor would check the identity for user alice.
- Create the following environment variables in alice's command
shell.
On Mac: export MQSAMP_USER_ID=alice export MQSERVER="CLOUD.ADMIN.SVRCONN/TCP/<HOSTNAME>(<PORT>)" On Linux: export MQSAMP_USER_ID=alice export MQSERVER="CLOUD.ADMIN.SVRCONN/TCP/<HOSTNAME>(<PORT>)" On Windows: set MQSAMP_USER_ID=alice set MQSERVER=CLOUD.ADMIN.SVRCONN/TCP/<HOSTNAME>(<PORT>)<HOSTNAME>- this is 'hostname' in the file connection_info.txt.<PORT>- this is 'listenerPort' in the file connection_info.txt..
- Run the sample program to receive the messages:
amqsputc DEV.QUEUE.1 <your Queue manager name>- Enter the application API key for alice when prompted for a password (This is your applicationApiKey value in the file applicationApiKeyalice.json)
The following image shows that alice's attempt to open the protected queue has failed with MQRC_NOT_AUTHORIZED.

Message Security Check - Authorize users to Send and Receive messages on a Protected Queue.
alice and bob have the required configuration and fully comply with the protection policy defined on the target queue. This makes alice and bob the authorized sender and recipient of the message on the protected queue. As part of this demonstration, you run the sender program (amqsputc) using alice's userid to send a message to the protected queue. You then run the receiver program (amqsgetc) using bob's userid to receive the message.
- Create the following environment variables in alice's command shell.
On Mac: export MQSAMP_USER_ID=alice export MQSERVER="CLOUD.ADMIN.SVRCONN/TCP/<HOSTNAME>(<PORT>)" export MQS_KEYSTORE_CONF="~/alice/.mqs/keystore.conf" On Linux: export MQSAMP_USER_ID=alice export MQSERVER="CLOUD.ADMIN.SVRCONN/TCP/<HOSTNAME>(<PORT>)" export MQS_KEYSTORE_CONF="/home/alice/.mqs/keystore.conf" On Windows: set MQSAMP_USER_ID=alice set MQSERVER=CLOUD.ADMIN.SVRCONN/TCP/<HOSTNAME>(<PORT>) set MQS_KEYSTORE_CONF=C:\Users\alice\.mqs\keystore.conf<HOSTNAME>- this is 'hostname' in the file connection_info.txt.<PORT>- this is 'listenerPort' in the file connection_info.txt.
- Create the following environment variables in bob's command shell.
On Mac: export MQSAMP_USER_ID=bob export MQSERVER="CLOUD.ADMIN.SVRCONN/TCP/<HOSTNAME>(<PORT>)" export MQS_KEYSTORE_CONF="~/bob/.mqs/keystore.conf" On Linux: export MQSAMP_USER_ID=bob export MQSERVER="CLOUD.ADMIN.SVRCONN/TCP/<HOSTNAME>(<PORT>)" export MQS_KEYSTORE_CONF="/home/bob/.mqs/keystore.conf" On Windows: set MQSAMP_USER_ID=bob set MQSERVER=CLOUD.ADMIN.SVRCONN/TCP/<HOSTNAME>(<PORT>) set MQS_KEYSTORE_CONF=C:\Users\bob\.mqs\keystore.conf<HOSTNAME>- this is 'hostname' in the file connection_info.txt.<PORT>- this is 'listenerPort' in the file connection_info.txt.
- From alice's command shell, run the sample program to send messages to the protected
queue.
amqsputc DEV.QUEUE.1 <your Queue manager name>Enter the application API key of alice when prompted for a password (This is your 'apiKey' value in the file applicationApiKeyalice.json).
Type the text of the message, then pressEnterkey twice to send only a single message.Note: Pressing theEnterkey twice will exit the sample application.
- From bob's command shell, run the sample program to receive the
messages.
Enter the application API key of bob when prompted for a password (This is your '"apiKey' value in the file applicationApiKeybob.json) You can see that received messageamqsgetc DEV.QUEUE.1 <your Queue manager name>message <Hello>confirms that bob is able to read the message data. - From bob's command shell, run the sample program to receive the
messages.
Enter the application API key of bob when prompted for a password (This is your apiKey value in the file applicationApiKeybob.json). You can see that received messageamqsgetc DEV.QUEUE.1 <your Queue manager name>message <Hello>confirms that bob is able to read the message data.
Message Privacy Check - Data stored as encrypted
To demonstrate that the messages are encrypted, you test using an alias queue. Retrieving messages via the alias queue does not trigger the interceptors on the target queue, so the message is retrieved as it is, without decryption, and so gives an accurate view on whether the message is plain text or encrypted. As part of this demonstration, you run the sender program (amqsputc) using the alice's userid to send a message to protected queue. You then run receiver program (amqsgetc) using the bob's userid to receive the message from an alias queue.
- Create the following environment variables in alice's command shell.
On Mac: export MQSAMP_USER_ID=alice export MQSERVER="CLOUD.ADMIN.SVRCONN/TCP/<HOSTNAME>(<PORT>)" export MQS_KEYSTORE_CONF="~/alice/.mqs/keystore.conf" On Linux: export MQSAMP_USER_ID=alice export MQSERVER="CLOUD.ADMIN.SVRCONN/TCP/<HOSTNAME>(<PORT>)" export MQS_KEYSTORE_CONF="/home/alice/.mqs/keystore.conf" On Windows: set MQSAMP_USER_ID=alice set MQSERVER=CLOUD.ADMIN.SVRCONN/TCP/<HOSTNAME>(<PORT>) set MQS_KEYSTORE_CONF=C:\Users\alice\.mqs\keystore.conf<HOSTNAME>- this is 'hostname' in the fileconnection_info.txt.<PORT>- this is 'listenerPort' in the fileconnection_info.txt.
- Create the following environment variables in bob's command shell.
On Mac: export MQSAMP_USER_ID=bob export MQSERVER="CLOUD.ADMIN.SVRCONN/TCP/<HOSTNAME>(<PORT>)" export MQS_KEYSTORE_CONF=~/bob/.mqs/keystore.conf On Linux: export MQSAMP_USER_ID=bob export MQSERVER="CLOUD.ADMIN.SVRCONN/TCP/<HOSTNAME>(<PORT>)" export MQS_KEYSTORE_CONF=/home/bob/.mqs/keystore.conf On Windows: set MQSAMP_USER_ID=bob set MQSERVER=CLOUD.ADMIN.SVRCONN/TCP/<HOSTNAME>(<PORT>) set MQS_KEYSTORE_CONF=C:\Users\bob\.mqs\keystore.conf<HOSTNAME>- this is 'hostname' in the fileconnection_info.txt.<PORT>- this is 'listenerPort' in the fileconnection_info.txt.
- From alice's command shell, run the sample program to send messages to the protected
queue.
Enter the application API key for alice when prompted for a password (This is your 'apiKey' value in the file applicationApiKeyalice.json). Type the text of the message, then press theamqsputc DEV.QUEUE.1 <your Queue manager name>Enterkey twice to send only a single message.Note: Pressing theEnterkey twice exits the sample application. - From bob's command shell, run the sample program to receive the
messages.
Enter the application API key for bob when prompted for a password (This is your 'apiKey' value in the file applicationApiKeybob.json). You can see that the message is received asamqsgetc DEV.QUEUE.1.ALIAS <your Queue manager name>message <PDMQ>shows data encrypted, thus confirming that message is stored as encrypted and not readable by non-authorized users.
Conclusion
You have now completed this tutorial. As a part of this guide, you have set up Application AMS for end-to-end security of messages. You have demonstrated that this ensures message integrity and message privacy are protected and that messages are readable only by authorized users.
Retrieving connection_info.txt
To retrieve the connection_info.txt file containing queue manager connection details:
- Navigate to your IBM MQ as a Service UI by following the instructions in Getting started with IBM MQ as a Service.
- The queue manager view opens. Select the queue manager you want to retrieve the connection info
from.

- Click Connection information.

- Download this file in JSON text format.
Retrieving platformApiKey.json
To create or reset your administrator api key:
- Navigate to your IBM MQ as a Service UI by following the instructions in Getting started with IBM MQ as a Service.
- The queue manager view opens. Select the queue manager you wish to retrieve the connection info
from:
- Next, select the Administration tab:

- Click Reset API Key button. The previous admin API key for this IBM MQ Username will no longer be valid.(If the button says Create API Key, then you have not created an api key in this way before. Click the Create API Key button.
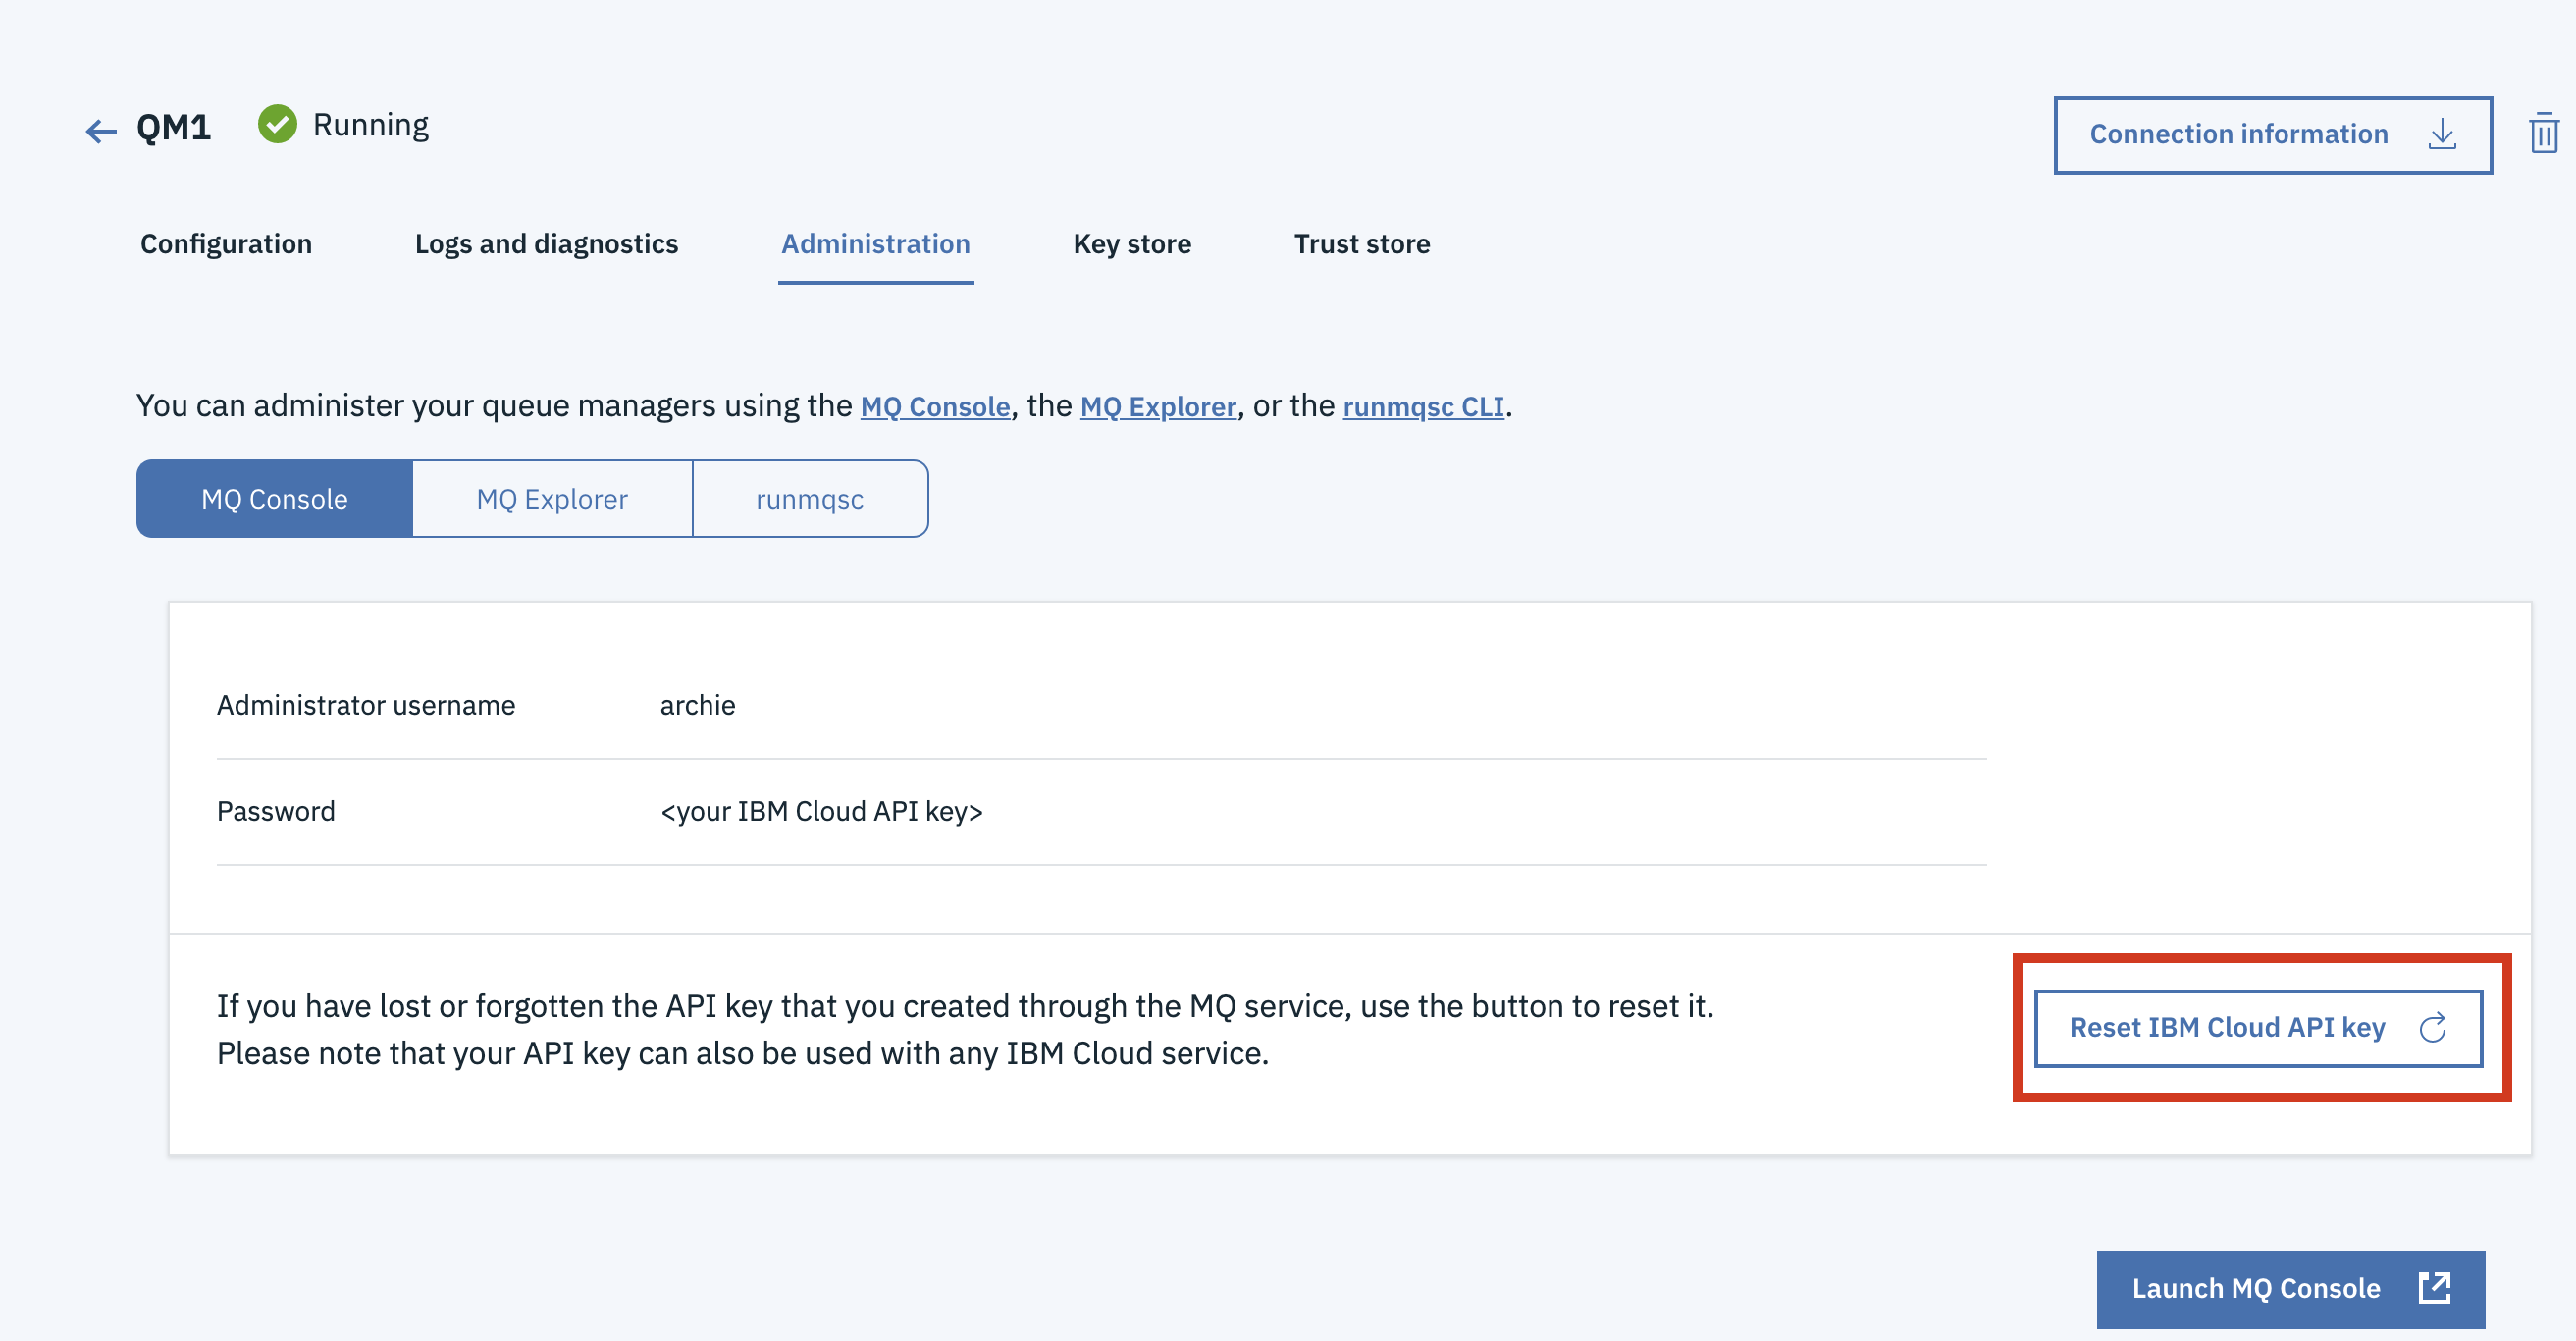
- Click Download to download the platformApiKey.json
file containing an admin username and apikey.

IBM MQ C Client
If you do not have the IBM MQ Client command line tool and samples (runmqsc, amqsputc, amqsgetc), you can download it from here.
- Select the latest package.
- Select the IBM MQ C redistributable client for your Operating System by ticking the box on the left of the package as shown below. It should have Redist in the file name. This tutorial was created using the Linux Ubuntu Operating system.
- Select to download via HTTPS, this will allow you to download the client directly through your
browser as shown below.If you do not have this option, try in an alternative browser.

- After clicking on continue, you are redirected to screen shown below. Click on the symbol as
shown by the red circle to begin your download.

- When downloaded, extract the file to a directory of your choice
<PATH_TO_MQCLIENT_DIR>tar -xvzf <IBM-MQC-Redist>.tar.gz <PATH_TO_MQCLIENT_DIR> - Add commands to
path:
export PATH=$PATH:<PATH_TO_MQCLIENT_DIR>/bin:<PATH_TO_MQCLIENT_DIR>/samp/bin