Enabling queue manager Advanced Message Security (AMS)
IBM® MQ Advanced Message Security expands IBM MQ security services to provide encryption at the message level to protect sensitive data, such as high-value financial transactions and personal information.
There are two approaches to IBM MQ AMS, known as Application AMS and Queue Manager AMS. This tutorial focuses on Queue Manager AMS.
Queue Manager AMS provides the following functions:
- Comprehensive security without writing complex security code or modifying or recompiling existing applications
- Support for encryption and digital signing of messages
- Public Key Infrastructure (PKI) technology to provide authentication, authorization, confidentiality, and data integrity services for messages
Tutorial overview

This tutorial guides you through the steps to configure queue manager AMS for encryption on an IBM MQ queue on an IBM MQ as a Service queue manager. You begin by putting and getting plain text messages to confirm that the messages sit on the queue in plain text. You then enable queue manager AMS encryption, thus ensuring that messages on the queue are encrypted. You then demonstrate that messages on the queue are now encrypted, ensuring the message data cannot be accessed or modified by unauthorized users or applications.
Prerequisites
You require the following prerequisites:
- IBM MQ as a Service queue manager
If you do not already have an IBM MQ as a Service queue manager, see Creating a queue manager.
You should have:
- An IBM MQ as a Service queue manager.
- Connection details downloaded in a connection_info.txt file (see Retrieving connection_info.txt).
- An admin username and apikey downloaded in a platformApiKey.json file (see Retrieving platformApiKey.json).
- An application username and apikey downloaded in an apiKey.json file (see Retrieving apiKey.json).
- IBM MQ Client
To complete this tutorial, you require the IBM MQ command line tool runmqsc as well as the IBM MQ sample applications amqsputc and amqsgetc installed and on your PATH. If you do not have these commands, you can get them by installing the IBM MQ Client. See IBM MQ C Client for details.
Setting up your terminal environment
- Open two terminal windows:
- One terminal will be the admin terminal, used to administer your queue manager
- One terminal will be the app terminal, used to represent an application connecting to the queue manager and performing message 'put' and 'get' operations
- Specify queue manager details in the admin terminal:
The runmqsc command that you use later requires an environment variable be set to identify the remote queue manager it should connect to. In the admin terminal, export MQSERVER variable with the following command:
export MQSERVER="CLOUD.ADMIN.SVRCONN/TCP/<HOSTNAME>(<PORT>)"<HOSTNAME>- this is 'hostname' in the file connection_info.txt<PORT>- this is 'listenerPort' in the file connection_info.txt
- Specify queue manager details in the app terminal:
The amqsputc and amqsgetc commands that you will use later also requires the environment variable be set to identify the remote queue manager they should connect to. In the app terminal, export MQSERVER variable with the following command: In the app terminal, export MQSERVER variable with the following command:
export MQSERVER="CLOUD.APP.SVRCONN/TCP/<HOSTNAME>(<PORT>)"<HOSTNAME>- this is 'hostname' in the file connection_info.txt<PORT>- this is 'listenerPort' in the file connection_info.txt
- Specify the app username
The amqsputc and amqsgetc commands also require an environment variable be set to specific which username they should use. In the app terminal, export MQSAMP_USER_ID with the following command:
export MQSAMP_USER_ID="<APP_MQ_USER>"<APP_MQ_USER>- this is 'mqUsername' in the file apiKey.json
- Disable Application AMS in the app terminalIn this tutorial we are enabling Queue Manager AMS. We therefore need to disable Application AMS (sometimes called Client AMS), so that only the queue manager performs AMS encryption and decryption, and the client does not. In the app terminal:
export MQS_DISABLE_ALL_INTERCEPT=TRUE
Create an alias queue, targeted at the default queue
In this section, you create an alias queue that is targeted at the default queue. When QM AMS has been enabled, the AMS interceptors trigger when a 'put' or 'get' is performed on the default queue. Therefore, despite the fact that the messages are encrypted on the queue, the message is readable as plain text when retrieved. To demonstrate that the messages are encrypted, you can use an alias queue. Retrieving messages via the alias queue does not trigger the interceptors on the default queue, so the message is retrieved as is, without decryption, and so gives an accurate view on whether the message is plain text or encrypted.
- Switch to the admin terminal
- Run runmqsc to connect to your remote queue manager:
runmqsc -c -u <ADMIN_MQ_USER> -w60 <QUEUE_MANAGER_NAME><ADMIN_MQ_USER>- this is 'mqUsername' in the file platformApiKey.json<QUEUE_MANAGER_NAME>- this is 'queueManagerName' in the file connection_info.txt-cinforms runmqsc it should connect to a remote queue manager using the MQSERVER variable
- The terminal prompts you for a Password
- This is your <ADMIN_API_KEY> = 'apiKey' in the file platformApiKey.json
- Terminal is now waiting for input
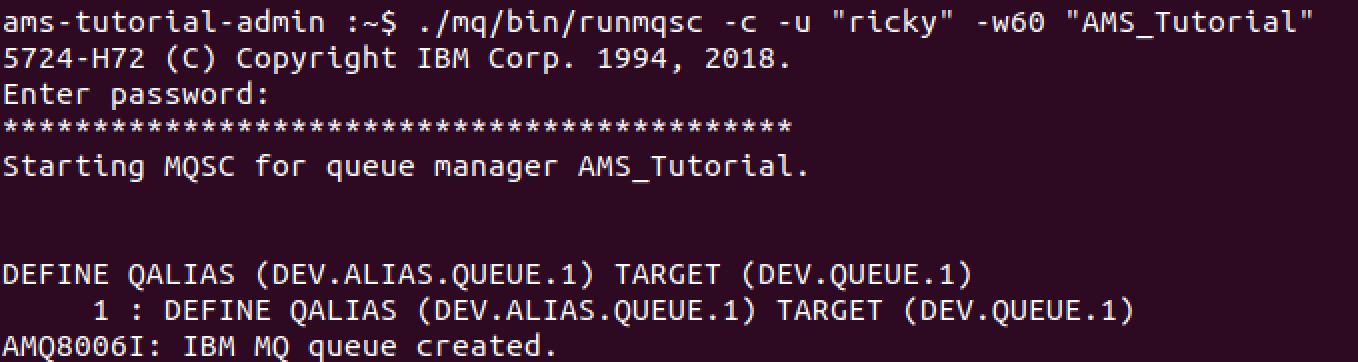
- Create an alias queue that targets your default queue:
DEFINE QALIAS (DEV.ALIAS.QUEUE.1) TARGET (DEV.QUEUE.1)- DEV.ALIAS.QUEUE.1 is our name for the alias queue
- DEV.QUEUE.1 is the default queue we are using in this tutorial
Test the alias queue before enabling queue manager AMS
To demonstrate that the alias queue is working correctly and that the messages are currently on the default queue in plain text, you now perform a 'put' of a message against the default queue and a 'get' of a message against the alias queue.
- Switch to the app terminal
- Run amqsputc to put a message on the default queue
amqsputc DEV.QUEUE.1
- The terminal prompts you for a Password
- This is your <APP_API_KEY> = 'apiKey' in the file apiKey.json
- Terminal will now be waiting for input. Enter a message and hit ENTER twice to exit from
amqsputc.

- Run amqsgetc against the alias queue to get the messages from the default
queue
amqsgetc DEV.ALIAS.QUEUE.1- DEV.ALIAS.QUEUE.1 is our name for the alias queue
- The terminal prompts you for a Password
- This is your <APP_API_KEY> = 'apiKey' in the file apiKey.json
- Terminal now outputs the messages from the default queue:

Select a certificate to use for AMS encryption
A queue manager channel must be configured to encrypt messages. IBM MQ as a Service comes with a default certificate provided by Let's Encrypt, which is used to encrypt the messages. Follow these steps to configure a queue manager channel for Queue Manager AMS:
- Navigate to your IBM MQ as a Service UI by following the instructions in Getting started with IBM MQ as a Service.
- The queue manager view opens. Select the queue manager you want to work with.
- Select the Key store tab:

- On the default certificate, click the 3 dots:

- Click Manage.

- Enable Use this certificate for queue manager AMS.

- Select the app channel CLOUD.APP.SVRCONN


- Click Next.

- Read the warning, then tick I understand and click
Save.You have now enabled queue manager AMS for the selected channel and selected the certificate to use for encryption.


- Click Copy details and paste into a text editor of your choice. Save this
as default_cert.txt as you will need the DN field contents later.

Create a policy to enable AMS encryption
You now configure the security policy on the individual queue in order to enable AMS. You identify that we will perform encryption, but not signing. No encryption or signing takes place until the security policy is configured on the relevant queues.
- In the admin terminal, create the policy with the following command. The terminal should
still be inside runmqsc. If not, run runmqsc against your
queue manager as you did before.
SET POLICY (DEV.QUEUE.1) ENCALG (AES256) RECIP ('<SUBJECT_DN>')- DEV.QUEUE.1 is the default queue we are using in this tutorial
- AES256 - the encryption we are using for this tutorial. Other algorithms can be found here
<SUBJECT_DN>- this is the 'Subject DN' in the file default_cert.txt, created at the last step of 'Select a certificate'. The single quotes around the Subject DN are required.
- Exit runmqsc, by typing
END.
Test the queue now that queue manager AMS is enabled
- Inside the app terminal, run amqsputc to put a message on the
default queue
amqsputc DEV.QUEUE.1 - The terminal will prompt you for a Password. This is your <APP_API_KEY> = 'apiKey' in the file apiKey.json.
- The terminal is now be waiting for input. Enter a message and press ENTER twice to exit from amqsputc
- Run amqsgetc against the alias queue to get the messages from the
default queue
DEV.ALIAS.QUEUE.1 is the name of the alias queueamqsgetc DEV.ALIAS.QUEUE.1 - The terminal prompts you for a Password. This is your <APP_API_KEY> = 'apiKey' in the file apiKey.json.
- The terminal now outputs the encrypted messages from the default queue:The message is not shown in plain text. This is because the message is encrypted on the default queue.

You have now completed this tutorial. You have enabled IBM MQ AMS on a queue, and you have demonstrated that this ensures that messages stored on the specified queue are encrypted.
Troubleshooting
- amqsputc returns reason code 2063
- This can occur if you have not selected a certificate for your channel. See Select a certificate to use for AMS encryption.

-
- amqsputc returns reason code 2035
- This can occur if you have not run
export MQS_DISABLE_ALL_INTERCEPT=TRUEas the last step of setting up your terminal environment, see Setting up your terminal environment.
- This can occur if you have not run

- amqsputc returns reason code 2035
Retrieving connection_info.txt
To retrieve the connection_info.txt file containing queue manager connection details:
- Navigate to your IBM MQ as a Service UI by following the instructions in Getting started with IBM MQ as a Service.
- The queue manager view opens. Select the queue manager you want to retrieve the connection info
from.

- Click Connection information.

- Download this file in JSON text format.
Retrieving platformApiKey.json
To create or reset your administrator api key:
- Navigate to your IBM MQ as a Service UI by following the instructions in Getting started with IBM MQ as a Service.
- The queue manager view opens. Select the queue manager you wish to retrieve the connection info
from:
- Next, select the Administration tab:
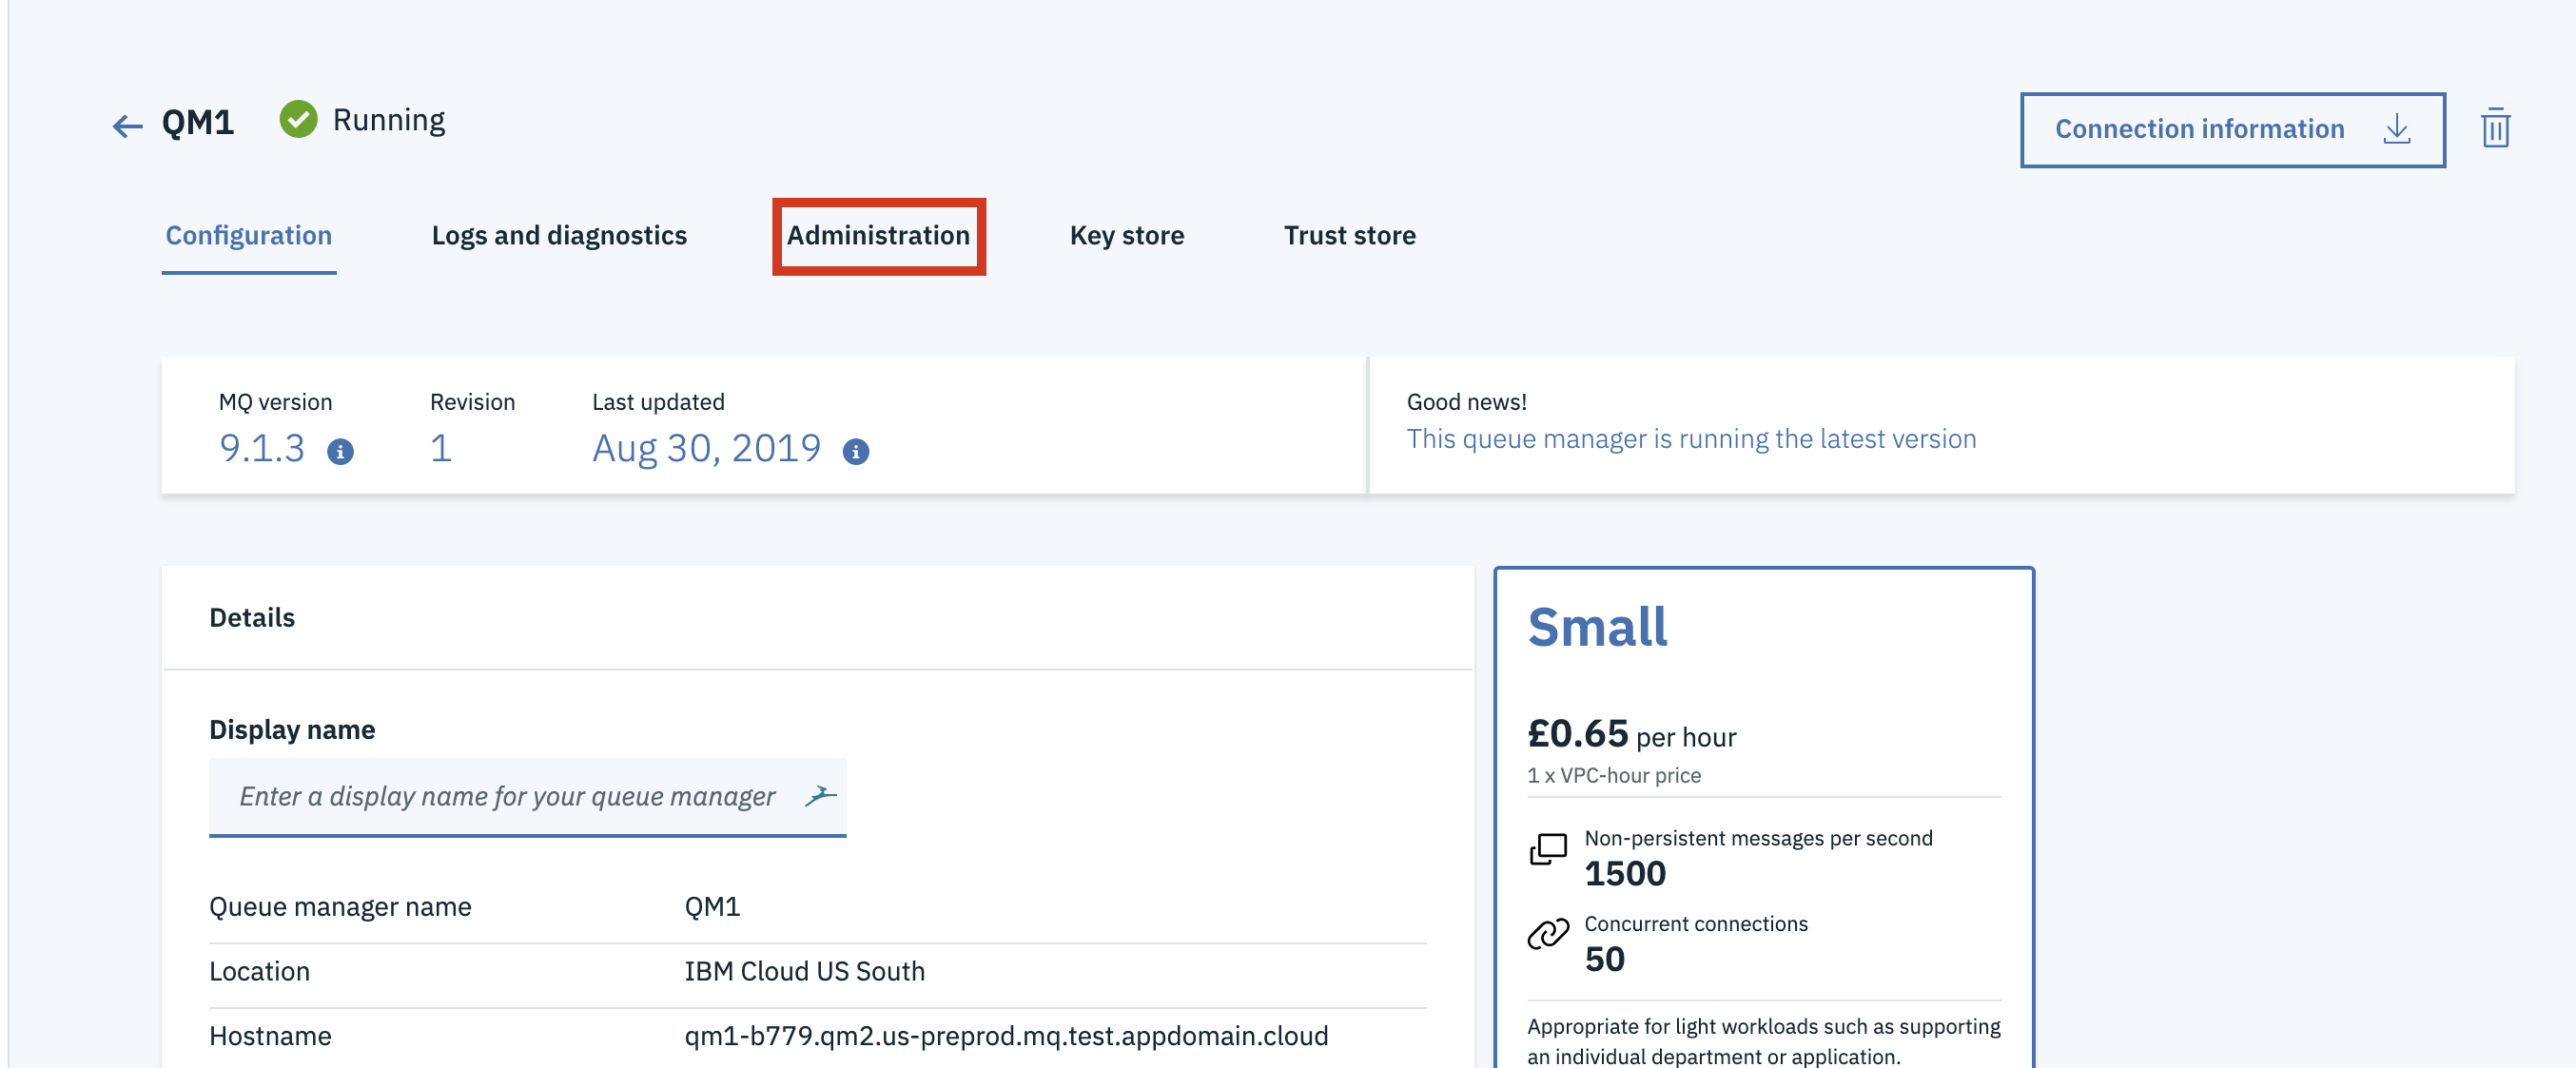
- Click Reset API Key button. The previous admin API key for this IBM MQ Username will no longer be valid.(If the button says Create API Key, then you have not created an api key in this way before. Click the CreateAPI Key button.
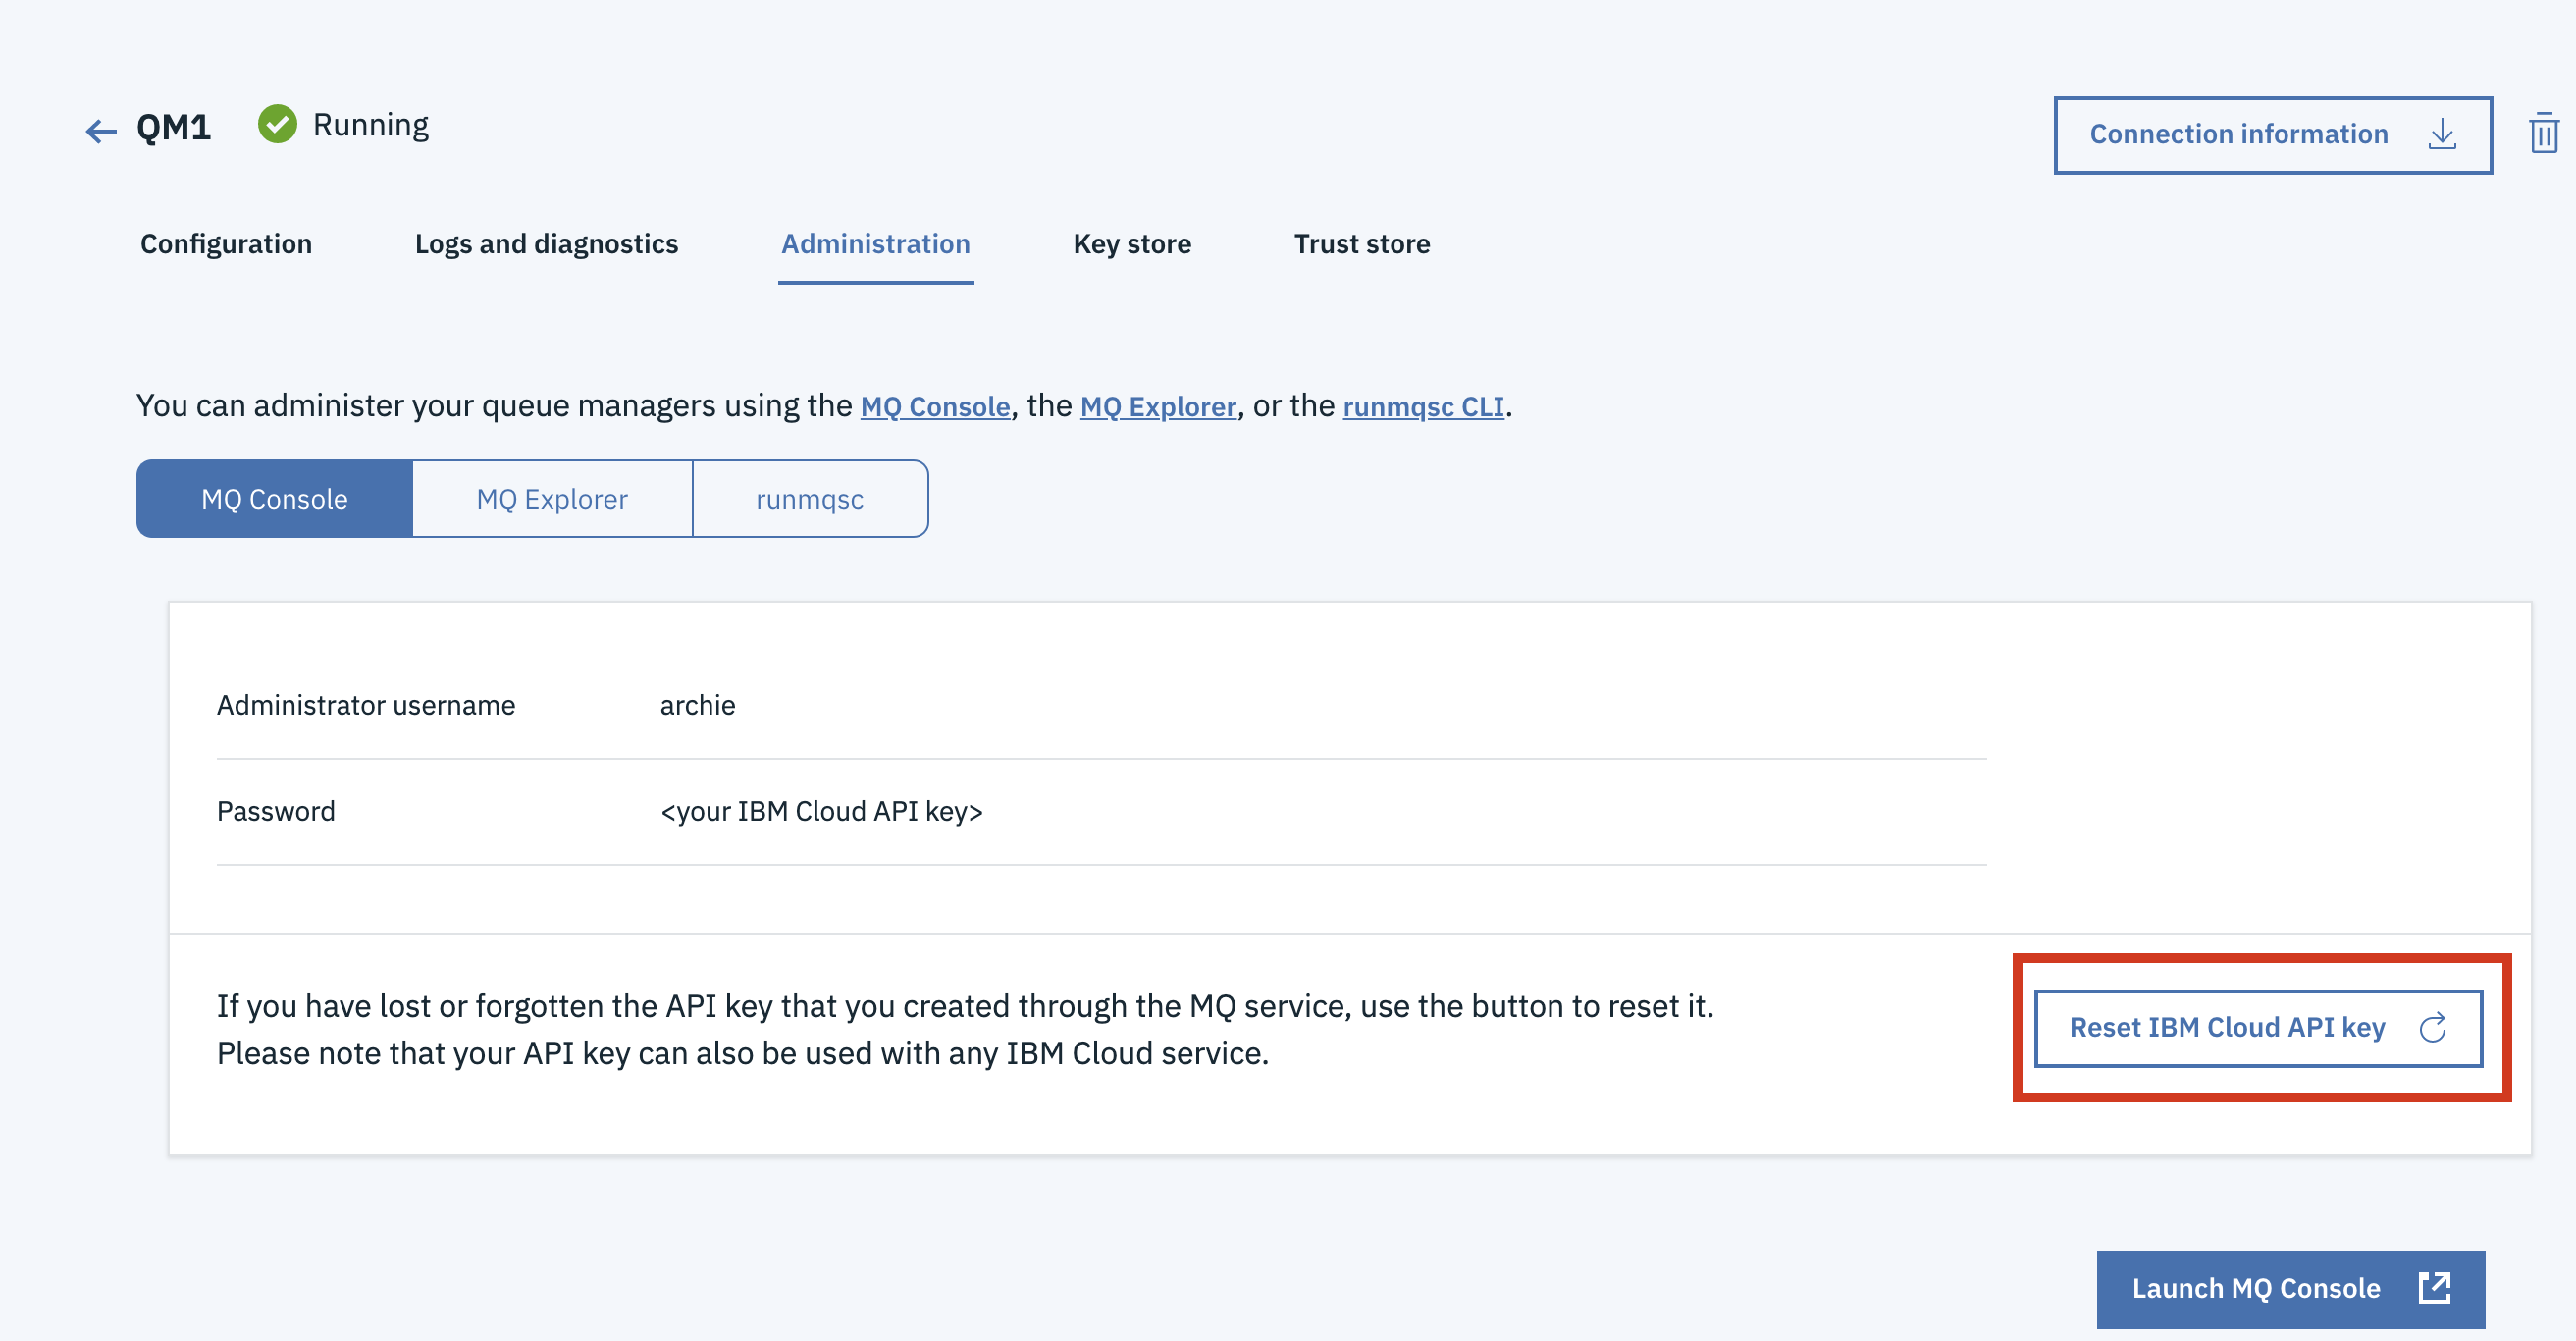
- Click Download to download the platformApiKey.json
file containing an admin username and apikey.

Retrieving apiKey.json
To create a new application api key:
- Navigate to your IBM MQ as a Service UI by following the instructions in Getting started with IBM MQ as a Service.
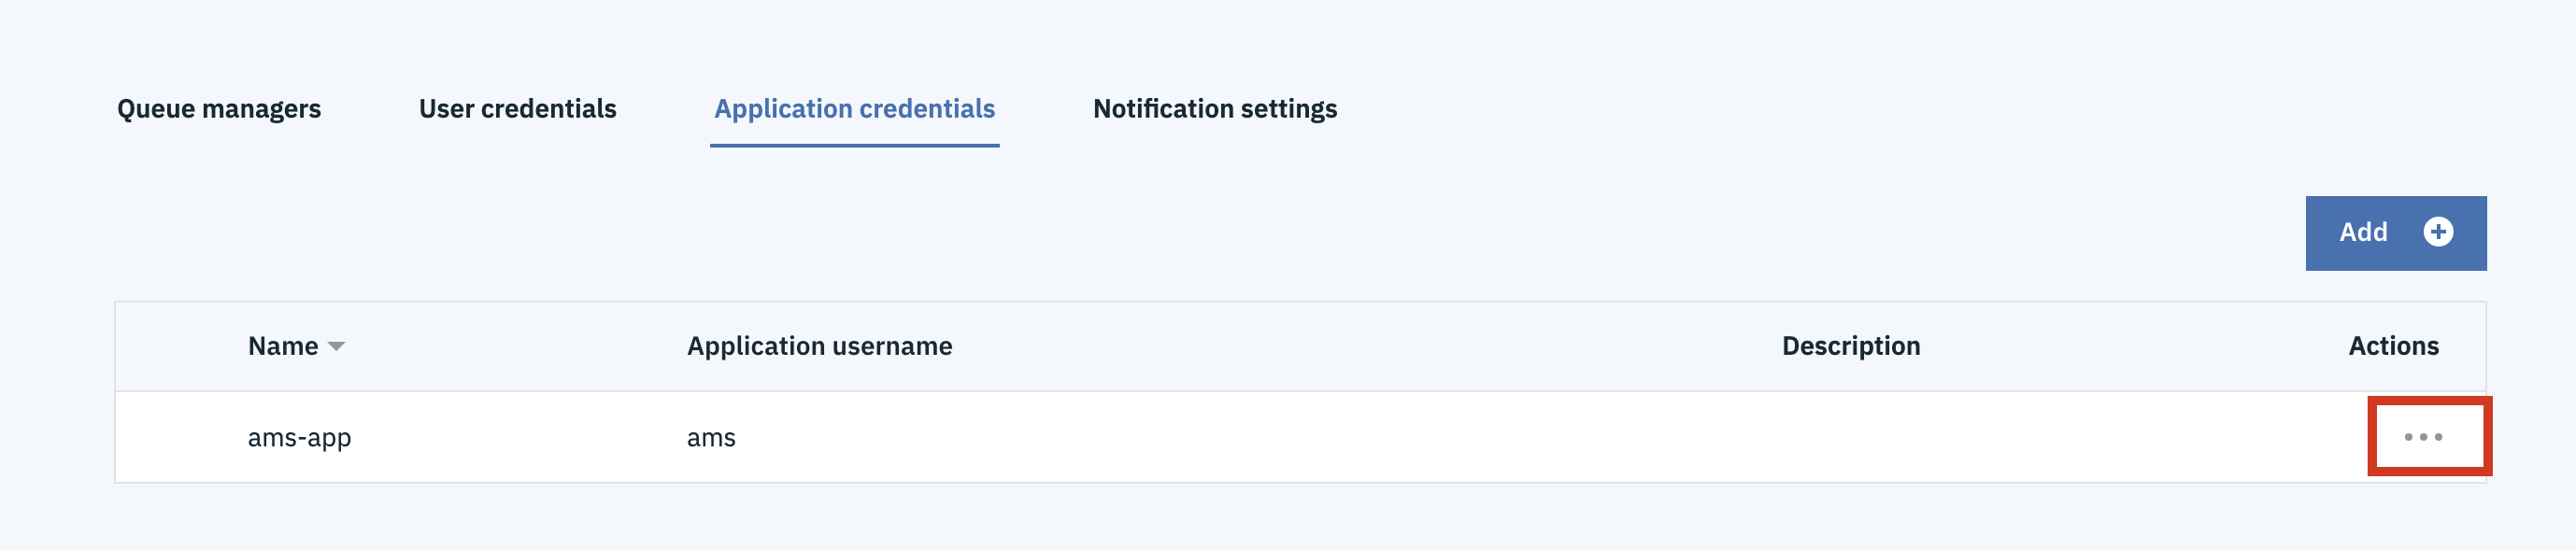
- This will open the queue manager view. Select the Application credentials
tab.
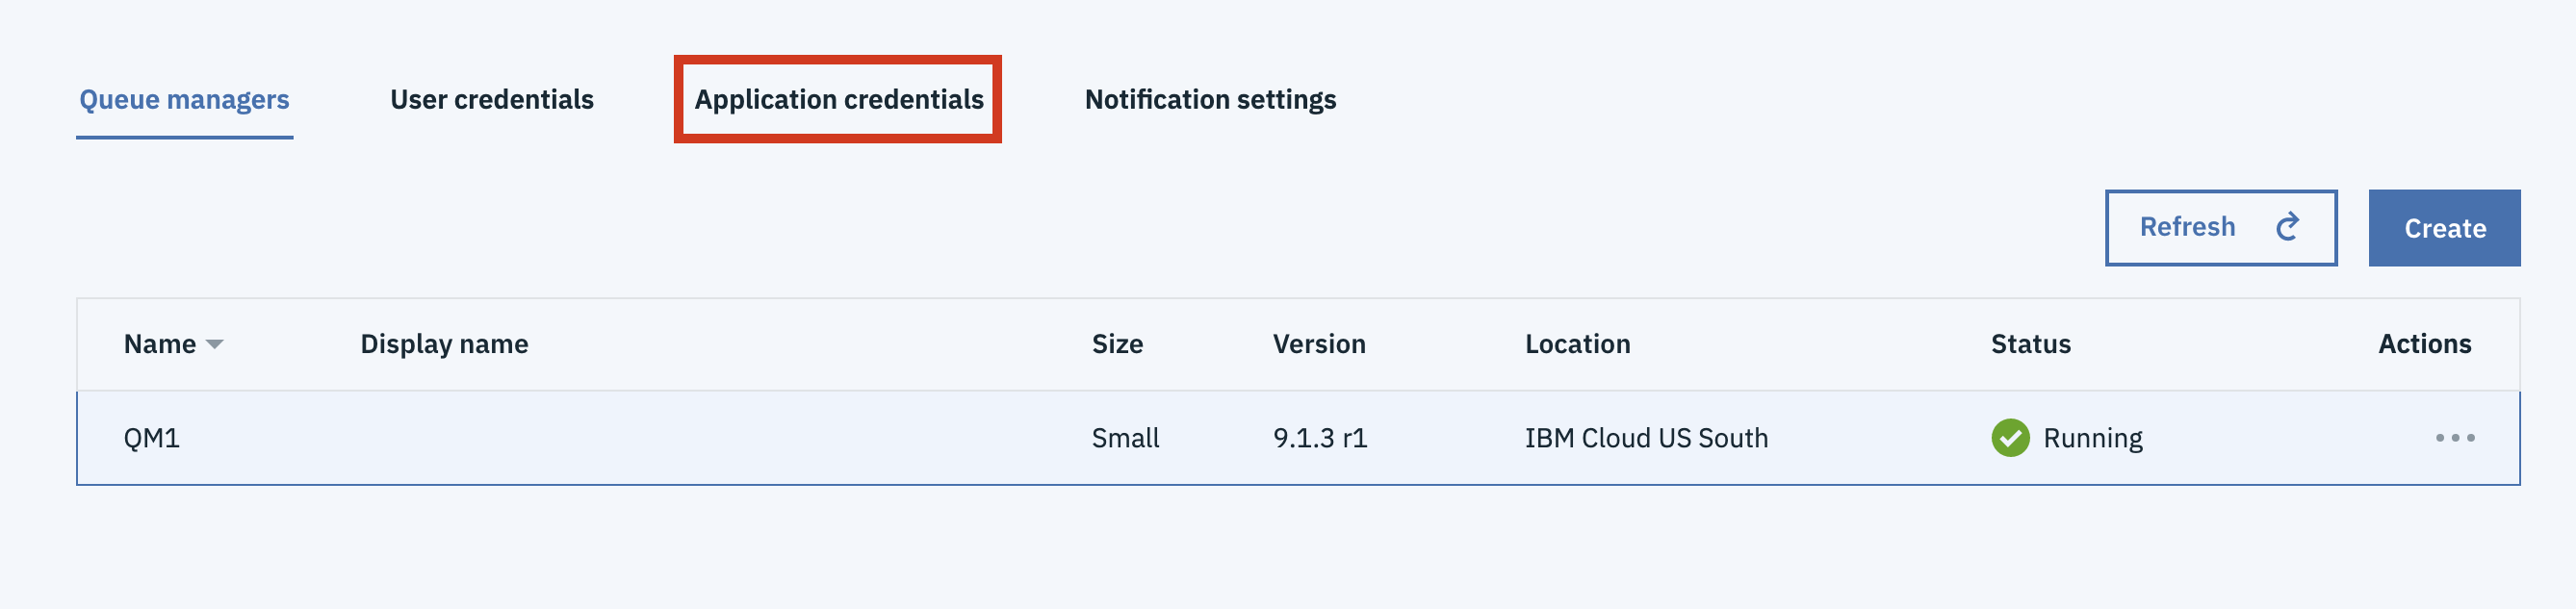
- Now click the 3 dots next to the application you will use for the AMS tutorial:
- Click Add new API key. Existing app API keys will continue to work:

- Click Download to download apiKey.json containing an
app username and apikey.

IBM MQ C Client
If you do not have the IBM MQ Client command line tool and samples (runmqsc, amqsputc, amqsgetc), you can download it from here.
- Select the latest package.
- Select the IBM MQ C redistributable client for your Operating System by ticking the box on the left of the package as shown below. It should have Redist in the file name. This tutorial was created using the Linux Ubuntu Operating system.
- Select to download via HTTPS, this will allow you to download the client directly through your
browser as shown below.If you do not have this option, try in an alternative browser.

- After clicking on continue, you are redirected to screen shown below. Click on the symbol as
shown by the red circle to begin your download.

- When downloaded, extract the file to a directory of your choice
<PATH_TO_MQCLIENT_DIR>tar -xvzf <IBM-MQC-Redist>.tar.gz <PATH_TO_MQCLIENT_DIR> - Add commands to
path:
export PATH=$PATH:<PATH_TO_MQCLIENT_DIR>/bin:<PATH_TO_MQCLIENT_DIR>/samp/bin