IBM Cloud Pak® for Data Version 4.7 will reach end of support (EOS) on 31 July, 2025. For more information, see the Discontinuance of service announcement for IBM Cloud Pak for Data Version 4.X.
Upgrade to IBM Software Hub Version 5.1 before IBM Cloud Pak for Data Version 4.7 reaches end of support. For more information, see Upgrading IBM Software Hub in the IBM Software Hub Version 5.1 documentation.
Creating batch deployments in Watson Machine Learning
A batch deployment processes input data from a file, data connection, or connected data in a storage bucket, and writes the output to a selected destination.
Before you begin
- Save a model to a deployment space.
- Promote or add the input file for the batch deployment to the space. For details on promoting an asset to a space, refer to Deployment spaces.
Supported frameworks
Batch deployment is supported for these frameworks and asset types:
- Decision Optimization
- PMML
- Python functions
- PyTorch-Onnx
- Tensorflow
- Scikit-learn
- Scripts (Python and R)
- Spark MLlib
- SPSS
- XGBoost
Notes:
- Batch deployments of Python functions and models based on the PMML framework can only be done programmatically.
- Your list of deployment jobs can contain two types of jobs:
WML deployment jobandWML batch deployment. - When you create a batch deployment (through the UI or programmatically), an additional
defaultdeployment job is created. The type of this job isWML deployment job. This is a parent job that stores all deployment runs generated for that batch deployment that were triggered by the Watson Machine Learning API. - The standard
WML batch deploymenttype job is created only when you create a deployment from the UI or by using thecpdctltool. Is is not possible to create aWML batch deploymenttype job by using the API. - This is the list of limitations of a
WML deployment job:- it cannot be edited
- it cannot be deleted unless the associated batch deployment has been deleted
- it doesn't allow for scheduling
- it doesn't allow for customizing notifications
- it doesn't allow for changing retention settings
For information on data sources that are used for scoring batch deployments, refer to Data sources for scoring batch deployments. For information on required input for scoring batch deployments, depending on model type, refer to Batch deployment input details by framework
Creating a batch deployment
To create a batch deployment:
-
From the deployment space, click the name of the saved model that you want to deploy. The model detail page opens.
-
Click New deployment.
-
Choose Batch as the deployment type and enter a name and description for your deployment.
-
Select hardware specification.
Restriction:You cannot create or select custom hardware specifications from the user interface in a deployment space. To learn more about ways to create and select a hardware specification, see Managing hardware specifications for deployments.
-
Click Create. When status changes to Deployed, deployment creation is complete.
- Watson Studio user interface, from an Analytics deployment space
- Watson Machine Learning Python Client
- Watson Machine Learning REST APIs
Viewing deployment details
Click the name of a deployment to view the details.
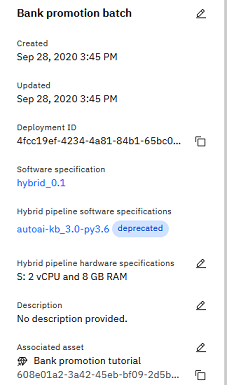
You can view the configuration details such as hardware and software specifications. You can also get the deployment ID, which you can use in API calls from an endpoint. For details, refer to Looking up a deployment endpoint.
Learn more
- For information on how to create a batch deployment job, refer to Creating jobs in deployment spaces.
- Refer to Machine Learning samples and examples for links to sample notebooks that demonstrate creating batch deployments that use the Watson Machine Learning REST API and Watson Machine Learning Python client library.
Parent topic: Managing predictive deployments