Tutorial: Connecting Keycloak to a SAML identity provider
IBM Cloud Pak® for Integration uses Keycloak for identity and access management (IAM) functions, such as assigning user roles and permissions, and connecting to third-party identity providers. This tutorial demonstrates how to connect Keycloak to a SAML identity provider so that your team can log directly into Cloud Pak for Integration through that SAML provider.

Configuring a SAML identity provider for login to the Cloud Pak for Integration enables you to manage identity and access management in your organization's identity provider. You can adapt this procedure for any SAML provider; Okta is used here as an example.
For a video demo of this tutorial, see Using a Keycloak SAML provider to integrate CP4I with Okta.
1. Get configuration values from Keycloak
Log in to your Platform UI instance with a user that has permissions to manage identity providers, for example, the
integration-adminuser.In the navigation panel, from the "Administration" group, click Access control. The "IBM Cloud Pak" Keycloak realm in the Keycloak UI opens. If you need to open the navigation panel, click the Navigation Menu icon at the top left corner of the screen.
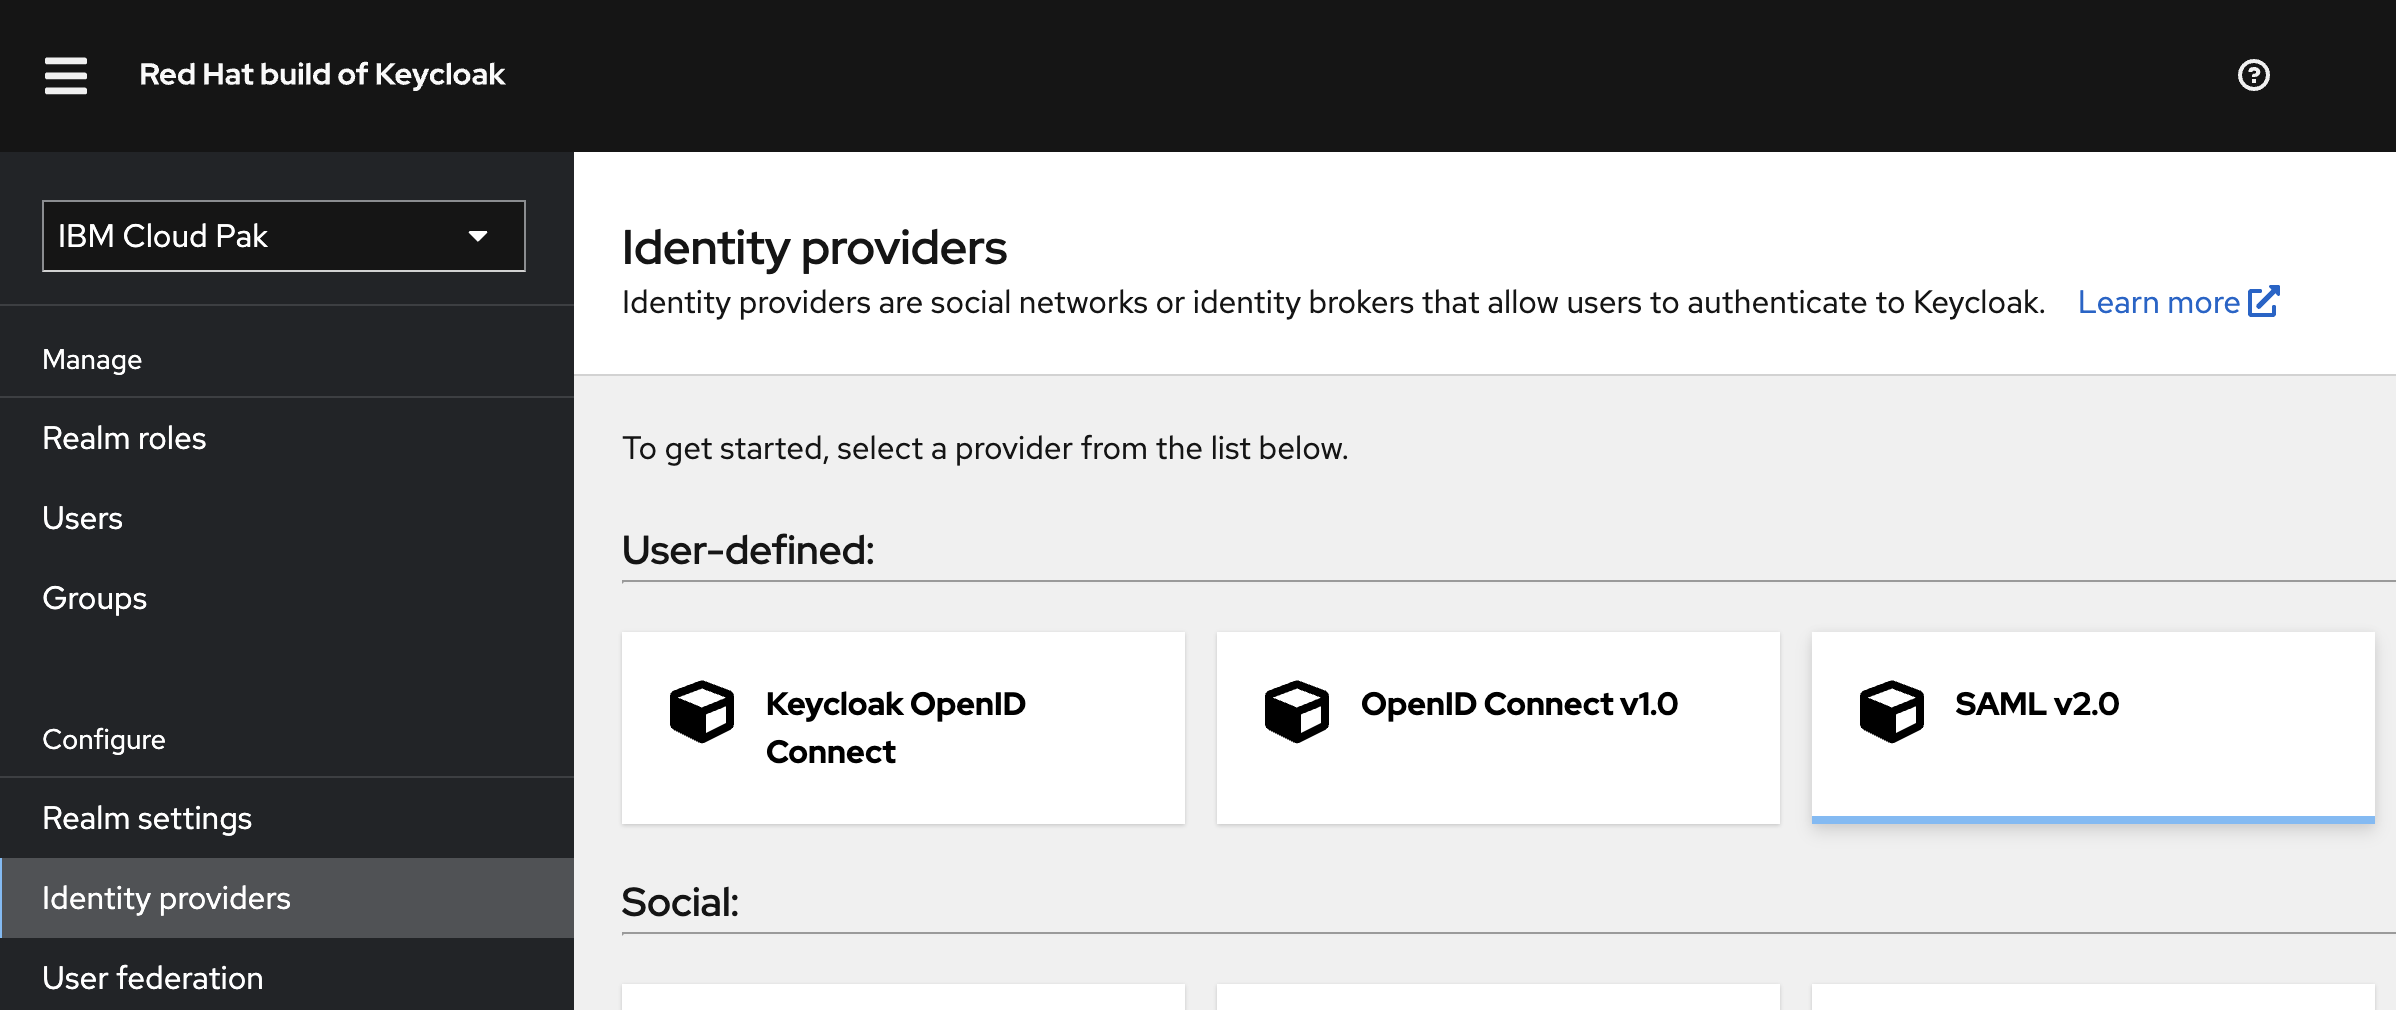
In the navigation pane, in the "Configure" group, click Identity providers.
In the "Identity providers" panel, click the SAML v2.0 tile.
The "Add SAML provider" panel contains information that you need to configure your identity provider so it can be used with Cloud Pak for Integration.
Add a value for Alias, in this case
okta. This action updates the URI string value in the Redirect URI field.Copy the values from the following fields. You will use those values in the next section.
Redirect URI
In the SAML settings section, Service provider entity

Keep this panel open; you will return to it in the last section, "Configure identity provider values in Keycloak".
2. Configure your identity provider to work with Keycloak
Log in to your Okta console. In the left navigation, click to open Applications and click Applications.
In the Applications panel, click the Create App Integration to add a new application to Okta.
In the "Create a new app integration" pane, select SAML 2.0 and click Next.
In the "Create SAML Integration" panel, enter
CloudPakin the App name field. Click Next.Configure the SAML settings. For each of the following fields, paste the value from Keycloak that you copied in the previous section:
Single sign-on URL - The redirect URI
Audience URI (SP Entity ID) - The service provider entity Keep all the other default values. Click Next to save your settings.
Skip the requested feedback step (or optionally, respond) and click Finish. Okta is now connected to the Cloud Pak for Integration application.
In the "CloudPak application" panel, click the Assignments tab, then click the Assign tab.
In the "Assign CloudPak to groups" pane, click the Assign button for the group you want.
Click the Sign On tab. In the "SAML setup" section of the right navigation panel, click the View SAML setup instructions button. A page that contains the data you need for configuring Keycloak opens.
From the Optional section, copy the value for Provide the following IDP metadata to your SP provider. Paste the value into a file and save the file locally to use in the next section.
3. Configure Keycloak with values from your identity provider
Go back to the "Add SAML provider" panel.
In the "SAML settings" section, configure these settings:
Set Use identity descriptor to Off.
In the Import config from file field, click Browse. Select the file that contains IDP metadata that you saved in the previous section. Click Open. Some fields are now automatically populated with values from the file.
Click the Add button to save your settings.
The okta identity provider is now available in Keycloak and it is listed as a SAML provider on the "Identity providers" page.
Click the Add button to save your settings. The
oktaidentity provider is now available in Keycloak and it is listed as a SAML provider on the "Identity providers" page.When you go to the login page for the Platform UI, you are presented with a new section, "Alternative logins", with an okta button. Click the button; you are redirected to the Okta login page.
After you log in to Okta, you are redirected to Keycloak. Enter the requested Keycloak account information to log in to Platform UI.
4. In your identity provider, configure Cloud Pak permissions for the SAML user
To complete the configuration process, configure permissions so that a user can log in to their personalized Keycloak dashboard from the Platform UI login page.
In Okta, click to expand the Applications section and click Applications.
In your "CP4I" application, in the "Settings" section, click Edit.
Scroll to the "SAML Settings" section and click Edit. The "Edit SAML integration" pane opens.
In the "Attribute Statements (optional)" section, edit the following fields, as indicated. Click the Add another button after each new row.
Name (enter a value) Name format (select a value) Value (select a value) email Basic user.email firstname Basic user.firstName lastname Basic user.lastName Click Next button to update the application with your values, then click the Finish button.
Pass these attributes through the SAML connection (from Okta) into Keycloak. In the Keycloak navigation menu, click Identity providers. From the list, click okta.
Click the Mappers tab, then click the Add mapper button.
In the "Add Identity Provider Mapper" panel, configure the following values:
In the Name field, enter the first attribute that you configured in your identity provider:
email.From the Mapper type menu, select Attribute Importer.
In the Attribute Name field, enter
email.From the User Attribute Name menu, select email to configure the field name that the user gets when logging in.
In the User Attribute Name field, select email.
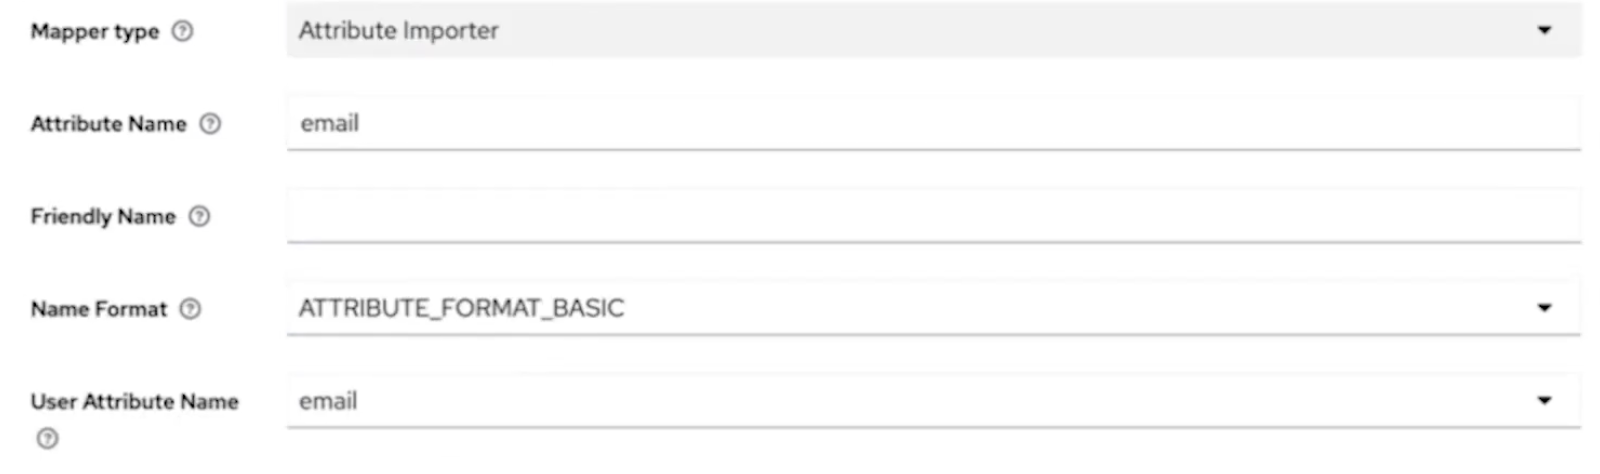
Click Save.
Click the Add mapper button. Configure the following values:
In the Name field, enter the first attribute that you configured in your identity provider:
email.From the Mapper type menu, select Attribute Importer.
In the Attribute Name field, enter
firstName.From the User Attribute Name menu, select firstName. Click Save.
Again, click the Add mapper button.
In the Name field, enter the first attribute that you configured in your identity provider:
email.From the Mapper type menu, select Attribute Importer.
In the Attribute Name field, enter
lastName.From the User Attribute Name menu, select lastName. Click Save.
Click the Add mapper button. In this example, you are creating a mapping between an attribute in Okta and the viewer role in Cloud Pak for Integration.
In the Name field, enter a name for the role in Okta (for example
cloudpak-viewers).From the Mapper type dropdown, select Hardcoded Role to ensure that any user that logs in to the Cloud Pak for Integration is assigned the viewer role by default.
For Role, click the Select Role button. In the "Assign roles to role" pane, click Filter by realm roles and change the filter to Filter by clients. From the list, select the role with a description of
viewer.
Click Assign, then click Save.
5. Log in to the Platform UI with your identity provider credentials
Go back to the login screen for the Platform UI. In the Alternative logins section, click okta. You do not need to enter your credentials; your identity provider recognizes you as a validated user and logs you in. The Platform UI welcome page opens.

You should now have viewer access.