Manually editing SPARQL or SQL Report Builder queries
With Report Builder, you can create reports to view data from across your projects. However, there are limitations to what you can do in the guided graphical interface. If you need to create more complex reports, you can use the native query language of the data source.
When you create a report, Report Builder generates the underlying query resource. If you are using Data Warehouse as the data source, an SQL query is generated. If you are using Lifecycle Query Engine, a SPARQL query is generated.
The query is displayed in the text editor in the Advanced section. When you create a report and then make changes, using the guided graphical Report Builder interface, the generated query is automatically updated, and it is read only.
- Application data related columns: These describe the data in terms that are familiar to each IBM® Engineering Lifecycle Management application.
- Data warehouse operational datastore mapping: This identifies where the data coming from the Engineering Lifecycle Management application is being stored in the data warehouse. Report Builder creates queries that run against this data warehouse.
Because the ability to manually edit the report queries is advanced functionality, and not all users are familiar with SQL or SPARQL query syntax, an administrator can specify that only report managers can edit the generated queries. See Limiting manual query editing to report managers.
Before you begin
Procedure
Manually adding columns
When you manually edit the generated query for a report, you can no longer use the Columns section of Report Builder to add new columns to the report; you must update the query itself to include new columns. However, you can use the Columns section to rearrange the column order and to update headings.
In the following example, the data warehouse is the data source. You start with the basic report on work items, and add a column for work item tags to the SQL query.
Before you begin
Procedure
-
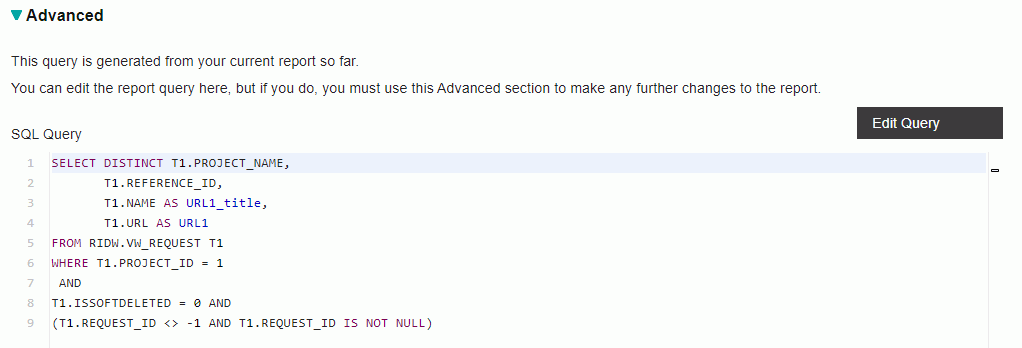
Expand the Advanced section in Report
Builder. The
generated SQL query looks like this:
- Click Edit query.
-
The items under
SELECTare the columns currently defined for the report. To add a column for tags, insert a line above that lastSELECTitem (T1.URL) and add the following statement:T1.TAGS as Tags,. -
Click Validate Query. The generated SQL query looks like this:
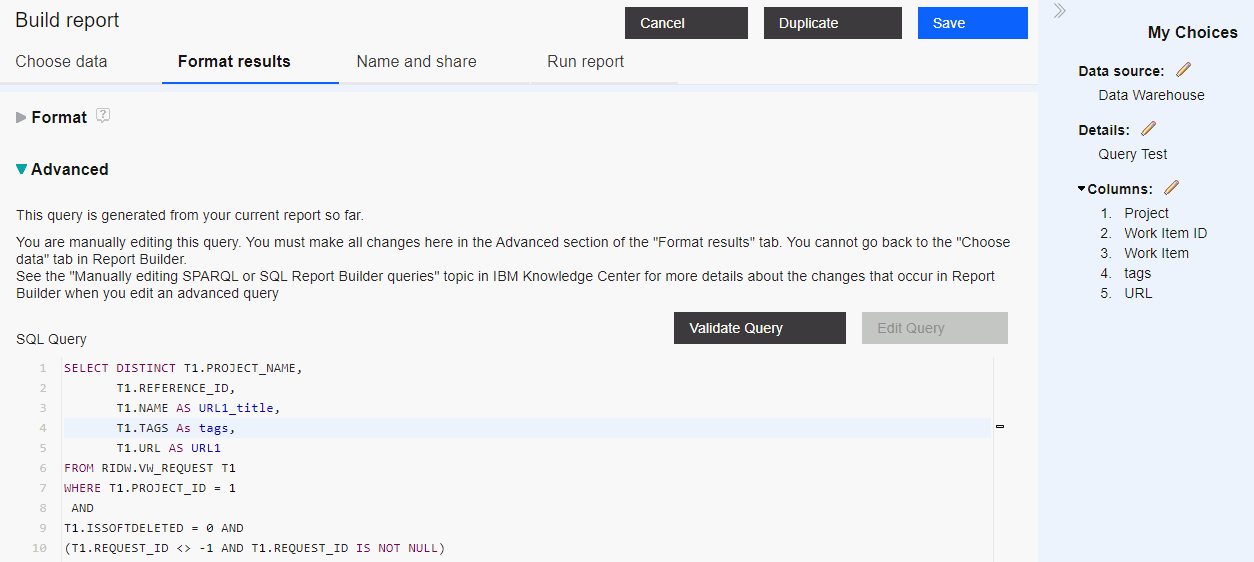 Note that the new column is included in the list in the My Choices pane.
Adding dynamic filters
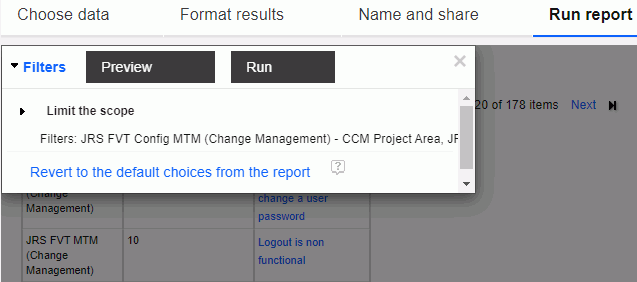
When you run a report, you can use dynamic filters to enter alternative values to filter the report data. When you create a report using the Report Builder user interface, dynamic filters are automatically generated for certain variables in the SELECT statements of the query. However, not all variables generate dynamic filters. You can explicitly add template parameters to the query logic to ensure that particular variables are available as dynamic filters for use with the report.
More details about filter annotations are available on the Jazz wiki.
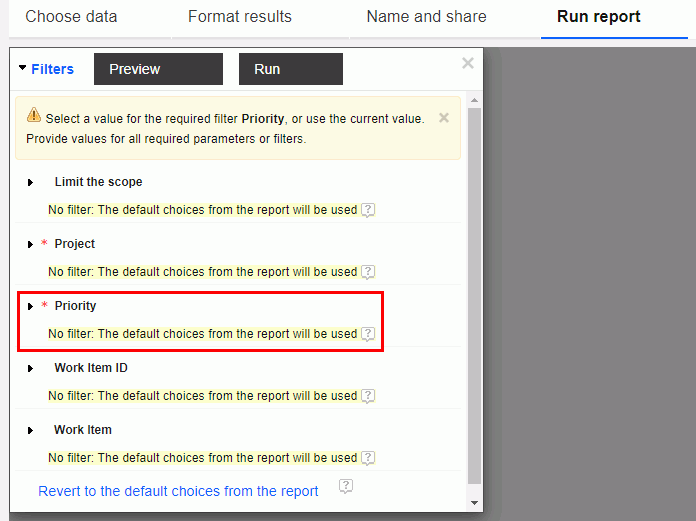
For SQL, template parameters are defined by a string that is within dollar signs ($), such as $Priority$. This string defines a text parameter for priority that will be substituted into the query at run time, based on what the user enters when they click the lock on the dashboard. When they run the report, the filters list includes Priority.
In the following example, the data warehouse is the data source. You start with the basic report on work items that includes columns for Complexity and Creation Date, and add a dynamic filter for Priority to the SQL query.
Procedure
-
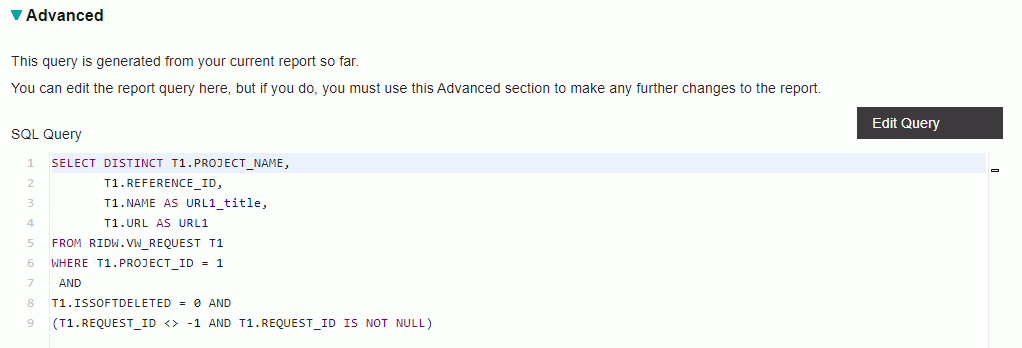
Expand the Advanced section in Report
Builder. The
generated SQL query looks like this:
 The dynamic filters that are available when you run the report looks like this:
- Click Edit query.
-
To add a dynamic filter for priority, under the
WHEREstatement, insert a line after the first item (T1.PROJECT_ID = 1), and add the following lines:ANDandT1.REQUEST_PRIORITY='$Priority$'. -
Click Validate Query. The generated SQL query looks like this:
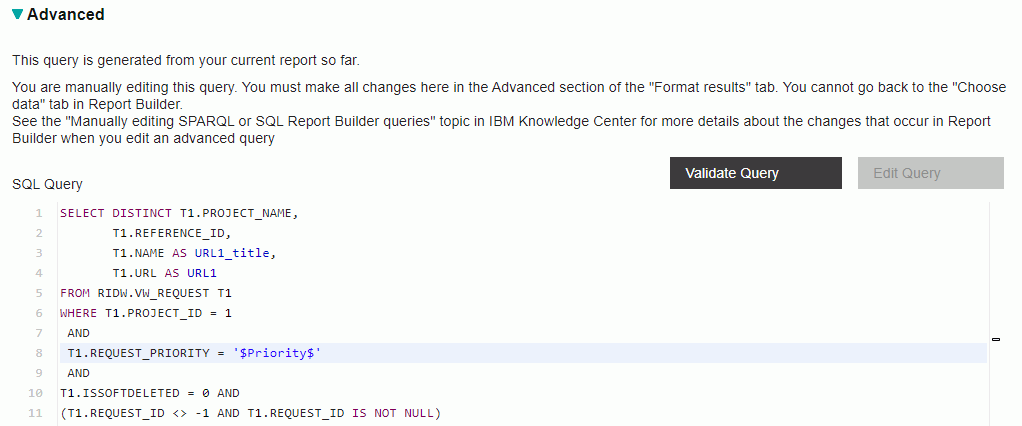 The dynamic filters that are available when you run the report looks like this:
Limiting manual query editing to report managers
Before you begin
Procedure
-
Open Report
Builder, and click
the Administration icon
 on the product banner and select Data
Sources or click Data Sources in the Connect to data
sources pane.
Alternatively, you can navigate to https://server_name:port/rs/endpoint
 - On the Data Sources page, click a data source name in the list.
-
In the Data source properties section, enable the Allow only
report managers to edit queries checkbox, then click Save.

- Optional: Repeat these steps for each data source.