Fix Readme
Abstract
This readme document contains guidance for installation of the upgrade package available on Fix Central to upgrade an IBM InfoSphere Information Server version 11.7.1.0 installation, These instructions can also be used if version 11.7.1.0 Service Pack 1 or Service Pack 2 is installed, but additional steps may be needed.
Content
1) Introduction
Use this document to upgrade your 11.7.1 installation.
You can
1. add a Microservices tier
2. add additional nodes
3. add the Watson Knowledge Catalog Lite or Professional plan
4. upgrade Watson Knowledge Catalog Lite plan to the Professional plan
See the instructions for Suite install of IBM InfoSphere Information Server 11.7.1.0 with a Microservices tier for information on the following:
1. Microservices tier system requirements and configuration
2. Installing Watson Knowledge Catalog
2) Provide a password or set up passwordless SSH to install or upgrade the Microservices tier
In this case, you do not have to setup passwordless SSH from the Information Server host to the master node.
However, for a multiple nodes environment, you must set up passwordless SSH for the root user from the master node to the worker nodes.
The specified non-root user must have sudo privilege with NOPASSWD enabled.
In this case, you do not have to setup passwordless SSH from the user running the install on the Information Server host to the master node.
For a multiple nodes environment:
ii. you must set up passwordless SSH for the specified non-root user from the master node to the worker nodes
You should set up passwordless SSH from the user running the install on the Information Server host to the master node.
For a multiple nodes environment, passwordless SSH must also be set up for the root user from the master node to the worker nodes.
The specified non-root user must have sudo privilege with NOPASSWD enabled.
You should set up passwordless SSH from the user running the install on the Information Server host to the master node.
For a multiple nodes environment:
i. the specified non-root user must be set up in the same manner on all nodes
ii. passwordless SSH must also be setup for the specified non-root user from the master node to the worker nodes
a. A "sudo: sorry, you must have a tty to run sudo" message when sudo is invoked.
b. While "yum install zip" is running, you may get a message
"ERROR: With yum install of zip. You can try to install requirement manually"
This error can appear even if zip is installed as needed.
In your /etc/sudoers, you will have to disable "requiretty" globally or at a user/group/command level:
You can change your global sudo configuration by replacing "Defaults requiretty" with "Defaults !requiretty".
Defaults:myuser !requiretty
a. If the file /root/.ssh/id_rsa.pub does not exist, create the SSH Keys with the following command:
> ssh-keygen -f /root/.ssh/id_rsa -q -N ""Copy
b. Copy the SSH public key to the Microservices Tier node with the following command:
> ssh-copy-id -i /root/.ssh/id_rsa.pub root@<enterprise search="" node="">Copy
c. Validate the root passwordless SSH connection to the Microservices Tier node with the following command:
> ssh root@<enterprise search="" node=""> hostnameCopy
A non-root user with sudo privileges can be setup for passwordless SSH in the same manner.
3) Downloads
3.1) If you are installing or upgrading the Microservices tier, download the Microservices tier pre-requirements verification script from IBM Fix Central.
See Technote to verify that your system meets the requirements for usage as the Microservices tier of IBM InfoSphere Information Server 11.7.1.0.
3.2) Update the Update Installer to the latest
3.2.1) On the Information Server host, download the Update Installer from
http://www.ibm.com/support/docview.wss?uid=swg24038034
3.2.2) Instructions to update the Update Installer.
See section “Installing a new version of the Update Installer before installing an update, fix, or patch”.
3.3) On the Information Server host, you should download the Information Server 11.7.1.0 Microservices ispkg image from IBM Fix Central, if you are going to do one of the following:
a. add a Microservices tier, with or without Watson Knowledge Catalog
b. add Watson Knowledge Catalog to your Microservices tier
c. upgrade Watson Knowledge Catalog Lite to Watson Knowledge Catalog Professional
For example, patch_JR60997v4_microservices_all_1171.ispkg
3.4) On the Microservices tier, you will need to download one or more images from IBM Passport Advantage depending on your installation choices.
For details on locating the images see http://www.ibm.com/support/docview.wss?uid=ibm10878310
3.4.1) If you have to install the Microservices tier, download "IBM Information Server Enterprise Search v11.7.1 for Linux".
For example, is-enterprise-search-11.7.1.tar.gz
3.4.2) If you are installing Watson Knowledge Catalog, download the Watson Knowledge Catalog Lite image.
For example, WKC-lite-11.7.1.tar.gz
3.4.3) If you are installing the Watson Knowledge Catalog Professional plan, download:
1. Watson Knowledge Catalog Professional image
See http://www.ibm.com/support/docview.wss?uid=ibm10878310 for details on locating the images.
For example, WKC-pro-11.7.1.tar.gz
2. Watson Knowledge Catalog Professional Bundle Spec file to the Information Server host
For example, IS_V1171_WKC_Pro_bundle_spec.zip
The Watson Knowledge Catalog Professional Bundle Spec file should be unpacked into the folder:
<Information Server install location>/_uninstall
> unzip -d /opt/IBM/InformationServer/_uninstall IS_V1171_WKC_Pro_bundle_spec.zip
You should have a directory structure …/_uninstall/ProductBundles/WKCPro/…
4) Upgrade scenarios for Information Server 11.7.1 installations
4.1) Instructions for upgrading an installation that does not have a Microservices tier
You can add a Microservices tier with a single node or multiple nodes to your installation. You may also choose to install Watson Knowledge Catalog Lite or Professional plan at the same time.
If not already done, run the Microservices tier pre-requirements verification script to validate that the master node meets the requirements for the Microservices tier.
See "Preparing the Information Server 11.7.1 microservices tier node" for details of the steps needed to set up the Microservices tier. You can use this pre-installation checklist while setting up the Microservices tier.
Installation of the Microservices tier will place the following packages on your system. If you have any of these packages on the system prior to the install, they must be at exactly the same level as indicated below, or the install will fail:
Version of RPM Packages
You should address "Known issues while installing or upgrading Information Server to version 11.7.1.0" prior to starting the install.
4.1.1) Add Microservices tier in GUI mode
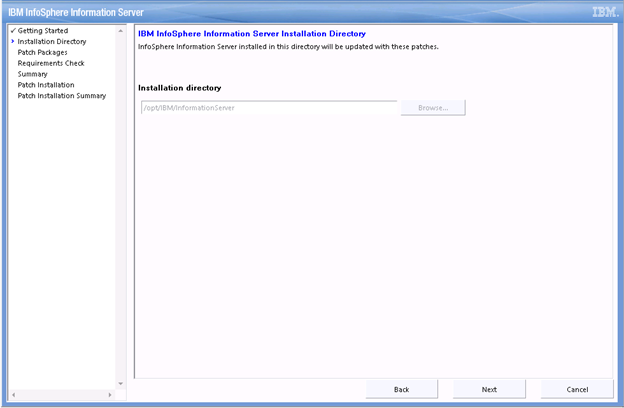
4.1.1.1) Login to the Information Server host. Change directory to <IS_HOME>/Updates/bin
For example, cd /opt/IBM/InformationServer/Updates/bin
4.1.1.2) Verify that the Update Installer version is 11.7.1.033 or later:
./installUpdates -version
4.1.1.3) Initiate the install with the following command
./installUpdates
This will launch the Update Installer in GUI mode.
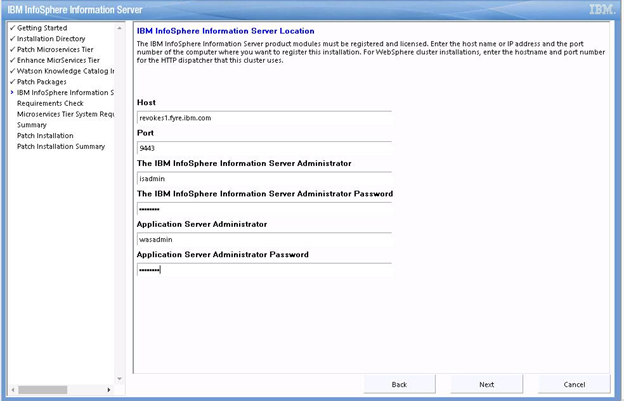
4.1.1.4) Provide information as required in each panel to complete the install.
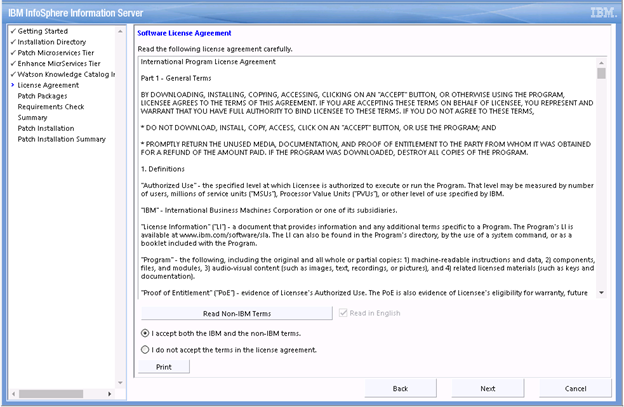
Click Login.

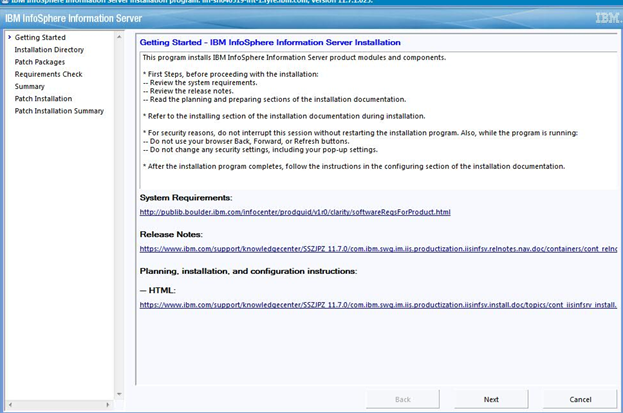
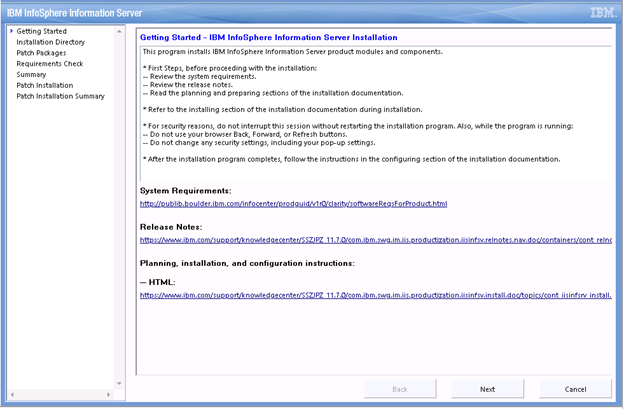
4.1.1.5) Getting started – Click Next.
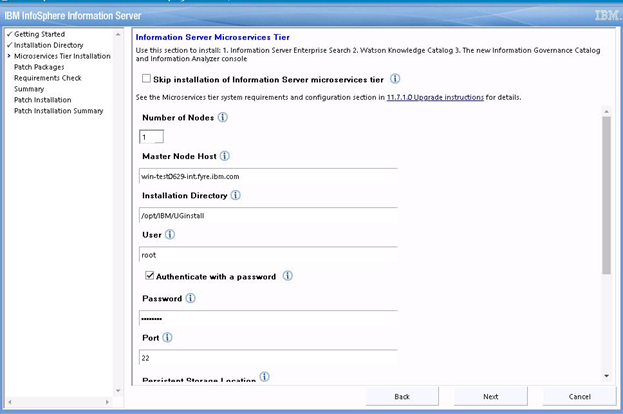
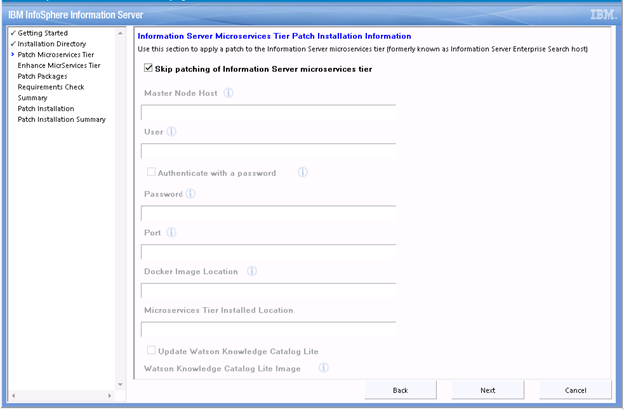
4.1.1.7.1) Installation of Microservices tier:
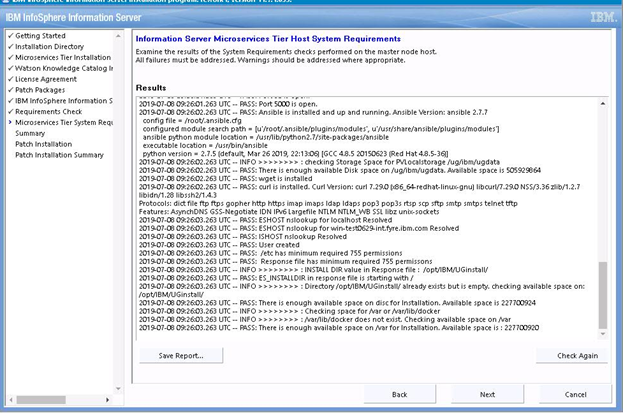
a. You can find details in the "Microservices tier system requirements and configuration" section of Technote 0876350.
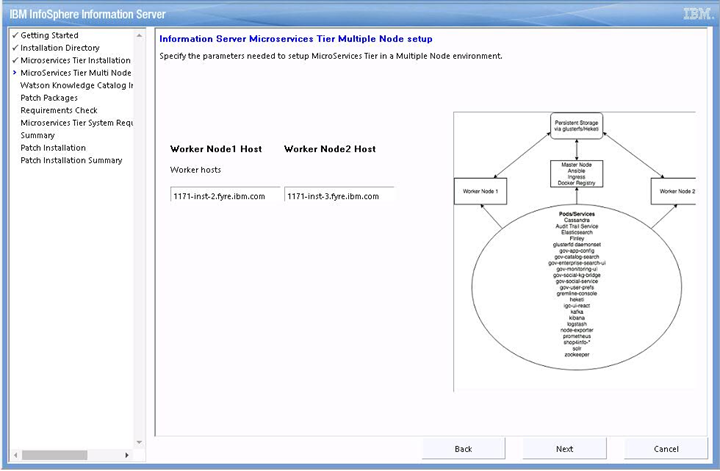
b. In "Number of Nodes", specify 1 for single node, or 3 for multiple nodes.
c. For details on "Authenticate with a password" see section 2.
d. For the Persistent Storage location, specify a directory on a local file system that has at least 300 GB of free disk space; do not specify a device location.
4.1.1.7.2) You may also choose to install Watson Knowledge Catalog Lite or Professional edition.
For Watson Knowledge Catalog Lite edition
a. Select the check box "Install Watson Knowledge Catalog Lite"
b. Provide the location of Watson Knowledge Catalog Lite Image
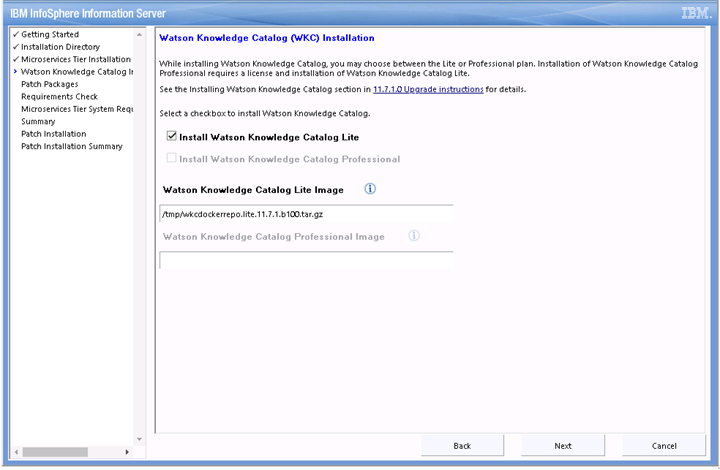
For Watson Knowledge Catalog Professional edition
a. Select the check box "Install Watson Knowledge Catalog Professional"
b. Provide the location of Watson Knowledge Catalog Lite Image
c. Provide the location of Watson Knowledge Catalog Professional Image
Click Next.
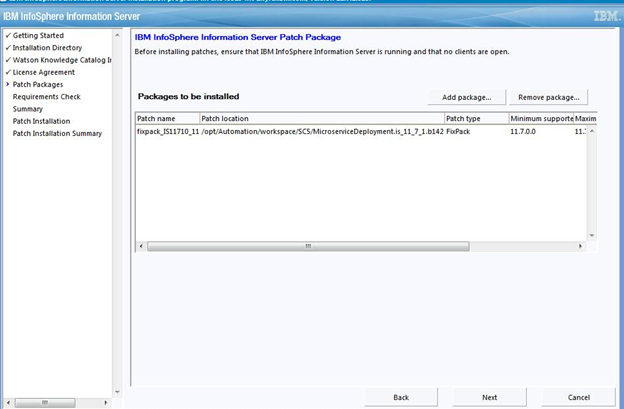
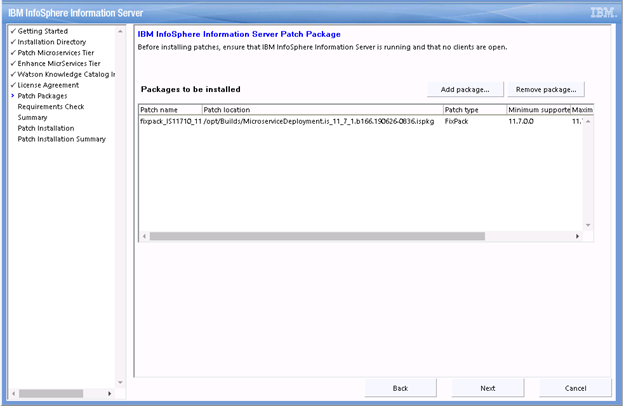
4.1.1.9) Select the Information Server 11.7.1.0 Microservices ispkg image for installation. Click Next.
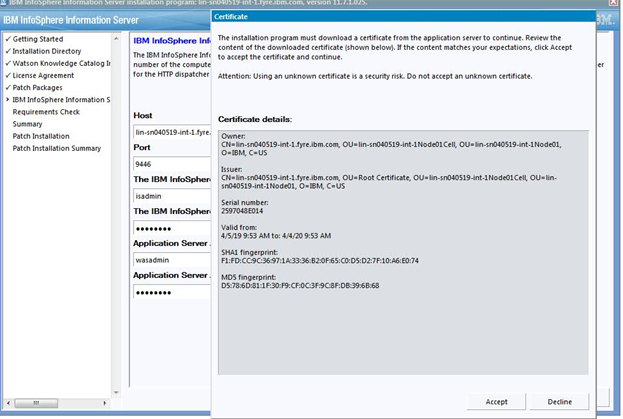
Accept the certificate and click Next.
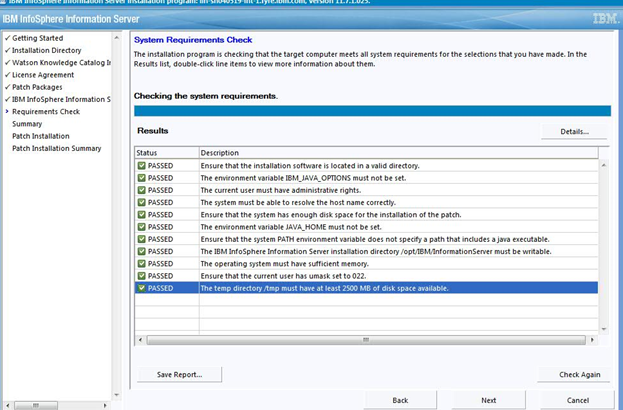
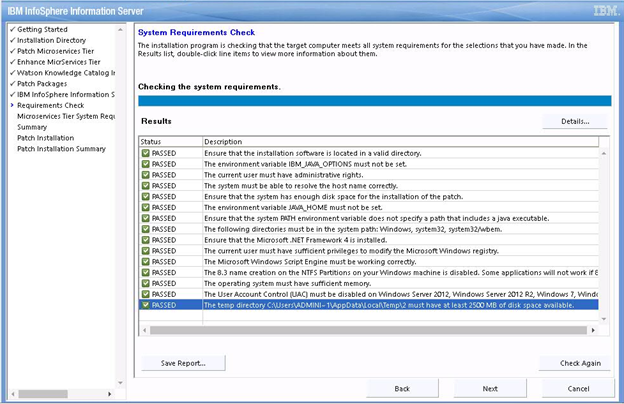
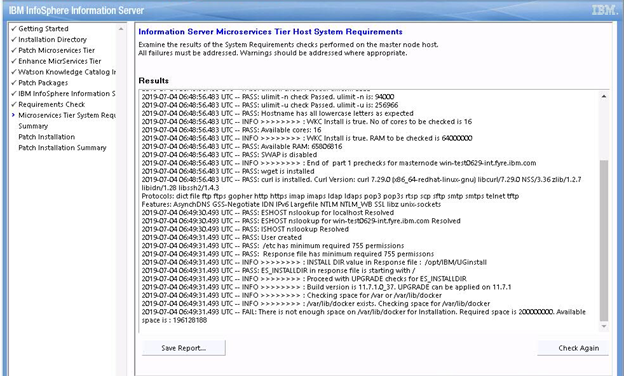
Likewise, confirm the System Requirements of the Microservices tier have passed and click Next.
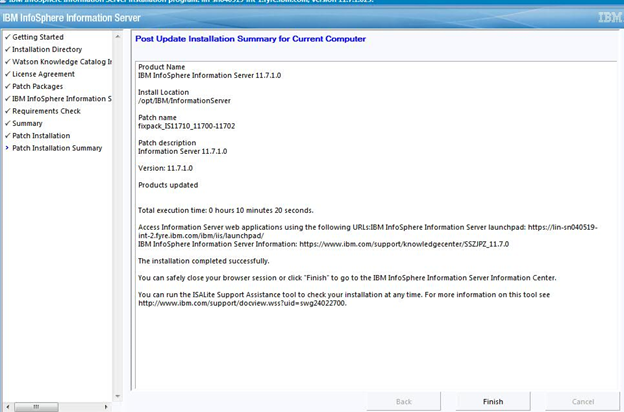
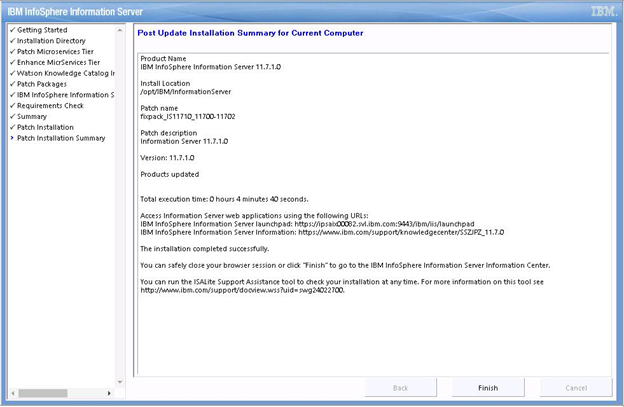
4.1.1.13) Click the Finish button after the installation completes.
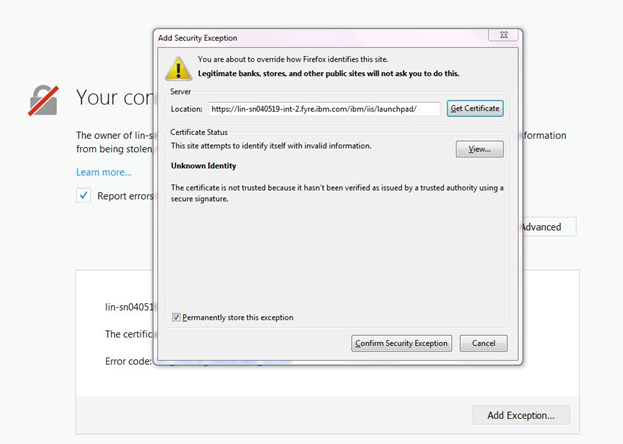
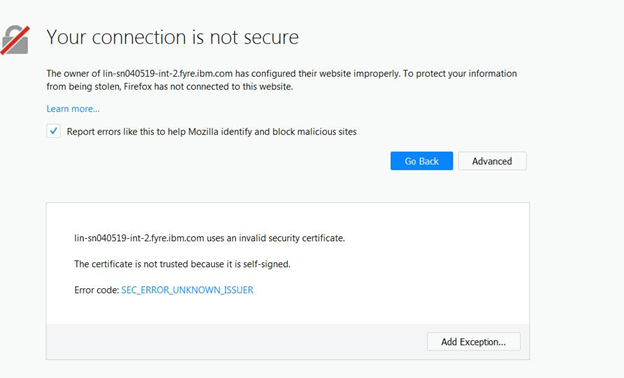
4.1.1.14) Click “Advanced” and then click "Add Exception".

4.1.1.15) Click “Confirm Security Exception”.
4.1.1.17) If you previously installed version 11.7.1.0 Service Pack 1 or Service Pack 2, you have completed addition of a version 11.7.1.0 Microservices tier.
The newly added Microservices tier should be upgraded to the corresponding Service Pack level.
Use
JR61287 to upgrade the newly added tier to Service Pack 1, or
JR62078 to upgrade the newly added tier to Service Pack 2
4.1.2) Add Microservices tier in console mode
4.1.2.1) Login to the Information Server host. Change directory to <IS_HOME>/Updates/bin
For example, cd /opt/IBM/InformationServer/Updates/bin
4.1.2.2) Before running the Update Installer, check the system requirements and make sure that your system meets the requirements.
4.1.2.3) Verify that the Update Installer version is 11.7.1.033 or later:
./installUpdates -version
4.1.2.4) Run the Update Installer to upgrade Information Server.
For example, installUpdates -i /opt/IBM/InformationServer/ -p /tmp/patch_JR60997v4_microservices_all_1171.ispkg -verbose -console -properties <full path to property_file_name>
where
patch_JR60997v4_microservices_all_1171.ispkg is the ispkg file you downloaded from IBM Fix Central
<property_file_name> is the name of the property file wherein you specify values for the various properties that control the install.
The Update Installer will prompt you for the Information Server Administrator user id and password, and the WebSphere Administrator user id and password.
4.1.2.5) See Technote for issues you may need to address after the install is completed.
4.1.2.6) If you previously installed version 11.7.1.0 Service Pack 1 or Service Pack 2, you have completed addition of a version 11.7.1.0 Microservices tier.
The newly added Microservices tier should be upgraded to the corresponding Service Pack level.
Use
JR61287 to upgrade the newly added tier to Service Pack 1, or
JR62078 to upgrade the newly added tier to Service Pack 2
4.2) Instructions for upgrading an installation that has a Microservices tier (without Watson Knowledge Catalog)
You can add the Watson Knowledge Catalog Lite or Professional plan to your installation. However, support for upgrading from single node to multiple nodes is currently not provided.
4.2.1) Add Watson Knowledge Catalog in GUI mode
4.2.1.1) You will follow the same steps listed in 4.1.1; the only difference is to replace step 4.1.1.7 with the following step:
Select the checkbox to "Skip patching of Information Server microservices tier" and click Next.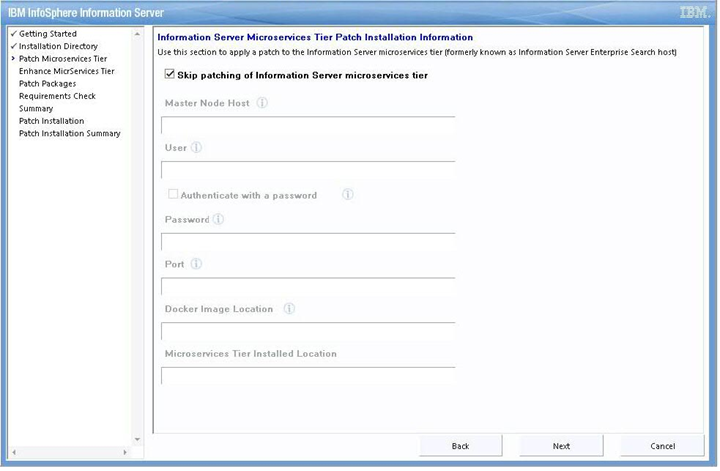
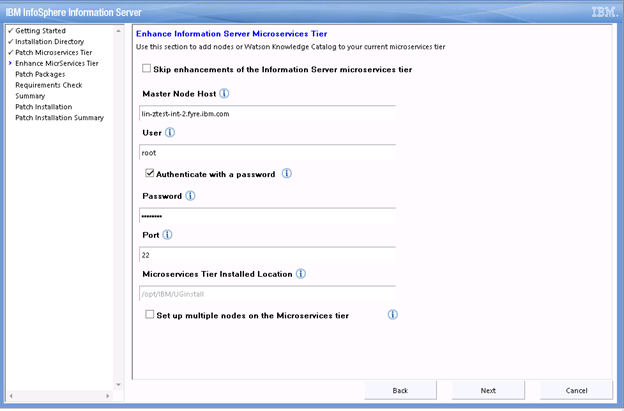
You can now choose to enhance your Microservices tier by leaving unchecked the check box "Skip enhancements of the Information Server microservices tier".
See Section 2 for information on "Authenticate with a password". Provide information about your Microservices tier and click Next.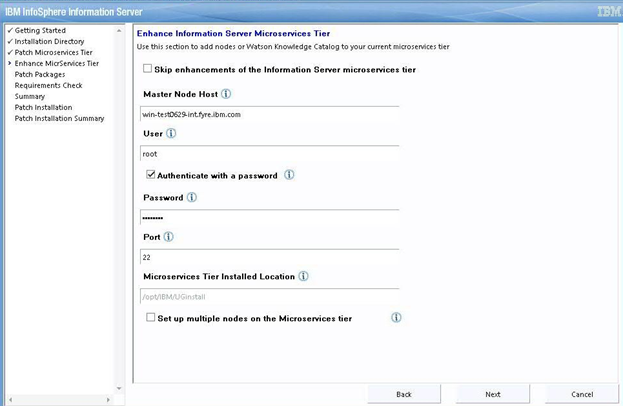
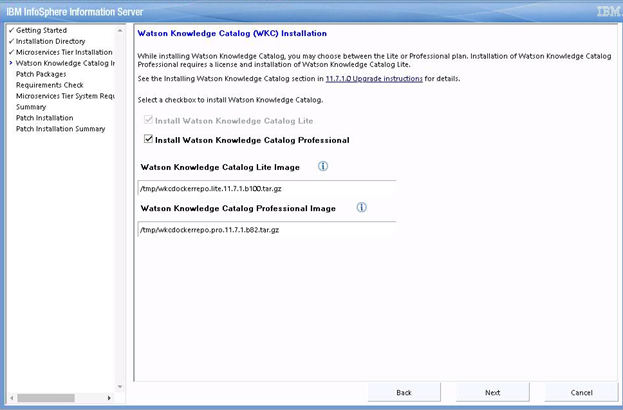
You may choose to install Watson Knowledge Catalog Lite or Professional edition.
For Watson Knowledge Catalog Lite edition
a. Select the check box "Install Watson Knowledge Catalog Lite"
b. Provide the location of Watson Knowledge Catalog Lite Image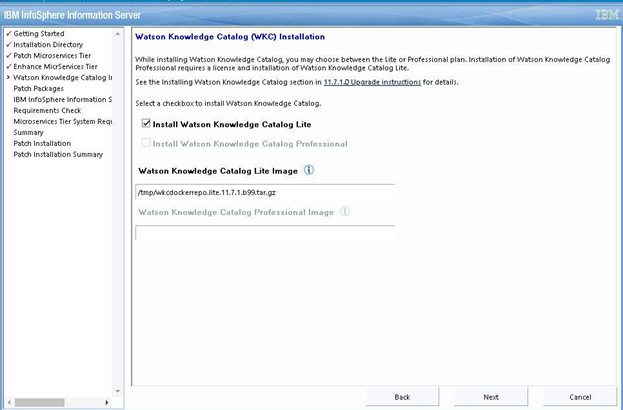
For Watson Knowledge Catalog Professional edition
a. Select the check box "Install Watson Knowledge Catalog Professional"
b. Provide the location of Watson Knowledge Catalog Lite Image
c. Provide the location of Watson Knowledge Catalog Professional Image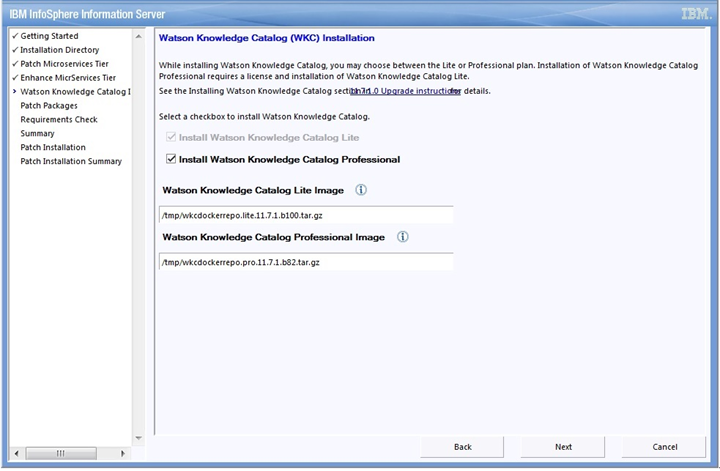
Click Next.
Resume from step 4.1.1.8 to complete the installation.
4.2.2) Add Watson Knowledge Catalog in console mode
4.2.2.1) Login to the Information Server host. Change directory to <IS_HOME>/Updates/bin
For example, cd /opt/IBM/InformationServer/Updates/bin
4.2.2.2) Before running the Update Installer, check the system requirements and make sure that your system meets the requirements.
4.2.2.3) Verify that the Update Installer version is 11.7.1.033 or later:
./installUpdates -version
4.2.2.4) Run the Update Installer to upgrade Information Server.
For example, installUpdates -i /opt/IBM/InformationServer/ -p /tmp/patch_JR60997v2_microservices_all_1171.ispkg -verbose -console -properties <full path to property_file_name>
where
patch_JR60997v2_microservices_all_1171.ispkg is the ispkg file you downloaded from IBM Fix Central
<property_file_name> is the name of the property file wherein you specify values for the various properties that control the install.
The Update Installer will prompt you for the Information Server Administrator user id and password, and the WebSphere Administrator user id and password.
Sample properties file - WKC Pro
4.2.2.5) See Technote for issues you may need to address after the install is completed.
4.3) Instructions for upgrading an installation that has a Microservices tier and Watson Knowledge Catalog Lite
You may upgrade Watson Knowledge Catalog Lite plan to Watson Knowledge Catalog Professional plan. However, support for upgrading from single node to multiple nodes is currently not provided.
4.3.1) Upgrade the Microservices tier from single node to multiple nodes
The ability to upgrade from single node to multiple nodes using the Information Server 11.7.1.0 Microservices ispkg is currently not supported.
4.3.2) Upgrade Watson Knowledge Catalog Lite to Watson Knowledge Catalog Professional in GUI mode
The Information Server 11.7.1.0 Microservices ispkg image should be used.
For example, cd /opt/IBM/InformationServer/Updates/bin
4.3.2.2) Verify that the Update Installer version is 11.7.1.025 or later:
./installUpdates -version
4.3.2.3) Initiate the install with the following command
./installUpdates
This will launch the Update Installer in GUI mode.
4.3.2.4) Provide information as required in each panel to complete the install.
Click Login.
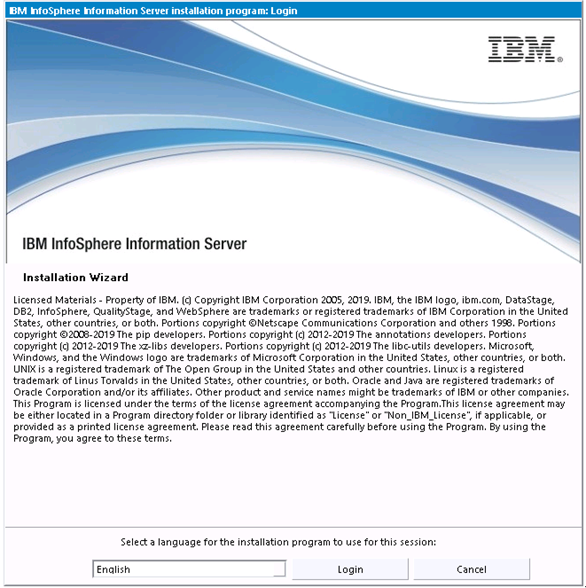
4.3.2.5) Getting started – Click Next.
4.3.2.9) Select the checkbox to install Watson Knowledge Catalog Professional and enter the location of the Watson Knowledge Catalog Professional image.

4.3.2.11) Select the Information Server 11.7.1.0 Microservices ispkg image for installation. Click Next.
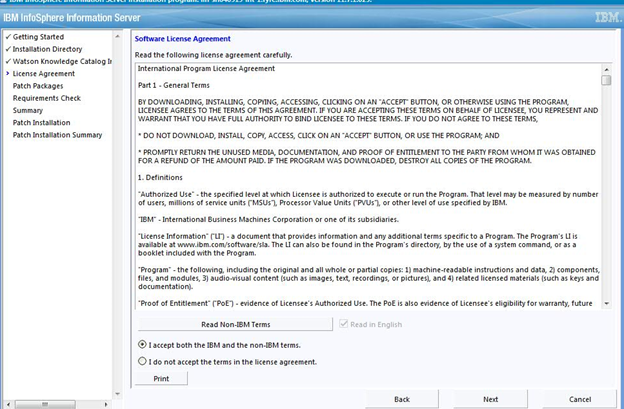
Accept the certificate and click Next.
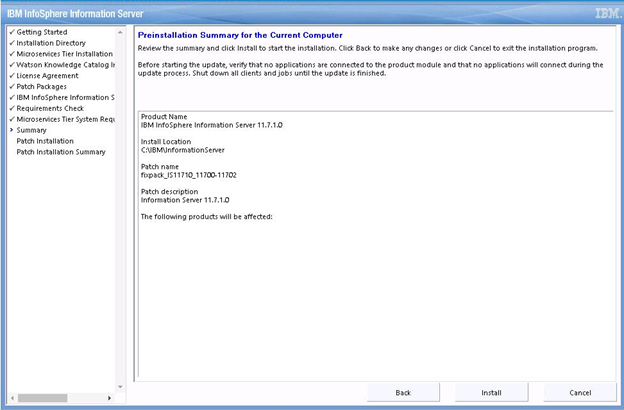
4.3.2.14) Review the Preinstallation Summary and click the Install button to start the installation.

4.3.2.15) Click the Finish button after the installation completes.
4.3.2.16) Click “Advanced” and then click "Add Exception".
4.3.2.17) Click “Confirm Security Exception”.

4.3.3.1) Login to the Information Server host. Change directory to <IS_HOME>/Updates/bin
For example, cd /opt/IBM/InformationServer/Updates/bin
4.3.3.2) Before running the Update Installer, check the system requirements and make sure that your system meets the requirements.
4.3.3.3) Verify that the Update Installer version is 11.7.1.025 or later:
./installUpdates -version
4.3.3.4) Run the Update Installer to upgrade Information Server.
For example, installUpdates -i /opt/IBM/InformationServer/ -p /tmp/patch_JR60997v2_microservices_all_1171.ispkg -verbose -console -properties <full path to property_file_name>
where
patch_JR60997v2_microservices_all_1171.ispkg is the ispkg file you downloaded from IBM Fix Central
<property_file_name> is the name of the property file wherein you specify values for the various properties that control the install.
The Update Installer will prompt you for the Information Server Administrator user id and password, and the WebSphere Administrator user id and password.
4.3.3.5) See Technote for issues you may need to address after the install is completed.
4.4) Instructions for upgrading an installation that has a Microservices tier and Watson Knowledge Catalog Professional
The ability to upgrade from single node to multiple nodes is currently not supported. Such an upgrade would require removal of all Cloudant data from the Persistent volume.
Was this topic helpful?
Document Information
Modified date:
09 June 2020
UID
ibm10882766