Technical Blog Post
Abstract
This document provides step by step instructions for a simple migration: default Maximo Asset Management 7.6.0.6 from WebSphere Application Server 8.5.5.11 to WebSphere Application Server traditional 9.0.0.7 or later.
This document is also applicable for upgrading Maximo 7.6.1 in place; that is, not creating a new server on which WebSphere Application Server 9 is installed.
It is also applicable to Linux 7 upgrades in place. The file locations, commands, and screen captures are similar but not identical.
Body
Prerequisites
- Existing WebSphere Application Server 8.5.5.3 or later server, preferably installed by using the Maximo Launchpad and Configuration Tool.
- Downloaded WebSphere Application Server traditional 9:
IBM WebSphere Application Server Network Deployment V9.0IBM WebSphere Application Server V9.0 Supplements - IBM HTTP ServerIBM WebSphere Application Server V9.0 Supplements - Web Server PluginsIBM WebSphere Application Server V9.0 Supplements - WebSphere Customization ToolkitIBM SDK, Java (TM) Technology Edition, Version 8
- Installed WebSphere 9.0.0.0 to this server.
- Applied WebSphere Application Server Version 9.0.0.7 or later.
- Have not yet run WebSphere Customization Toolbox Version 9.0.
- One or Maximo Asset Management instances installed to the current WebSphere instance. All Maximo instances on the server must be at version 7.6.0.6 or later, or are to be updated to version 7.6.0.6 or later immediately after migrating profiles from WebSphere Application Server 8.5.5 to WebSphere Application Server 9.0.x.
About Configuration Migration Tool
What is it? It is one of several WebSphere wizards. It uses a graphical interface to generate and execute WebSphere administration commands that perform complex operations on WebSphere Application Server.
Why use this tool? Because WebSphere Application Server 8.5.5 cannot be upgraded to version WebSphere Application Server 9.0.x in the traditional sense. All profiles, including servers and applications, must be re-created and migrated from WebSphere Application Server 8.5.5 by the Migration Tool. The goal of migration is to reconstruct your current profiles in a new WebSphere Application Server 9.0.x environment.
1. Create Deployment manager (Dmgr) profile
This new Deployment manager executes all of the commands for Migration Tool.
Launch the WebSphere 9 Profile Management Tool by going to the start screen. Click IBM WebSphere Application Server 9.0 > Profile Management Tool. (Windows Server 2012)


Click Create....

Select Custom Profile. Click Next.

Select Advanced profile creation. Click Next.

Enter a new Profile name. It must not be the same as existing WebSphere Application Server 8.5.5 profile. In this example, it is named ctgDmgr02. I also changed the profile directory to match it. Click Next.

Enter a new Node name. It cannot be the same as an existing WebSphere Application Server 8.5.5 Node. In this example, I named it ctgNode02.
Check that the hostname is correct. Click Next.

This node will not be federated, because this profile is being used only to migrate ctgNode01 from WebSphere Application Server 8.5.5. Select the check box next to Federate this node later. [We are deleting ctgNode02 when we delete the ctgDMgr02 profile later on.]

Click Next.

Accept the defaults (change the password if you want, but this profile will be deleted), and click Next.

Click Next.
After completion, clear the check box next to Launch the First steps console. Close the profile Management Tool window, and close WebSphere Customization Toolbox 9.0.
2. Migrate WebSphere Application Server 8.5.5 Deployment manager (Dmgr01) profile
Launch Windows Services.

Shut down the IBM HTTP Server V8.5, IBM WebSphere Application Server V8.5 - ctgCellManager01 and IBM WebSphere Application Server V8.5 - ctgNode01 services, and change their startup Type to Manual. Then, restart the server.
Once you are at the back at the desktop, even though can back up your profiles in the Migration Tool, back them up now:
- Start an administrative command prompt and navigate to the new Deployment Manager profile (default C:\Program Files\ibm\WebSphere\AppServer\profiles\ctgDmgr02\bin\).
- Run backupConfig.bat to back up the Version 9.0 deployment manager configuration.
- Once completed, navigate to the existing WebSphere 8.5.5 Node Agent directory (default C:\Program Files (x86)\ibm\WebSphere\AppServer\profiles\ctgAppSrv01\bin\).
- Run backupConfig.bat to back up the Version 8.5.5 node configuration. If you have more than one or two Maximo servers, backup can take time.
Configuration Migration Tool
Launch the WebSphere 9 Profile Management Tool by going to the start screen and clicking IBM WebSphere Application Server 9.0 > Profile Management Tool.

Migrating the Deployment Manager

On the Migration Sources tab, click New....
5. The Tool will search for installed versions of WebSphere Application Server. Select existing installations.

Here, there is just one eligible version. Select it and click Next.
Source Profile. Here we are migrating two profiles. Start with ctgDmgr01. Since we backed up configuration before, there is no need to back it up again. If you do need to keep both servers running, check Clone migration (which is not covered in this blog entry).

Click Next.
Administrative Security.

Enter the WebSphere username (wasadmin default) and password and click Next.
Deployment Manager Disablement. Keep "Disable the source deployment manager after migration" checked, unless both WebSphere Application Server environments need to run on this server. Click Next.
Profile Migration Output. When you accept the defaults, note that the new WebSphere Application Server 9 Deployment Manager will have the same name as the WebSphere Application Server 8.5.5 Deployment Manager. The new Deployment Manager profile created earlier is required to run the Migration Tool, but is not used in the environment after migration.

Click Next.
Target Profile
Keep "Migrate to a New Profile" selected, and click Next.
You can migrate to an existing profile but it must already exist. When we created ctgDmgr02 we did not federate it (pair it with a node).
Profile Creation Parameters. You can give it any name you want. I decided to give it the same name as is used in OOB Maximo. The profile name is unique to the set of product binaries (WebSphere Application Server 9.0.x) where it is created. The other ctgDMgr01 profile is unique to WebSphere Application Server 8.5.5.

Check that the hostname is correct. Click Next.
Application Migration. Accept the default values. The application installed is Deployment Manager, not MXServer. MXServer is migrated later, in the second run of Configuration Migration Tool.

Click Next.
Port value. Since we are shutting down WebSphere 8.5.5, you can use the port values assigned to the source profile (Deployment Manager). If you are keeping the older WebSphere Application Server version running, there is an option to increment the port numbers by 1.

Click Next.
Additional Migration Options.

Click Next.
Migration Summary. Click Migrate... and watch it go.

Migrating Deployment Manager does not take that long to complete. When it completes, it displays a full listing of the migration tool output.
Click Next, then click Finish.

You don't see anything in the Target Profile column because none of the values change.
3. Migrate WebSphere Application Server 8.5.5 Node Agent (AppSrv01) profile
Migrating the Node and nodeagent (also known as ctgAppSrv01), which includes the Maximo application server and the webserver1 definition, step by step.
From a command prompt, start Deployment Manager. The new Dmgr 01 profile is located (using default values) in C:\Program Files\IBM\WebSphere\AppServer\profiles\ctgDmgr01\bin
Type startmanager. Press Enter.

Launch the Configuration Migration Tool by going to the start screen and clicking IBM WebSphere Application Server 9.0 > Configuration Migration Tool.
Click New... on the upper right. There should only be a single existing installation. Make sure it is selected, and click Next.
From the Source profile menu, select your application Server profile (ctgAppSrv01 by default).

Check the box next to create a backup of the source profile as part of this Migration. Click Next.

Note the warning. Since the associated Deployment Manager (the migrated Dmgr01) is the same release level, this is not a problem.
Deployment Manager Verification. Enter the Administrative user name (wasadmin by default) and password. Test the connection first.

Click Next.
On the Profile Migration Output screen, check over the provided values. It is not necessary to change them.
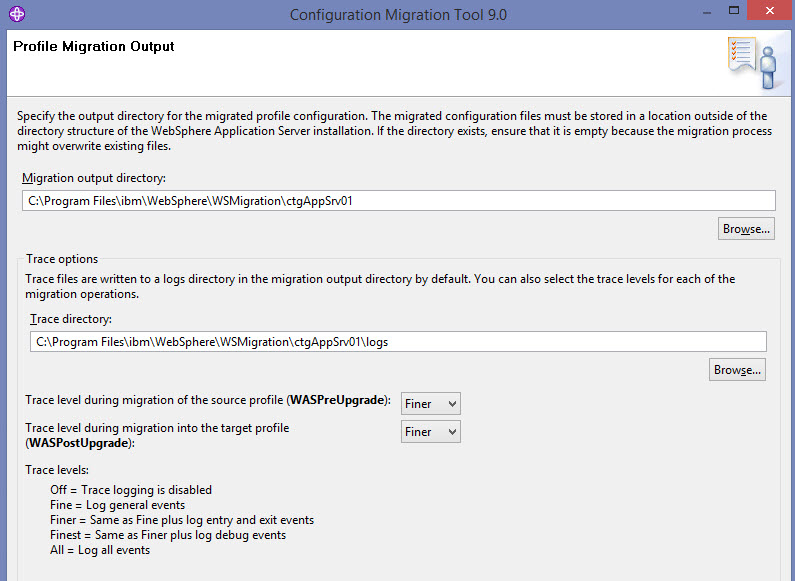
Click Next.
On the Target Profile screen, accept the default, to migrate to a new profile.

Click Next.
On the Profile Creation Parameters screen, if you want to change the Profile name from appSrv01 to something else (ctgAppSrv01, for example), change it here.

Click Next.
Port Value. If you are deactivating WebSphere 8.5.5, as in this example, use the port values assigned to the source profile.

Click Next.
Additional Migration Options. Out of the box Maximo does not use WebSphere database connections to connect to Maximo. It's not running, either.

Click Next.
Migration Summary

Click Migrate.

In this example, the Migration Tool migrated the ctgAppSrv01 profile, which contains the nodeagent, webserver1, the RMIRegistry, and four Maximo servers. Click Next.

Once the migration completes, click Exit.
4. Post-Migration Tasks
For the following post, the original (WebSphere Application Server 8.5.5) installation is at C:\IBM\WebSphere. The new (WebSphere Application Server 9.0.x) installation is at C:\Program Files\WebSphere.
At this point in the migration, the profiles are:
WebSphere 8.5.5.11: Deployment manager (dmgr): C:\IBM\WebSphere\AppServer\profiles\ctgDmgr01 and nodeagent: C:\IBM\WebSphere\AppServer\profiles\ctgAppSrv01 (nodeagent, MXServer, webserver1).
WebSphere 9.0.0.7: Deployment manager (dmgr): C:\Program Files\IBM\WebSphere\AppServer\profiles\ctgDmgr01 (migrated), C:\Program Files\IBM\WebSphere\AppServer\profiles\ctgDmgr02 (deployment manager used for migration) and nodeagent: C:\Program Files\IBM\WebSphere\AppServer\profiles\ctgAppSrv01 (nodeagent, MXServer, webserver1). ctgDmgr01 and ctgAppSrv01 are both migrated (re-created) from WebSphere Application Server 8.5.5.
A. Start the Cell Manager and the Node Agent
Start an administrative command prompt at <APPSRV9>\profiles\ctgDmgr01\bin
> startManager.bat
C:\Program Files\IBM\WebSphere\AppServer\\profiles\ctgDmgr01\bin>startManager.bat
ADMU0116I: Tool information is being logged in file <APPSRV9>\profiles\ctgDmgr01\logs\dmgr\startServer.log
ADMU0128I: Starting tool with the ctgDmgr01 profile
ADMU3100I: Reading configuration for server: dmgr
ADMU3200I: Server launched. Waiting for initialization status.
ADMU3000I: Server dmgr open for e-business; process id is 4388
Change directory to <APPSRV9>\profiles\ctgDmgr01\bin: cd ..\..\ctgAppSrv01\bin
> startNode.bat
C:\Program Files\IBM\WebSphere\AppServer\\profiles\ctgAppSrv01\bin>startNode.bat
ADMU0116I: Tool information is being logged in file <APPSRV9>\profiles\ctgAppSrv01\logs\nodeagent\startServer.log
ADMU0128I: Starting tool with the ctgAppSrv01 profile
ADMU3100I: Reading configuration for server: nodeagent
ADMU3200I: Server launched. Waiting for initialization status.
ADMU3000I: Server nodeagent open for e-business; process id is 1928
B. Remove the WebSphere 8.5 Plug-In Configuration and Web server
From the Start Page, under IBM WebSphere, launch WebSphere Plug-In Configuration Toolbox.

In the Web Server Plug-in Configurations panel, select the webserver1 Web Server Definition.
Click Delete, and confirm the deletion. In the Web Server Plug-in Runtime Locations section, select webserver1.
Click Remove, and confirm the removal.
Exit WebSphere Customization Toolbox V8.5.
Log in to the WebSphere console.
Go to Server Types > Web servers.

Tick the button next to webserver1, and click Delete.
Log out of the WebSphere console.
C. Configure WebSphere 9 Web Server Plug-In
Go the Start page. Under WebSphere Customization Toolbox V9.0, click WebSphere Plug-In Configuration.

Click Add... and enter your environment information. The default installation location for the Plug-ins directory is at C:\Program Files\IBM\WebSphere\Plugins.

Click Finish.
On the Web Server Plug-In Configurations tab, click Create...

Click Create...

Click Next >.
Note: Be careful on these pages. As with the Maximo Configuration Tool, WebSphere Configuration Toolbox (WCT) does not pull values from IBM Installation Manager's product installation database. The populated values are suggested only.

Confirm this path is correct. Click Next.

Clear the check box next to Setup IBM HTTP Server Administration Server. Click Next.
In this case, because the web server instance is created in the same cell and node as the web application server, it is not necessary to set up IBM HTTP Server Administration Server, or create a Windows service for it.

Enter webserver1 and click Next >.

Select Local and enter the location of the WebSphere Application Server 9 installation directory. Click Next >.

Select ctgAppSrv01 and click Next >.

Click Finish.
D. Re-create webserver1 and Generate Plug-In
Log in to the WebSphere console. Go to Server Types > Web servers.
Create a new Web server. Default values are Node ctgNode01, Name webserver1, Type IBM HTTP Server.

Click Next.

Click Next.

Confirm that the file locations are correct and click Next.

Click Finish.

Click Save directly to the master configuration.
D. Generate Plug-In
Click webserver1.

Under Additional Properties, click Plug-in properties.

Confirm locations are correct. Click OK. Save changes to the master configuration.
Select webserver1. Click Start. When completed, select webserver1.
Click Generate Plug-in.

Log out of WebSphere console and close browser.
E. Remove WebSphere Application Server 8.5.5
1) Remove Windows Services. Use wasservicehelper.bat in the old installation location and remove both WebSphere Application Server 855 Windows services.
C:\IBM\WebSphere\AppServer\bin>wasservicehelper.bat

-------------------
Menu Options :
-------------------

1  Add new or update existing WebSphere service (minimum parameters required)
2  Add new or update existing WebSphere service (all parameters)
3  Remove WebSphere service
4  Status of WebSphere service
5  Tracing WASServices

Select number next to the options
(default 1)[q to Quit]:3

-------------------
Remove Service:
-------------------
1 IBMWAS85Service - ctgCellManager01
2 IBMWAS85Service - ctgNode01

Select the number next to the service to remove:1

You selected ctgCellManager01 to be deleted.
cmd : WASService.exe -remove "ctgCellManager01"

Execute command now? [Y/N][q to Quit]:y


Success.
 WASServiceCmd.rep contains additional details.

Remove Another? (default Y)[Y/N][q to Quit]:y
1 IBMWAS85Service - ctgNode01

Select the number next to the service to remove:1

You selected ctgNode01 to be deleted.
cmd : WASService.exe -remove "ctgNode01"

Execute command now? [Y/N][q to Quit]:y


Success.
 WASServiceCmd.rep contains additional details.

Remove Another? (default Y)[Y/N][q to Quit]:q

-------------------
Menu Options :
-------------------

1  Add new or update existing WebSphere service (minimum parameters required)
2  Add new or update existing WebSphere service (all parameters)
3  Remove WebSphere service
4  Status of WebSphere service
5  Tracing WASServices

Select number next to the options
(default 1)[q to Quit]:q

C:\IBM\WebSphere\AppServer\bin>
Using the shortcut for WebSphere [8.5] Plug-In Configuration Toolbox, remove WebSphere Plug-In Runtime Locations. It also deletes the Plug-In configuration.
Exit WebSphere 8.5 Customization Toolbox.
b) Uninstall WebSphere 8.5.5
Launch IBM Installation Manager

Uninstall WebSphere Customization Toolbox V8.5, Web Server Plug-Ins for IBM WebSphere Application Server V8.5, IBM WebSphere Application Server 8.5, and IBM HTTP Server V8.5.

Make sure that all WebSphere IFPIs and IBM WebSphere SDK Java Technology Edition versions 6.x and 7.x are selected for uninstallation.
Manually delete the original WebSphere and HTTPServer folders.
F. Create new Windows services for dmgr and nodeagent
Restart the server.
Start a command prompt. Navigate to AppServer\bin directory.
Run wasservicehelper.bat and create services for ctgNode01 (ctgAppSrv01) and ctgCellManager01 (ctgDmgr01)
G. Remove the ctgDmgr02 profile
Since migration is complete, the ctgDmgr02 profile is no longer necessary.
Start a command prompt. Navigate to AppServer\bin directory.
C:\Program Files\IBM\WebSphere\AppServer\bin>manageprofiles.bat -delete -profileName ctgDmgr02
INSTCONFSUCCESS: Success: The profile no longer exists.
Manually delete the <APPSRV9>\profiles\ctgDmgr02 directory.
NOTE: If IBM HTTP Server V9.0 service does not start up, start it manually:
C:\Program Files\IBM\HTTPServer\bin>httpd -k start
AH00526: Syntax error on line 309 of C:/Program Files/IBM/HTTPServer/conf/httpd.conf: Multiple <DirectoryMatch> arguments not (yet) supported.
If HTTPServer does not start, edit httpd.conf, change C:\Program Files\ to C:\Progra~1\ and save the file. Start the Windows service again.
UID
ibm11111473