About cookies on this site Our websites require some cookies to function properly (required). In addition, other cookies may be used with your consent to analyze site usage, improve the user experience and for advertising. For more information, please review your options. By visiting our website, you agree to our processing of information as described in IBM’sprivacy statement. To provide a smooth navigation, your cookie preferences will be shared across the IBM web domains listed here.
News
Abstract
Administrators with QRadar Risk Manager appliances in their deployment are being alerted to changes in Configuration Source Manager due to the approaching end of life of Adobe Flash. Due to removal of Adobe Flash, the Configuration Source Management (CSM) functionality is integrated in to the Configuration Monitor. The updated Configuration Monitor interface is available to administrators who upgrade their QRadar deployment in upcoming fix pack releases.
Content
QRadar Risk Manager administrators are being alerted to an upcoming user interface change to the Configuration Source Management (CSM) component. Due to the End of Life (EOL) announcement for Adobe Flash, QRadar Risk Manager has deprecated the default Configuration Source Management interface and integrated device backup and configuration functionality in to the Configuration Monitor. The Configuration Monitor interface includes the same device backup functionality, but was developed without Adobe Flash to ensure that administrators can comply with Adobe's 31 December 2020 end of life announcement. Administrators who are in corporate environments who are required to remove Adobe Flash can discuss upgrades to a QRadar version that includes the updates to the Configuration Monitor. All created schedules (Scheduled Discovery, jobs) are automatically moved from the legacy Admin tab Configuration Source Management interface to the Configuration Monitor on the Risks tab after you upgrade.
Product versions
The following versions integrate scheduling and device configurations on the Risks tab in to the Configuration Monitor:
- QRadar Risk Manager 7.4.1 fix pack 1 and later
- QRadar Risk Manager 7.3.3 fix pack 5 and later
How to identify the issue
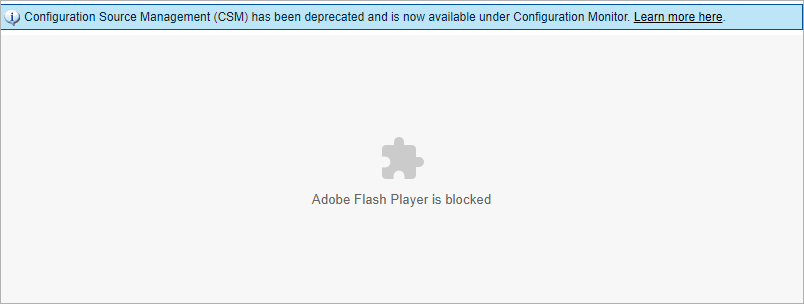
A notice is displayed in the Configuration Source Management component to advise administrators that the Configuration Source Management is deprecated. Administrators who see this information message can upgrade to a QRadar version that includes the Configuration Monitor to avoid interruptions with device configurations after 31 December 2020 due to Adobe Flash end of life (EOL) issues.

Figure 1: Legacy Configuration Source Management user interface for Adobe Flash.

Figure 2: Browsers which block Adobe Flash by default do not display the Configuration Source Management user interface.

Figure 1: Legacy Configuration Source Management user interface for Adobe Flash.

Figure 2: Browsers which block Adobe Flash by default do not display the Configuration Source Management user interface.
Locating the Configuration Monitor
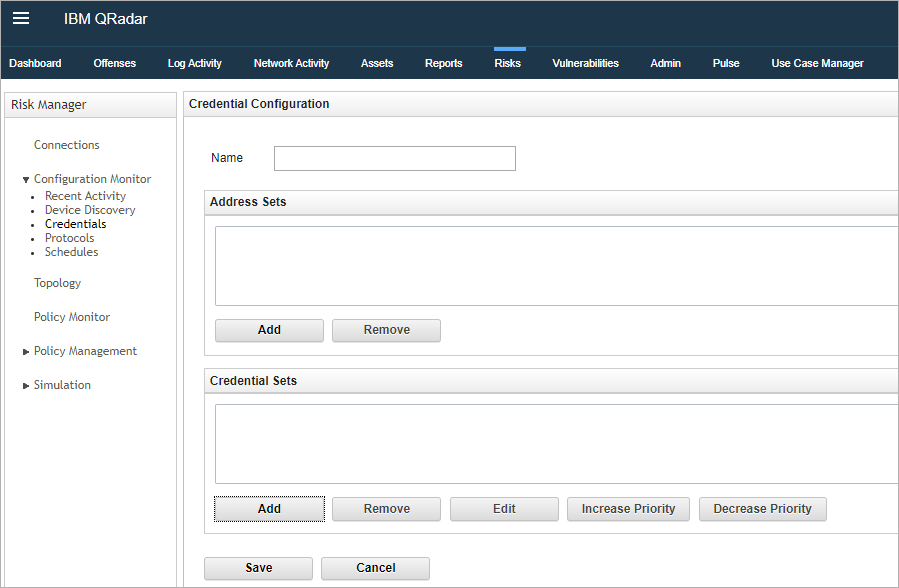
QRadar 7.4.1 fix pack 1 and QRadar 7.3.3 fix pack 5 updates move the functionality of discovery, backups, credentials and scheduled to the Risks tab. Administrators can use the Configuration Monitor to make changes to their devices after an upgrade to the QRadar deployment. The functionality between Configuration Source Manager and the Configuration Monitor is identical and the Configuration Monitor does not include dependencies on Adobe Flash.
Procedure
Procedure
- Log in to QRadar.
- Click the Risks tab.
[{"Line of Business":{"code":"LOB24","label":"Security Software"},"Business Unit":{"code":"BU059","label":"IBM Software w\/o TPS"},"Product":{"code":"SSBQQU","label":"IBM Security QRadar Risk Manager"},"ARM Category":[{"code":"a8m0z000000cwtKAAQ","label":"QRadar Risk and Vulnerability Manager"}],"ARM Case Number":"","Platform":[{"code":"PF016","label":"Linux"}],"Version":"7.3.3;7.4.1"},{"Line of Business":{"code":"LOB24","label":"Security Software"},"Business Unit":{"code":"BU059","label":"IBM Software w\/o TPS"},"Product":{"code":"SSBQAC","label":"IBM Security QRadar SIEM"},"ARM Category":[{"code":"a8m0z000000cwtKAAQ","label":"QRadar Risk and Vulnerability Manager"}],"Platform":[{"code":"PF016","label":"Linux"}],"Version":"7.3.3;7.4.1"}]
Was this topic helpful?
Document Information
More support for:
IBM Security QRadar Risk Manager
Component:
QRadar Risk and Vulnerability Manager
Software version:
7.3.3, 7.4.1
Operating system(s):
Linux
Document number:
6326009
Modified date:
08 October 2020
UID
ibm16326009
Manage My Notification Subscriptions

 Figure 4: Schedules are now defined in the Configuration Monitor for the Risk Manager versions defined in this technical note.
 Figure 5: Device Discovery in the Configuration Monitor displays the status or logs for added devices.