Release Notes
Abstract
In Information Server version 11.7.1.1, the Information Server Administration (Web) console is replaced with a new implementation of the Administration console.
Note: The Information Server, version 11.7.1.3 Administration (Web) console is documented in technote https://www.ibm.com/support/pages/node/6507351
Content
Table of Contents
2) Login
2.1 Navigation menu
2.2 Help
2.3 About
2.4 Change password
2.5 Logout
3) Domain Management
3.1 Engine Credentials
3.1.1 Open engine configuration
3.1.2. Open my credentials
3.1.3. Open user credentials
3.2 User registry configuration
3.2.1 Open provider configuration
4) Session Management
4.1 Viewing all active sessions
4.1.1 Active sessions list pane
4.1.2 Global session properties
4.1.3 Setting session limits
4.1.4 Steps for opening user session details
4.1.5 Steps for disconnecting a session
4.1.6 Steps for disconnecting all sessions
5.1 Users
5.1.1 User list page
5.1.2 Steps for creating new users in the new Web Admin console
5.1.3 Open user
5.1.4 Simple search and Advanced Search
5.1.5 Add roles to multiple users
5.1.6 Delete User
5.2 Groups
5.2.1 Groups list page
5.2.2 Steps for creating new groups in the new Web Admin console
5.2.3 Open group
5.2.4 Simple search and Advanced Search
5.2.5 Add roles to multiple groups
5.2.6 Delete group
6) Reporting
6.1 Introduction
6.2 New Reports
6.3 My Reports
6.4 Steps to create a New report
6.5 Example of using the Security report template Active users in session
6.6 Report Maintenance
7) Known issues
7.1 Domain management
7.2 Session management
7.3 Users and Groups
7.4 Reporting
7.5 General
8) Fixed issues
8.1 11.7.1.1 RU1
8.2 11.7.1.1 RU2
8.3 11.7.1.1 SP1
8.4 11.7.1.1 SP2
1) Introduction
Beginning Information Server release 11.7.1 Fix Pack 1, a new Information Server Web (Administration) Console is introduced with the following functionality:
- User and group management
- Domain management
- Session management
- Limited Reporting functionality through User interface
- Schedule monitoring functionality through API
Currently, Reports maintenance actions and Schedule monitoring are not supported. See Usage of IBM InfoSphere Information Server Administration (Web) Console functionality via REST APIs for information on how you can get access to exposed APIs.
See the Known issues list at the end of this technote for other missing functionality.
The supported browsers for the new Administration console are:
- Firefox version 68 and future Versions, Releases and Fix Packs
- Google Chrome 74 and future Versions, Releases and Fix Packs
- Microsoft Edge 44.18362.449.0 and future Versions, Releases and Fix Packs
Currently, Microsoft Internet Explorer 11 and its previous versions are not supported for the new Administration console.
For MacOS, use Firefox version 77.
Note: The Information Server, version 11.7.1.3 Administration (Web) console is documented in technote 6507351.
2) Login
The new Administration console can be accessed using URL: https://<Hostname>:port/ibm/iis/console
You will be redirected to the login page.

Enter your Information Server administrator credentials and click the Login button.
On successful login, you will see the following page.

2.1) Navigation menu
On the left side, you will have the navigation pane which consists of links to the various modules you can work with.
At the upper right corner, you can find two icons that have drop-down links. The first offers Help, Usage and About options, while the second offers Change password and Logout options.


2.2) Help
Help links to information available on IBM Documentation.

2.3) About
On clicking the About link, a dialog window displays the current major release version along with copyright information.


Information about the current logged in user is displayed at the upper right corner.

2.4) Change Password
On clicking the Change password link, a dialog window is displayed to change the password of the currently logged in user.

Enter the current password, the new password, and click Save. After you logout and log in to the admin console, the changed password will be in effect.
2.5) Logout
Click this button to logout from the current session. You will be redirected to the login screen.
3) Domain Management
In the Domain Management menu, you can manage engine credentials, and configure your user directories.

3.1) Engine Credentials
Use this pane to manage the mapping of IBM® InfoSphere® Information Server user names and engine credentials. Users can only manage the mapping for their own user name. Suite administrators can manage the mapping of credentials of all users.

Name
Displays the host name of an InfoSphere Information Server engine that is registered in the data integration domain.
User registry
Displays whether the InfoSphere Information Server engine and the metadata server are configured to use the same user registry.
After you select an engine you will get three options at the top of the screen: Open engine configuration, Open my credentials, and Open user credentials.

Open engine configuration
Shares the user registry and specifies the default InfoSphere Information Server engine credentials.
Open my credentials
Maps the credentials for your InfoSphere Information Server engine user account with your metadata server account.
Open user credentials
Creates credential mappings for suite users with IBM InfoSphere DataStage® and IBM InfoSphere QualityStage® privileges.
3.1.1) Open engine configuration pane
Use this pane to configure IBM® InfoSphere® Information Server and its engine to authenticate their users with the same user registry. If you cannot share the same user registry, you must establish credential mappings between the users defined in the registry used by the InfoSphere Information Server and the registry used by its engine. Only suite administrators can perform these tasks.

Share User Registry
Select this check box to indicate that the InfoSphere Information Server and its engine use the same user registry for storing credentials. You must ensure, through installation or postinstallation configuration, that the two user registries are the same.
Default Credentials
You can optionally specify default credential mapping. If specified, the user ID and password are used by all InfoSphere Information Server users for whom a specific credential mapping is not defined. If you selected the share user registry option, you cannot specify default credentials.
Steps for defining default credentials:
Before you begin
You must have suite administrator authority or IBM® InfoSphere® DataStage® and IBM InfoSphere QualityStage® administrator authority.
About this task
The default credentials are used for any users who do not have their own credential mappings. If you do not want users who do not have mapped credentials to access the server, do not add default mapping credentials.
Procedure
- In the Navigator pane, select Domain Management > Engine credentials.
- Select the InfoSphere Information Server engine for which you want to specify the default credentials.
- Click Open engine configuration.
- In the User Name field, type the user name to be used by all InfoSphere Information Server users for whom a specific mapping is not defined.
- In the Password field, type the corresponding password. The user name and password that you provide must be a valid user name and password for the operating system where the engine tier components are installed.
- Confirm the password.
- Click Save and Close.
3.1.2) Open my credentials pane
Use this pane to provide your IBM® InfoSphere® Information Server engine credentials. Credentials that are configured here will override default credentials that may have been defined for the engine.

If the Share User Registry mode is enabled in the Open Configuration pane, the fields and buttons in this pane are disabled.
User Name
Type a valid user name for logging in to the InfoSphere Information Server engine.
Password
Type the password for the InfoSphere Information Server engine user name.
Confirm Password
Type the password again.
Clear Fields
Click to clear your field entries. If you click Save, you will not be able to access the InfoSphere Information Server engine until you set up new credentials, or an Administrator sets default credential mapping in the Open Configuration pane.
3.1.3) Open user credentials pane
Use this pane to map IBM® InfoSphere® Information Server engine credentials to suite user accounts. This pane is accessible only to suite administrators.
If the Share User Registry mode is enabled in the Open Configuration pane, the fields and buttons in this pane are disabled.
This page consists of the three frames: Select users, Users with mapped credentials and Credentials to assign to selected users, which are necessary to do credential mapping.

Select users:
Use this frame to select the users for whom you need to set up credential mapping. You can use Filter, and Show additional filter to refine the search based on First name, Last name, Username, Roles etc.
Note: Querying a large LDAP user registry for user IDs may result in LDAP timeouts if an appropriate filter is not set for the IDs to be returned.
In ISF 11.7.1.1 RU1 patch, JR62755 changes the behavior when the Select users panel is first opened. Since there is no filter applicable at that time, the UI will only display users that have roles assigned to them. This is also the behavior when Clear Filter is clicked, or Filter is clicked with an empty filter.
To retrieve IDs from the LDAP repository, you should set an appropriate non-empty filter.
Also, for an LDAP user registry, unless the registry is configured with attributes mapping, the filter will work only with Username and Group ID.

Finalize selection of users
After selecting at least one user in the right frame, a button “Finalize selection of users” appears at top of the right frame. Click to map the selected suite users to the InfoSphere Information Server engine credentials specified in the bottom frame.
Users with mapped credentials:
After selecting the users to update, and clicking Finalize selection of users, the selected users will be added to this frame.

Remove (![]() )
)
Click the icon ![]() to remove mapped credentials of a user listed in Users with mapped credentials pane. A confirmation dialog will pop up and on clicking Yes, the selected user’s mapped credentials will be removed. Users whose mapped credentials are removed will not be able to connect to the InfoSphere Information Server engine unless a default mapping is defined in the Open Configuration pane.
to remove mapped credentials of a user listed in Users with mapped credentials pane. A confirmation dialog will pop up and on clicking Yes, the selected user’s mapped credentials will be removed. Users whose mapped credentials are removed will not be able to connect to the InfoSphere Information Server engine unless a default mapping is defined in the Open Configuration pane.
If you want to remove all mapped users credentials, click Delete all mapped users button. A confirmation dialog will pop up and on clicking Yes, all the user’s mapped credentials will be removed.
Credentials to assign to selected users:
Enter the InfoSphere Information Server engine credentials in the bottom frame to specify the credential mapping.

User Name
Type the login name of the InfoSphere Information Server engine user. The user name must exist and be recognized by the Engine tier.
Password
Type the password of the InfoSphere Information Server engine user. This password must be valid for the specified user name.
Confirm Password
Type the password again.
Apply Only to Users without Credentials
Select this check box to map only suite users who do not already have a credential mapping.
Save or Save & close
Click to map the credentials.
Cancel
Click to close the pane without any changes.
Steps to map the credentials for a user
If you use the IBM® InfoSphere® Information Server user registry, you must create a credential mapping before you can use IBM InfoSphere DataStage® and IBM InfoSphere QualityStage® clients. Create users and groups in the Web console before you begin this task.
Procedure
- Log in to the IBM InfoSphere Information Server Web console as an Administrator.
- Under the Navigation pane, expand the Domain Management section and click Engine Credentials.
- Select the InfoSphere Information Server engine for which you want to map user credentials.
- Click Open User Credentials.
- Enter First name or Last name to search for suite users.
- Optional: Specify Advanced Search criteria and click Filter to display a list of users.
- From the search results, select the suite users that you want to map to the engine tier operating system local credentials and click Finalize selection of users.

- The selected user/users will be added to the Map user credentials panel.

- On the Select users frame, select one or more users to map to the credentials. If you want to map some suite users to one user and map other suite users to a different user, select one subset of users and continue.
- In the Assign User Credentials frame, specify a valid operating system user name and password for the system where the engine tier components are installed. If you want to preserve all previously configured credential mapping, select the Apply Only to Users without Credentials check box.

- Click Save or Save & close and the specified user credentials will be mapped with the engine credentials.

In the Map user credentials frame, you will be able to see the mapped user credential information.

- To map credentials for additional suite users, do one of the following:
- Repeat steps 8 through 11 to map credentials for additional users displayed in the Select users frame.
- Repeat steps 5 through 10 to select from a new filtered list of users and map credentials for those users.1
What to do next
After you map the credentials, any suite user or group that is assigned an IBM InfoSphere DataStage and QualityStage user or administrator security role can log in to an InfoSphere DataStage and QualityStage client.
3.2) User registry configuration
Use this pane to view summary information about directory providers for logon credentials and authorizations. Only suite administrators can perform this task.
Note that for security reasons, the Information Server internal user registry should not be used in Production systems. Its intended purpose is to facilitate an install, and to provide a test environment where appropriate.

Display Name & Name
Shows the name of the repository that contains the logon credentials and authorizations.
Description
Shows the description of the repository.
Active Provider
Shows whether the repository is the current provider of logon credentials and authorizations. The current provider will be listed as ‘true’. All others will be listed as ‘false’.
For Internal user registry the pane looks as shown below. Active provider option will be set to ‘true’.

For External LDAP user registry the pane looks as shown below. Active provider option will be set to ‘true’.

Select a provider and you will get the option “Open provider configuration”.
Open Provider Configuration
Click to view details about the selected directory provider.
3.2.1) Open provider configuration pane
Use this pane to view and modify the configuration of a directory provider. Only suite administrators can perform this task.
Some directory providers, such as IBM® InfoSphere® Information Server and IBM WebSphere® Application Server, are preconfigured and cannot be modified. Some directory providers are partially preconfigured and can only be partially modified. Not all check boxes are available if a directory provider is preconfigured or partially preconfigured.
Supports All Attributes
Shows a check mark if the repository supports users, groups, and all of their attributes. Select to include all attributes in the repository.
Writable
Shows that the metadata can be edited only by using the external repository, not by using the Web console. Select to specify whether metadata can be written to the external repository.
User Attributes
Shows the list of user attributes that are in the repository. Select the specific attributes that you want to include in the repository.
Group Attributes
Shows the list of group attributes that are in the repository. Select the specific attributes that you want to include in the repository.
Open provider configuration pane:ASBDirectoryProvider

Open provider configuration pane:J2EEProvider

4) Session Management
4.1) Viewing all active sessions
In the IBM® InfoSphere® Information Server Web console, you can view and manage the active user sessions.
Before you begin
You must have suite administrator authority.
About this task
A user session is an instance of a user with a connection to the IBM InfoSphere Information Server. You may want to view all active sessions to determine whether you need to set thresholds for the maximum number of user sessions to allow, to disconnect one or more users, or to view details about the user who is connecting.
Procedure
4.1.1) Active sessions list pane
Use this pane to view a list of all the active sessions and identifying information about sessions that run against the metadata server.

User Name
Shows the user ID of the active session.
Session ID
Shows the internal session ID of the active session.
Address
Shows the host name or network address of the client that is using the session.
Type
Shows the client type that is associated with the active session, such as IBM® InfoSphere® Information Server Web console, IBM InfoSphere Information Server console, or the IBM InfoSphere DataStage® client.
Created
Shows the timestamp of the start of the active session.
Last Updated
Shows the timestamp of the last action that the active session performed.
Trusted
Shows the value Yes if the trusted authentication mechanism was used to create the session.
Global Session Properties
Click to specify general session details, such as the default session timeout for inactive sessions and the maximum number of active sessions that are allowed.
Disconnect All
Click to disconnect all currently active user sessions. Any unsaved data in those unsaved sessions will be lost.
Select a session and you will get the options “Open session details” and “Disconnect”.

Open session details
Click to view details for the selected session.
Disconnect
Click to disconnect the selected session. Any unsaved data in that session will be lost.
4.1.2) Global session properties pane
Use this pane to set the session properties for all suite users.
Inactive Session Timeout
Set the maximum duration of idle time for all users, in seconds. The duration applies to all sessions. If a session does not show any activity for this duration, it is automatically disconnected. Any changes to this setting only apply to new sessions; the changes do not apply to current sessions.
Maximum Sessions
Set the maximum number of active sessions that can run against the current metadata server. A change to Maximum Sessions does not disrupt existing sessions. If the new maximum is less than the current number of active sessions, no new sessions are allowed until the total number of active sessions is less than the new maximum.
Current Sessions
Shows the number of active sessions that are running against the metadata server

4.1.3) Steps for setting session limits
You can set the maximum number of active sessions on the server. You can also specify how long a session can remain inactive before it is automatically disconnected and how often the sessions are polled for inactivity.
Before you begin
You must have suite administrator authority.
Procedure
- In the Navigation pane, select Session Management > Active sessions list.
- In the Active Sessions pane, click Global session properties.
- Optional: Specify settings for inactive sessions and maximum number of sessions.
- Click Save and close.
4.1.4) Steps for opening user session details
To view information about a current session that includes the user record, the duration of the session, and the security roles that are assigned to the user, you can open the details of a user session.
Before you begin
You must have suite administrator authority.
Procedure
- In the Navigation pane, select Session Management > Active Sessions.
- In the Active sessions list pane, select a user session.
- Click Open session details link. The Session details pane shows detailed information about the user session.


4.1.5) Steps for disconnecting a session
You can disconnect an individual user session.
Before you begin
You must have suite administrator authority.
Procedure
- In the Navigation pane, select Session Management > Active sessions list.
- In the Active sessions list pane, select a session. If multiple users signed in with the same user account, only the selected session is disconnected.
- Click Disconnect.
- Click Yes to immediately end the session.

4.1.6) Steps for disconnecting all sessions
To force all active sessions to end immediately, you can disconnect all user sessions. You might want to disconnect all users to prepare for a system shutdown.
Before you begin
You must have suite administrator authority.
Procedure
- In the Navigation pane, select Session Management > Active sessions list.
- In the Active sessions list pane, click Disconnect all.
- In the Disconnect all window, click Yes to immediately end all sessions.

5) Users & groups
5.1) Users
Log in to new admin console UI with Information Server administrator credentials. In the Navigation pane on the left side, expand the norgie Users & groups.

Click the Users link to work with users. The User list page is displayed.
5.1.1) User list page
Use this pane to search for and view information about suite users, create a user, or assign security roles to a user.

Note: Querying a large LDAP user registry for user IDs may result in LDAP timeouts if an appropriate filter is not set for the IDs to be returned.
In ISF 11.7.1.1 RU1 patch, JR62755 changes the behavior when the Users panel is first opened since there is no filter at that time; the UI will only display users that have roles assigned to them. This is also applicable when Clear Filter is clicked, or Filter is clicked with an empty filter.
You should set an appropriate non-empty filter to retrieve IDs from the LDAP repository.
Also, for an LDAP user registry, unless the registry is configured with attributes mapping, the filter will work only with Username and Group ID.
First name OR Given name
Type the given name of the user or a search pattern.
Last name or Family name
Type the family name or the user name of the user or a search pattern to filter the users that are displayed. If you use an external directory (for example, LDAP), you might search on user name instead of family name and given name.
Filter
Click to find users that match the criteria you entered.
Clear filter
Click to remove the filter terms and show the entire list of users.
Show additional filter criteria
Enter additional user metadata such as email address or title to filter the returned results. Additionally, you can select an assigned role to filter by security role.
First name
Shows the given name of the user.
Last name
Shows the family name of the user.
Username
Shows the name of the user.
Courtesy title
Shows the formal title of the user.
Business phone
Shows the business telephone number of the user.
Location
Shows the physical location of the user.
New user
Click to create a user. This task is not available if an external directory is used.
If you select any user/users from the list, you will see the following options: Delete user, Open user, Add roles to multiple users.

Open user
Click to view and update the details of the selected user.
Add roles to multiple users
Click to assign security roles to the selected users.
Delete User
Click to delete the selected user. This task is not available if an external directory is used.
5.1.2) Steps for creating new users in the new Web Admin console
If the IBM® InfoSphere® Information Server internal user registry is used, you can create users as the first level of security. You must create a user for each person that needs to log in to InfoSphere Information Server.
Before you begin
You must have suite administrator authority.
Procedure
- Log in to the new IBM InfoSphere Information Server Web console with admin credentials.
- In the Navigation pane, select Users & groups > Users.
- In the Users list pane, click New User.
- In the Create new user pane, provide information about the user.
Primary information:
The User name, Password, Confirm password, First name (Given name), and Last name (Family name) fields are required.First Name (Given Name)
Type the first name or given name of the user.
Last Name (Family Name)
Type the last name or family name of the user.

- Provide additional information if required.
Additional user information:
Title
Type a title for the user.
Instant Messaging ID
Type the user's instant messaging ID.
Job Title
Type a job title for the user.
Home Phone Number
Type the telephone number of the user's home.
Office Phone Number
Type the telephone number of the user's office.
Mobile Phone Number
Type the number of the user's mobile phone.
Pager Number
Type the telephone number of the user's pager.
Fax Number
Type the telephone number of the user's fax machine.
Email Address
Type the email address of the user.
Business Address
Type the user's business address.
Location
Type the user's location.
Organization
Type the user's organization.

6. Roles
Expand the norgie Roles. Click the drop-down arrow, and specify whether the user is an administrator user of the suite, or a user of the suite. The suite user role is assigned by default.

7. In Select all component roles drop-down, select whether the user has any suite component roles. To log in to any of the product modules, a user must have the suite user role. Also, add at least one suite component role for each suite component that you want the user to access. For example, if you are creating a user that will access IBM InfoSphere Information Analyzer, you must assign the suite user role and an Information Analyzer role; Project Administrator, Data Administrator, or User role.

8. Optional: Expand the Groups norgie. You can make a user a member of one or more groups.
In the “Select required groups from the below table” frame, you can use a filter to locate the groups you want the current user to belong to. Select groups as needed from the filtered output. The “Add selected groups” option is displayed on selecting a group. Click it to add the selected groups to the “Selected groups” frame on the left.
You can delete group/groups by clicking the Delete icon  located next to the group.
If you want to remove all groups added for a user, click Clear all.

9. Click Save,
The saved user information is displayed.

10. Clicking Save and Close, saves the user information and moves to the User list page.

5.1.3) Open user
Select from the list, a user to update, and click the Open user link.
Other than the User name field and project roles, you can update all other information of the selected user in the Update user page.
View suite roles and component roles for the user by expanding the respective sections. Roles that are directly assigned to the user are displayed with their corresponding check-box checked.


Project roles drop-down:
Use this pane to view the project roles assigned to a user.
Within components, for example InfoSphere DataStage, or InfoSphere Information Analyzer, a user can be assigned the role of a component user (not component administrator) so that the user can log in and use that component. In addition to such component roles, to work in a component project, a user must have roles specific to that project. Such roles are called project-level roles. Use the component’s GUI to log in to the relevant project for that component and assign the role to the user.
For example, use the IBM® InfoSphere® DataStage Administrator client to log in to a specific DataStage project, and assign a user the InfoSphere DataStage and Quality Stage Operator role. After assignment, the role is listed on the Project Roles pane for that user.
For DataStage roles, the server host and project name of the associated project are displayed, while for Information Analyzer roles, the workspace is displayed.

You can optionally add the user to an existing group.
Select the group you want to add the user to, and click Add selected groups link.
Next, click Save or Save and Close.


Use the Print option to see the complete information about this particular user like Additional user information,roles and groups it is part of .
Print View:


When a user is added to a group, the user inherits the roles of that group. You can assign roles at the suite level or at the component level. If you use an external directory (for example, LDAP), you cannot use this pane to add new groups.
If a role is directly assigned to a user, the check-box for that role will be checked. If a user inherits a role from a group, you will see inherited group information displayed next to the role (under the Inherited from groups column)..

5.1.4) Simple search and Advanced search
Use this pane to search for users based on different search criteria. You can use First name, Last name to search for users.

Note: Querying a large LDAP user registry for user IDs may result in LDAP timeouts if an appropriate filter is not set for the IDs to be returned.
In ISF 11.7.1.1 RU1 patch, JR62755 changes the behavior when the Users panel is first opened since there is no filter at that time; the UI will only display users that have roles assigned to them. This is also applicable when Clear Filter is clicked, or Filter is clicked with an empty filter.
You should set an appropriate non-empty filter to retrieve IDs from the LDAP repository.
Also, for an LDAP user registry, unless the registry is configured with attributes mapping, the filter will work only with Username and Group ID.
First name
Type the given name of the user or a search pattern.

Last name or User name
Type the family name or the user name of the user or a search pattern to filter the users that are displayed.

Filter
Click to find users that match the criteria you entered.
Clear filter
Click to remove the filter terms and show the entire list of users.
Likewise, you can also filter based on User name, location, and roles.

If you use an external directory (for example, LDAP), you may search on user name instead of family name and given name.
Show additional filter criteria
You can enter additional user metadata to filter the returned results such as email address or title.
Note: You can filter on attributes like email address only if
- Internal user registry is in use or
- You use a Federated repository and mapped the attributes you are filtering on

Additionally, you can select an assigned role to filter by security role.


5.1.5) Add roles to multiple users
From the User list page select users, or use filter and Additional filter criteria to choose users that match your criteria, and then click the “Add roles to multiple users” link.

Select users from the filtered listing in the “Assign roles to selected users” frame.
Use the drop-downs for “Select suite roles” and “Select component roles” to select which roles to assign to the selected users.

Click Save or Save & close. The selected roles are assigned to the users.

5.1.6) Delete User
Click to delete the selected user/users. This task is not available if an external directory is used.
Click Yes to confirm the selection; the selected user/users will be deleted.

5.2) Groups
From the Navigation pane on the left side, expand the norgie Users & groups.

Click Groups link to work with groups. The Groups list page will be displayed.
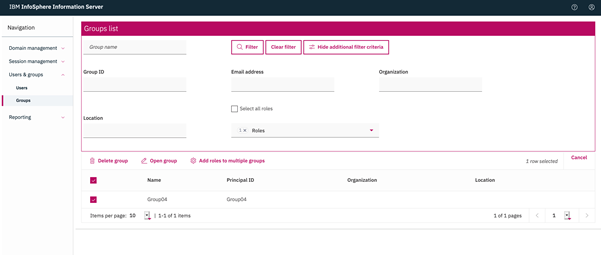
5.2.1) Groups list page
Use this pane to view information about groups, create a group, or assign security roles to a group.

Note: Querying a large LDAP user registry for group IDs may result in LDAP timeouts if an appropriate filter is not set for the IDs to be returned.
In ISF 11.7.1.1 RU1 patch, JR62755 changes the behavior when the Groups panel is first opened since there is no filter at that time; the UI will only display groups that have roles assigned to them. This is also applicable when Clear Filter is clicked, or Filter is clicked with an empty filter.
You should set an appropriate non-empty filter to retrieve IDs from the LDAP repository.
Also, for an LDAP user registry, unless the registry is configured with attributes mapping, the filter will work only with Username and Group ID.
Group name
Type a group name, group ID, or search pattern. If you use an external directory (for example, LDAP), you might search on group ID instead of name.
Filter
Click to show only groups that match the filter criteria in the object list.
Clear filter
Click to remove the filter terms and show all groups in the object list.
Show additional filter criteria
Enter additional user metadata to filter the returned results such as email address or location. Additionally, you can select an assigned role to filter by security role.
Location
Shows the physical location of the group.
New group
Click to create a new group and assign users to that group. This task is not available if an external directory is used.
After you select a group, you will see the options, Delete group, Open group, Add roles to multiple groups.

Delete group
Click to delete the selected group. This task is not available if an external directory is used.
Open group
Click to view and update the details of the selected group.
Add roles to multiple groups
Click to assign security roles to the selected groups.
5.2.2) Steps for creating new groups
If the IBM® InfoSphere® Information Server internal user registry is used, you can create user groups and assign security settings and roles to the groups. All users that belong to a group automatically inherit the security settings and roles that are assigned to the group.
Before you begin
You must have Administrator authority.
Procedure
- Log in to the new IBM InfoSphere Information Server console with admin credentials.
- In the navigation pane, select Users & groups > Groups.
- In the Group list page, click New group link.

ID
Type the ID of the new group. The following characters are valid when the internal User Registry is used:
- alphanumeric characters
- _ (underscore)
- - (hyphen)
- , (comma)
- \ (backslash)
- = (equal sign)
- . (period)
- $ (dollar sign) - not recommended if you want your local user ID to match the Internal User Registry ID
Name
Type the name of the group

Group Type
Type a category for the group. You can use this field to further categorize groups if needed. It is an optional classification that you can define in addition to the name field that gives the group more context, such Administrators of projects or Catalog Administrators.
Email Address
Type the email address of the group. Spaces are not allowed in this field.
Web Address
Type the URL of the group.
Location
Type the physical location of the group.
Organization
Type the organization of the group.

6. Roles- Expand the Roles norgie. You can specify Suite and Suite Component roles.
Select the suite roles and suite component roles that you want to assign to the group.
The roles are used to grant top-level and administrative access to IBM® InfoSphere® Information Server and its product modules, such as who can log in to InfoSphere Information Server, who has InfoSphere Information Server administrative rights, and who can access IBM InfoSphere DataStage®, IBM InfoSphere QualityStage®, or IBM InfoSphere Information Analyzer with regular user privileges or as administrators.

7. From the Select all suite roles drop-down, select the suite roles you want to assign to this group.

8. In the Select all component roles drop-down, select the component roles you want to assign for this group. You must add at least one suite component role for each suite component that you want the group of users to access. For example, if you are creating a group that will access IBM InfoSphere Information Analyzer, you must assign either the Information Analyzer Project Administrator, Data Administrator, or User role.

9. Optional: Expand the Users norgie. You can add Users to this group.
In “Select required users from below table” frame, filter the users you want to add to the current group. Select users from the filtered output and click Add selected users. The selected users will be added to the “Selected users” frame on the left side.

You can delete user/users with Delete icon  located next to the added user.
If you want to remove all users added to a group, click Clear all.

10. Click Save. The saved group information will be displayed.

11. Click Save and close, you will be redirected to the Group list page.

5.2.3) Open group
Select the group you want to update from the list, and click the ‘Open group’ link.
Other than the Group ID field and project roles, you can update all other information of the selected group in Update group page.
View suite roles and component roles for the group by expanding the respective sections. Roles that are directly assigned to the group are displayed with their corresponding check-box checked.


Project roles drop-down:
Use this pane to view the project roles assigned to a group.
Within components, for example InfoSphere DataStage, or InfoSphere Information Analyzer, a group can be assigned the role of a component user (not component administrator). All users that are a member of that group can log in and use that component. In addition to such component roles, to work in a component project, a user must have roles specific to that project, either assigned directly or inherited from a group. Such roles are called project-level roles. You can use the component’s GUI to log in to the relevant project for that component and assign the role to a group.
For example, use the IBM® InfoSphere® DataStage Administrator client to log in to a specific DataStage project, and assign a group the InfoSphere DataStage and Quality Stage Operator role. After assignment, the role is listed on the Project Roles pane for that group. For DataStage roles, the server host and project name of the associated project are displayed, while for Information Analyzer roles, the workspace is displayed.

You can optionally add existing users to the group.
Select the user you want, to add it to the group and click Add selected users link. Next, click Save or Save and Close.


Use the Print option to see the complete information about this particular user like Additional user information, roles and groups it is part of.
Print View:


When you add a user to a group, the user inherits the roles of that group. You can assign roles at the suite level or at the component level. If you use an external directory (for example, LDAP), you cannot use this pane to add new users.
5.2.4) Simple search and Advanced Search
Use this pane to search for groups based on different search criteria. You can search groups with Group name.

Note: Querying a large LDAP user registry for group IDs may result in LDAP timeouts if an appropriate filter is not set for the IDs to be returned.
In ISF 11.7.1.1 RU1 patch, JR62755 changes the behavior when the Groups panel is first opened since there is no filter at that time; the UI will only display groups that have roles assigned to them. This is also applicable when Clear Filter is clicked, or Filter is clicked with an empty filter.
You should set an appropriate non-empty filter to retrieve IDs from the LDAP repository.
Also, for an LDAP user registry, unless the registry is configured with attributes mapping, the filter will work only with Username and Group ID.
Group name
Type a group name, group ID, or search pattern. If you use an external directory (for example, LDAP), you can search on group ID instead of name.
Filter
Click to show only groups that match the filter criteria in the object list.

Clear filter
Click to remove the filter terms and show all groups in the object list.

Show additional filter criteria
Enter additional group information to filter the returned results such as email address or location. Additionally, you can select an assigned role to filter by security role.

If you use an external directory (for example, LDAP), you may search on group ID instead of group name.
In the drop-down for Roles, select an assigned role to filter by security role.

5.2.5) Add roles to multiple groups
In the Group list page select groups, or use filter and Additional filter criteria to choose groups that match your criteria. Next, click the “Add roles to multiple groups” link.

Select users in the “Assign roles to selected groups” page, and assign suite or component roles from the respective drop-downs.


Click Save or Save & close. The selected roles are assigned to the users.

5.2.6) Delete group
Click to delete the selected group/groups. This task is not available if an external directory is used.
Click Yes to confirm your selection; the selected group/groups are deleted.

6) Reporting:
6.1) Introduction
The new Administration console has limited Reporting functionality through the User interface as listed below:
a. New report creation for Scheduling and Security Report templates
b. View saved reports
c. Edit report
d. Delete reports
e. Run selected report
f. Open report result history etc.
Although optional fields are present in each New report creation page, currently, only the mandatory fields are supported in the New report creation and Edit report features.
Log in to the new Administration console with Administrator privileges. You will find the Reporting link in the Navigation pane on the left side.

Reporting:
Expand this norgie to choose the tasks you want to perform under Reporting. On expanding the norgie, you will see two links, New report and My reports.

6.2) New Report
Use this link to create a report that you can run to generate the results. You can specify parameter settings for the report, the report format, and the expiration policy for report results.
Click the New report, select any Report template from the Scheduling and Security report templates listed in the drop-down.

6.3) My reports

i) Log in to the new Administration console with Administrator credentials.
ii) Click the Reporting link from the left Navigation pane.
iii) Expand the norgie and click New Report link.
iv) Select a Report template (Scheduling OR Security) from the drop-down list and click Next.

v) Provide values for all mandatory fields and click Save and run.

Name
Type a name for the report. By default, the name of the report is the same as the name of the template.
Description
Type a description of the report. By default, the description of the report is the same as the description of the template. Optional:
Save-in Folder
By default, the report is saved in the main Reports folder.
Parameters
NOTE: In Information Server 11.7.1 Fix Pack 1, only values provided for Required parameters are honored. Values provided for optional parameters are not consumed. and not supported in this release; any default value associated with such parameters will be used.
Required parameters are indicated by an asterisk (*). Specify values for parameters; you may leave one or more required or optional parameter values unspecified, depending on whether you plan to run the report manually or by using a schedule.
Parameters that you specify values for, when you create or edit a report are called bound parameters. Parameters that you do not specify values for when you create or edit a report are called unbound parameters.
When you run a report using a schedule, you cannot specify values for parameters at the time of running the report. Hence, you cannot run a report by a schedule if the report has required parameters that are unbound. When you run a report manually, you can specify values for unbound parameters, but you cannot specify values for bound parameters.
Format
Specify the format of the report results. The number of available formats depends on which report template you use to create the report.
Output Format
Select a format for the report results.
HTML
Creates one or more HTML files. Specify HTML output options.
Creates a PDF file. Specify PDF output options.
RTF
Creates a file in rich text format.
TXT
Creates a file in text format. Specify Text output options.
XLS
Creates a file in XSL format that can be opened in Microsoft Excel. Specify XLS output options.
XML
Creates an XML file. Specify XML output options.
Settings
Specify the expiration policy and the retention policy for report results.
Expiration
Select the expiration policy for report results:
No Expiration
The report results do not expire.
Expire after
Specify the number of days, weeks, months, or years after which the report results expire. Report results are deleted at midnight on the day of expiration.
History Policy
Specify whether to replace or retain old report results, and the maximum number of results to retain for the report:
Replace Old Version
New report results replace previous results.
Archive as New Version
New report results are added to previous results.
Maximum Versions
Type the value for the maximum number of results that you want to save for the report.
vi) Click the Download button to view the report result.


You can generate other reports by repeating the same steps with any of the other report templates; provide values for mandatory fields and click Save and run.
6.5) Example of using the Security report template Active users in session:


6.6) Report Maintenance
You can manage reports with the following:
Open report settings, View report result, Run selected report, Open report result history, Delete report, etc.
In the left Navigation pane, click the My reports link under the Reporting norgie. The My reporting page will list the name and description of each report, the template that the report was created from, and the date that it was created.

Select a report. Next, select one of the tasks listed at the top of the panel:

6.6.1) Open report settings:
Use this pane to view and edit the settings of a report. You can specify parameter settings for the report, the format, and expiration policy for report results.

Name
Type a name for the report. By default, the name of the report is the same as the name of the template.
Description
Type a description of the report. By default, the description of the report is the same as the description of the template. Optional:
Save-in Folder
By default, the report is saved in the main Reports folder.
Parameters
NOTE: In Information Server 11.7.1 Fix Pack 1, only values provided for Required parameters are honored. Values provided for optional parameters are not consumed; any default value associated with such parameters will be used.
Required parameters are indicated by an asterisk (*). Specify values for parameters; you may leave one or more required or optional parameter values unspecified, depending on whether you plan to run the report manually or by using a schedule.
Parameters that you specify values for, when you create or edit a report are called bound parameters. Parameters that you do not specify values for when you create or edit a report are called unbound parameters.
When you run a report using a schedule, you cannot specify values for parameters at the time of running the report. Hence, you cannot run a report by a schedule if the report has required parameters that are unbound. When you run a report manually, you can specify values for unbound parameters, but you cannot change the values assigned to bound parameters.
Format
Specify the format of the report results. The number of available formats depends on which report template you use to create the report.
Output Format
Select a format for the report results.
HTML
Creates one or more HTML files. Specify HTML output options.
Creates a PDF file. Specify PDF output options.
RTF
Creates a file in rich text format.
TXT
Creates a file in text format. Specify Text output options.
XLS
Creates a file in XSL format that can be opened in Microsoft Excel. Specify XLS output options.
XML
Creates an XML file. Specify XML output options.
Settings
Specify the expiration policy and the retention policy for report results.
Expiration
Select the expiration policy for report results:
No Expiration
The report results do not expire.
Expire after
Specify the number of days, weeks, months, or years after which the report results expire. Report results are deleted at midnight on the day of expiration.
History Policy
Specify whether to replace or retain old report results, and the maximum number of results to retain for the report:
Replace Old Version
New report results replace previous results.
Archive as New Version
New report results are added to previous results.
Maximum Versions
Type the value for the maximum number of results that you want to save for the report.
Click Save and run if you want to save your changes. Otherwise, click Cancel button.
When you change the settings of a report, the changes are reflected in the report results the next time you run the report, either manually or by using a schedule. Changing the settings of a report does not change report results that were generated before you changed the settings.
6.6.2) View report result:
Displays the latest report result for the selected report in another tab or new window.

6.6.3) Run selected report:
Runs the selected report.

When report execution is completed, the report results are opened in a new tab or new window as shown below:

6.6.4) Open report result history:
Displays the list of report results for this report.

6.6.5) Delete:
Deletes one or more selected reports. You must have Delete permission for the report and on all results for a given report (if any) when deleting the report.


7) Known issues
- Suite user is unable to save engine credentials in the "Open my credentials" panel.
- "Invalid credentials" message is displayed when maximum configured sessions are used.
- Trusted sessions or any indication of the same should not be displayed as they are intended to be transient.
7.3) Users & Groups
- In various panels, roles are displayed with the role name. However, DirectoryCommand output lists roles with role IDs. To see the mapping between Role ID and Role Name, refer to DirectoryCommand help.
-
For ISD project roles that are inherited, the group from which the role is inherited is not displayed.
-
A warning message is not displayed if the Suite User role is unchecked while creating or updating a user.
-
In IBM Cloud Pak for Data environments, user and group role assignment should not be allowed.
7.4) Reporting
- Folder management feature (Create, Rename and Delete a folder) is currently not available.
- Reporting search functionality is not implemented.
- Access control feature which manages the list of users, groups, and roles that have access to a selected report, is currently not available.
- The features to add reports as Favorites, and to remove reports from Favorites are currently not available.
- The ability to set Preferences for Maximum Result History Limit, Default Expiration, Default History Policy is currently unavailable.
- There are some overlapping sections in reports generated with RTF format.
- In the “List of Users” new report creation page, incorrect items are listed in the Components drop-down.
- The Report Result Status is not displayed.
- Reports created in the new Administration console are not listed under the Save reports tab of the Information Server Console (Mozart Console). However, they are listed in “View Reports by date”.
7.5) General
- Customers using Information Server releases before version 11.7.1.1, that desire to use the new Administration console should upgrade to version 11.7.1.1 or later.
- Context specific help links are not functional.
- The “Remember me” checkbox in the login screen is not completely implemented.
- You will not get a warning message if you cancel out of a panel when unsaved data is present.
- Limitation on the pagination in Engine Credential, Users and Groups panels: You must finalize the contents in the first page before you move on to the next page. If you move to the next page without finalizing, the previous page selections will be lost.
- Native Language Support (NLS) is not provided.
- If you change the Engine tier host name, the host name change document and scripts does not replace the old host name in XMETA.registration_ASBNode. As a result, the new Administration console lists the old host name in the Engine Credentials panel. Similar behavior may also be seen if an IP address is assigned to multiple host names. Updating the entry in XMETA resolves the issue.
- The Reporting console (new Administration console) feature in the DataStage Designer reports error status 404 when connecting from a version 11.7.1.1 client to a 11.7.1.1 Service Pack 1 or later server.
- In 11.7.1.3, clicking Usage does not take you to the "Usage of the Administration console in InfoSphere Information Server 11.7.1.3" document.
8) Fixed Issues
8.1) 11.7.1.1 RU1
- JR62767-In installations that have configured multiple engine tiers, the Engine credentials panel displays duplicate entries in the list of engine tiers.
- JR62755-If your LDAP user registry contains a large number of users and groups, the Users and Groups page does not load and display the users list. In ISF 11.7.1.1 RU1 patch, JR62755 changes the behavior of this page to address this issue. For details, see sections that filter user or group IDs.
- JR62502-Unable to log in to the new Information Server Administration Console after 11.7.1 Fix Pack 1 is installed.
- JR62814 Launchpad does not display Microservices tier icons properly. Enhance configuration to allow launchpad to work with short/long hostname or IP. Follow the post install steps in 11711 RU1 readme file to resolve the issue.
8.2) 11.7.1.1 RU2
- JR62880 - Various issues related to handling of Project roles in the Administration console.
a. In Open user and Open Group panels, within roles, the "Select all project roles" listing provides checkboxes for users to maintain project related roles. However, none of these roles can be changed in the Administration console. Additionally, the roles listed do not specify the project that they are associated with.
b. User does not inherit project roles from group membership when LDAP is used.
c. DataStage Project roles inherited from a group are not displayed as inherited. - JR62945 - In Domain management->User registry configuration->Open provider configuration of the Administration console, the list of attributes is determined by the user registry in use.
8.3) 11.7.1.1 SP1
- In some panels, saved data is not reflected in the UI when Save is clicked.
- There might be panels where long LDAP names might not be word wrapped or scrollable.
- User suite and component roles are shown as inherited even when the role was directly assigned to the user.
- Group suite and component roles are shown as inherited even though a group cannot inherit roles.
- Group count is showing as 1 when no group is assigned to a user in the Open user page.
- If no user is selected for credential mapping in the Open user credential page, no error message is displayed .
- A user without Suite User role can log in to the console.
- JR63465 - Log in to the administration console fails when Chrome or EDGE browsers are used.
- JR63385 - After 11.7.1.1 Rollup patch 2 is installed, Information Analyzer project roles are not listed.
- On the Microservices tier, clicking on the Reporting link is redirecting to the login screen.
8.4) 11.7.1.1 SP2
- For Suite, Component and Project roles, the Open session details, Update user, and Update groups panels are enhanced to display information clearly and correctly. Refer to sections 4.1.4, 5.1.3, and 5.2.3 for details.
-
Project roles display is enhanced for directly assigned roles and roles inherited from a group. Refer to sections 5.1.3 and 5.2.3 for details.
-
Enhanced Update user and Update group panels with a Print option that can be used to display the updated information in a form that can be easily printed. Refer to sections 5.1.3 and 5.2.3 for details.
- After clicking Disconnect all button, an error message indicating unauthorized user is displayed instead of the login page.
- In Users and Groups -> Groups -> Open group ->Users, all the users in the selected group cannot be removed when the Clear all button or the Delete button is used.
- IA Project roles inherited from a group are not displayed as inherited.
- An inherited project role is not showing the group information from which the project role was inherited
- In Open User (or Group), when the Select all Suite (or component) roles checkbox is selected, the list of roles cannot be viewed as the drop-down is disabled.
- In Open group panel, after information for the group is updated, users cannot be added to the group until the changed information is saved.
- With LDAP user directory, wild cards are not required for the search filter to work with Username and Group ID.
- Display names improved for User registry configurations.
- Individual groups can be cleared from the Update user page.
- Reporting Console can be launched from the DataStage Designer.
- With LDAP user directory, groups with a long name are displayed properly in the Users panel.
- With LDAP user directory, users with a long name are displayed properly in the Groups panel.
- With LDAP user directory, IA Project roles are inherited from the group for a given user.
Was this topic helpful?
Document Information
Modified date:
03 November 2021
UID
ibm10959613