How To
Summary
This article describes how to enable and disable two-factor authentication for QRadar EDR (formerly ReaQta) Hive dashboard users.
Steps
Enable two factor authentication
Two-factor authentication can be enabled at the time of creating a new user, as described here, or later from Manage Users page.
Steps to enable two-factor authentication from dashboard GUI:
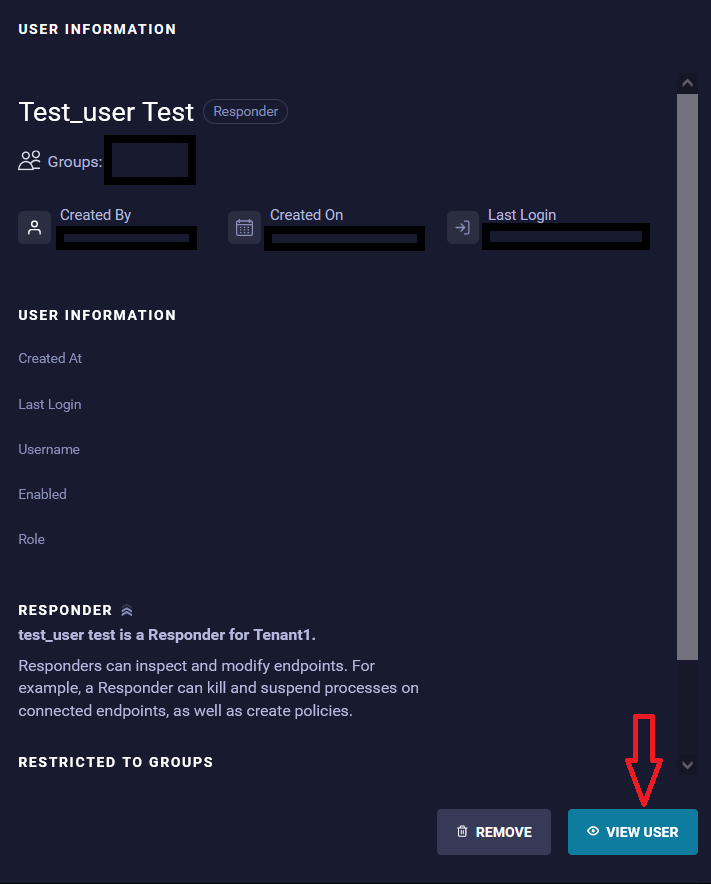
- As an administrator user, go to Administration > Manage Users.

- Click the user that you want to enable two-factor authentication. A user details page appears. Select View User.
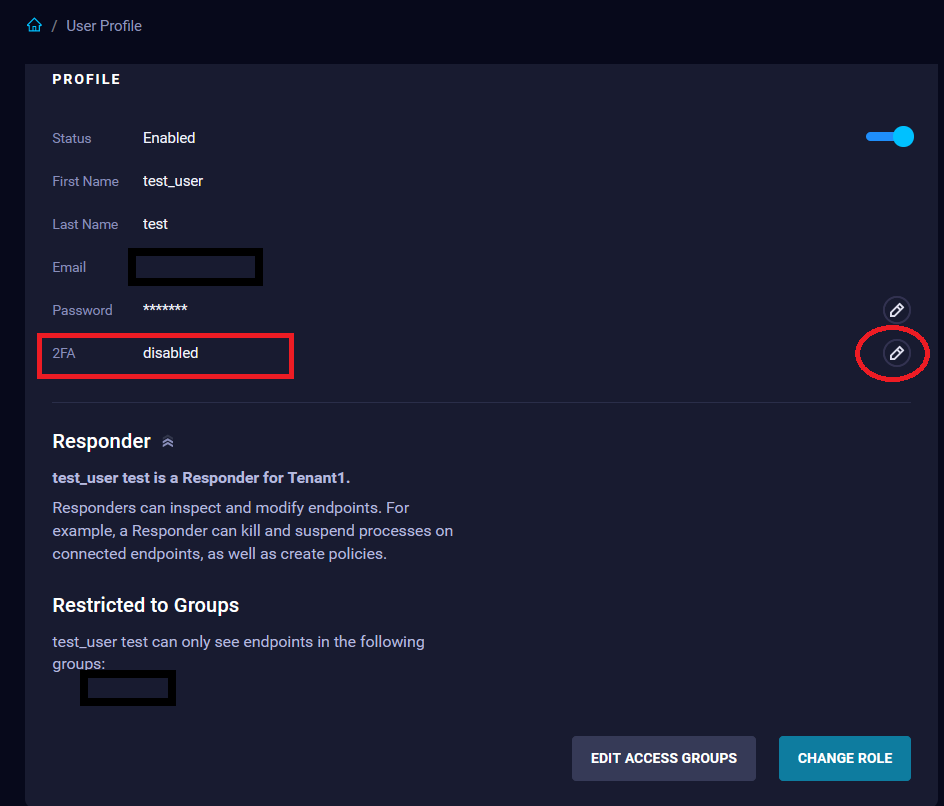
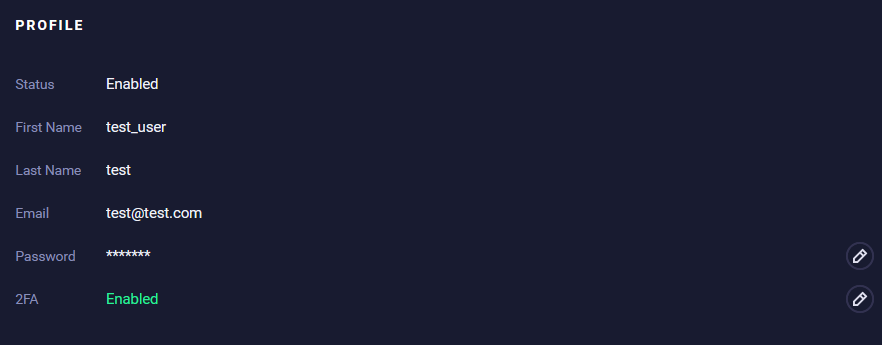
- Click the edit symbol against 2FA on Profile section of the user.
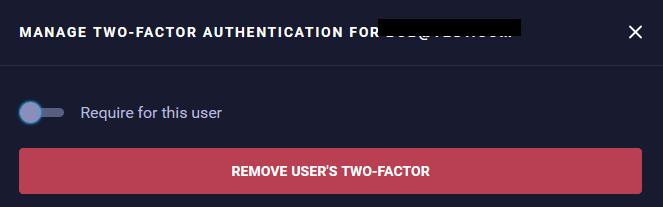
- In the dialog box that appears, toggle the Require for this user option.
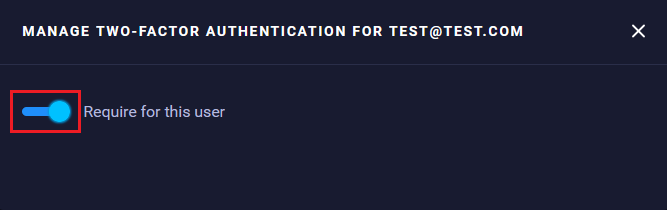
- Once it is enabled, you see the following message, which indicates it is required for the user:
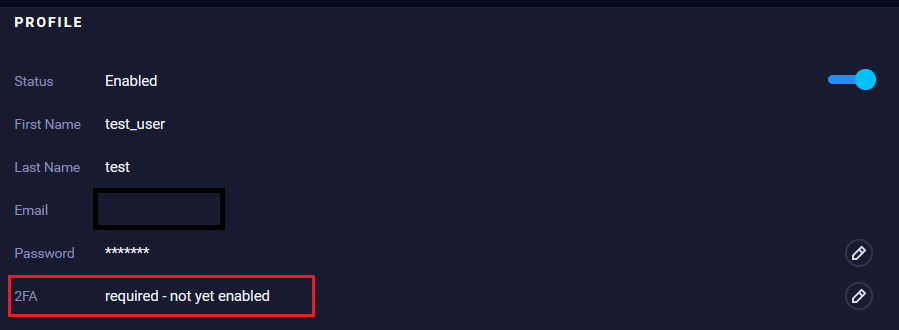
- For the user that you enabled two-factor authentication for, these steps must be performed to set it up.
- The user is presented with the following message to set up two-factor authentication.
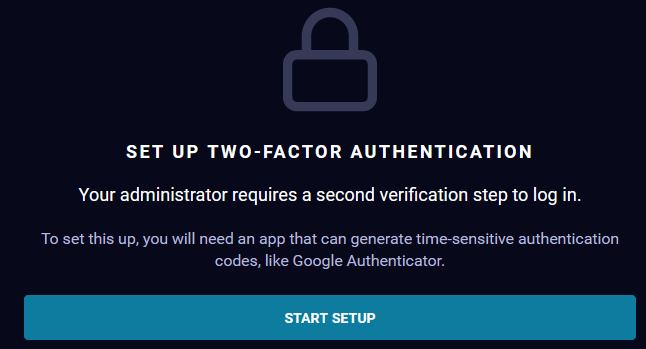
- Click Start Setup.
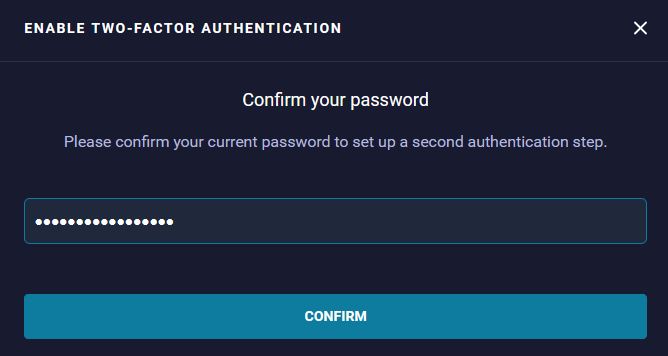
- You are asked to confirm your password:

- Next, you are presented with a QR code, which you can scan by using any application that can generate six-digit time-sensitive passwords. Scan the code and enter the 6-digit TOTP (time based one-time password).
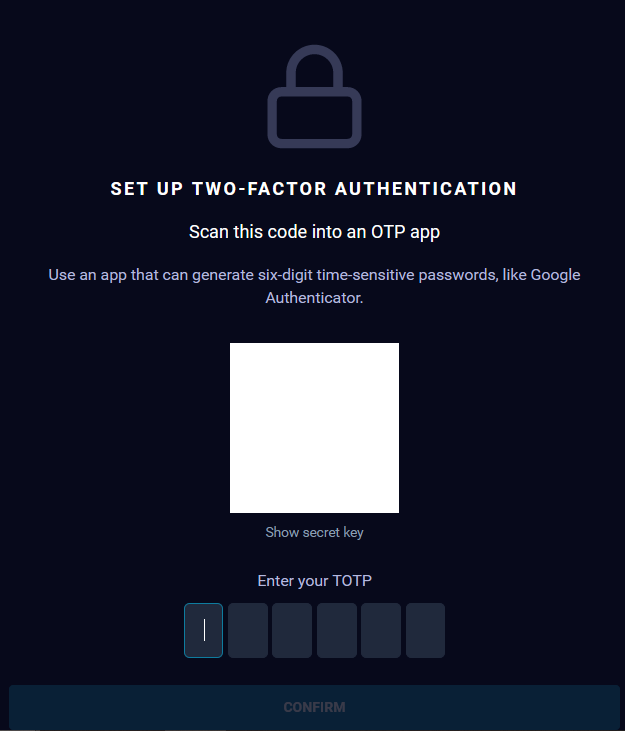
- Click Confirm.
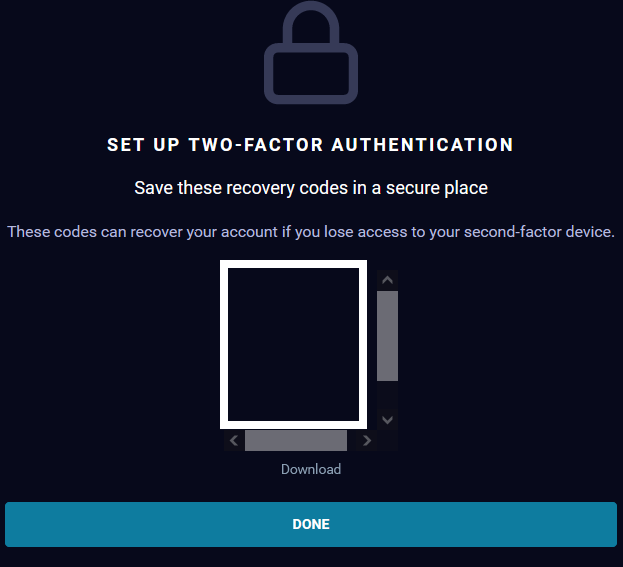
- You would be presented with recovery codes, which can be used in case you lose access to second-factor device.
- Finally, you are presented with a license agreement page followed by changing the temporary password with a permanent one.
- The user is presented with the following message to set up two-factor authentication.
- Now you are able to log in to the dashboard with two-factor authentication required every time.
- Alternatively, nonadministrative users can enable two-factor authentication for their account.
- If you log in as nonadministrative user for the first time, you are presented with a license agreement page followed by changing the temporary password with a permanent one.
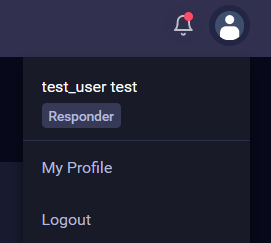
- Go to User account icon on upper right of the dashboard and click My Profile.
- Click the edit symbol against 2FA on Profile section of the user as mentioned in step 5 previously.
- You are prompted to confirm user password.
- Once confirmed, you are presented with QR code.
- Scan the code, enter the TOTP, and download the recovery codes.
- Click Done.
- Second-factor authentication is now enabled for the user account each time you log in to the system
Disable two-factor authentication
Only Administrator users can disable two-factor authentication for all types of users.
Steps to disable two-factor authentication:
- As an administrator, go to Administration > Manage Users.
- Double-click the user that you want to disable two-factor authentication.
- A user details page appears. Select View User.
- Click the edit symbol against 2FA on Profile section of the user.

- Toggle the Require for this user option and click Remove user's two factor button.
- Two factor authentication is now disable for the user:

Related Information
Document Location
Worldwide
[{"Type":"MASTER","Line of Business":{"code":"LOB24","label":"Security Software"},"Business Unit":{"code":"BU059","label":"IBM Software w\/o TPS"},"Product":{"code":"SSVOEH","label":"IBM Security ReaQta"},"ARM Category":[{"code":"a8m3p000000hBSPAA2","label":"Administrative Tasks-\u003EUsers"}],"ARM Case Number":"","Platform":[{"code":"PF025","label":"Platform Independent"}],"Version":"All Versions"}]
Product Synonym
ReaQta
Was this topic helpful?
Document Information
Modified date:
17 May 2023
UID
ibm16568697