Troubleshooting
Problem
NETSERVER PRINT SHARES WILL NOT WORK WITH SMB2: https://ideas.ibm.com/ideas/IBMI-I-2489
Resolving The Problem
 Adding a Printer that Uses an IBM i NetServer Print Share on Microsoft Windows 7
IMPORTANT:**************************************************************IBM i NetServer print sharing requires the client and server to support SMB1 to allow the client to fall back to supported versions of print flows. IBM i NetServer does not support the Windows services necessary for supporting print over the SMB2 protocol.**************************************************************This is also documented in:MA48963: OSP NETSERVER PRINT SHARES WILL ONLY WORK IN SMB1 ENVIRONMENT: https://www.ibm.com/mysupport/s/defect/aCI3p0000008tisGAA/dt306601?language=en_USThere is also an Idea:NETSERVER PRINT SHARES WILL NOT WORK WITH SMB2: https://ideas.ibm.com/ideas/IBMI-I-2489
To install a Windows print driver to work with the print share:From PRINTERS AND SCANNERS, select to ADD A PRINTER OR SCANNERSelect the option to ADD A NEW DEVICE MANUALLYSelect SELECT A SHARED PRINTER BY NAME and specify \\NetServerName\PrinterShareNameClick NEXTInstall the appropriate Windows print driver for the destination printerAs noted, this will not work unless in an entirely SMB1 environment.*************************************************************************************************************************The following information is obsolete and provided for historical purposes only. It will eventually be deletedStep 1: Click on the Windows Start
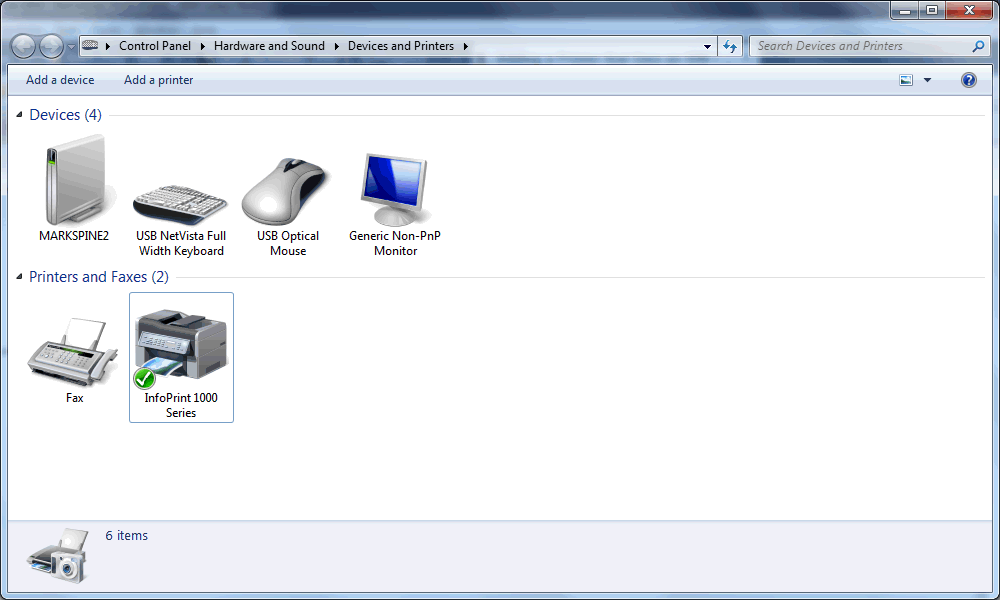
 button, then open the Windows Control Panel and select View devices and printers, or select Devices and Printers directly.
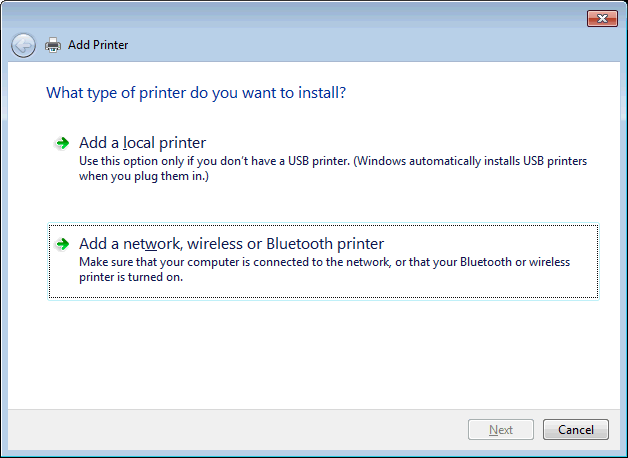
Step 2: Click on Add a printer, then click on Add a network, wireless or Bluetooth printer.
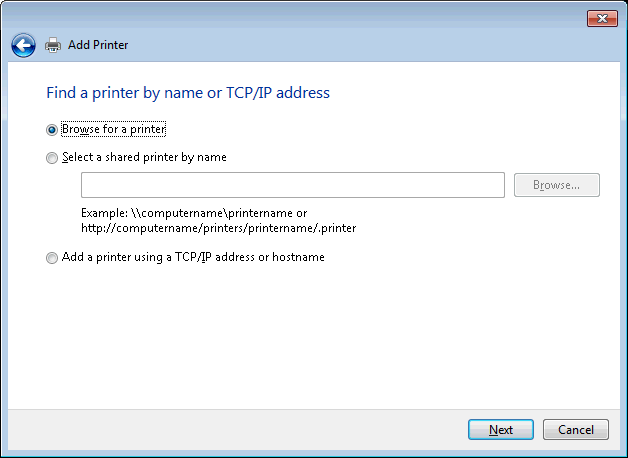
Step 3: The printer will not be found automatically, so at any time just click on The printer that I want isn't listed.

Step 4: Select Browse for a printer and then click Next.
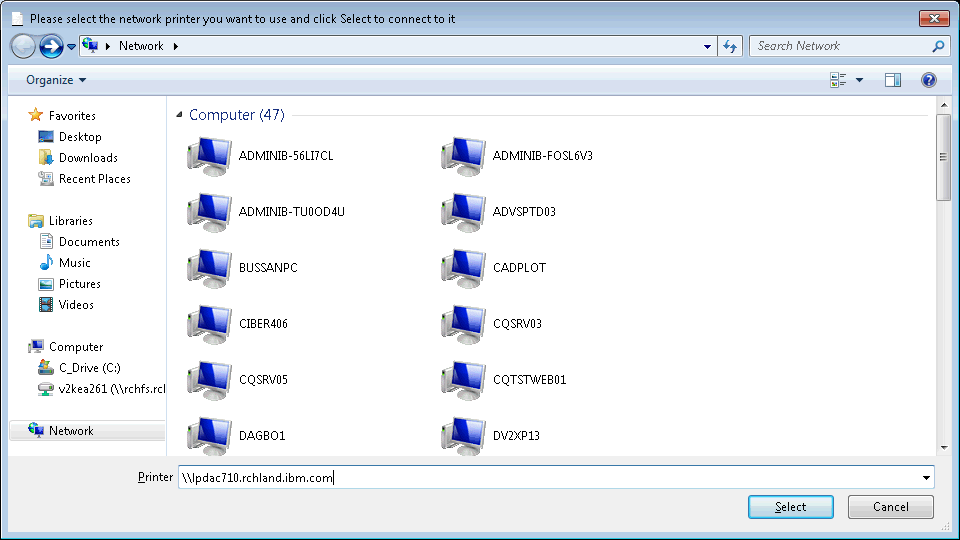
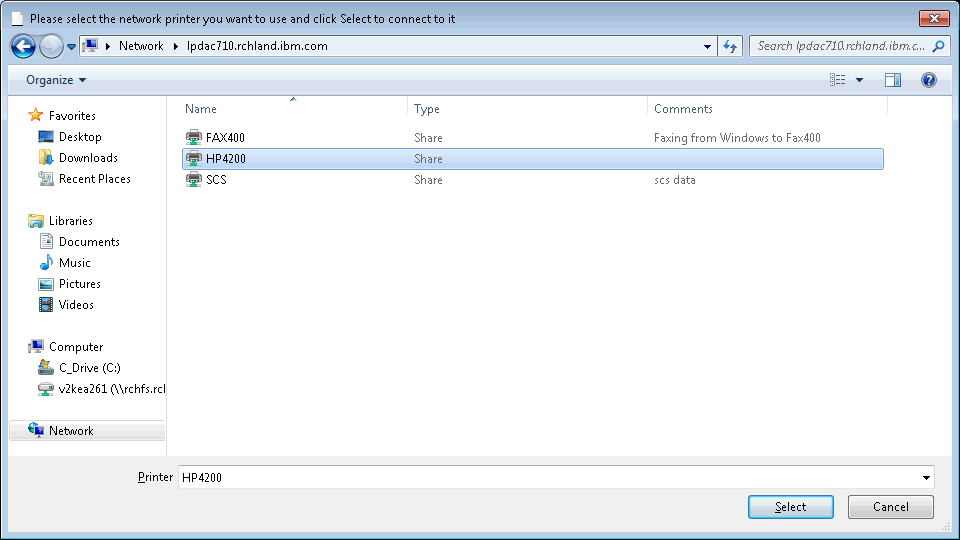
Step 5: The IBM i NetServer will not be found automatically by Windows, so type two backslashes ("\\") followed by the system name in the Printer field and click Select.
Step 6: Select the print share from the list and click Select.
Step 7: If you receive the Windows "No driver found" message, click OK.
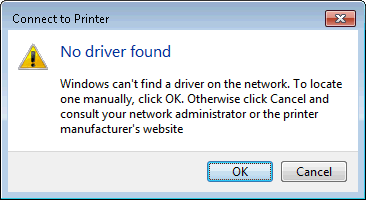
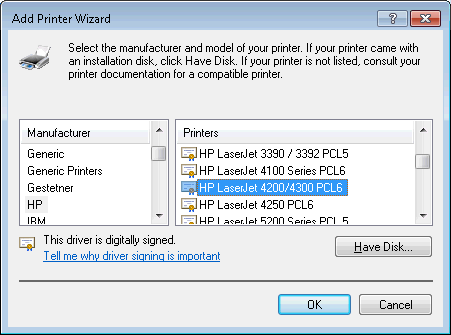
Either select an appropriate printer driver from the list and click OK, or use your web browser to download a driver from the printer manufacturer's web site and click Have Disk.
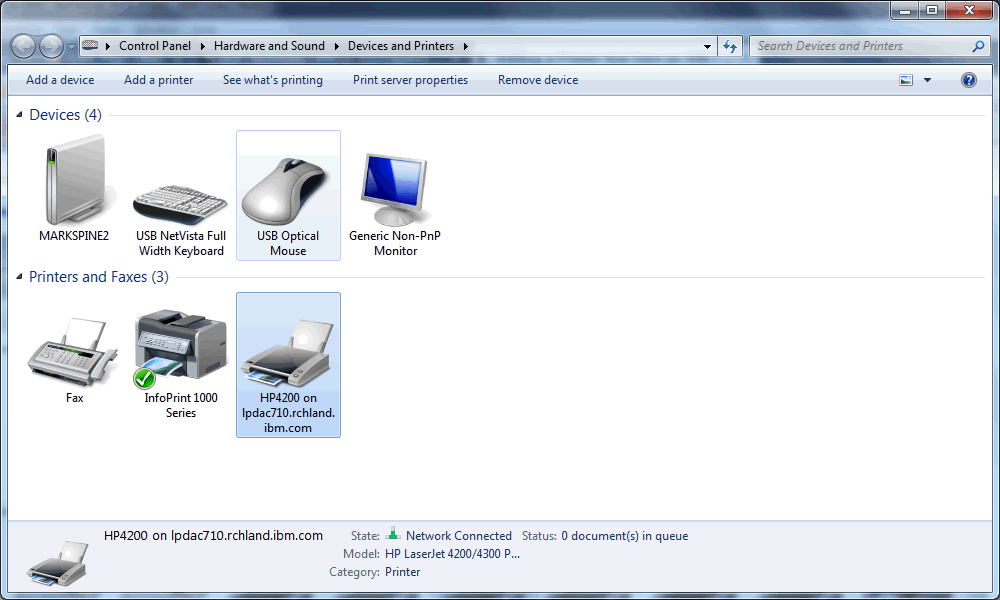
Step 8: Once the print share has been successfully added, click Next.

Step 9: Select whether to set the print share as your Windows default printer, then click Print a test page to test the print share, if desired, and then click Finish.

Step 9: Clicking on Print a test page will result in the following message. Click on Close to close this dialog box.

Note: If the test page does not print right away, check the corresponding output queue and writer on your IBM i system.
Step 10: Once the Add Printer wizard has completed, you can right click on the new printer and select Printer properties to change the printer driver settings, if desired.
- Adding a Printer that Uses an IBM i NetServer Print Share on Microsoft Windows XP
Step 1: It is recommended that you right-click on the My Network Places icon on your desktop and select Search for Computer to find the name or TCP/IP address of the iSeries NetServer.
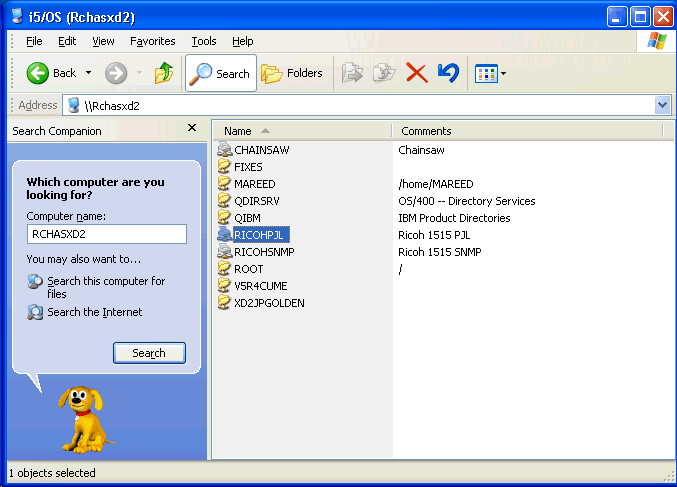
Step 2: Double-click on the iSeries NetServer name to find the shared object (printer) that you want to use:
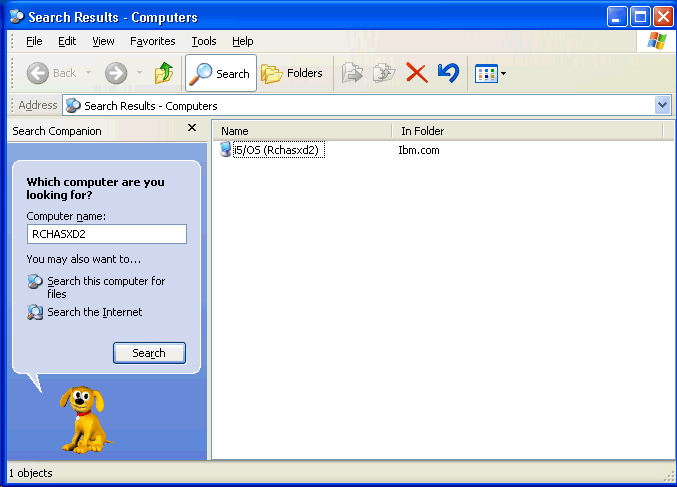
If you receive a message stating that the computer was not found, refer to Rochester Support Center knowledgebase document 11600129, Getting Started with iSeries NetServer. To link to 11600129 immediately, click here .
Step 3: After you get the list of shared objects from the iSeries NetServer, double-click on the printer that you want to use:
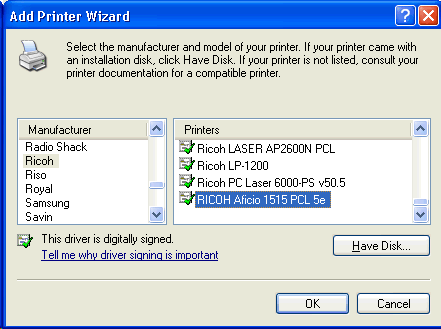
Step 4: The printer driver will not be found on the IBM System i products, so just click OK:

Step 5: Select the correct printer, then click OK:
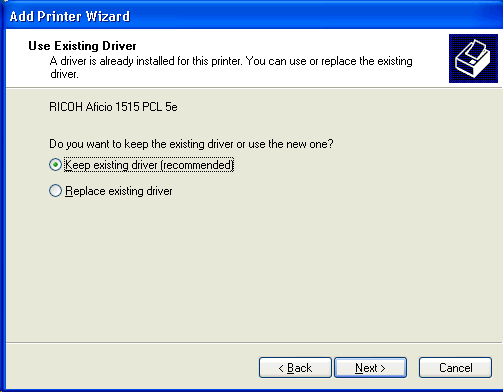
Step 6: If you already have the driver installed, select Keep existing driver and then click Next:
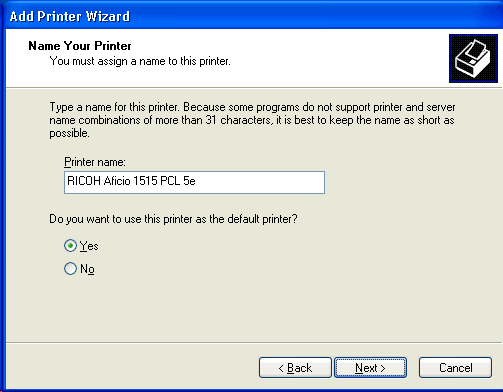
Step 7: If requested, type in a user-specified name:
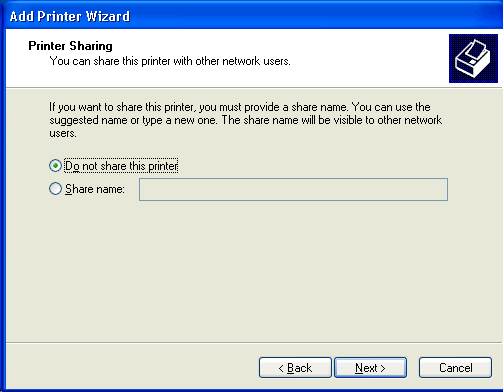
Step 8: It is not necessary to share this printer, so just click Next:
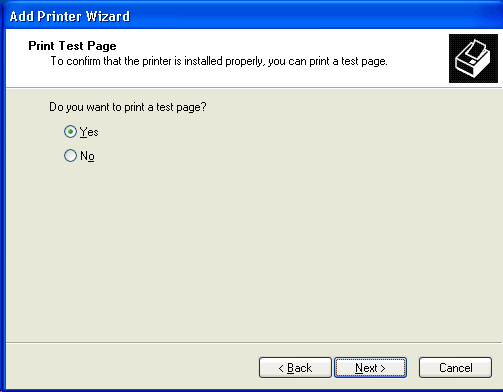
Step 9: You might want to print a test page at this point:
Your iSeries NetServer printer is now installed.
Historical Number
14323730
Was this topic helpful?
Document Information
Modified date:
12 May 2025
UID
nas8N1019656