This blog is to get you jump started with a quick fundamental task using IBM® BigInsights® for Apache Hadoop on Bluemix®. You may treat it as similar to writing a “Hello World” program using a programming language, that you have learnt recently.
Target is to ingest .csv file data into a BigInsights cluster, and query the file directly using Hive External Table. To accomplish this, you will need the following.
1. One IBM Bluemix user account. If you do not have one, sign up at http://ibm.biz/bluemixRegistration for 30 day free trial.
2. One BigInsights for Apache Hadoop cluster, under Basic (Beta) service plan. A quick documentation on how to provision a cluster is available at https://console.ng.bluemix.net/docs/services/BigInsights/index-gentopic…
a. One data node is sufficient for this project. However, you may have more of them if you wish to.
b. “Optional Components” can be left out, as you will not need them. However, it would be wise enough to choose all of them, in case you plan using this cluster for some other project later.
3. Data set to be ingested, in .csv file format. For this blog, we will be using the classic “Adult Data Set” (http://archive.ics.uci.edu/ml/datasets/Adult) available in UCI Machine Learning Repository (http://archive.ics.uci.edu/ml/).
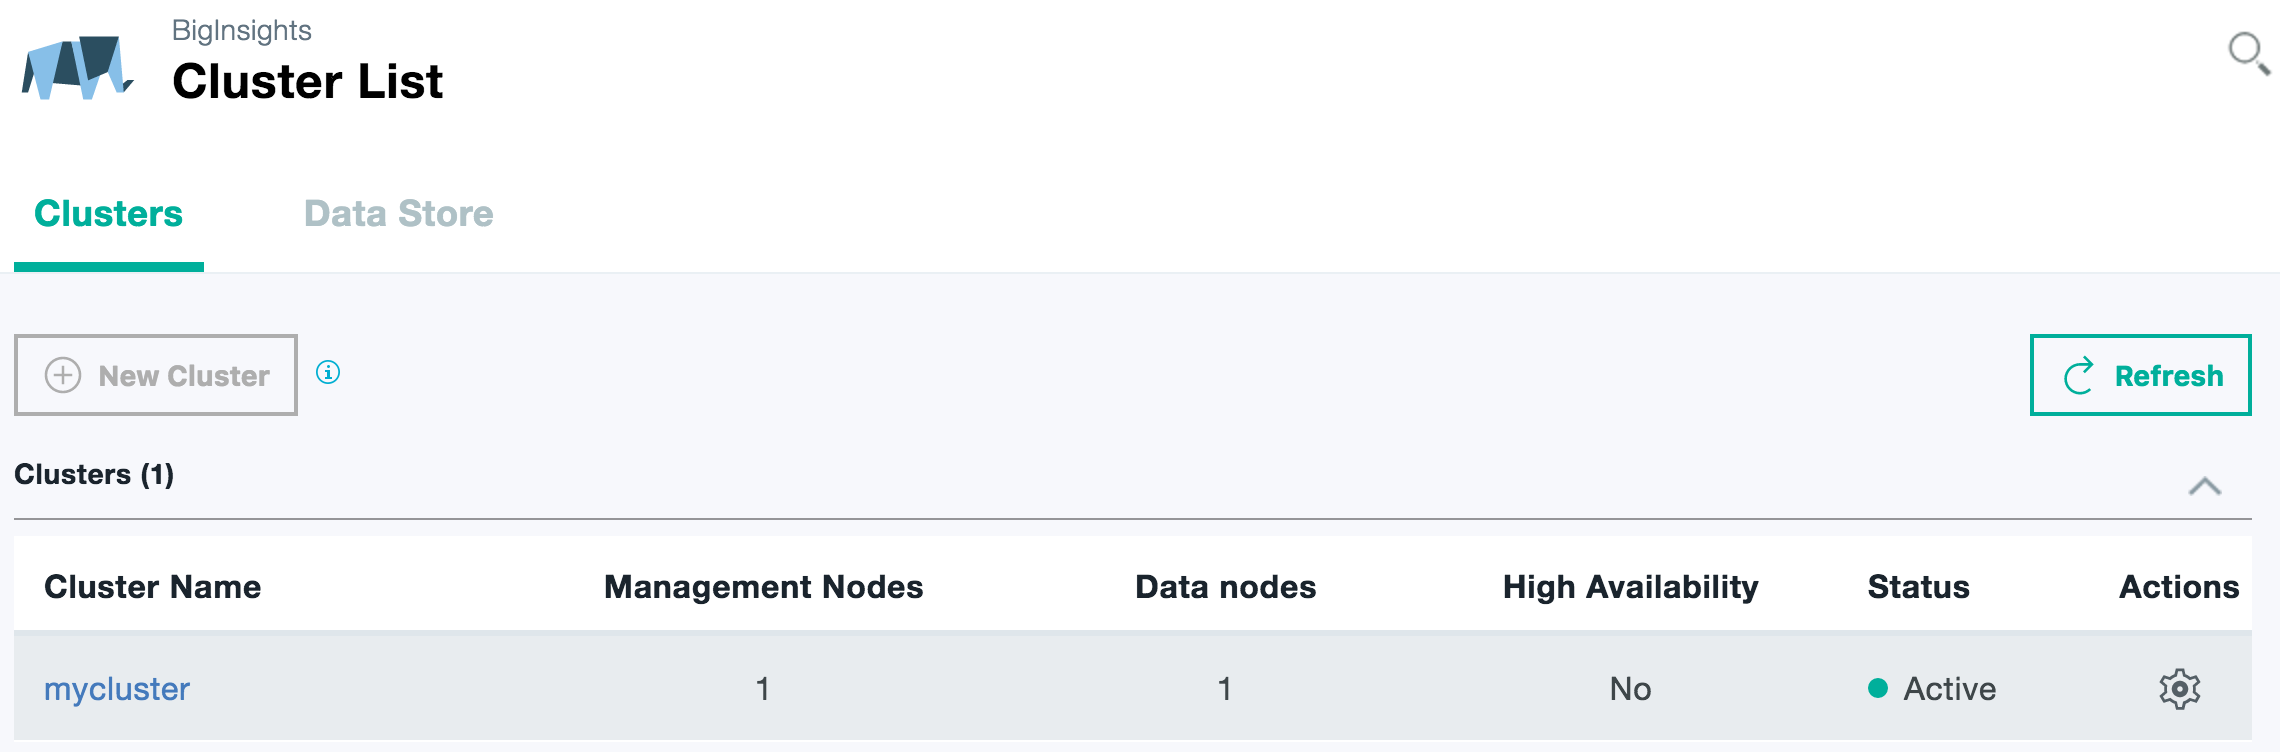
The cluster, that I created is called “mycluster” and cluster user name is “myuser”
Wait until your cluster reaches the “Active” state; and then proceed further.
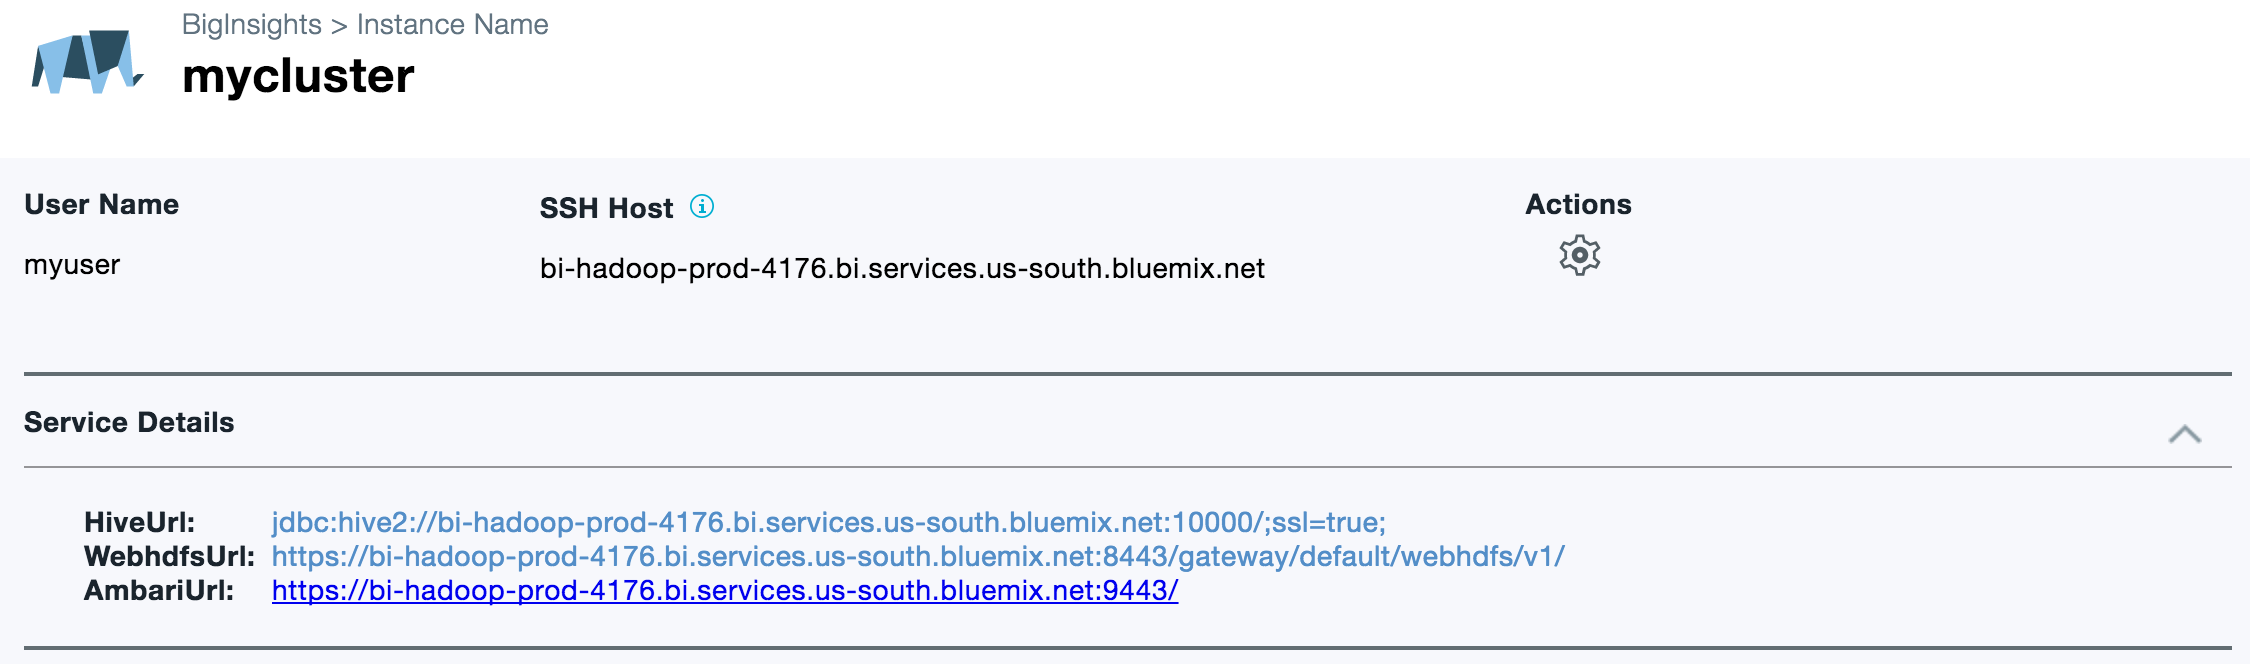
1. Click on the cluster name hyperlink (“mycluster” in my case) to open the cluster details web page. Copy the SSH hostname from there.
2. Connect to the SSH host using your local terminal.
a. I am connecting to “bi-hadoop-prod-4176.bi.services.us-south.bluemix.net” using “myuser” credentials. Following is the command
ssh myuser@bi-hadoop-prod-4176.bi.services.us-south.bluemix.net
b. Accept the RSA key.

c. Enter password (that you chose for your user while provisioning the cluster). Upon successful authentication, you will get into the shell node command prompt of your cluster.

3. Download the “Adult Data Set” from UCI Machine Learning Repository. Use the below command to do that.
wget http://archive.ics.uci.edu/ml/machine-learning-databases/adult/adult.data
Download should not take more than a couple of seconds. Once done, verify that the “adult.data” file is now available at the local home directory. Execute ‘ls’ command to perform this quick validation.

4. Push the data set to HDFS. In order to to place the file in HDFS home directory of your cluster user (‘/user/myuser’ in my case), execute the below command from the shell node system command prompt.
hadoop fs -copyFromLocal $HOME/adult.data /user/myuser
Again, copy would finish as soon as you hit the enter key. Make sure that the file is now available in HDFS using the below command.
hadoop fs -ls /user/myuser

Note: We could have used Hadoop specific tool such as Flume to fetch the .csv data file from the internet and place it onto HDFS. However, we chose to use “wget” instead, for the sake of simplicity. I did not want Flume to take away any attention, as this blog is more about Hive.
5. Now, it’s time to apply a schema on the data set. We will use Hive service to do that; but before proceeding further, skim through the adult data set description (https://archive.ics.uci.edu/ml/machine-learning-databases/adult/adult.n…) to quickly understand various attributes of it.
a. To interact with Hive through its CLI, type in hive at the system command prompt of your shell node, and you will get Hive CLI at your service.

b. We do not want Hive to duplicate the data in a persistent table. Rather, we will create an external table pointing to the file location (see the hive command below), so that we can query the file data through the defined schema using HiveQL. For the sake of simplicity, we will make use of the ‘default’ Hive database.
create external table if not exists adult (age int, workclass varchar(25), fnlwgt int, education string, education_num tinyint, marital_status string, occupation string, relationship string, race string, sex varchar(6), capital_gain int, capital_loss int, hours_per_week smallint, native_country string, income varchar(10)) row format delimited fields terminated by ',' stored as textfile location ‘/user/myuser’;
You should see the response message appearing as below.

6. At the final step, we will query the ‘adult’ external table using HiveQL.
a. By default, Hive CLI does not print the query result table with column headers. We need to enable it using the following command.
set hive.cli.print.header=true;
b. Let us try figuring out adult count by workclass and income levels. Following is a SELECT query to get the numbers.
select coalesce(workclass,'Unknown') as workclass, coalesce(income,'Unknown') as income, count(*) as count from adult group by workclass, income;
And the results should appear as below.
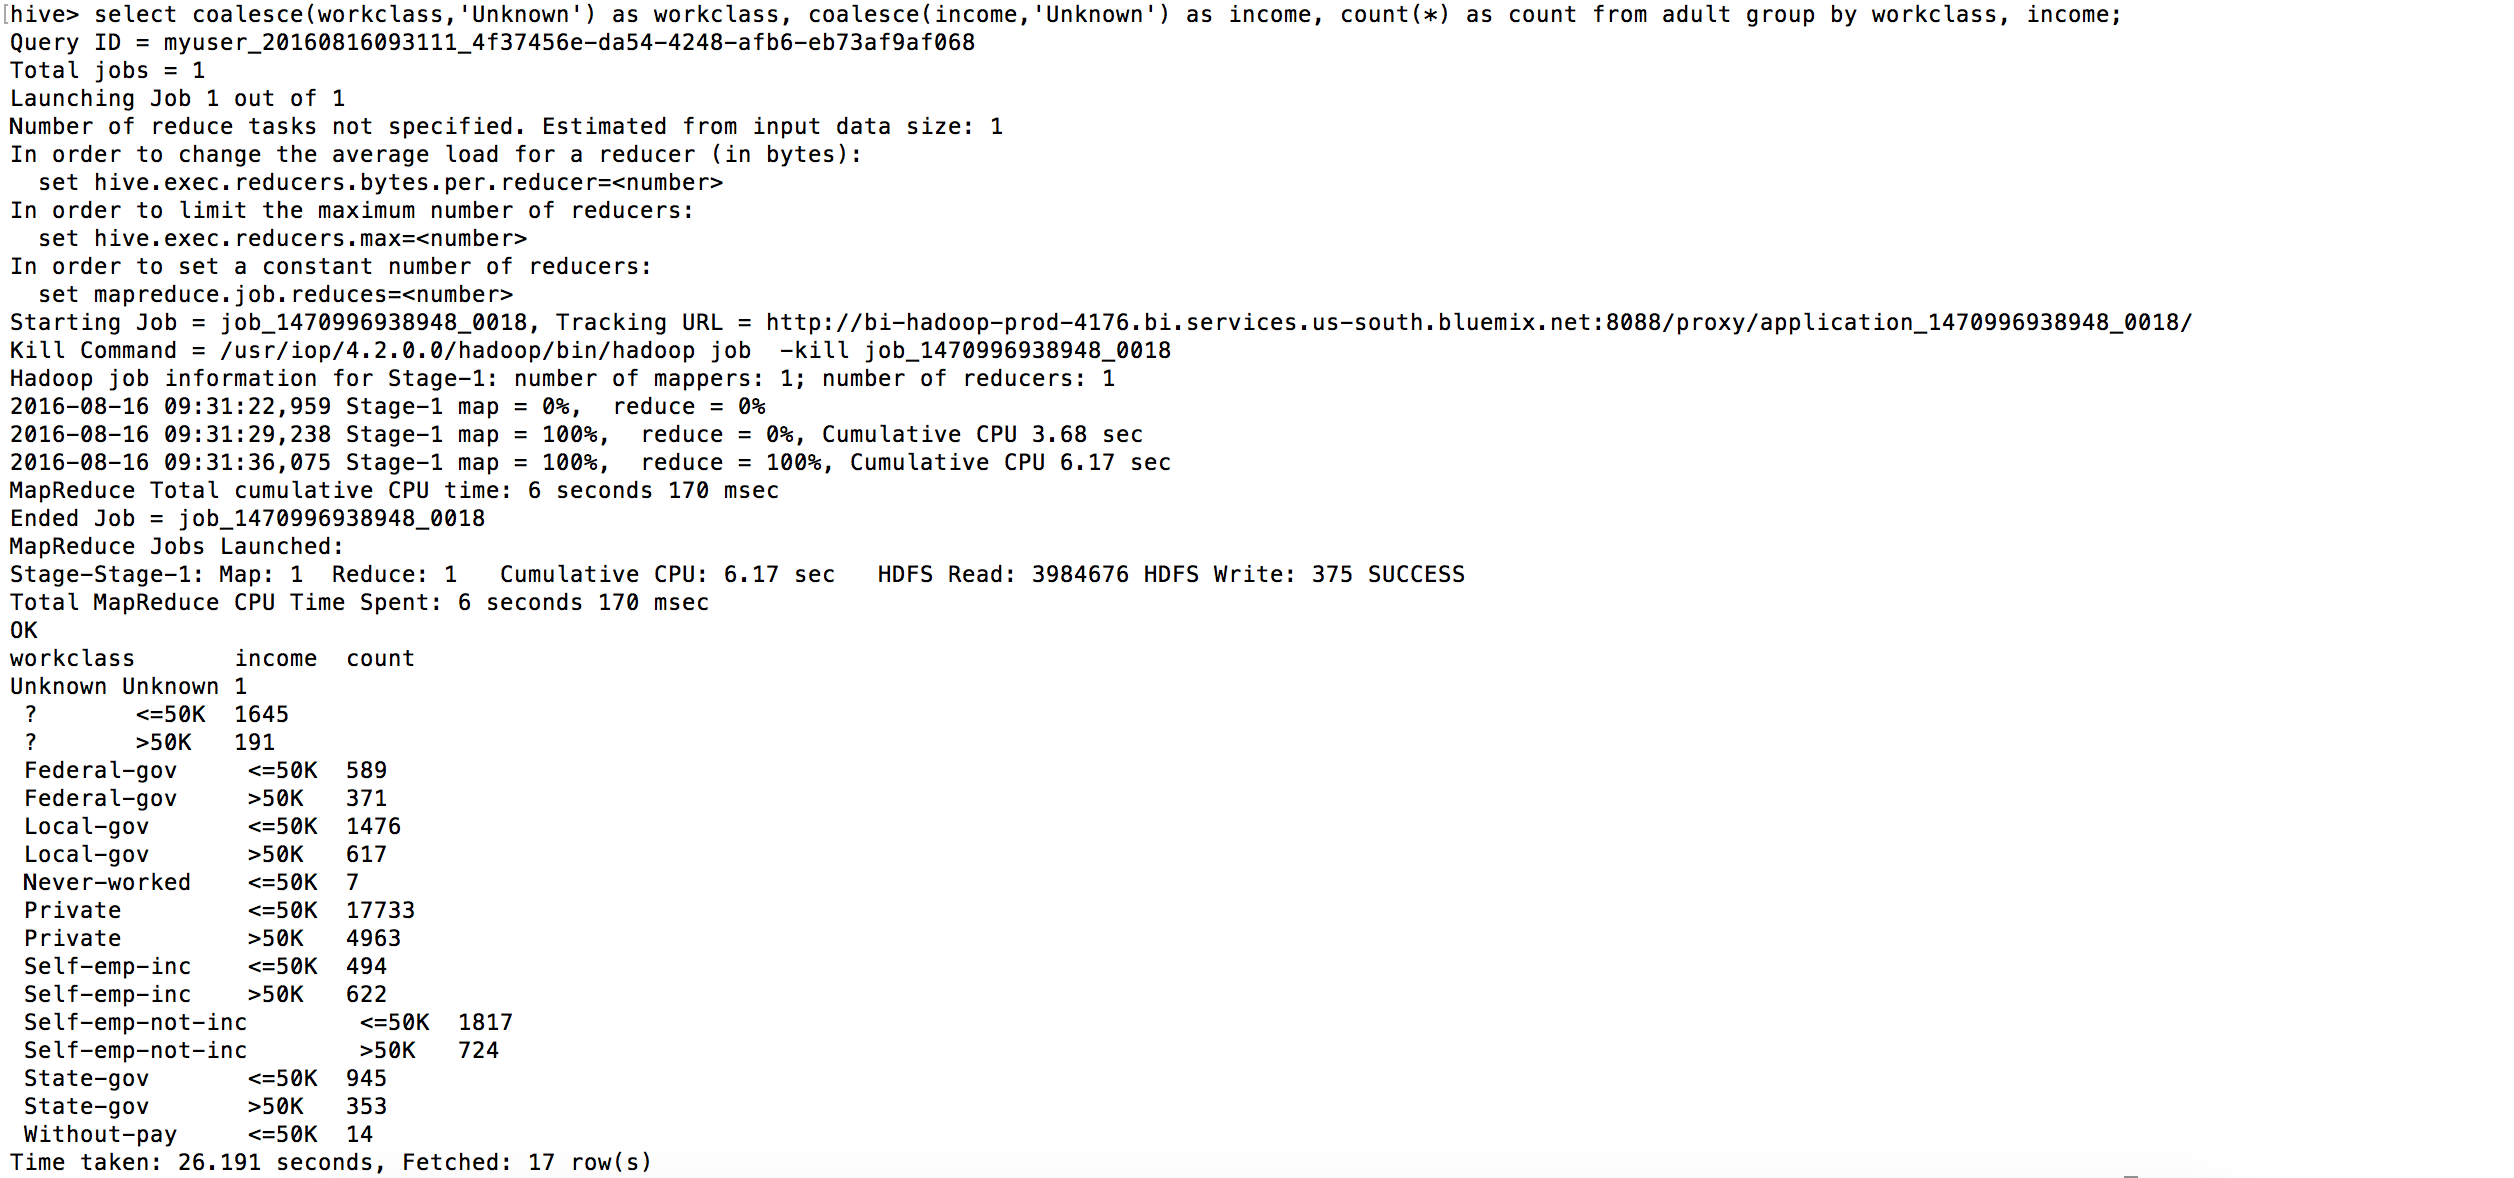
With this, we accomplish our objective.