How To
Summary
Following the configuration steps below will setup Single Sign-On (SSO) for any users that are synced between your AD domain server and your Secret Server User list.
Objective
Steps
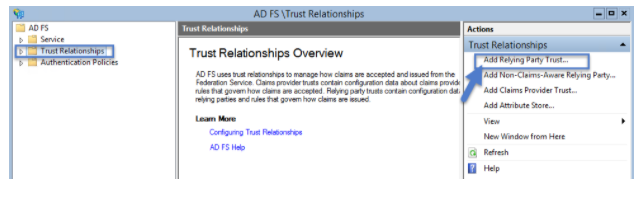
ADFS Server:
2. Open Active Directory Federation Services (ADFS) Management

3. Select Trust Relationships, then click on Add Relying Party Trust… to add your Service Provider information
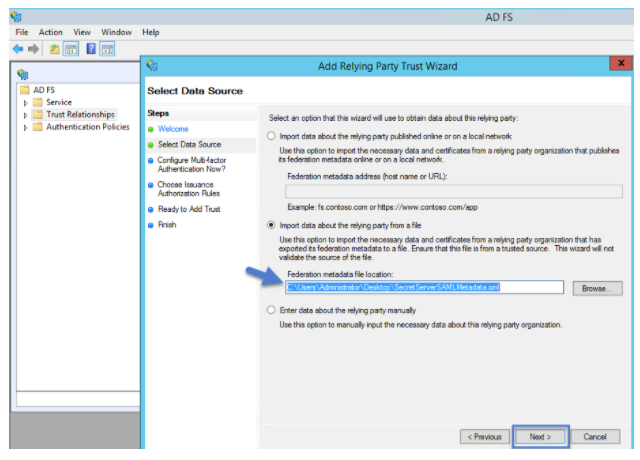
4. In the Add Relying Party Trust Wizard, click Start and click Import data about the relying party from a file. Then Browse to select the Metadata XML file you downloaded earlier, then click Next
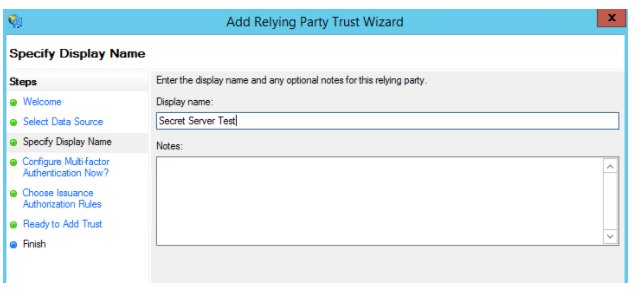
5. Specify a Display Name of your choice and then click Next
6. Decide whether to configure multi-factor authentication. For these instructions, multi-factor is NOT configured. Click Next
7. Choose Issuance Authorization Rules. For these instructions, the default to Permit all users to access this relying party was chosen. Click Next
8. On the Ready to Add Trust page, allow the "Open the Edit Claim Rules dialog" checkbox to remain checked and click Next. Then click Close.
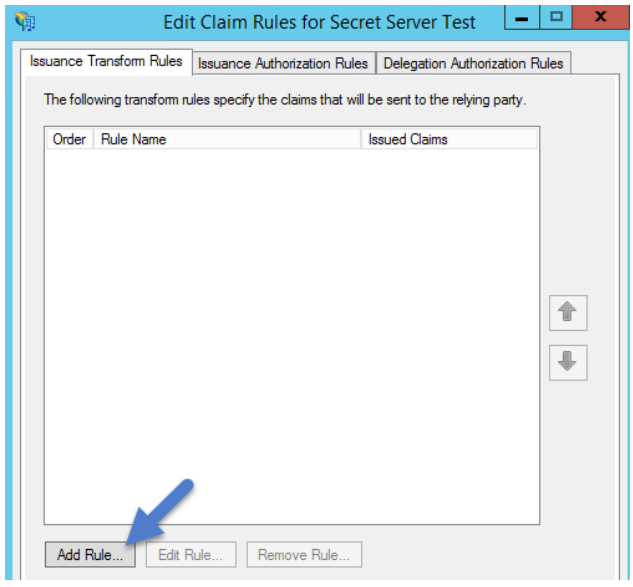
9. The Edit Claim Rules for Secret Server window should open automatically. Click Add Rule…
10. Select Send LDAP Attributes as Claims as the Claim Rule Template and click Next
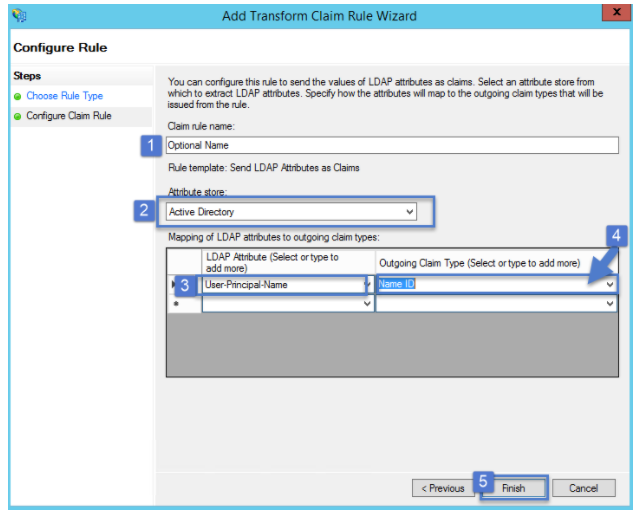
11. Fill out the information:
b. Attribute Store: select Active Directory
c. Add an LDAP Attribute of User-Principal-Name with
d. an Outgoing Claim Type of Name ID
e. Click Finish
12. Click Apply and then OK.
13. Run the following PowerShell command:
Set-ADFSRelyingPartyTrust -TargetName name of the relying party trust created in adfs -SamlResponseSignature "MessageAndAssertion"
14. Navigate to https://[YOURSERVERNAME]/FederationMetadata/2007-06/FederationMetadata.xml to download the Metadata for your ADFS IDP. The file will automatically download.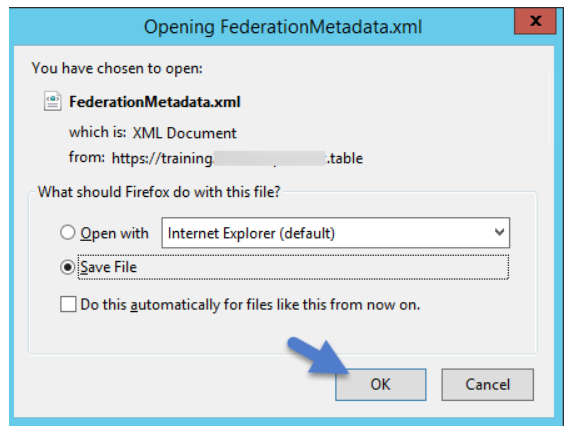
Secret Server:
1. Navigate to your Secret Server instance and to the SAML configuration page (Admin > Configuration > SAML tab)
2. Click Create New Identity Provider.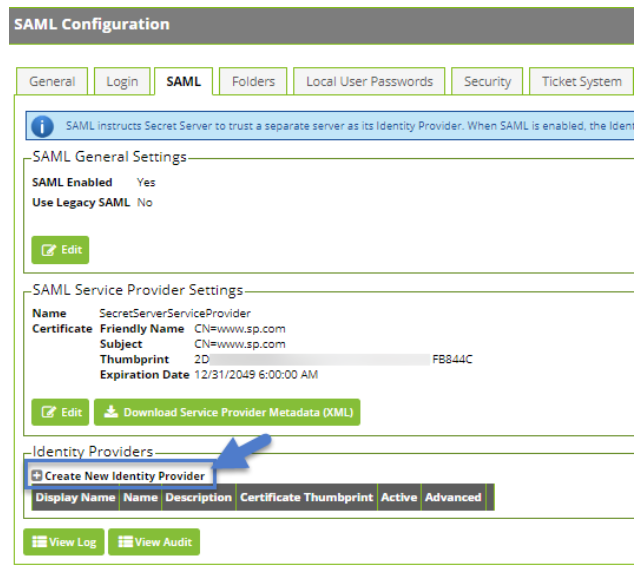
3. Click Import IDP from XML Metadata and select the ADFS metadata you downloaded. If you don't see the file, you might need to change the metadata filetype to xml.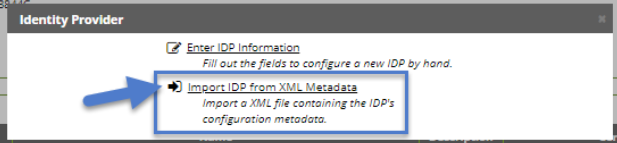
Additional Information
Adding Users to ADFS
Once configured, any user that exists both in Secret Server and in your AD domain userlist will be able to login to their desktop computers using their AD credentials and then browse to Secret Server without being prompted for further authentication, according to the Single Sign-On workflow.
Note: If you have accounts that have different sAMAccountName than UPN, custom rules can be created.
Common Errors:
"Attempt to login via SAML from identity provider had no signed responses or assertions.""Attempt to login via SAML with unsigned request."
"Attempt to login via SAML with unsigned assertion."
- Check that the RelyingPartyTrust Rule on the ADFS has both the message and assertion signed as by default only the assertion is signed.
"SAML Response signature message from IDP failed verification."
- This error means that Secret Server cannot decrypt the assertion message sent from the IdP (ADFS) because the public certificate thumbprint is incorrect. To fix this, download the ADFS certificate and upload it in Secret Server ( Admin > Configuration > SAML tab and Edit the IdP configuration).
- Check the token-decrypting in ADFS to verify the certificate. Check information on Get-AdfsCertificate cmdlet for further troubleshooting.
- When using the Get-AdfsCertificate cmdlet to retrieve the certificates that Active Directory Federation Services (AD FS) uses for token signing, token decrypting, card signing, and securing service communications, check that the IsPrimary is set to True which indicates that the certificate is primary. Primary token-signing certificates are used to digitally sign outgoing claims. Primary token-encrypting certificates are published in federation metadata for use by trusted claims providers. Information Card signing and service communications certificates are always primary.
Document Location
Worldwide
Was this topic helpful?
Document Information
Modified date:
16 June 2020
UID
ibm16233426