Question & Answer
Question
You need to install a second instance of the IBM Engineering Workflow Management (EWM) application onto a server where EWM is already installed, and register that instance with IBM Jazz Team Server.
Cause
- Some environments have a primary and secondary EWM application registered to the same IBM Jazz Team Server for deployment considerations.
- IBM Engineering Systems Design Rhapsody - Model Manager (RMM) is no longer a stand-alone application in the Engineering Lifecycle Management 7.0 solution. Instead, it is replaced by an extension to the EWM application. A second instance of EWM the application must be installed, along with IBM Engineering Systems Design Rhapsody – Model Manager, in order to perform the migration from RMM version 6.x to a newer one.
Answer
Here are the steps you can follow to install and register the second instance of EWM application to the existing JTS. It is assumed that you already have a JTS and an EWM application installed and configured that uses the default WebSphere Liberty application server and Derby database.
1. If JTS is running, stop the application.
2. Install EWM into a different package group with a temporary location by using IBM Installation Manager.
2. Install EWM into a different package group with a temporary location by using IBM Installation Manager.
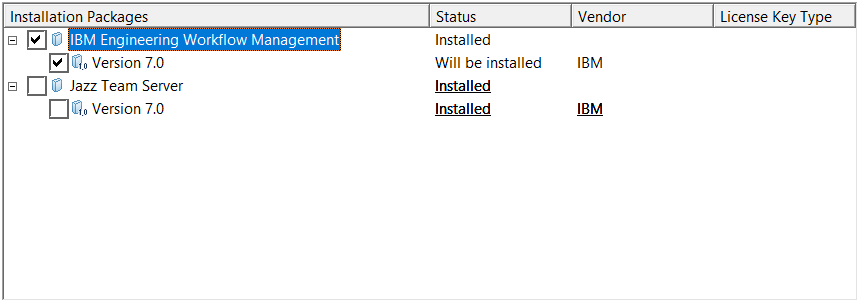
3. Ensure the “Install with WAS Liberty Profile” option is selected.

4. Select a context root (later referred to as <EWM context root>) to be used for the second instance of the EWM application. For example, “ccm2”.
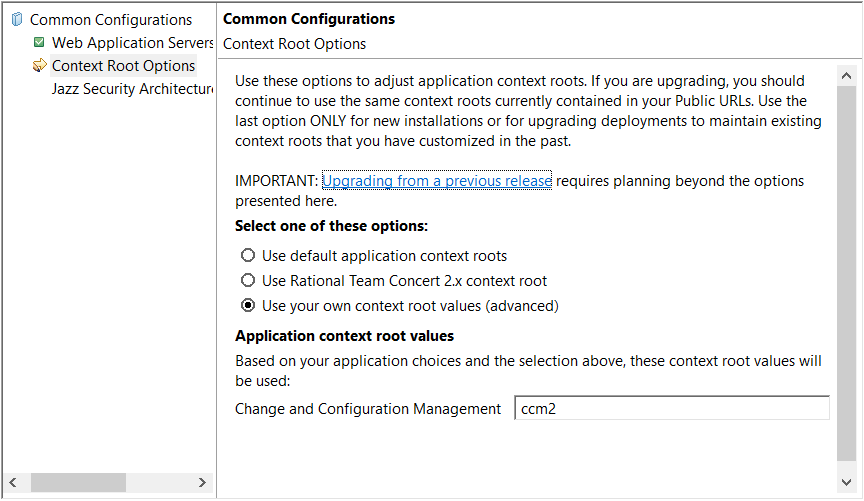
5. Copy the following files and directories (including contents) from the temporary location (where it was previously installed with the Installation Manager) to the corresponding directories and files in the original JTS/EWM installation directory. For example, if “ccm2” context root is selected for the second instance of EWM application, the following directories and files must be copied:
A. server/conf/<EWM context root> directory;
B. server/liberty/clmServerTemplate/<EWM context root>.war directory;
C. server/liberty/clmServerTemplate/<EWM context root>.war.zip file;
D. server/liberty/servers/clm/apps/<EWM context root>.war directory;
E. server/liberty/servers/clm/apps/<EWM context root>.war.zip file;
F. server/upgrade/<EWM context root> directory;
G. server/repotools-<EWM context root>.bat (or .sh on Unix) file;
H. repotools/<EWM context root> directory.
For example, if “ccm2” context root has been selected for the second instance of EWM application, the following directories and files must be copied:
A. server/conf/ccm2 directory;
B. server/liberty/clmServerTemplate/ccm2.war directory;
C. server/liberty/clmServerTemplate/ccm2.war.zip file;
D. server/liberty/servers/clm/apps/ccm2.war directory;
E. server/liberty/servers/clm/apps/ccm2.war directory;
F. server/upgrade/ccm2 directory;
G. server/repotools-ccm2.bat (or .sh on Unix) file;
H. repotools/ccm2 directory.
6. Ensure the file server/liberty/servers/clm/conf/application.xml located in the original JTS/EWM installation directory contains the following child inside the <server>…</server> entry. Open file in a text editor and add it if such entry is missing.
<application type="war" id="<EWM context root>" name="<EWM context root>" location="${server.config.dir}/apps/<EWM context root>.war"> <application-bnd> <security-role name="JazzAdmins"> <group name="JazzAdmins" /> </security-role> <security-role name="JazzProjectAdmins"> <group name="JazzProjectAdmins" /> </security-role> <security-role name="JazzUsers"> <group name="JazzUsers" /> </security-role> <security-role name="JazzGuests"> <group name="JazzGuests" /> </security-role> </application-bnd> </application> For example, if “ccm2” context root has been selected for the second instance of EWM application, the following entry must exist in this file:
<application type="war" id="ccm2" name="ccm2" location="${server.config.dir}/apps/ccm2.war"> <application-bnd> <security-role name="JazzAdmins"> <group name="JazzAdmins" /> </security-role> <security-role name="JazzProjectAdmins"> <group name="JazzProjectAdmins" /> </security-role> <security-role name="JazzUsers"> <group name="JazzUsers" /> </security-role> <security-role name="JazzGuests"> <group name="JazzGuests" /> </security-role> </application-bnd> </application> 7. Start JTS.
8. Follow steps in Registering applications with Jazz Team Server to register and configure the second instance of EWM application.
Here are the steps you can follow to perform the migration of JTS, Change and Configuration Management (CCM) and RMM applications versions 6.x to JTS, EWM and EWM with RMM applications version 7.0 or newer. It is assumed that you have JTS, CCM and RMM applications versions 6.x installed and configured using the default WebSphere Liberty application server and Derby database. It is also assumed that the default context roots of JTS, CCM and AM have been used for these applications.
1. Install JTS and EWM applications versions 7.0 into a target package group using the Installation Manager. Use the same context roots as in 6.x installation (e.g. JTS and CCM).
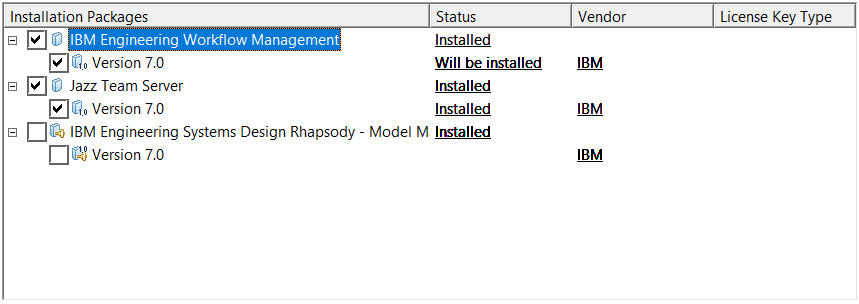
2. Install EWM application with IBM Engineering Systems Design Rhapsody – Model Manager into a different package group with a temporary location using the Installation Manager.
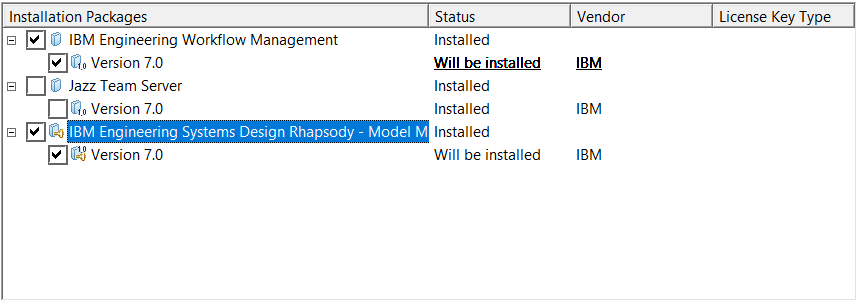
3. Ensure the “Install with WAS Liberty Profile” option is selected.

4. Change the context root that will be used for this instance of EWM application to “am” to be in sync with the context root used by RMM application version 6.x.
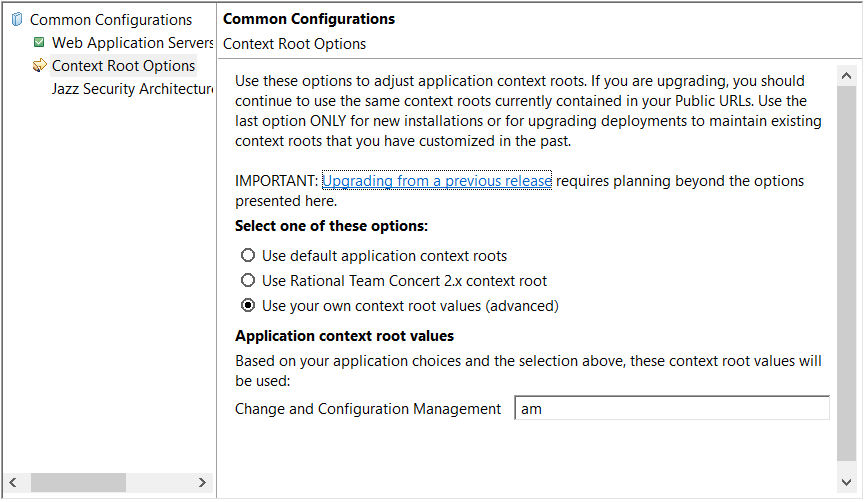
5. Copy the following files and directories (including contents) from the temporary location (where it was previously installed with the Installation Manager) to the corresponding directories and files in the target JTS/EWM installation directory:
A. server/conf/am directory;
B. server/liberty/clmServerTemplate/am.war directory;
C. server/liberty/clmServerTemplate/am.war.zip file;
D. server/upgrade/am directory;
E. server/repotools-am.bat (or .sh on Unix) file;
F. repotools/am directory.
6. Optional: check the file server/liberty/clmServerTemplate/conf/application.xml located in the target JTS/EWM installation directory contains the following child inside the <server>…</server> entry. Open file in a text editor and add it if such entry is missing.
<application type="war" id="am" name="am" location="${server.config.dir}/apps/am.war"> <application-bnd> <security-role name="JazzAdmins"> <group name="JazzAdmins" /> </security-role> <security-role name="JazzProjectAdmins"> <group name="JazzProjectAdmins" /> </security-role> <security-role name="JazzUsers"> <group name="JazzUsers" /> </security-role> <security-role name="JazzGuests"> <group name="JazzGuests" /> </security-role> </application-bnd> </application> 7. Follow the standard migration procedure to migrate JTS, CCM and RMM applications.
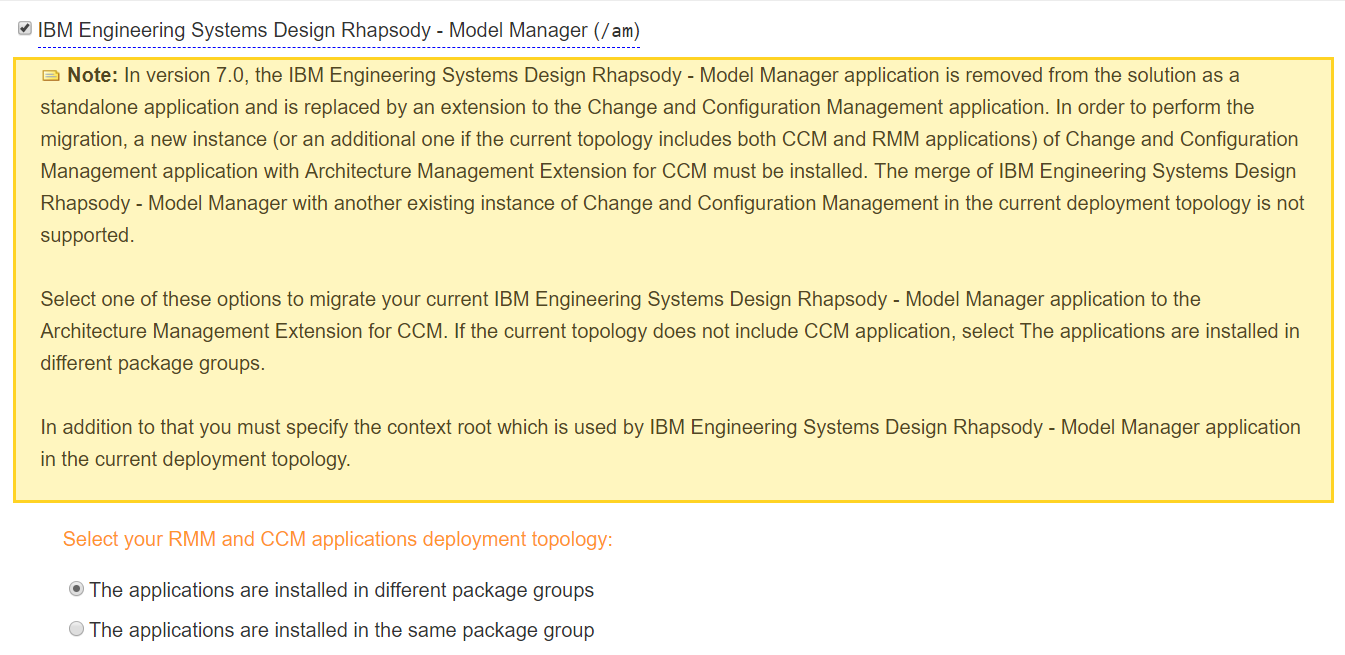
A. Select “Jazz Team Server”, “Change and Configuration Management” and “IBM Engineering Systems Design Rhapsody - Model Manager” applications to upgrade.
B. Ensure “The applications are installed in different package groups” option is selected under “Select your RMM and CCM applications deployment topology:” section.
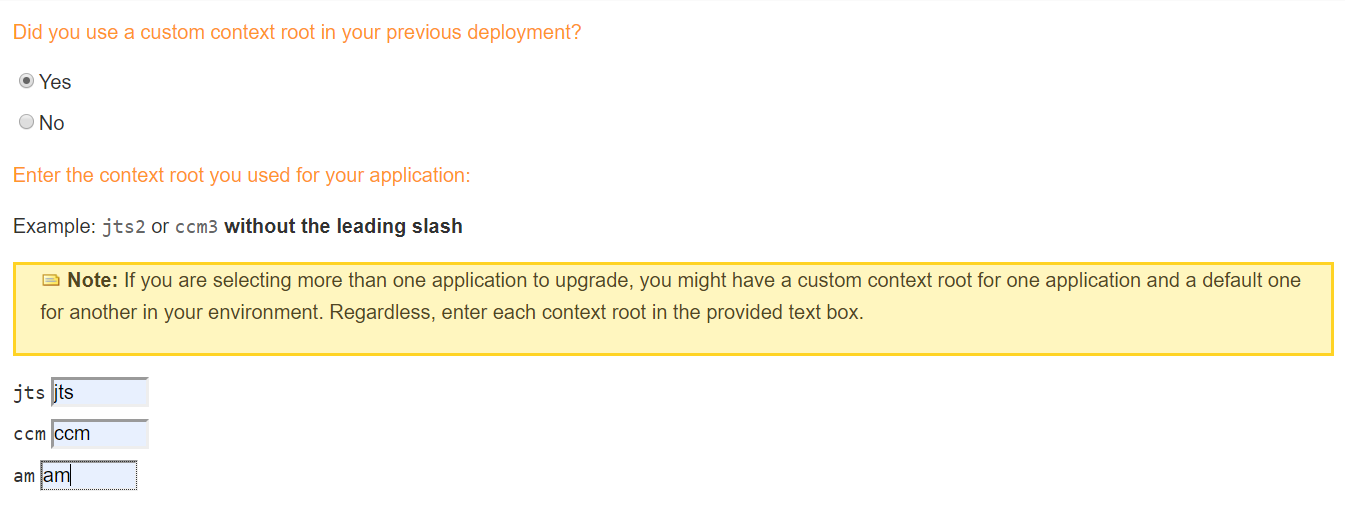
C. Answer “Yes” to question “Did you use a custom context root in your previous deployment?” and specify context roots for all 3 applications: JTS, CCM and AM.
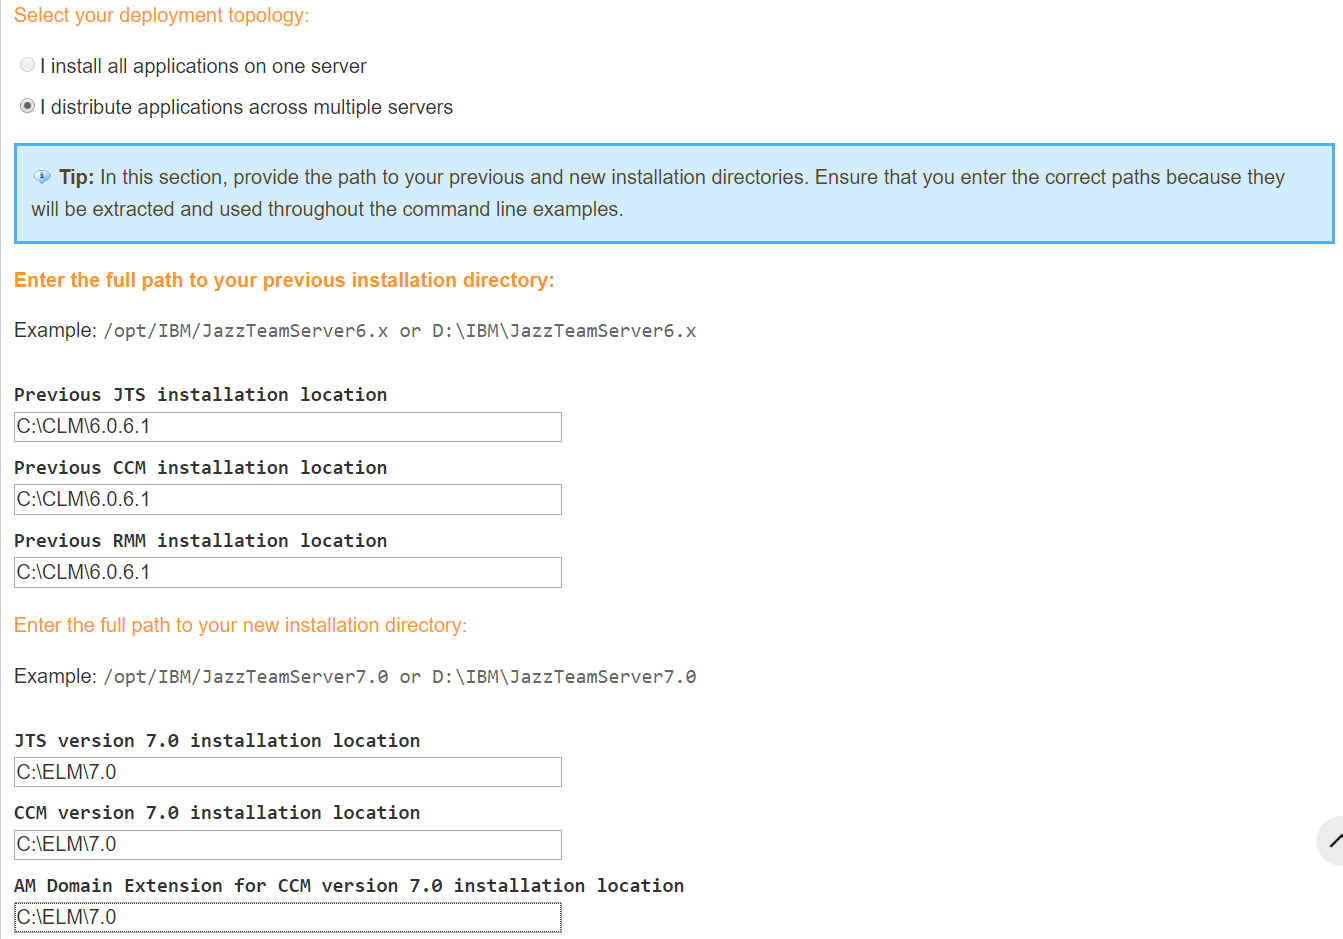
D. Ensure option “I distribute applications across multiple servers” is selected under “Select your deployment topology:” section. Specify the same installation location for all 3 applications version 6.x and the same target installation location for all 3 applications version 7.0 or newer.
E. Select all other options according to the configuration of existing 6.x topology.
F. Generate the upgrade guide.
8. Perform the migration according to the upgrade guide generated on step 7.
[{"Business Unit":{"code":"BU059","label":"IBM Software w\/o TPS"},"Product":{"code":"SSUC3U","label":"IBM Engineering Workflow Management"},"ARM Category":[{"code":"a8m50000000CjejAAC","label":"Team Concert->Installation\/Deployment *File under JTS*->Server"}],"ARM Case Number":"","Platform":[{"code":"PF025","label":"Platform Independent"}],"Version":"7.0.0","Line of Business":{"code":"LOB59","label":"Sustainability Software"}}]
Was this topic helpful?
Document Information
Modified date:
11 June 2020
UID
ibm16224040