"How to Use Source Control with RDi"
RDi is an excellent client to use with your source control management solution.
Many ISVs provide excellent solutions in this space and there is also Git which an industrial strength open source solution which is freely available on the IBM i.
The following sections provide instruction on how you can have a Git repo on the IBM i and access it via EGIT on RDi:
- Using Git and RDi step by step
- Install EGit via IBM Installation Manager
- Git and RDi for QSYS members
- Install EGit via Eclipse Marketplace
Using Git and RDi step by step
1) Set up Git repository
First you need to have a Git repository to connect to.
This can exist on an IBM i server or even on a public hosted location like github or bitbucket.
You can see the steps needed to achieve this in the screen capture below.
1.1) mkdir on IFS and in that new dir, type in "git init --bare"

This has created a repository with the URL: reinhard@i7adt06.torolab.ibm.com:/home/REINHARD/gitrepo/
where reinhard is the userid you will be authenticating with.
2) Share a project with Git and specify the URL to the git repository
You now have another decision to make, Do you want to develop your source in the QSYS or the IFS directories. RDi will support both of these approaches.
We will document the IFS approach here as well.
2.1) Set up EGit
In either case you will need to set up RDi to use Git. RDi has excellent Git integration via the EGit eclipse plugins. If you don't already have this installed, you can do this in 2 ways.
2.1 a) Using IBM Installation Manager you can Modify your RDi installation (requires RDi 9.5.1 or later)
2.1 b) Use Eclipse Marketplace to install EGit
2.2) Create a Git repository connection from RDi to the Git repository
Open Git Perspective.
One of the fastest ways is typing Git into the Quick Access entry field in the toolbar and selecting the Git Perspective
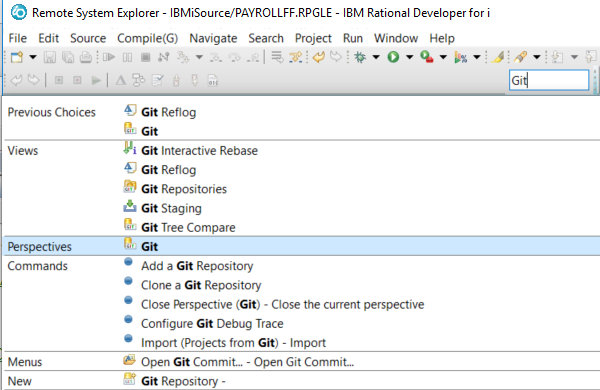
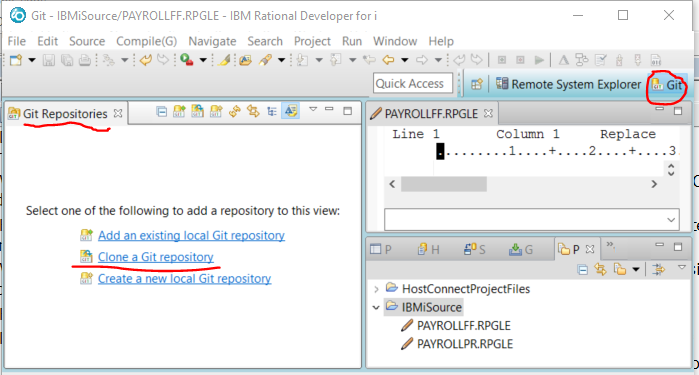
Click on the Git perspective and then in the Git Repositories view click on the Clone a Git repository link
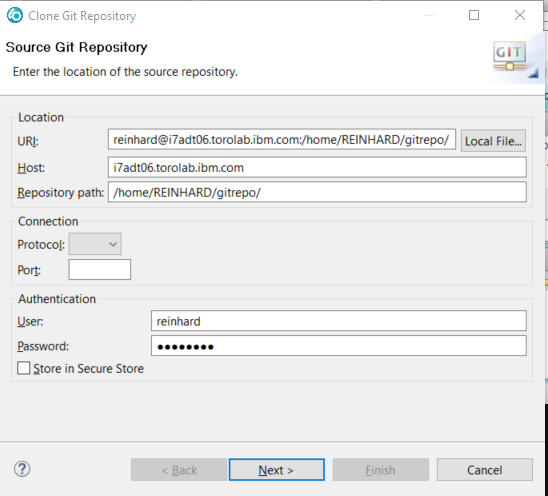
Here is where you fill in the URI for the Git repository you want to push to from RDi?
If you were using Github or Bitbucket, they will give you the URL.
If you are using your IBM i:
- Fill in the Host with the DNS name of your IBM i
- Fill in the IFS path to the folder containing the .git directory. (i.e. the one you typed git init in)
- Fill in your IBM i userid and password under Authentication
- Press Next
You will be prompted to select a branch, but we haven't created any yet, so just leave it blank and hit Next
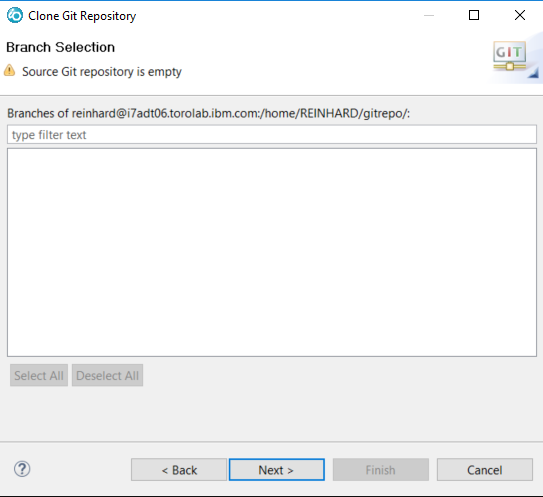
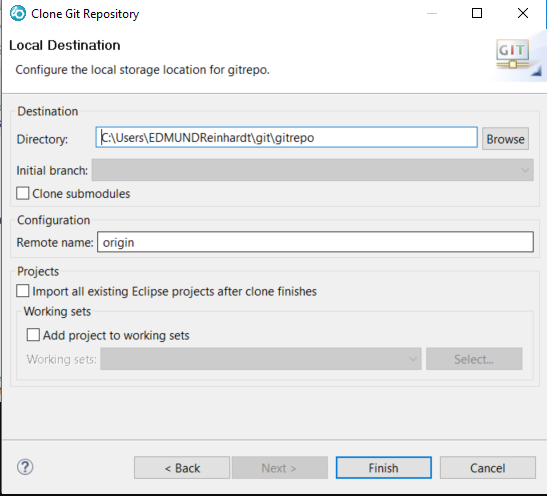
The defaults are fine on the last page, you can just press Finish
We are creating a local git repository in the directory specified.
We are naming the repository we cloned from 'origin' and it will be the default repository to push our commits to.
At this point we are not automatically adding any Eclipse projects to this repository
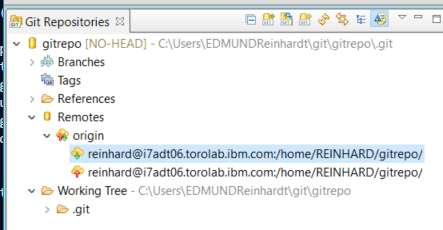
Congratulations, you now have a Git repository set up and Eclipse knows how to work with it.
Your working tree is empty at this point because we haven't committed any files yet.
We will be pushing and pulling changes to the IBM i git repository created earlier.
2.3) For working with Git using the QSYS file system
Chris Hird has written an article on the QSYS approach
But to continue this example for the QSYS file system click on the following
Using Git and RDi for QSYS members
2.4) For working with Git using the IFS file system
Eclipse allows you to work with any number of source control systems which are called Team Providers in Eclipse parlance. The idea is that you can take any project in Eclipse and share it with a Team provider.
Eclipse and RDi contain many specialize projects that could help you develop Java or Javascript or HTML etc. For RPG there is nothing special required and a general project is all that is required..
2.4.1) Create a project to contain your source
Open the Project Explorer view (can just type Project Explorer in the Quick Access in the toolbar)

Create a New Project...

a General Project is fine, press Next
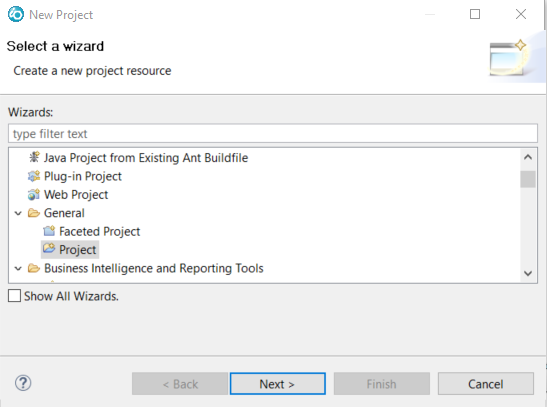
Give your new project a name and press Finish
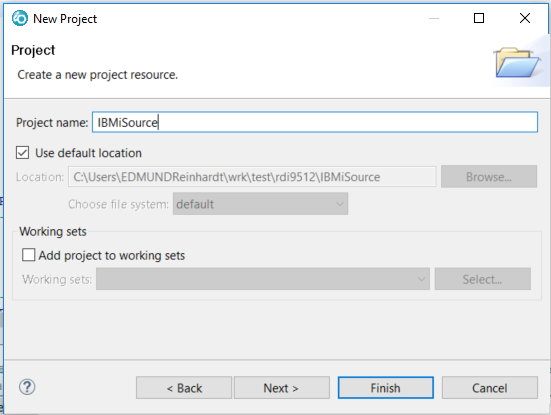
Populate this project with all the source you want to manage with Git. You could structure your code with any number of folders and even nest them to any level (no more limitations of the QSYS file system).

Now you can share this project via Git by right clicking on the project and selecting Team->Share Project...
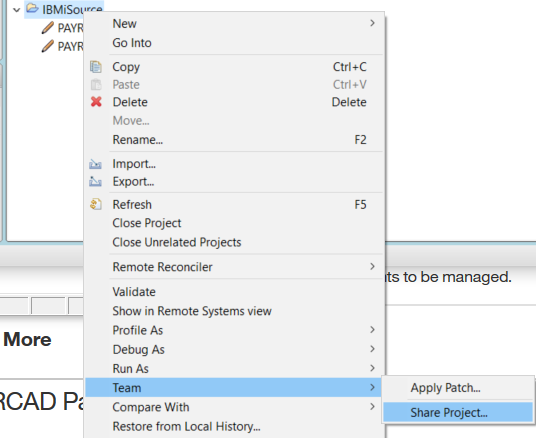
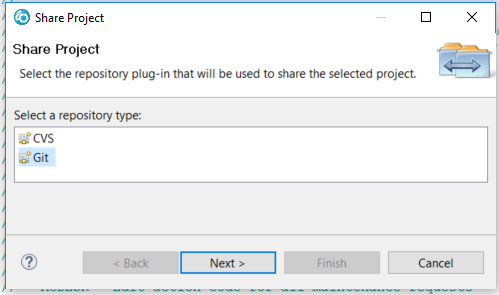
Now select Git as the repository Type and press Next
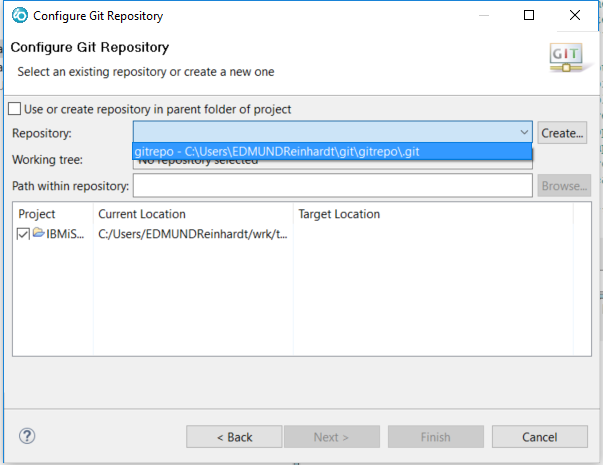
Select the Git repository that we had created earlier and press Finish
Install EGit via IBM Installation Manager
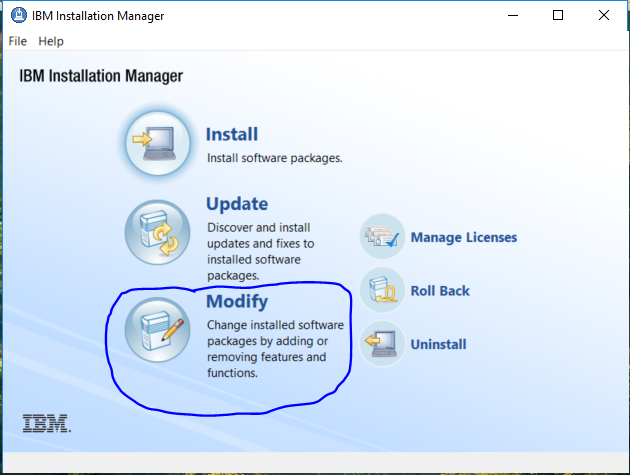
Launch IBM Installation Manager and press the Modify button (if you haven't installed RDi before press the Install button instead)
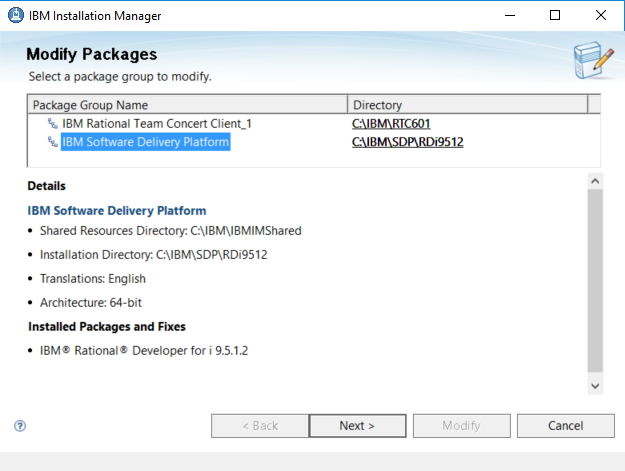
Select the package group you installed RDi into and hit Next
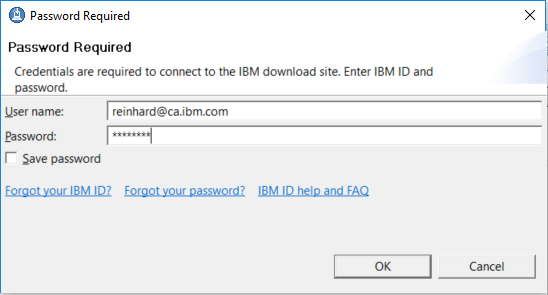
You may need to enter you IBM ID credentials
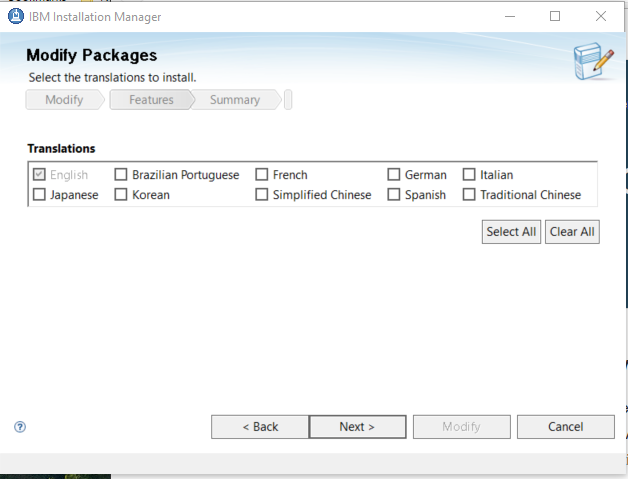
You probably don't want to change language translation so just press Next
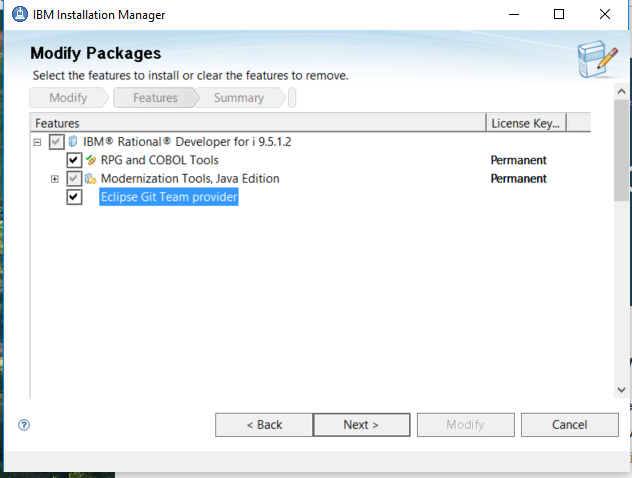
Check of the "Eclipse Git Team provider" feature at the bottom of the list and hit Next
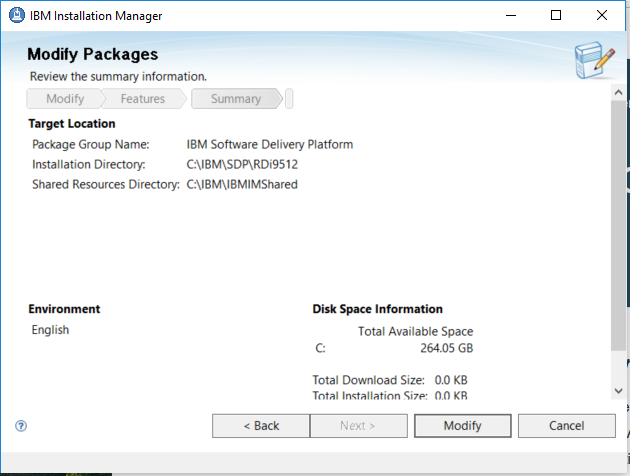
Hit the Modify button and RDi will be updated to have EGit.
Git and RDi for QSYS members
This tutorial will take you through the steps of using i Projects to manage your QSYS members in Git.
Having followed the previous instructions on http://ibm.biz/rdi_git from steps 1 through 2.2 we have:
- a Git repository at /home/REINHARD/git/gitrepo on the IBM i server i7adt06
- EGit is installed in RDi
- a local Git repository has been cloned from the IFS git repo above. It was stored in <user home>\git\gitrepo .
- EGit is aware of this local repository and its remote repository
1) Create the iProject
In our case we will take the TDD_DEMO library that currently has 2 empty source files, one for the source and the other for tests.
Add whatever content you wish to this new i Project
I will rename the project to just "Demo of TDD for RPG"
2) Share the Project using Git
Source control is done through the Team sub menu of the context menu.
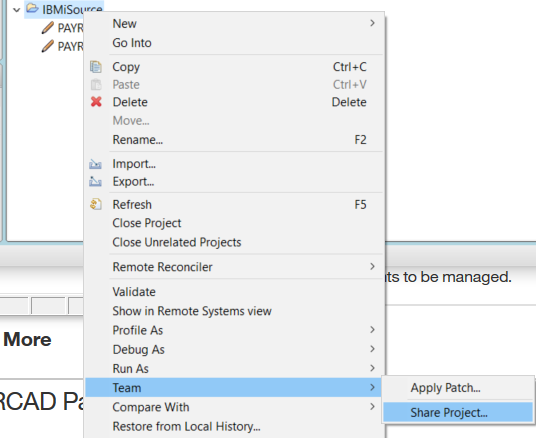
Select Git as the Team provider to share this project with.
Select the Git repository that we have already set up
3) Initial Commit into repository
A look at the Staging view shows us that the content of our i Project so far is unstaged.
Note that Git does not track directories, only files. So our empty SRC-PF directories are not yet tracked, only the metadata that iProjects is tracking on them.
To add the initial metadata simply drag to Staged Changes
To commit type in a message and hit Commit
If you hit the Commit button it will be committed to the local repository on your local workstation.
If you hit Commit and Push it will not only be committed locally, but it was also be pushed to the remote repository (Git repo in the IFS).
Let's try the latter.
The push dialog shows the source commit (complete with its hash and branch) and the target repository and branch.
You have option to force overwrite (be careful!)
And there are even more options on the advanced dialog
The push confirmation page shows you what will happen
4) Available Actions
Note all of the actions available on both the local and remote branches
The Synchronize with Workspace is particularly useful
Note all of the actions available on the remotes
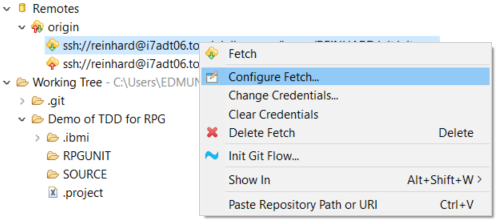
Note how you can paste a github URL or any other Git URL here!
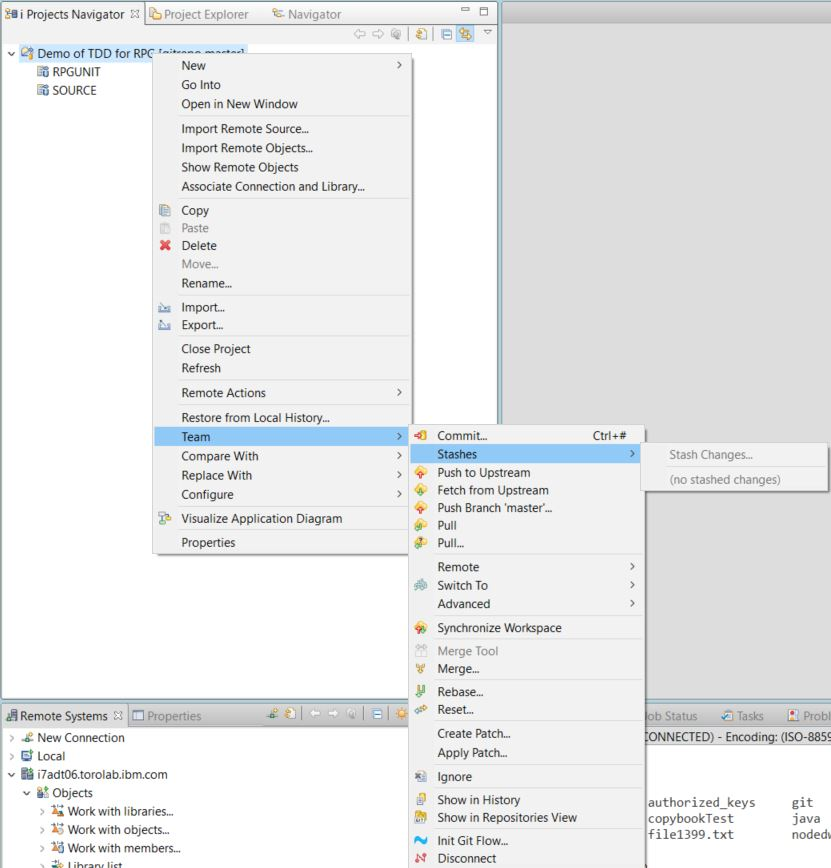
Note that there are lots and lots of actions available on the context menu of the i Project
Install EGit via Eclipse Marketplace
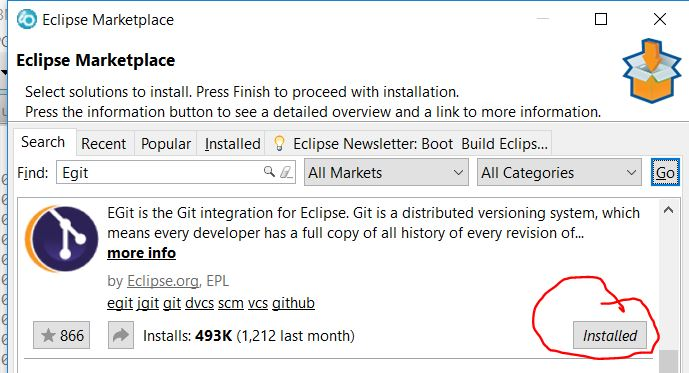
Installing EGit (or anything) from Eclipse Marketplace is really easy.
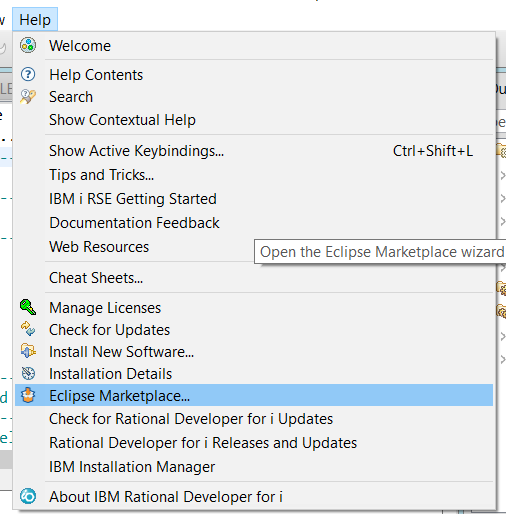
Simply select Eclipse Marketplace... from the Help pulldown.
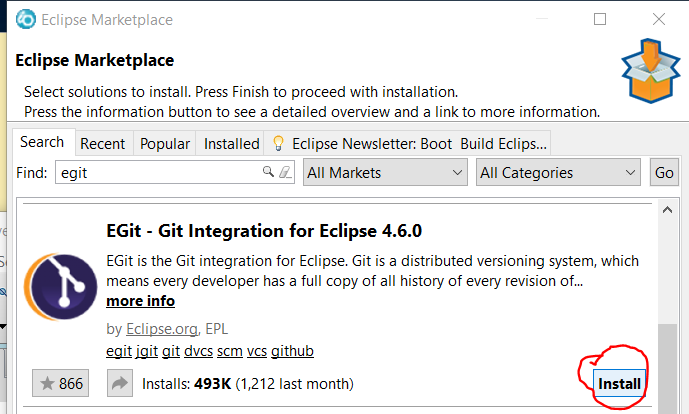
Then type egit into the Find entry field and press Go to search for it.
The EGit offering will be found and on the bottom right there will be an Install button. Go ahead and press it.
All the right magic will happen and the latest version of EGit for your Eclipse level will be installed.
The next time you look to for Egit in the marketplace, the button will have changed into an Installed status message.
