Technical Blog Post
Abstract
Steps to build an Aircraft Asset Hierarchy in Asset Configuration Manager
Body
1. Go to the Models (CM) application.
Create a new record called A320 with description Airbus A320.
Enter an LCN Structure e.g. 16666666
Top LCN = L
Label System = ATA
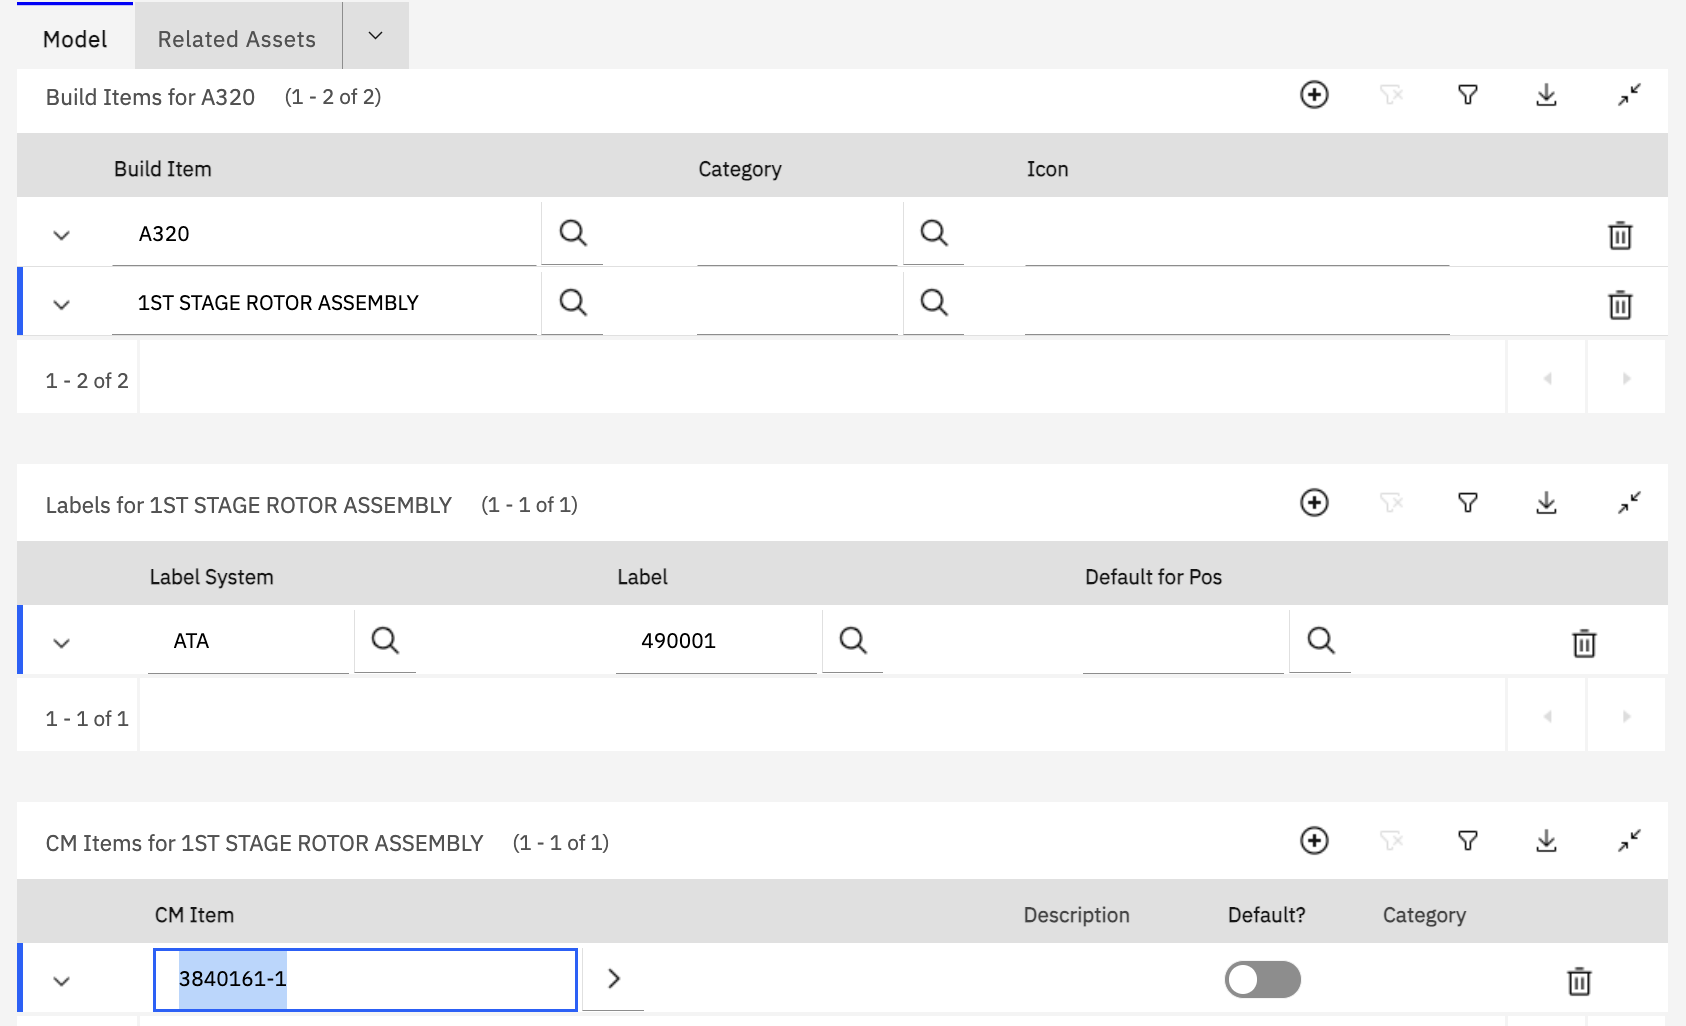
2. Go to the "Build Items" section.
Click "New Row" to create a new Build Item.
Enter 1ST STAGE ROTOR ASSEMBLY in the Build Item field.
Label System = ATA , Label = 490001 (There is no field validation in the Label field).
Enter 3840161-1 as the CM Item (If there is no CM Item from the lookup, please hyperlink to the CM Item Master application and create a CM Item).
3. Click "New Row" to create a another Build Item e.g. 2ND STAGE ROTOR ASSEMBLY
Label System = ATA , Label = 490002
Enter 3610894-11 as the CM Item
4. Repeat step 2 and 3 above to create more build Items if needed
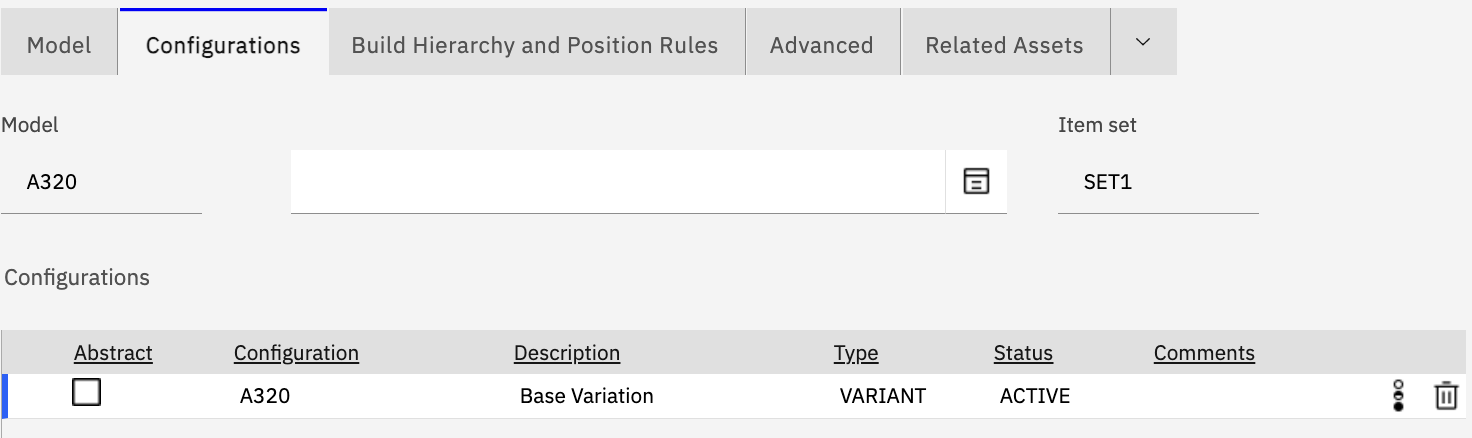
5. Go to the "Configurations" tab.
De-select the "Abstract" checkbox.
Change the Configuration Status to Active.
6. Go to the "Build Hierarchy and Position Rules" tab.
Right-click on the "Build Hierarchy" section and select "New Child".
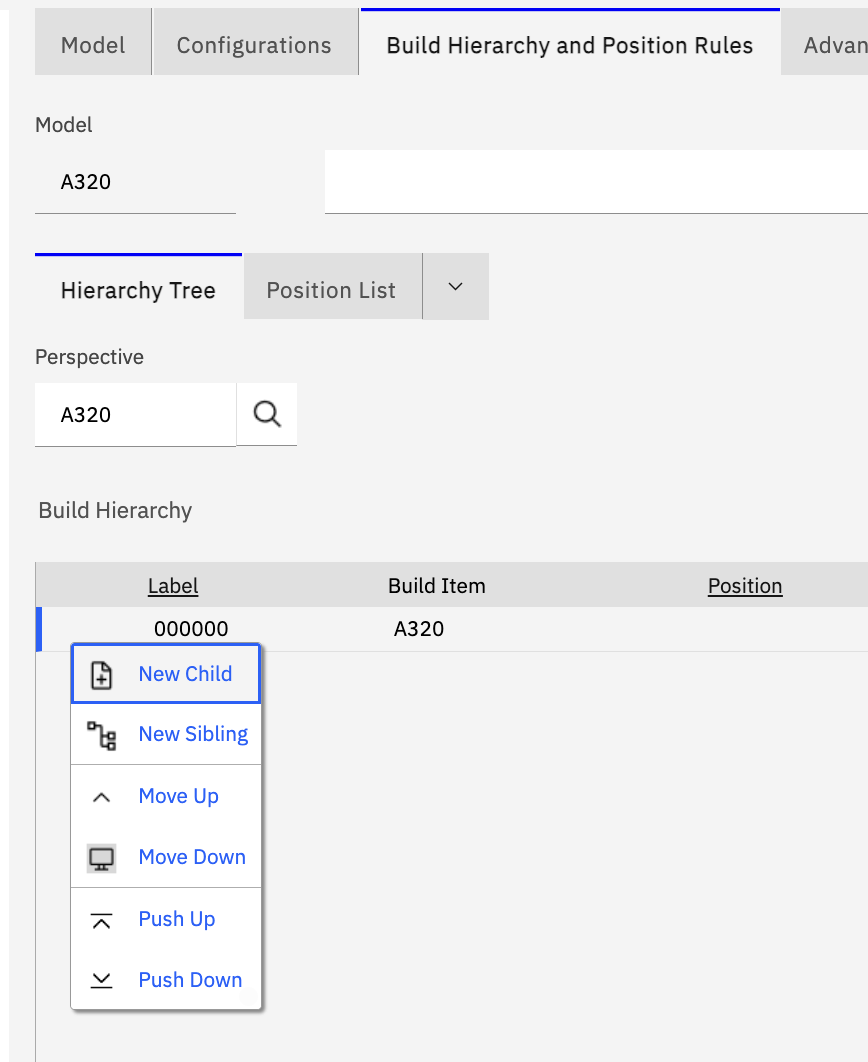
Select one of the existing build items.
Enter a position in the Position field.
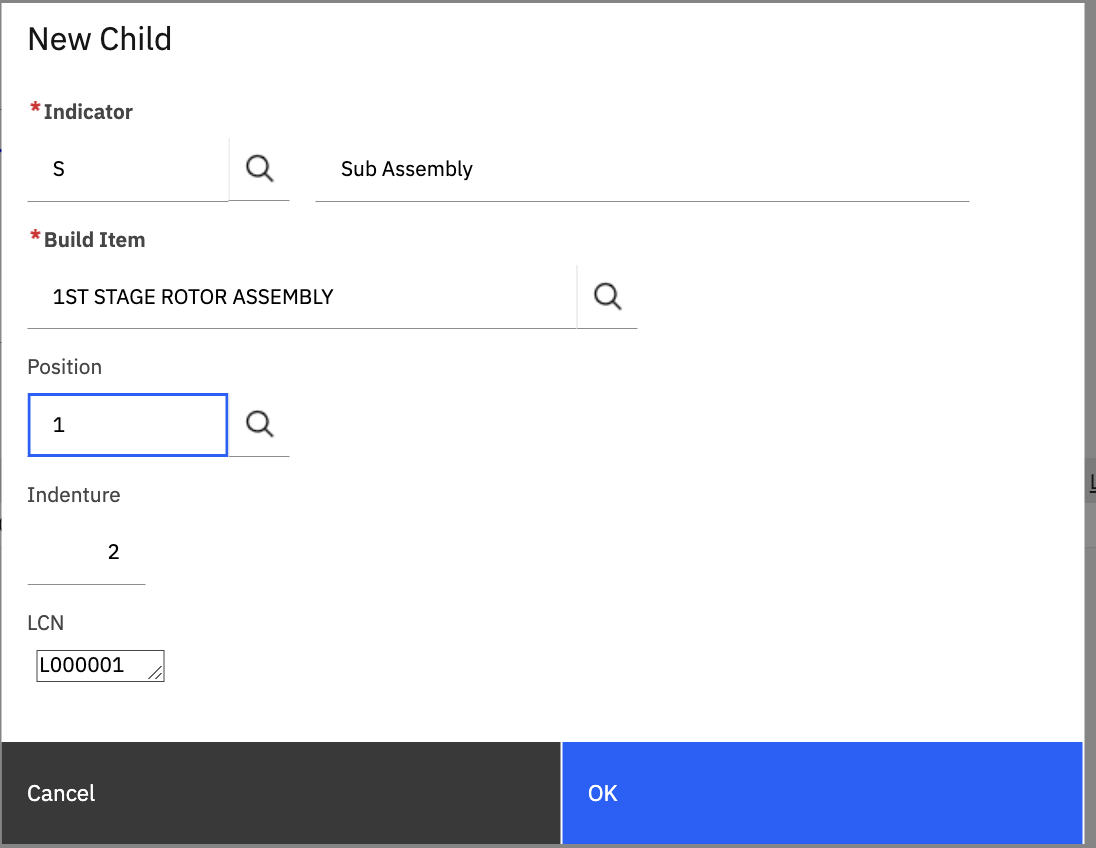
Click OK.
7. Right-click on the Build Hierarchy section and select "New Sibling".
Select an existing Build Item, enter a position in the Position field:
Click OK.
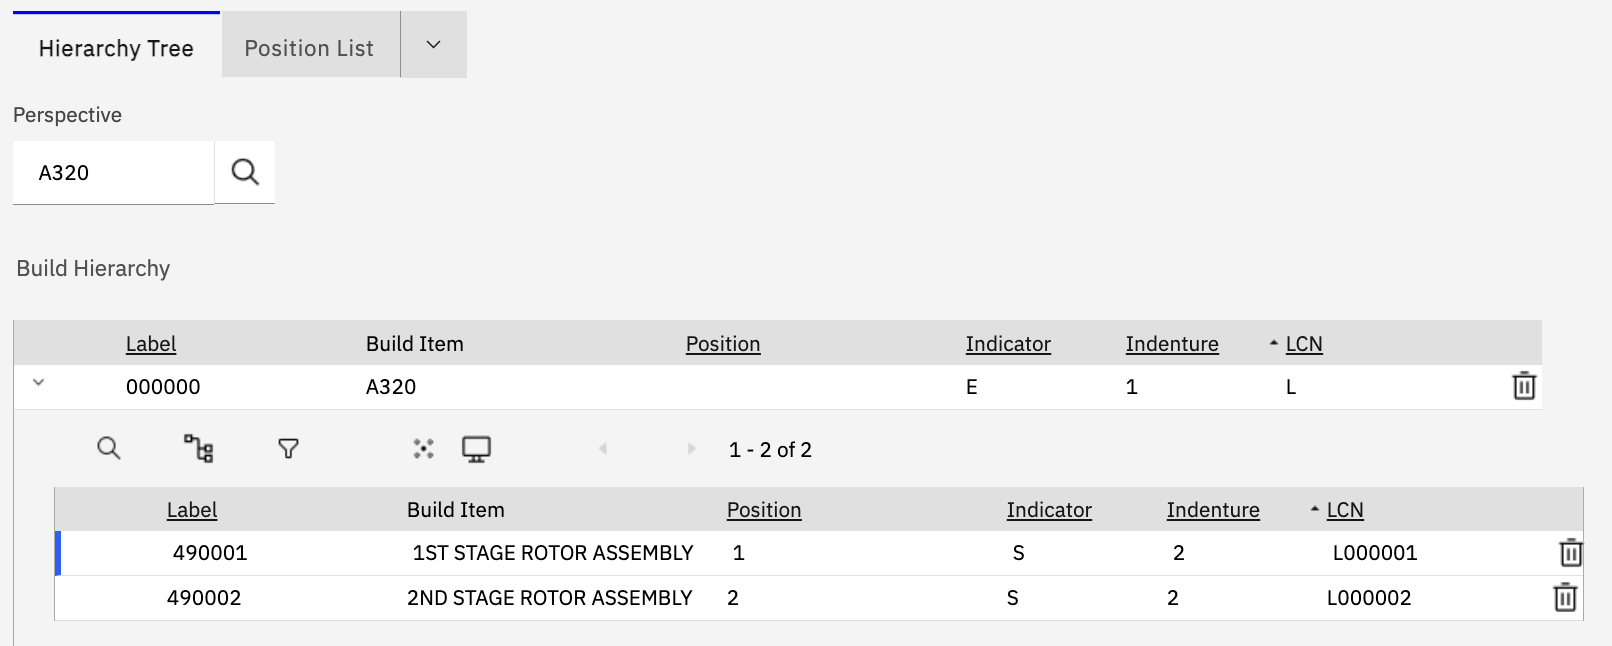
8. Add more child and siblings.
NOTE: A typical aircraft model will have around 4 to 5 levels of build hierarchy.
9. Go to Master PM (CM) application
Create a Master PM against the CM Items associated with Build Item in the Model e.g. A320.
Create a Frequency for both Time and Meter Based Frequency.
10. Go to the New Asset Assemblies application.
Create a new Asset. For example, TA30
CM Item = A320
Model = A320
Enter a Registration value TA30.
Asset status = Active
Save the record.
Enter Meters, Spare Parts, Condition Monitoring, Warranty details on the bottom of the screen.
From the "Select Action" menu, select 'Create Sub assemblies from the CM build'.
A System Message comes up: "BMXAM0226I - New asset sub assemblies and their meters created successfully."
11. Go to the "Sub Assemblies Details" tab.
Enter asset numbers in the Asset fields in the sub assemblies.
Save the record.
From the "Select Action" menu, change the status to Active.
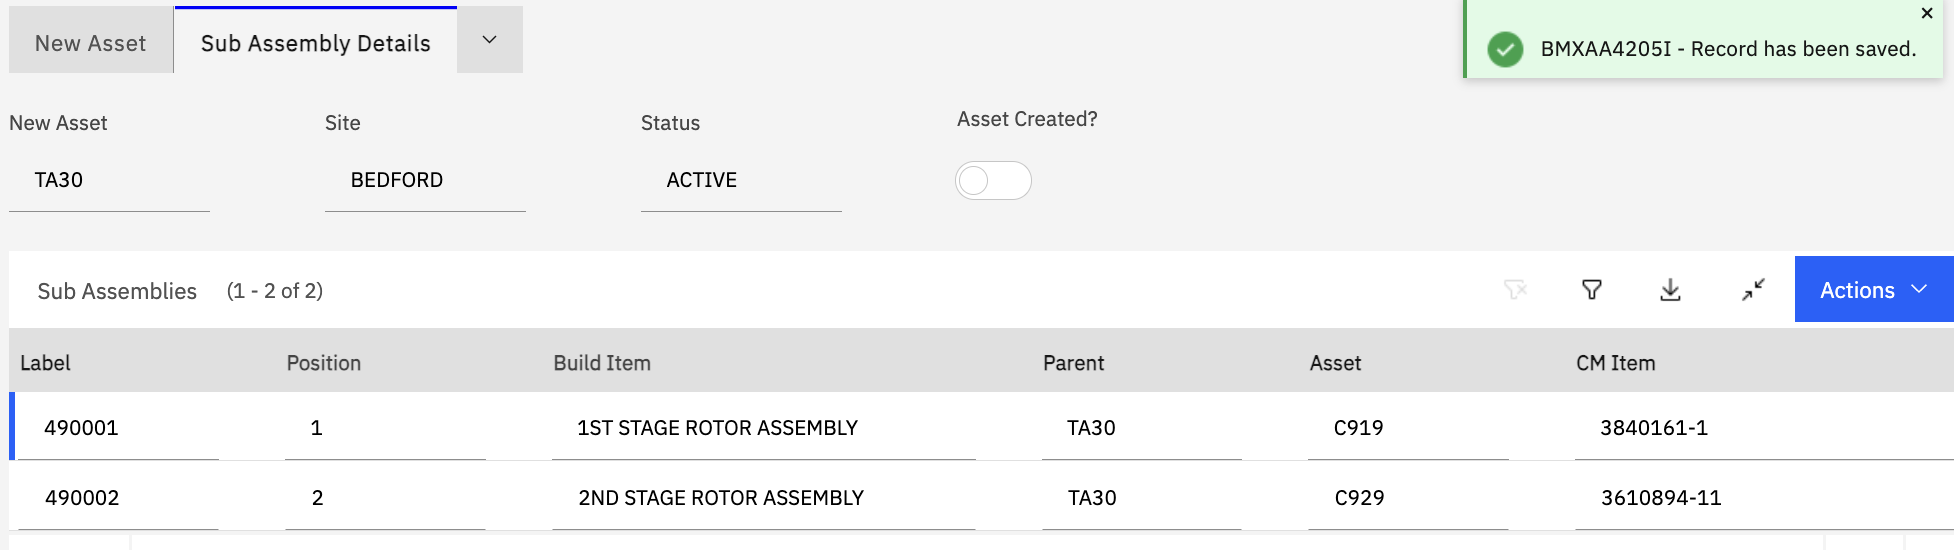
Go to 'Select Action' menu, select Create Asset.
You will receive the system message: "System Message: BMXAM0224I - Asset created successfully."
Click OK.
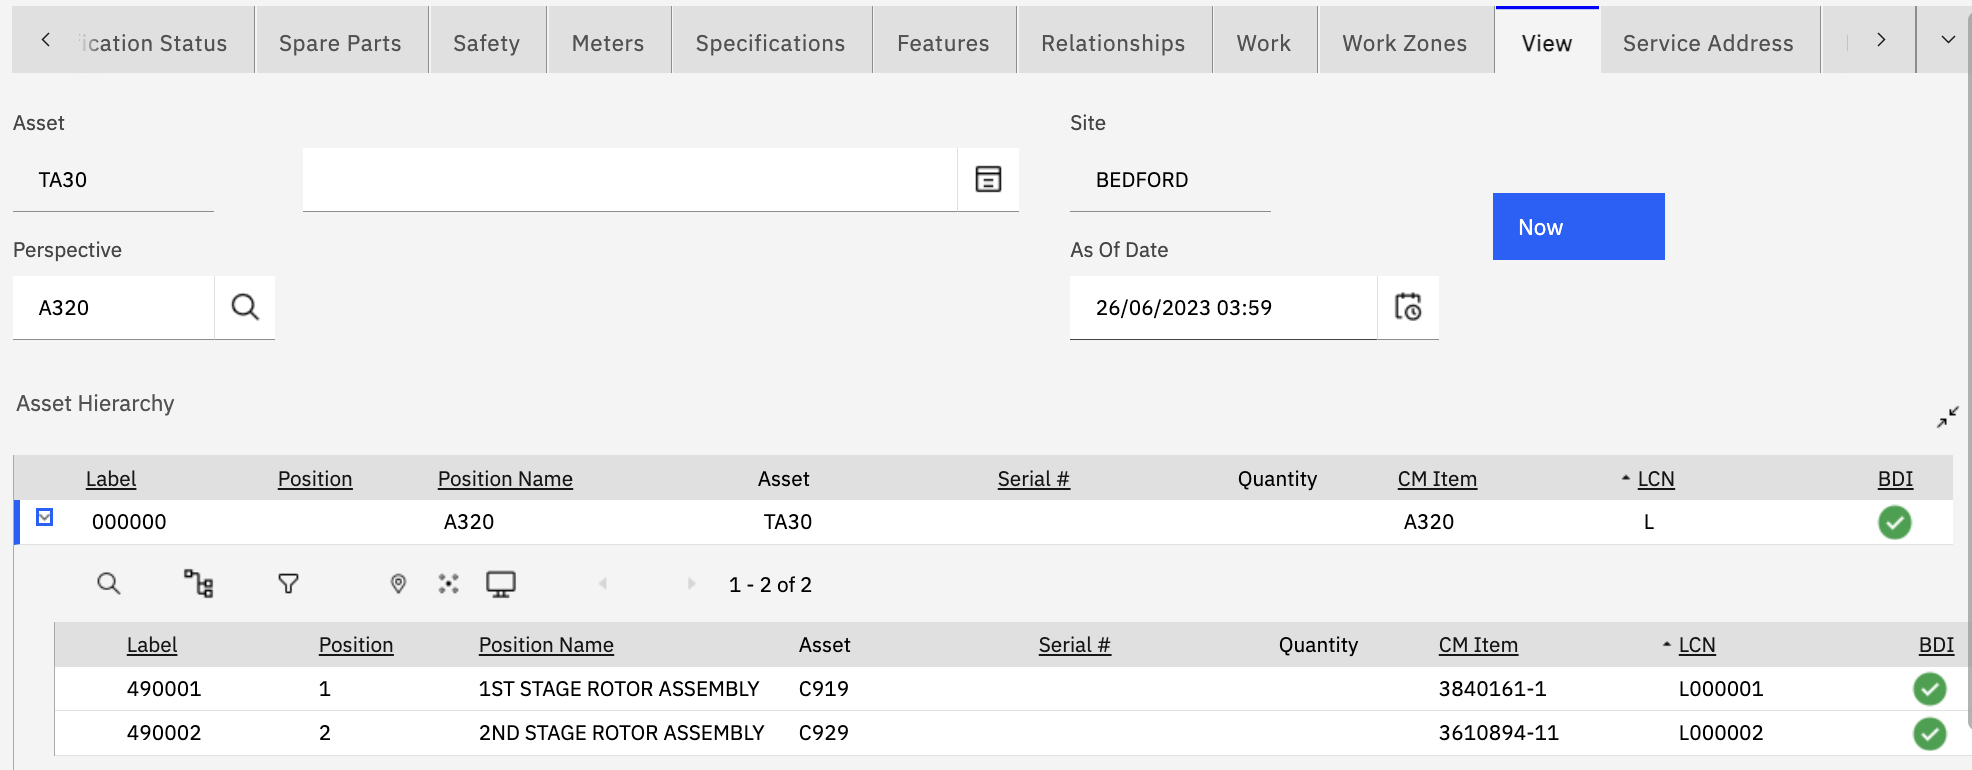
12. Go to the Assets (CM) application.
Bring up Asset TA30.
Click the View tab. Expand the tree to confirm that an Asset Hierarchy is created.
UID
ibm11130523