Technical Blog Post
Abstract
Maximo Anywhere and SSL: Securing your data
Body
I've been doing a lot of work with our latest Mobile software, Maximo Anywhere. If you haven't heard of Maximo Anywhere or your looking for more information on Maximo Anywhere you can head on over to it's product page.
When working with Maximo Anywhere, I decided I wanted to secure my transactions using LDAP and SSL (I will document LDAP in another post) and recently a blog was published by a colleague of mine on using the key tool with Java, that blog can be found here. Now we all know how important security is and many of you likely already have your core Maximo application running over SSL, so I wanted to take some of that information from my colleagues previous blog and show you how we can use this to secure the data sent back and fourth to Maximo from Maximo Anywhere.
Going forward this blog assumes you are already connect to Maximo via HTTPS and are looking to configure Maximo Anywhere to connect to the https ports on that environment.
Downloading your certificate from a browser and importing it in to the Worklight keystore.
1. You may already have your .cer file saved to your Anywhere build machine, if not we can download this from the browser and save it. We will do this using Google chrome in this tutorial as it is used to emulate the Anywhere applications in WorkLight and exists on most build machines. So first we want to access our Maximo application via the https address, once the log in page displays, click on the lock beside https:// in the address bar.

2. A menu will drop down and provide a some information on your SSL encryption, click on certificate information.

3. A new window will now open, click on the details tab, then click 'Copy to File' this will bring up a wizard to save the file. In this wizard choose the Base64 encoding and name your certificate and path.

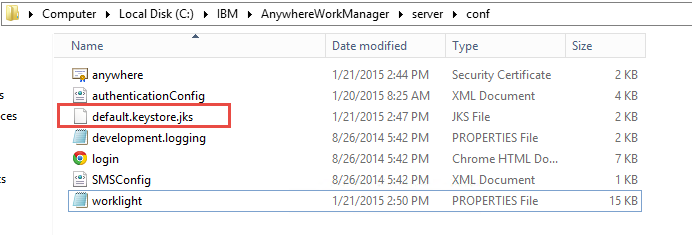
4. Before we add the certificate to the keystore, we will want to rename the current keystore file for Worklight. You can find the current file in the \AnywhereWorkManager\server\conf folder and it will be named default.keystore. We want to rename this file to add the extension .jks if your using PKSC12, you will want to re-name the file to it's appropriate extension. Once done your file should look like you see below.
5. So now that we have our anywhere.cer file saved to the Anywhere build machine and our keystore renamed, lets use the Java keytool to add the certificate to the Worklight keystore. On my Anywhere build machine WebSphere is also installed, so we will be using it's java located in IBM\WebSphere\AppServer\Java\jre\bin.
To add the certificate to your keystore open a command window and proceed to your java path and run the following command to add the certificate.
ikeycmd -cert -add -db C:\IBM\AnywhereWorkManager\server\conf\default.keystore.jks -pw worklight -label anywhere -file C:\IBM\AnywhereWorkManager\server\conf\anywhere.cer -format ascii -trust enable
-db is the path to the default keystore for Worklight
-pw is the password for the Worklight keystore (this is defined in the worklight properties and is worklight by default)
-label is the label for the cert in the keystore
-file is the path to the certificate you saved from your browser.
The command should look like you see below.
![]()
Once your certificate has been added, you can use the following command to confirm it exists in the keystore.
ikeycmd -cert -details -label anywhere -db C:\IBM\AnywhereWorkManager\server\conf\default.keystore.jks -pw worklight
6. Now our certificate is in the keystore, we have two more steps to complete before rebuilding and re-deploying the AnywhereWorkManager.war. The first step is to update the worklight.properties to the correct name for our default.keystore.
The worklight.properties exists in ibm\AnywhereWorkManager\server\conf. Open this file and update the following properties to match the name and properties of your keystore then save the file.
#SSL certificate keystore location.
ssl.keystore.path=conf/default.keystore.jks
#SSL certificate keystore type (jks or PKCS12)
ssl.keystore.type=jks
#SSL certificate keystore password.
ssl.keystore.password=worklight
7. Once the worklight.properties is updated, you will need to change the protocol and port for the adapter in your build.properties that is located in the root of the AnywhereWorkManager install folder. The following properties should be pointing to the https protocol and your SSL enabled ports on the Maximo server.
adapter.connection.protocol=https
adapter.connection.domain=localhost
adapter.connection.port=9443
adapter.connection.context=maximo
8. Now the last step is to rebuild the applications and redeploy the war file. From ibm\AnywhereWorkManager run 'build all' in a command prompt to rebuild the applications. Once done use the WorkLight Configuration Tool to update the AnywhereWorkManager.war to your application server. Now when you log in to Maximo Anywhere your requests will go through https to Maximo.
You can confirm HTTPS is working by enabling the developer tools in Chrome (F12) and looking at the OSLC request being sent. As you can see below this query is running against Maximo via HTTPS.
[TRACE] Invoking adapter with these parameters:
{"adapter":"OSLCGenericAdapter","procedure":"query","parameters":[{"url"
:"https://localhost:9443/maximo/oslc/os/oslcsynonymd…tle%3D%22LOCTYPE%22+and+spi%3Amaxvalue%3D%22STOREROOM%22&stablepaging=true","sessionid":"JSESSIONID=0000FQvoDa1YUheMHm1QA704wv_:-1;
Well that's all for tonight, I will follow this up in the coming weeks with enabling Maximo Anywhere to authenticate through LDAP. As always any questions, concerns or comments please reply to this post.
Update 08/25/2016
Just to provide an update to address some issues that have been run in to following this document as it is a simple basic cert tutorial.
1. If there are multiple certificates in your certificate chain, all certificates must be imported in to the default.keystore.jks file to fully complete the certificate chain.
2. The certificates must be also imported in to the key store for the Application server that is running the MobileFirst server and hosting the runtime default.keystore.jks is deployed to.
In WebSphere Liberty this key store exists in the ibm\WebSphere\Liberty\usr\servers\defaultserver\resources\security
The certificate must be imported in to the key.jks for Liberty and not a different store as key.jks already contains a personal certificate generated by the MobileFirst install
For WebSphere ND you can import the certificates via the WebSphere console through SSL certificate and key management
Update 12/13/2016
When using the Eclipse integrated development environment to run the Anywhere applications, the certificates would need to be imported to the keystore in your Eclipse workspace.
For example : workspace\MobileFirstServerConfig\servers\worklight\resources\security\key.jks
UID
ibm11130469