Troubleshooting
Problem
This document includes an example migration of IBM i host with IBM i client LPARs on a POWER6 server to a POWER7 server.
Resolving The Problem
Migrate Server/Client from POWER6 to POWER7 Hardware
Note: These are notes taken during a migration test and are not intended to cover all situations
Helpful resources:
http://www.mcpressonline.com/networking/techtip-virtualization-made-simple-with-i-hosting-i.html
Considerations and notes prior to starting the process
Here are a few questions to ask:
o Does the Client Partition own any dedicated hardware slots? For example, does it own a dedicated Ethernet adapter or a Fibre Channel adapter?
o Do you want the Client Partition to own any dedicated hardware when moved to the new P7 Hardware?
On the HMC
1. Go to Properties-->Virtual Adapters.
2. Make note of the number of Server/Client pairs that are being used for the current configuration.
In this case, only one Virtual SCSI adapter is being used. When you move to the new hardware, you know that you can suffice creating/using only one SCSI adapter:

On the Server Partition
1. Check the Network Server Description (NWSD) for the Client Partition.
2. Specifically check the following parameters. (These parameters may(or will) need to be changed when the recovery is completed to the new hardware):
RSRCNAME - The CTLxx resource gets created when you create the Virtual SCSI Adapter - Server/Client pair.
PARTITION - This can be the name of the partition or *NONE if you use the PTNNBR parameter.
PTNNBR - This can be number of the partition or *NONE if you use the PARTITION parameter.

Are the Server and Client Partitions using Current code levels?
Update the PTFs, if necessary, prior to performing the save.
Save the Server
Are you using BRMS or Native Go Save? It does not matter which you choose; however, BRMS is a much easier way to manage the restore/recovery process because you will have the recovery reports.
On the Client Partition
1. Issue the ENDSBS *ALL *IMMED command on the Client Partition.
2. Issue the PWRDWNSYS *IMMED command the Client Partition.
On the Server Partition
1. Vary off the NWSD(s) for the Client Partition to ensure that this will be saved correctly.
2. Issue the ENDSBS *ALL *IMMED command.
3. Perform a BRMS Full restricted state backup of the Server Partition and save the entire system.
4. Gather the BRMS Recovery Reports and print them because you will need them for the recovery.
Prepare partitions on the Power7 Hardware
On the HMC
1. Update the HMC to proper code levels that will support managing the Power7 Hardware.
2. Create the new Partition(s) that will exist on the Power7 Hardware.
3. Create the Server/Client SCSI Adapter pairs as shown below.
On the Server Partition
Go to Configuration-->Manage Profiles and create a new Virtual Adapter (Server/Client pair):


On the Client Partition
Go to Configuration-->Manage Profiles and create a new Virtual Adapter (Server/Client pair):


Perform the Recovery to the new Server partition on the Power7
Perform the Recovery by starting a D-mode IPL using the SAVSYS media from the Server partition.
We are using BRMS and followed the QP1ARCY recovery report for the D/R
STRRCYBRM OPTION(*SYSTEM) ACTION(*RESTORE)
----- Attention ---------------------------------------------------
Press F9 on the Select Recovery Items display to go to the Restore
Command Defaults display.
__ Ensure the tape device name or media library device name is
correct for the Device prompt.
__ Ensure *SAVLIB is specified for the Restore to library prompt.
__ Ensure *SAVASP is specified for the Auxiliary storage pool prompt.
If you are recovering to a different system or a different logical
partition, you must specify the following:
__ *ALL for the Data base member option prompt.
__ *COMPATIBLE for the Allow object differences prompt.
__ *NONE for the System resource management prompt.
__ Select *NEW for Restore spooled file data to recover saved
spooled files concurrently with restored output queues.
Follow the steps listed on the BRMS QP1ARCY Recovery Report until the Recovery is completed.
On the Host Partition, change the 'Change Network Server Desc' (CHGNWSD) for the Client Partition
You need to gather some information before you can make the change to the NWSD.
1. On the HMC, identify and make a note of the Partition ID for the server (RCHASTKS) and the client (KansasCity):

2. Identify the Communication resource for the Client.
3. From command line ===> wrkhdwrsc *cmn and look for the 290B resource:

4. When displaying the CTL01 resource, it will show that the server adapter ID is 4, and the client adapter ID is 2:

5. Now you are ready to change the NWSD.
Notes:
a. Depending how you had created the NWSD using either the PARTITION name or the PARTITION NUMBER, you may need to change one of the them.
b. You cannot use both parameters in the NWSD.
6. You will need to change or check the following parameters:
RSRCNAME
PARTITION
PTNNBR

Verify NWSSTGs are linked and Vary on NWSD
1. Verify that the Network Server Storage Spaces are linked-up to the Server. This is usually automatically completed for you during the BRMS recovery process. However, it is always a good practice to check these before you attempt to vary on the NWSD:

2. Vary on the NWSD:
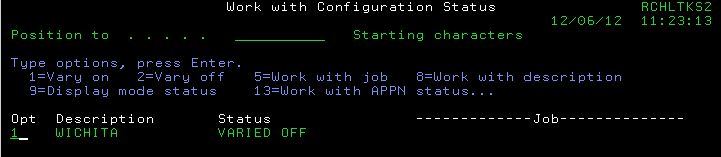
3. The NWSD should go active; if it does not, check messages and qsysopr:

IPL the Server Partition
1. You will need to IPL after completing the D/R.
2. Following the IPL, verify that the NWSD is showing ACTIVE status:

3. Go to the HMC and tag the Load Source and the Alternate restart device to the Client SCSI Slot and press Enter:

4. Activate the partition for the Client:
Historical Number
659354284
Was this topic helpful?
Document Information
Modified date:
18 December 2019
UID
nas8N1010544