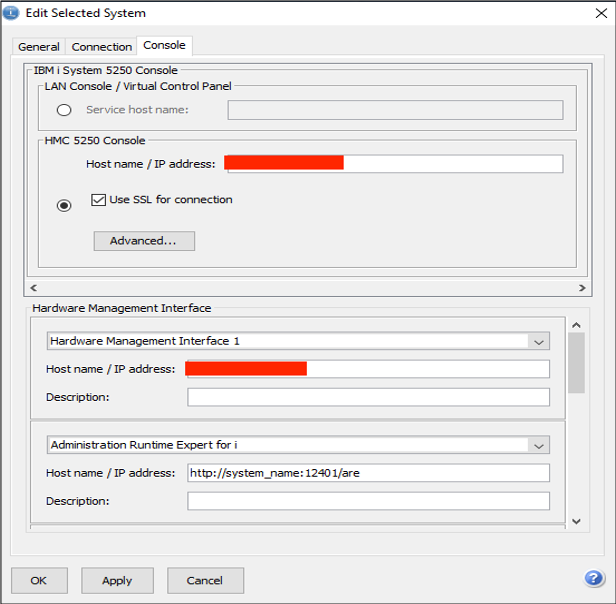
Please be aware that starting with version ACS 1.1.8.4 you now have a new tab to select for the Hardware Management Interface values.
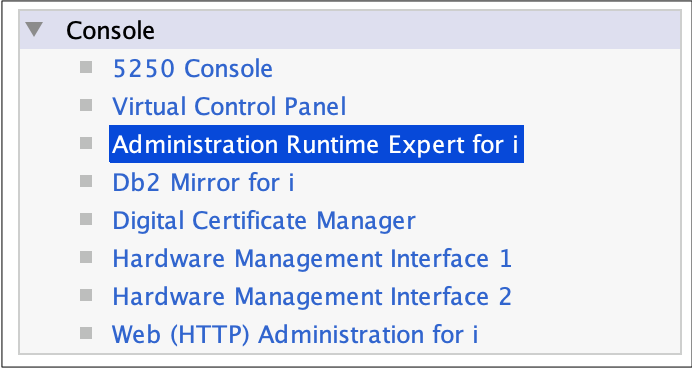
The next time you want to use ARE, click the Administration Runtime Expert link under the Console heading in the left navigation area.
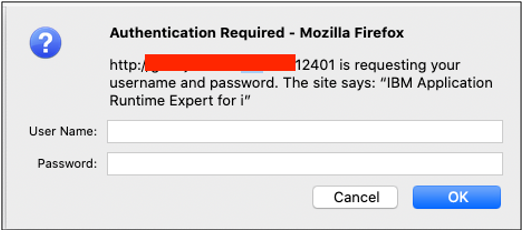
3. You are required to authenticate to the IBM i after you first click or open the ARE URL, either directly in your browser or if you launch it from ARE. When you open the link the first thing you will see is a sign on window, which looks something like this:
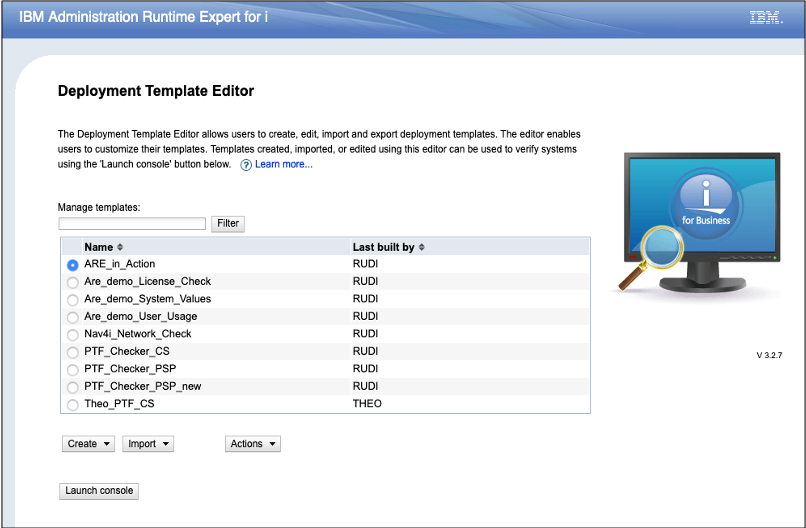
4. After you have signed in, the Main ARE Home page is shown. This is the starting place. Here you will need to configure a new template. The template identifies what things should be validated against an endpoint system. Click on the 'Create' button to get started.
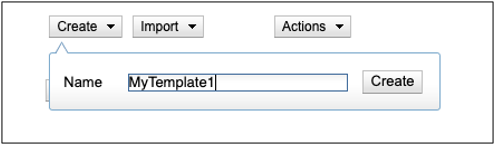
5. In order to create your PTF distribution template, press the 'Create' button and fill in a meaningful name or use the default.
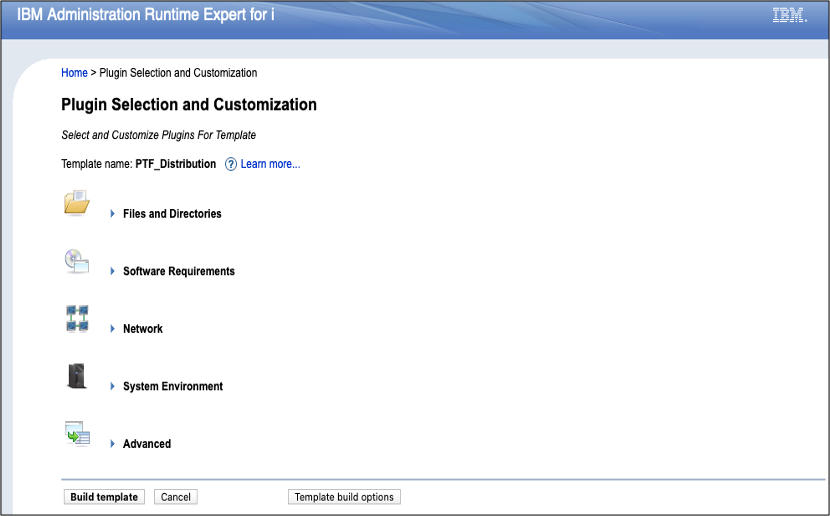
6. The main template editor is now shown. Here you can identify many different attributes and values for validation.
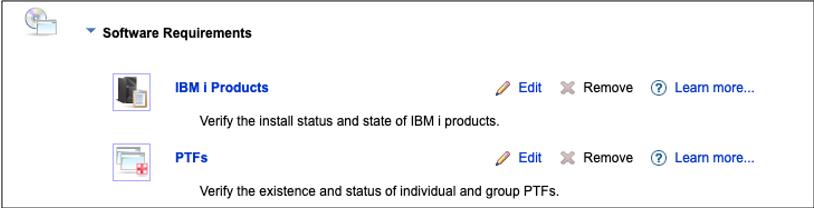
7. For this template we want to validate PTFs. Open the Software Requirements twisty to see the PTFs plugin. To add PTFs to this template, click on the Edit link.
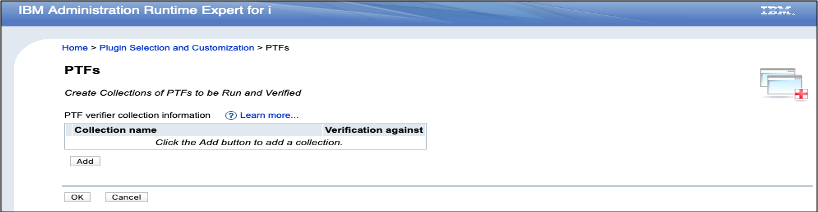
8. Each plugin allows you to define 'Collections'. Each collection is a specific groping of values that will be used to validate against an endpoint system. To add a new collection, click on the Add button.
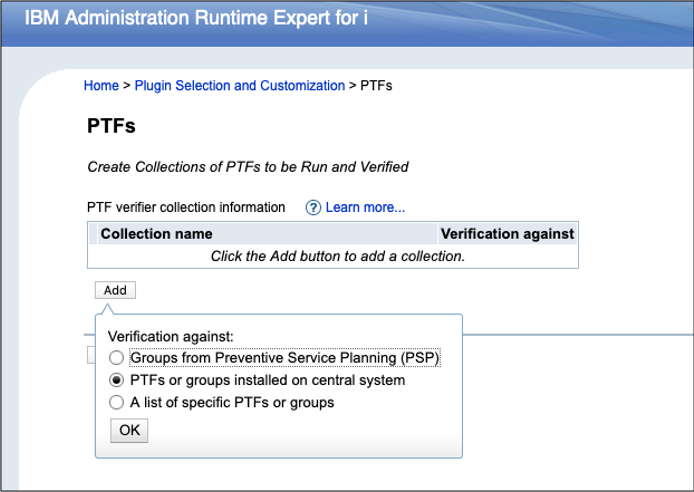
9. After you click on Add, you will be prompted for the type of add you want. For this example, we want to validate PTFs from a central system. Click on the 'PTFs or Groups installed on a central system' option. There are a couple of things to point out here. First, the central system is the system that this ARE template is run from. For this example, it is where we are running the ARE GUI. Second, all the PTFs we want to validate must be both loaded and applied on this central system.
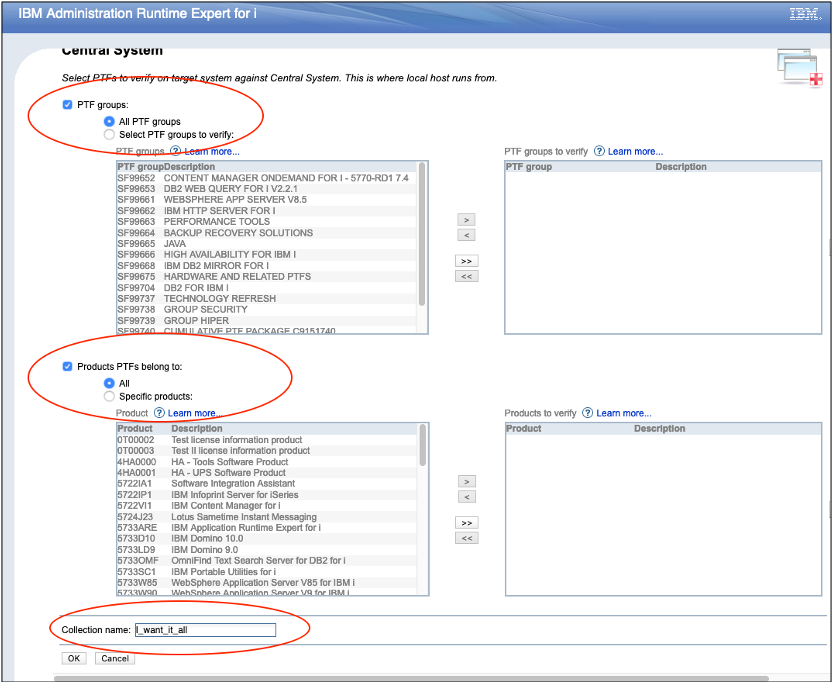
10. The obvious choice would be to select only PTF Groups, but as we want to make sure we do not want to leave any individual PTF out, its best to select both All PTF Groups and All for Product PTFs. Additionally, specify a meaningful name for this collection incase you want to add more collections in the future.
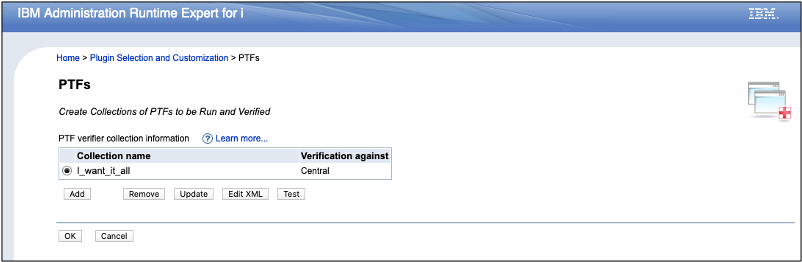
11. After Pressing 'OK', we are returned to the collections page with this newly created collection shown.
12. Press 'OK' to return to the template editor main page.
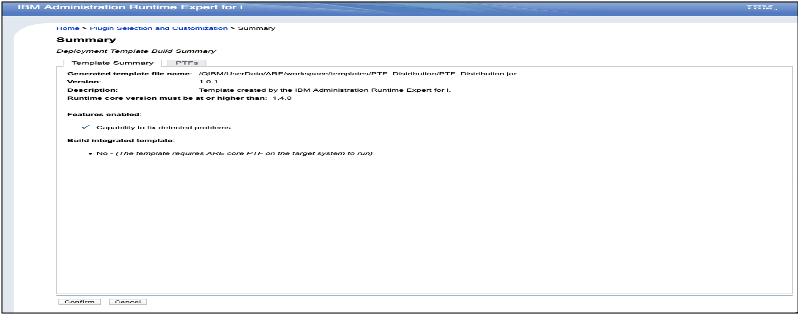
13. Now its time to build the template. Click the 'Build template' button to start the process. Review the summary of what is going to be built and click 'Confirm' to actually build this template. ARE is now going to harvest information from this central / GUI system and build a verification template that will be used to validate the selected information against endpoint systems.
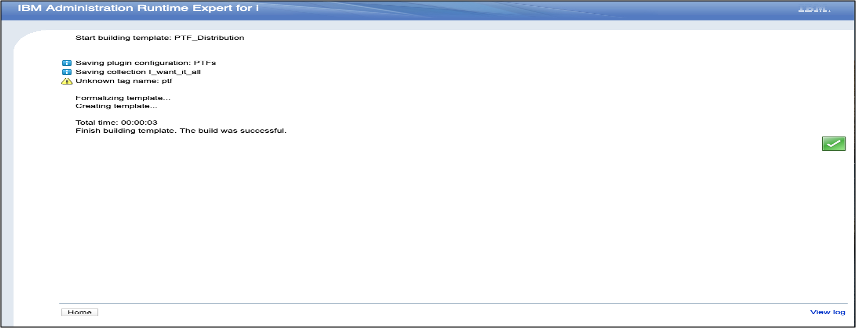
14. Once the template as been successfully built you will see the green check mark and the 'Home' button will show. Click 'Home' to return to the ARE Home page.
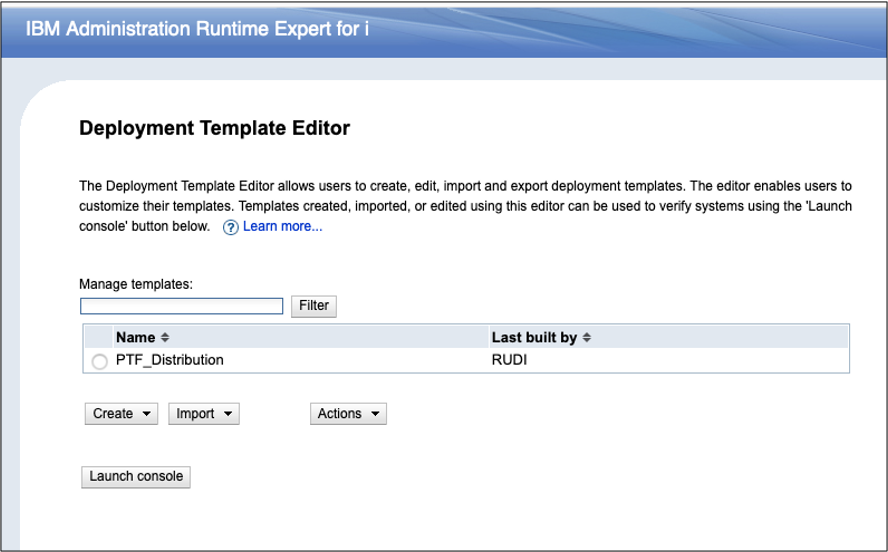
15. Congratulations! You have now build your first ARE Template. To run this template against one or more endpoint systems, click on the 'Launch Console' button to open the ARE runtime Console.
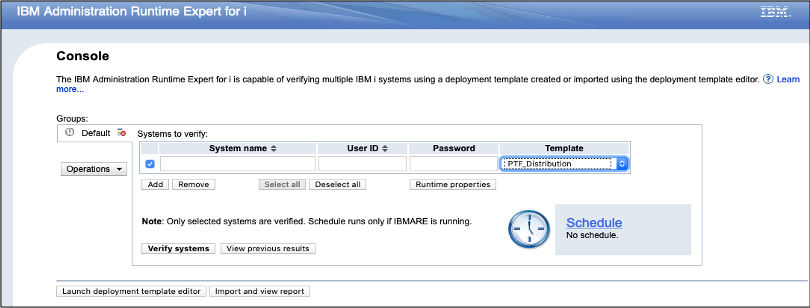
16. The console gives you the ability to specify many endpoint systems that you may want to run a template validation against. Click on the 'Add' button to specify a new endpoint system.
17. Specify the system name, a user and password for that endpoint system, and the template that you want to validate against.
Note: For the system name, the IP address can be used if the name cannot be resolved.
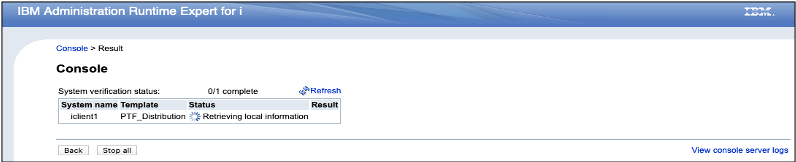
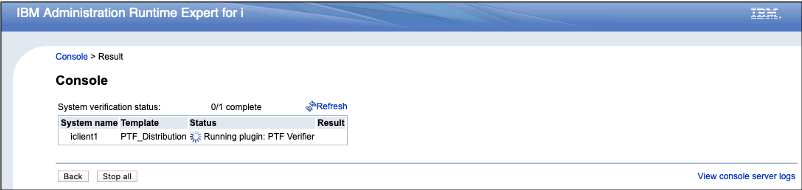
18. By pressing the 'Verify systems' button, you start the validation process against that endpoint system. The screens below show the progression of the validation process.
19. When the template validation has completed, you will be returned to a validation status page. Here you can see if there are differences on the endpoint system or if everything is the same.
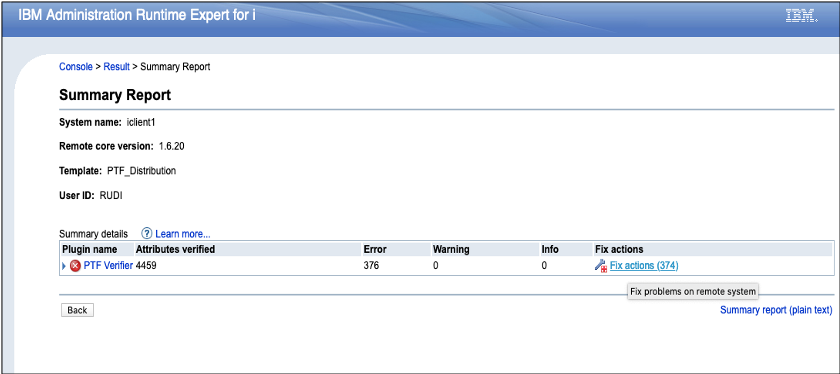
When difference are found, you will be shown the number of differences found during the validation process.
If no differences are found, you will see 'No problems found' as the returned status.
20. To see the actual report with the details on what was found during the validation process, click on the line reporting the issues found, A select list will display where you can choose what report you would like to view. The Summary report is formatted well for viewing in a browser and also provides the ability to launch the next step in this process which may either be fixing the issues; or sending, loading and applying the missing PTFs. Click on the 'Summary Report' link to view this report.
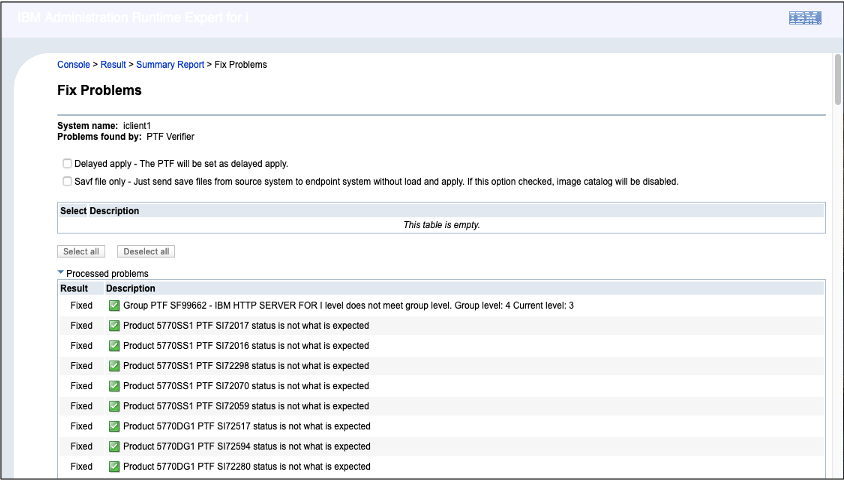
21. The Summary report details each of the items that were discovered during the validation process, both good and bad. To correct these PTF validation issues (i.e. PTFs that are that are on the central system but missing from the endpoint system), click on the 'Fix Actions' link.
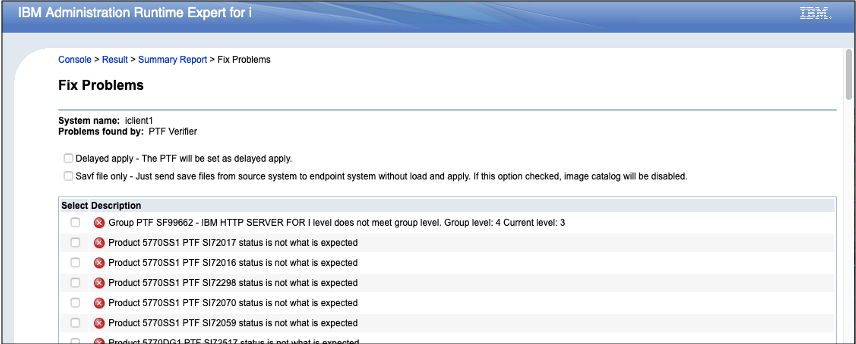
22. The Fix Actions page gives you the option of choosing what PTFs you want to have sent, loaded, and applied to the endpoint system. Either click on the individual PTFs you want to 'fix', or scroll to the bottom of the list of entries.
23. To have all PTFs that are missing considered for the fix action process, click on the 'Select All' button at the bottom of the list of Fix Actions.
24. Back at the top of the list are two options. You have to check one.
You have the option of doing a delayed apply of the PTFs, OR you can choose to just send the SavFiles only. The main reason for me to select the '*Savf file only' option, is I want to be in control when to apply the PTFs. Another reason is that I want a new Full System save before I start applying PTFs.
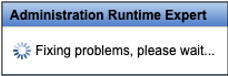
25. After you have selected the PTF and the Action to take, Scroll to the bottom of the page and click on the 'Fix' button. This will launch a process against the endpoint system to send the *Savf, and if requested, to load and apply the PTFs. This process will take some time to complete. You will see a processing popup to let you know this is happening.
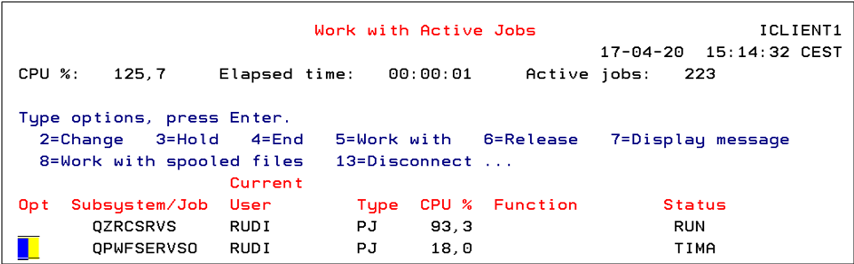
26. Now the waiting begins because it take some time depending on the amount of PTFs being sent across. This is done by tasks on the system called “QPWFSERVSO” on the source and endpoint system the name is identical. On the endpoint system an extra task is running, called “QZRCSRVS”, under the same user profile running ARE.
27. Once the Fix Action processing has completed the Fix Action screen is updated showing the status of each of the PTFs and if it was successfully Fixed.
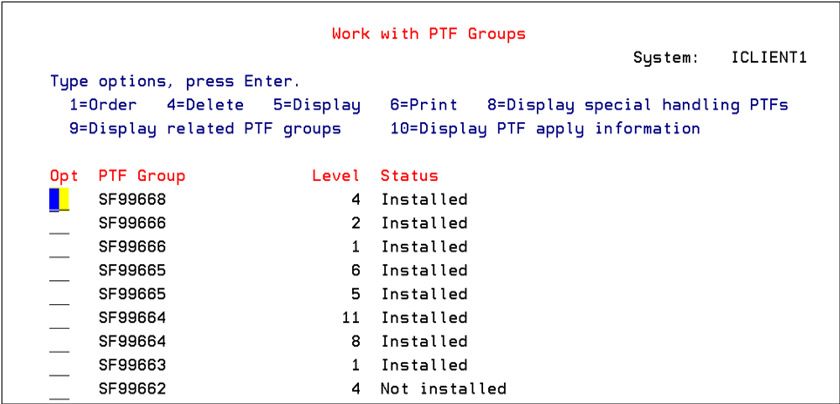
28. On the endpoint system, the WRKPTFGRP screen will look similar to the one shown below. New group levels are available with the status “Not Installed” as we only choose to send the *Savf and not actually run the load and apply though the ARE Fix action.
Note: In this example only one PTF Group was behind the Central system.
29. Since I like to do a full system save before PTFs are loaded and applied, I can do the full system save on the endpoint system now. Once the Save is complete I can now choose to load and apply all PTFs. Its best to run the following command on the endpoint systems:
INSPTF LICPGM(*ALL) INSTYP(*DLYALL)
All PTFs have now been loaded and applied in a delayed manner. On the next IPL, all PTFs will be applied.
The Administration Runtime Expert interface provides an easy way to keep track of many endpoint systems and automate the process of moving and even loading and applying PTFs across either a single endpoint or many endpoints.