Creating an SSH key file for accessing IBM Storage Virtualize storage
When configuring Db2® Mirror for storage that is located in an IBM® Storage Virtualize storage server, the cloning process requires the use of an SSH key file to authenticate and access the storage server. This section covers the required steps to create the RSA-based key and the steps for registering the RSA key in the SVC storage server.
The setup and cloning process requires making a connection to the SVC storage servers using an SSH key. This type of connection is a handshake where the outside system (in this case the IBM i that is driving the cloning process) establishes an SSH connection with a user (SVC user ID), and then passes the RSA-based key file along on the connection. The SVC server verifies that the user ID on the storage server has the corresponding public version of the key file. If the files match up, the SSH connection is authenticated and processing can continue.
It is important to create the SSH key file the correct way.
Software requirements
- 5733SC1 *BASE IBM Portable Utilities for i
- 5733SC1 Option 1 OpenSSH, OpenSSL, zlib
- 5770SS1 Option 33 Portable Application Solutions Environment
Creating the SSH key file
The SSH key is created on the IBM i partition. Open a 5250-emulator session using Access Client Solutions. Your profile must be authorized to use SSH-related functions.
From the green screen enter QSH to start the Qshell environment.
mkdir /home/usernameFor our example, we are creating a user named db2mssh as shown below.
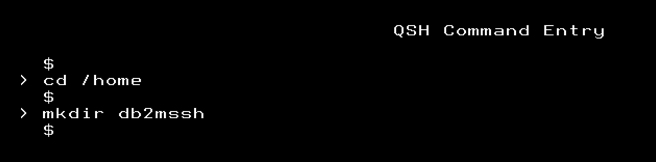
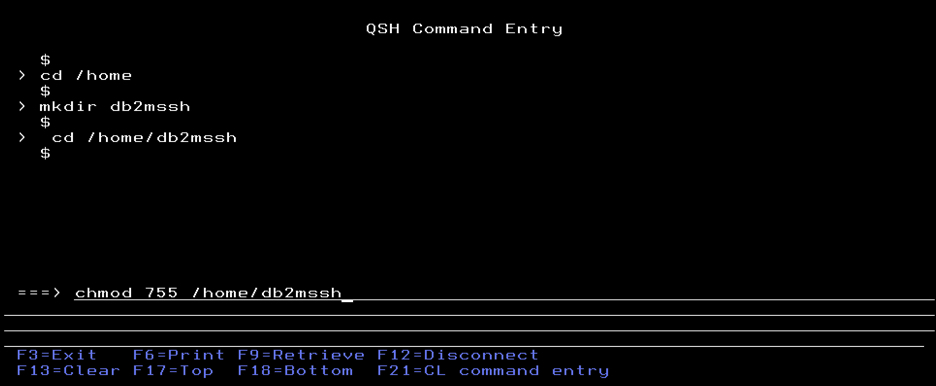
chmod 755 /home/usernameIf the user already has a home directory, check if a /.ssh directory already exists. If it does, it is important that you remove it before continuing. The SSH key creation process needs to create that directory along with the RSA keys.
For our example we are setting the authority for user db2mssh.
The ssh-keygen command handles the creation of the RSA-based key file. It will create both a public and a private key. These two key files are used to establish the authenticated connection when accessing the storage server. The private key will remain on the IBM i, and the public key is assigned to the user that is registered in the storage server. It is important to create this SSH key without a passphrase. If a passphrase is included, the authentication request will fail.
To simplify the process of creating the key file, change the home directory for the IBM i user profile you are currently signed in with to the directory you created above.
CHGUSRPRF USRPRF(MYPROFILE) HOMEDIR('/home/db2mssh')The rest of the commands are entered from QSH.
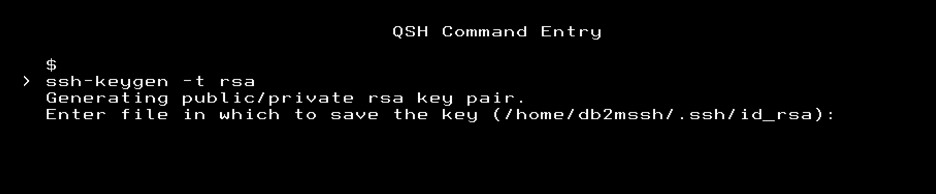
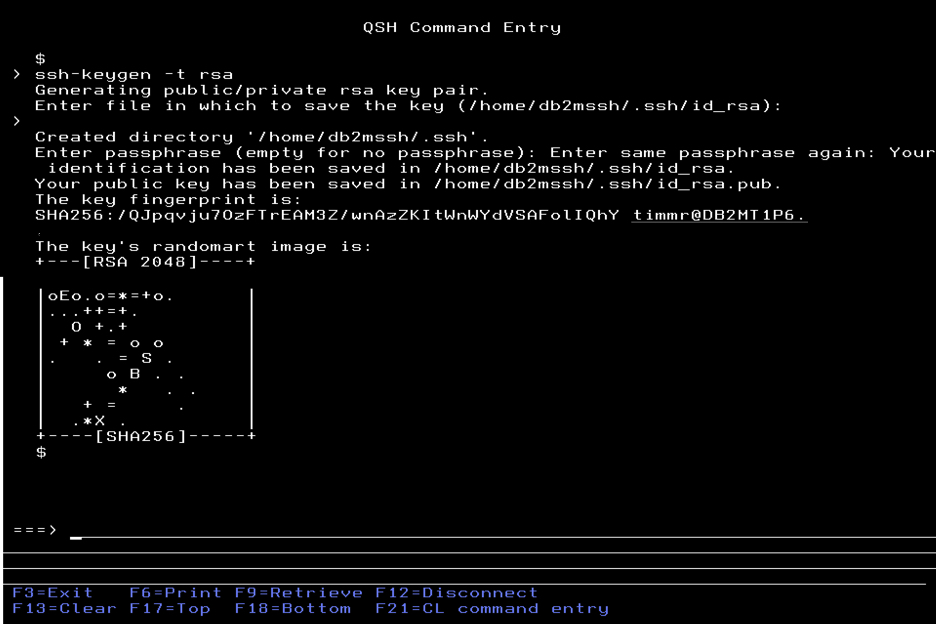
ssh-keygen -t rsa Press the Enter key when prompted for the file. Since we added the directory as your user profile’s home directory, you can see that the default is pointing to the correct place. In this example it is /home/db2mssh/.ssh/id_rsa.
The .ssh directory as well as the file id_rsa do not exist at this time. That is expected since the key generation process will create them.
Press the Enter key twice without entering any other values to set the passphrase to blank as shown below.
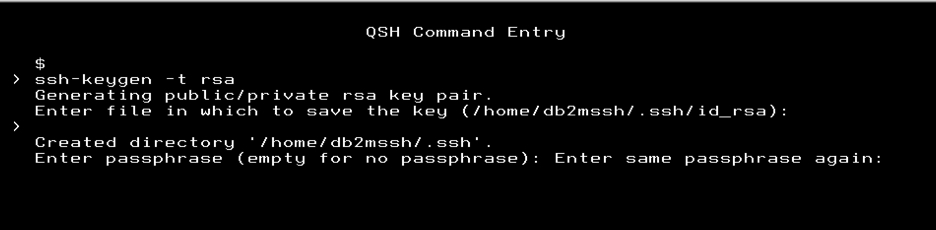
After you pressed enter to pass over the passphrase value, the SSH public and private keys are created as shown here.
cd /home/db2mssh/.ssh/
ls
During key generation, SSH will check to see if there is a .ssh folder in the user's home directory. If one does not exist, the folder will be created in the user's home directory and the public/private key pair will be stored in it. The public key will have a .pub extension; for example, id_dsa.pub or id_rsa.pub. The private key will be the one without the extension; for example, id_dsa or id_rsa. You will also be prompted for a passphrase. Do not enter one. Just press Enter twice and the key file will be generated without a passphrase.
Configuring the User ID for the IBM Storage Virtualize storage
- Sign on to the storage server
- From the left navigation, hover over the Users icon and select Users.
Figure 6. Storage sign in 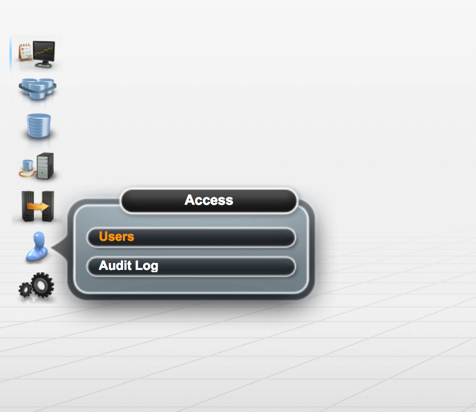
For our example, we are going to create a new user in the User Group – SecurityAdmin. Follow the security practices for your company when creating your users. You can also choose to assign this newly created SSH key to an existing user ID.
- Click on the Create User tab as shown below.
Figure 7. Create user 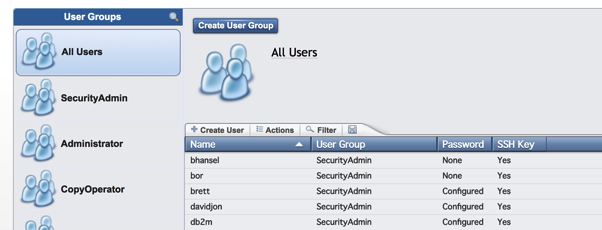
- On the Create user panel:
- Enter the name of the user ID.
- For Authentication mode select Remote
- Enter a password
- Click on Choose File to select the location that you have downloaded the id_rsa.pub file.
Figure 8. Create user panel 
- Click Create to create this new user ID.
Figure 9. Create new user ID 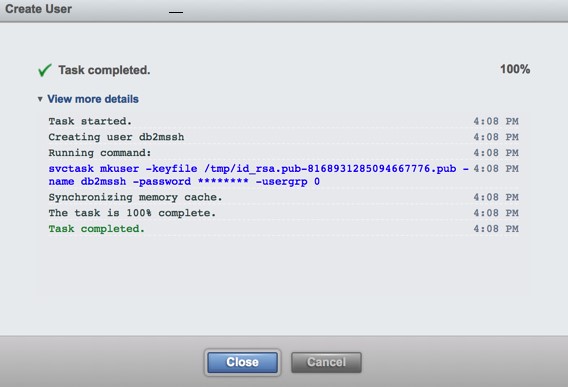
Now that the user has been created to use the key file, it is time to verify that everything works.
Verifying the certificate
There are two ways to verify the certificate: walk through the setup wizard, or connect using SSH to the storage server using your newly created certificate.
To verify your certificate using SSH, sign on to a 5250-emulator session on your IBM i.
Type qsh on the command line to enter Qshell.
ssh –i /home/db2mssh/.ssh/id_rsa db2mssh@1.2.3.4This command is invoking an SSH connection. The -i provides the path to find the SSH key. In our example, it is the location we specified when we created it. If you moved this key to a different location or system, then specify that path value. The last part of the command specifies what user ID to use to establish the connection, and the target IP address or host name.
The first time you connect, you might be prompted to verify that you want to connect to this target server. Type yes to proceed.
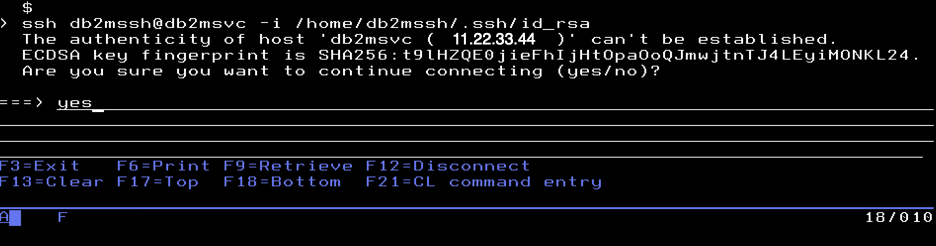
This will add the storage server host as a trusted IP address as shown below. Future requests will not prompt you again.
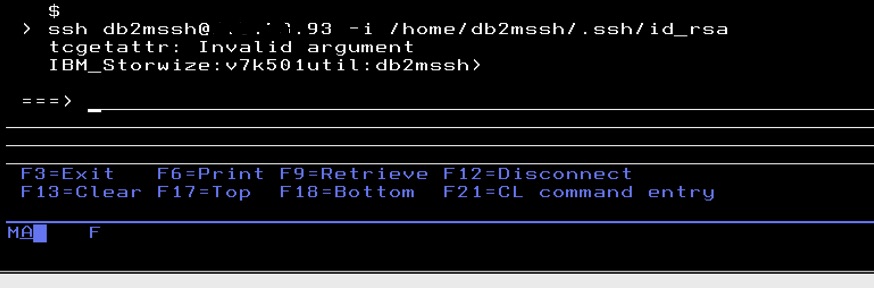
You should expect to see the message Invalid argument. You should also see a message that confirms that you are connected to the storage server. If your certificate is not correct, there are a several messages that could appear instead.
Type exit to close the SSH connection and return to the normal QSH prompt.
Uploading the SSH Key file on the managing node
When setting up a new managing node, the RSA key for the storage server you want to connect to must be in the IFS directory on that node.
The following instructions show you how to put the SSH key file into an IFS directory on the system where you are initiating the cloning process.
Create and download the key file
Create the RSA key file if one is not available to you for the storage you are using.
Download the id_rsa file. Note that the file with the .pub extension is only used when setting up a user id in the storage server.
Create the directory for the file and upload to IBM i
Follow the steps in this section to set access permissions so that the key file can be accessed whether using the GUI or command line Toolset.
- The SSH key file needs to be private.
- The permission settings cannot be too open.
- The user profile running the command is required to have read access.
- No group profile access is allowed.
- Sign on to a 5250-emulator session on your IBM i and open Qshell using qsh.
- Create a directory on the IFS to store the key file. If you are going to connect to multiple
storage servers, you will need to create a separate directory for each storage server to help
eliminate confusion. A recommended format
is:
/home/sshkeys/storage_server_name/db2mssh - Once you have created a directory using the mkdir command, you need to
set the correct authority on the directory. The SSH key needs to be private. Use the
chmod command to set access to the directory as read and write for the owner
only.
chmod 600 /home/sshkeys/storage_server_name/db2msshUse ls -lL to verify authority settings as shown below.
Figure 12. Directory access 
- Use the CL command WRKLNK option 9 to grant users (other than the key file owner) read access to
the directory. Add *R for any additional user profiles that will need to be able to access the key
file. This allows the user profile to access the key file when using the GUI or command line setup
tools.
Figure 13. Work with Authority 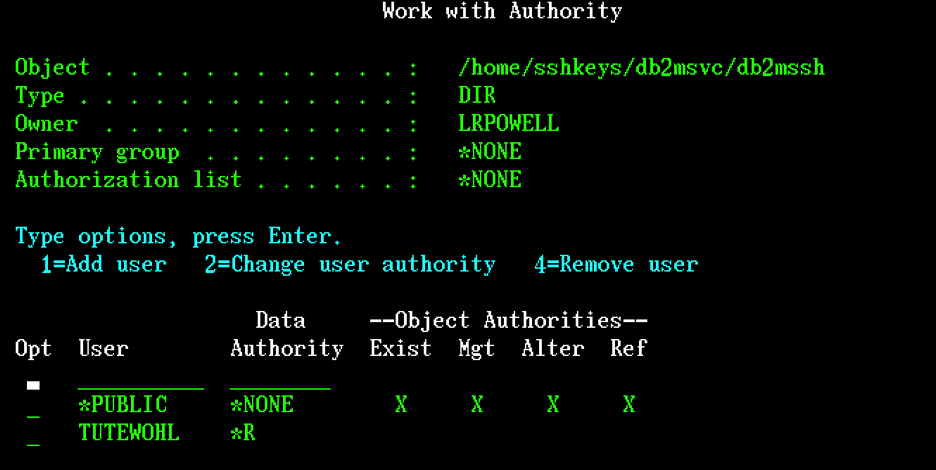
- Upload the file to the IFS directory using the Access Client Solutions interface or your preferred method.
Set permissions for the file
chmod 600 /home/sshkeys/storage_server_name/db2mssh/id_rsaNow the file access is private so it is not accessible by any user profile except the key file owner.