
You can configure a TAI service for the Liberty profile using developer tools.
Before you begin
For a description of the underlying process of configuring a server, and detailed information about specific aspects of server configuration, see Administering the Liberty profile manually.
Avoid trouble:  There are several security configuration examples on the wasdev.net website for reference when configuring security for your applications on the Liberty profile.
There are several security configuration examples on the wasdev.net website for reference when configuring security for your applications on the Liberty profile.Procedure
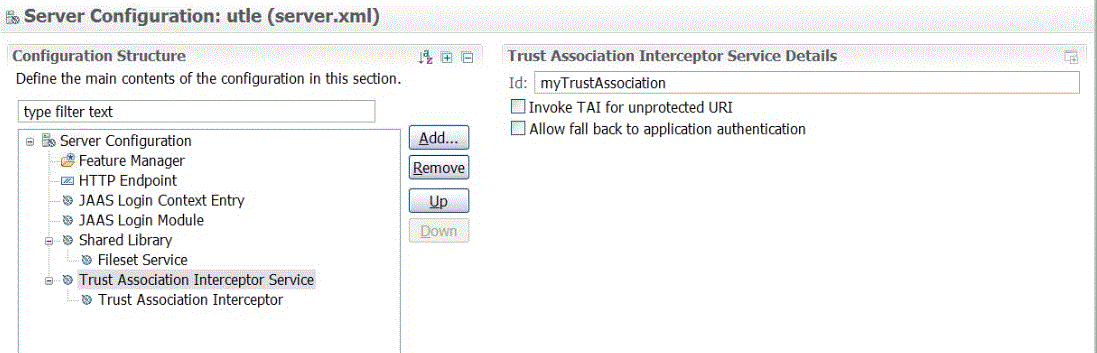
- Select Trust Association Interceptor Service and
enter an Id name. In
this example, the Id name is myTrustAssociation.
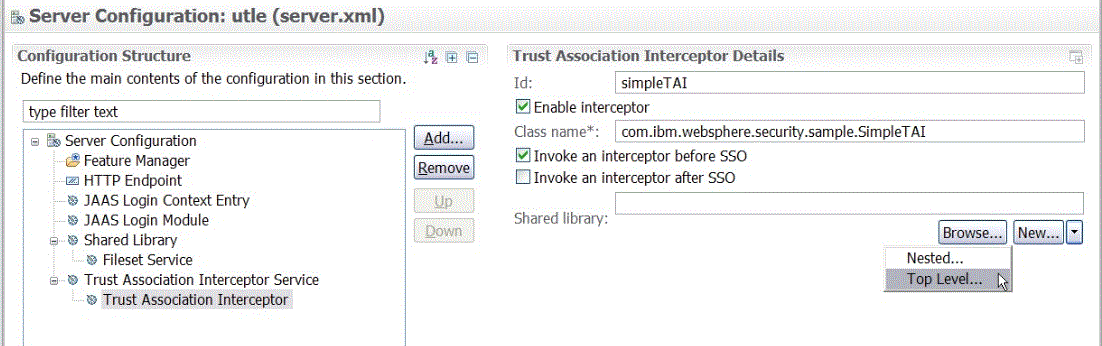
- Select Trust Association Interceptor and
configure the Id and the Class name which
is the fully qualified name of your TAI implementation class, then
click New button and select Top
Level to enter the Shared Library information. In this example, the Id of
your TAI is simpleTAI, class name is com.ibm.websphere.security.sample.SimpleTAI, Enable
interceptor and Invoke an interceptor before
SSO are checked.
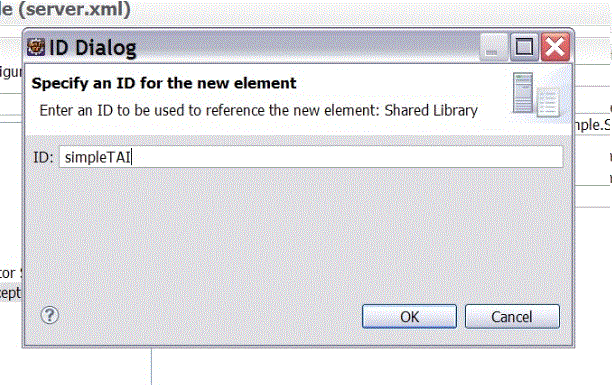
- Enter the ID for the shared Library
in the pop-up panel and click OK. In this example, the Id corresponds
to the name of the shared library is simpleTAI.
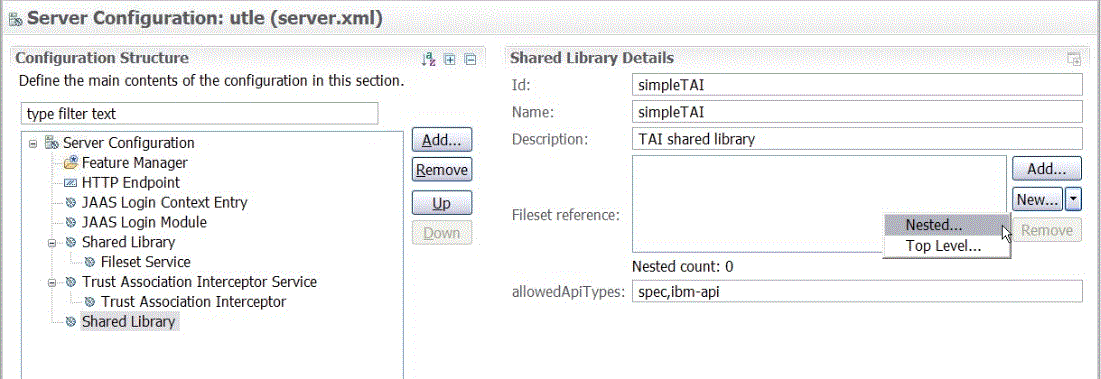
- Configure the Name and Description fields
for the shared library, then click New button
and select Nested to add a Fileset reference
as a nested element.
- Configure the Fileset Service Details by
clicking Browse button in the Base
Directory field and select the directory where the jar
file is located. Then, click Browse button
in the Includes pattern field to select your
jar file that contains your TAI implementation. In this example, the TAI implementation jar file
is simpleTAI.jar and located under the ${server.config.dir} directory.

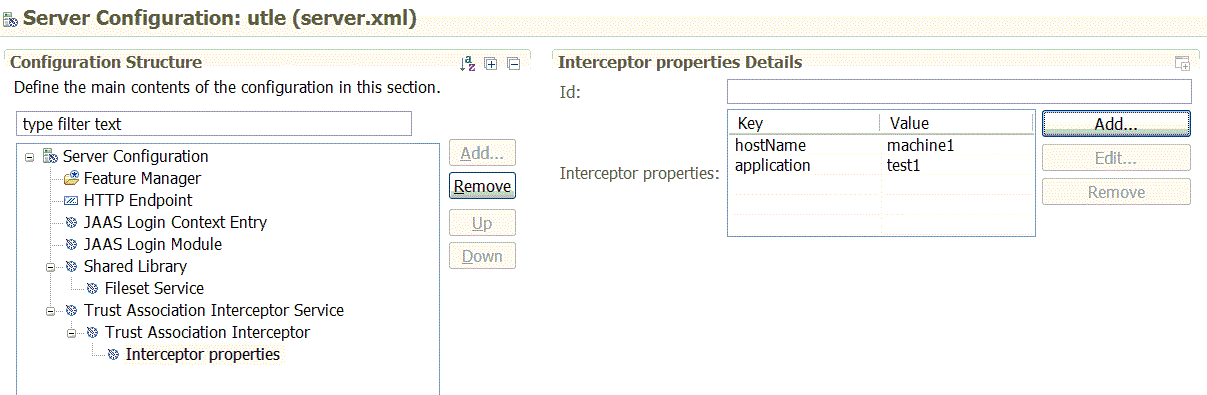
- Configure Interceptor properties Details by
clicking Add button to add properties for the
interceptor. In this example, there
are two pairs of properties for the interceptor. The hostName is machine1 and
the application is test1.
 Task topic