Deploying the Decision Center EAR file
You map roles to their equivalent groups and deploy the Decision Center EAR.
Before you begin
- Open and click on your server.
- Expand Java and Process Management under Server Infrastructure.
- Click Process definition, then click Java Virtual
Machine, and then:
- Under General Properties modify:
- Initial heap size: 4096 MB
- Maximum heap size: 8192 MB or up to 16 GB for 64-bit systems.
- Under Generic JVM Arguments, add: -Dclient.encoding.override=UTF-8
- Under Additional Properties, click Custom
Properties and add the following properties:
- com.ibm.ws.cdi.enableImplicitBeanArchives=false
- com.ibm.ws.cdi.enableCDI=false
- Under General Properties modify:
- Depending on our operating system:
- Windows: Save your changes and restart the server before deploying the EAR.
- Linux
- Save your changes and stop the server.
- Increase the open file limit of the operating system by using the command ulimt -n 8192.
- Restart the server, and then deploy the EAR.
About this task
When you deploy the Decision Center EAR file, the process sets the persistence locale. After you have saved a rule to the database, you are no longer allowed to change the persistence locale. If you want to install Decision Center in a language other than English, take note of the instructions in Setting the persistence locale.
If you redeploy the Decision Center EAR file, all users lose their role and the module properties are lost.WebSphere® Application Server reverts to the default parent first setting.
Procedure
To deploy the EAR file:
- In Step 9, map the security roles
that are defined in the deployment descriptors.
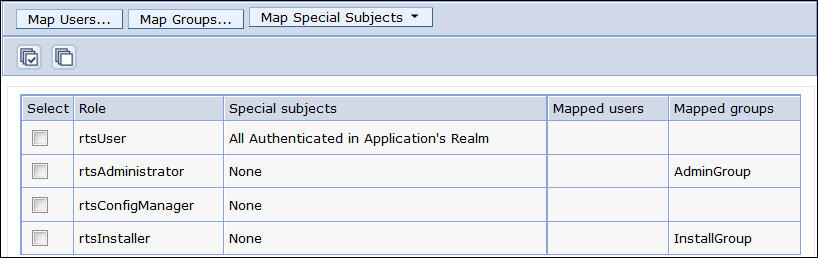
You map these roles to your users or groups of users, as follows:
- Select the check box next to the rtsAdministrator role and click Map groups.
- Click Search to display the groups.
- Select the AdminGroup that you created in the previous step, and move it to the Selected column.
- Click OK and repeat for the rtsInstaller role.
- Finally, select the check box next to the rtsUser role,
and click Map Special Subjects > All
Authenticated in Application's Realm.
What to do next
- Heap size
- UTF encoding
- Open and click on your server.
- Expand Java and Process Management under Server Infrastructure.
- Click Process definition and then click Java
Virtual Machine and then:
- Under Additional Properties modify:
- Initial heap size: 4096 MB
- Maximum heap size: 8192 MB or up to 16 GB for 64-bit systems.
- Under Generic Java Arguments, add: -Dclient.encoding.override=UTF-8
- Under Additional Properties modify:
- Save and restart the server.
At this point you are able to open the Decision Center consoles. See Completing the configuration of Decision Center for information on how to open the consoles, and what tasks remain to complete.