Setting up Domino Mobile Apps in the cloud
Follow these steps to set up IBM® Domino® Mobile Apps if you use IBM SmartCloud Notes for mail.
Before you begin
- Make sure you meet the Requirements.
- Make a note of your mail server name, which you need to complete this procedure. To determine your mail server name, for example, Mail2/Renovations, open your SmartCloud location document from your IBM Notes client.
Procedure
- Copy your Notes ID file to your iPad. There are multiple ways to do this, but the following
steps describe how to a copy it from a Mac or PC using Apple iTunes. Tip: See whether your ID file is in a vault: from the Notes® client, click . You see the following text in the Security Basics tab when your ID is in a vault: This ID file has been backed up into vaultxxxx. If you don't see this text, make a local copy of the ID on your iPad.
- Install iTunes on your Mac or PC if not already installed. (iTunes for Windows is available from the Microsoft Store.)
- Copy your ID file to your Mac or PC.
- Launch iTunes on your Mac or PC.
- Connect your Mac or PC to your iPad. If PC, use an adapter that allows you to connect.
- When prompted, allow the Mac or PC to access the iPad, and vice versa.
- From your Mac or PC, select the iPad icon:
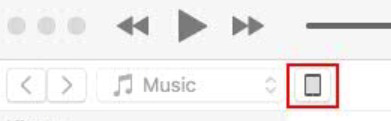
- In the Settings menu, click File Sharing.

- Select Domino Apps and click Add.
- Browse for your Notes ID file and add it.