You must establish a connection between CICS Explorer® and your CICS® systems before you can view any information.
You must provide details about the system connection, its location,
and its authentication requirements.
Before you begin
If you are connecting to a CICS TS
Version 3 system, you must connect to a CICSPlex® SM WUI server by using the CICSPlex SM Data Interface
read-only connection.
If you are connecting to a CICS Version 4 or later system, you can connect
either to a CICSPlex SM
WUI server by using the CICSPlex SM
Data Interface
read-only connection. Alternatively, if you want
update capability, you can use the CICS management
client interface (CMCI) connection. If you use the CMCI connection,
the CICS system must be set
up to use CMCI. For more information, see Setting up access for CICS Explorer.
If
you are connecting to a CICS TS
for VSE/ESA 1.1.1 system, you can use the CICS management client interface (CMCI) read-only
connection.
If CICS
Explorer is not configured, or you want to add a connection,
use the following procedure.
Procedure
- On the main menu for the workbench, click .
The Host Connections view is displayed.
If
your connections are preconfigured, the connections are listed under
the categories in the view. If not, the categories are empty. The
following example screen shows the Host Connections view with one
connection in each category type. Each connection is associated with
a credential, except for the z/OSMF connection. The credential is
shown in parentheses after the connection name.
- In the Connections section, select the required connection
type in the CICS System Management
connection category, then click Add.
The
Add Connection window is displayed.
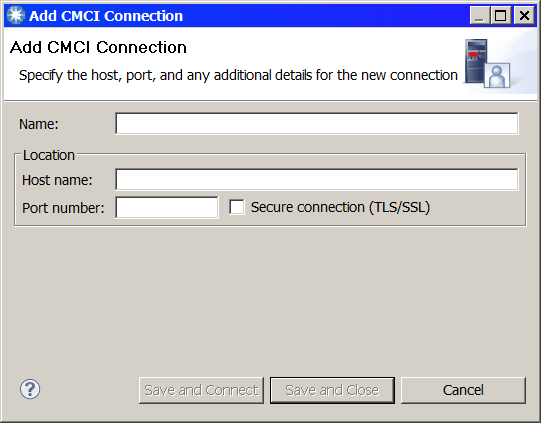
The following example shows the
Add CMCI Connection window.
- Type the TCP/IP host name of your server in the Host
name field. As you type, the characters up to the end
of the first qualifier are inserted in the Name field.
For example, for the host name myserver.example.ibm.com,
the name displayed is myserver.
- Enter the port number. As you type, the port number is
also appended to the name field. For example, the name displayed might
become myserver:20332.
- Optional: You can specify a different name
by replacing the name in the Name field.
- If the host connection is configured for SSL, select the Secure
connection (SSL) check box.
- Click Save and Close to save the
configuration without connecting or click Save and Connect to
save the configuration and connect immediately. If you click Save
and Connect, you are presented with the Signon window,
where you must select an existing credential to use with this connection,
or define a new credential.
What to do next
The connection and associated
credential are shown in the Host Connections view.
To connect
to the system, right-click the connection name and click Connect on
the menu. Alternatively, select the connection name and click Connect.
If the connection is not already associated with a credential, you
can choose an existing credential or create one at this time.

