Configuring Application Management Console (Windows)
Administrators must configure Application Management Console to meet the specific requirements of their environment.
- Before you begin configuration, review Information to collect before you begin installation and configuration. In addition, review the Windows Configuration Parameters. You will need these parameters during configuration.
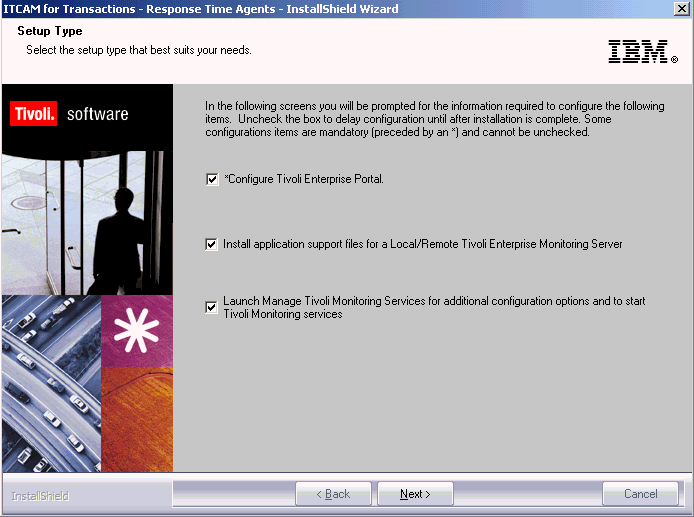
- In the Setup Type window of the Installation Wizard, select Launch
Manage Tivoli Monitoring Services for additional configuration options
and to start Tivoli Monitoring services and click Next. The Configuration Defaults for Connecting to a TEMS window is displayed.
- Specify the Tivoli Enterprise Monitoring Server connection
information and click OK:
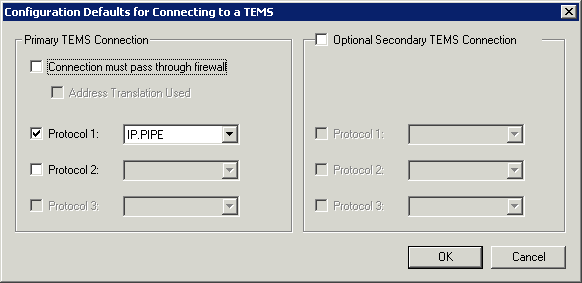
- Select Connection must pass through firewall if the agent and the Tivoli Enterprise Monitoring Server are on different sides of a firewall.
- Identify the Information to collect before you begin installation and configuration that the agent uses to communicate with the monitoring server. You have four choices: IP.UDP, IP.PIPE, IP.SPIPE, or SNA. You can specify three communication methods. This enables you to set up backup communication methods. If the method you have identified as Protocol 1 fails, Protocol 2 is used.
- At this point, do not select Optional Secondary TEMS Connection. You can set up the standby support for agents after installation. See the IBM Tivoli Monitoring product documentation.
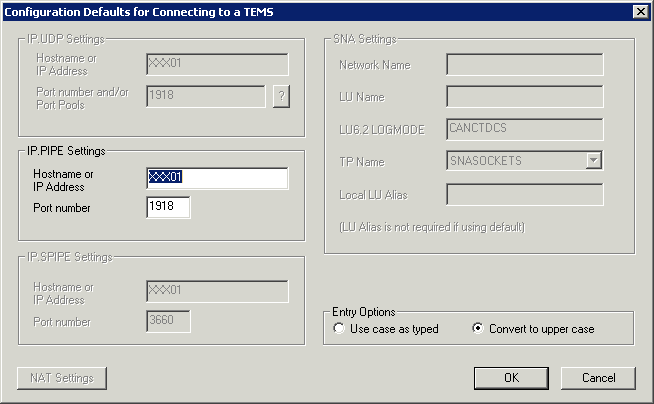
- In the Configuration Defaults for Connecting
to a TEMS window,
check the information and click OK. The information
on this window is automatically detected and depends on the protocol
selected earlier.
- In the ITCAM Console Configuration window,
select the Data Collection Configuration tab.
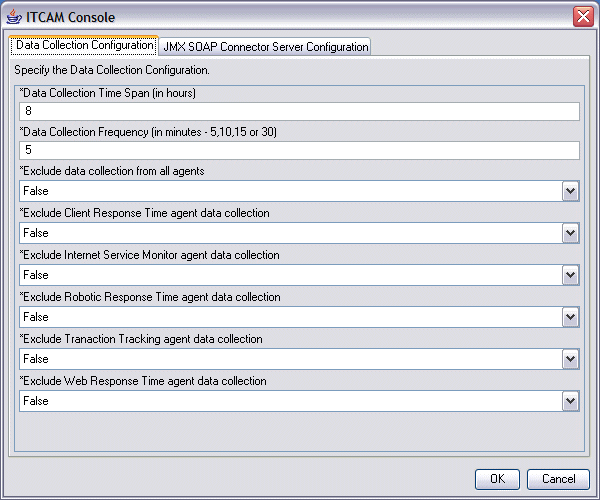
- Specify the configuration information about how data
is analyzed.
The Application Management Console agent collects data from other ITCAM for Transactions agents on a regular basis. It does this data collection automatically with no configuration required by using the KT1 File Transfer Enablement service installed on the monitoring service.
By default, the data is collected from the agents every 5 minutes except for the Transaction Reporter, from which the data is collected every 2 minutes to ensure not missing any data. After the data is collected, the metrics in the Application Management Console are updated with the latest values.
You can configure the collection frequency by changing the value in the Data Collection Frequency field, for example, to collect data at less frequent rates, such as every 10 or 15 minutes. Setting a lower collection frequency is useful to decrease the number of calls made through your monitoring server in high volume environments. Note that the Transaction Reporter frequency is fixed and is not affected by this setting.
The type of data collected can be controlled using the additional agent specific configuration fields. For example, if you do not want to collect any data, and only need the Application Management Console for configuration purposes, you can set the Exclude data collection from all agents parameter to True.
You can filter out specific agents by setting one or more of the following configuration parameters to True:- Exclude Internet Service Monitor agent data collection
- Exclude Robotic Response Time agent data collection
- Exclude Transaction Tracking agent data collectionNote: In ITCAM for Transactions V7.4 and later, Transaction Tracking data is not collected by default. Set Exclude Transaction Tracking agent data collection to False to collect data from the Transaction Tracking agent.
- Exclude Web Response Time agent data collection
- Select the JMX SOAP Connector Server Configuration tab.
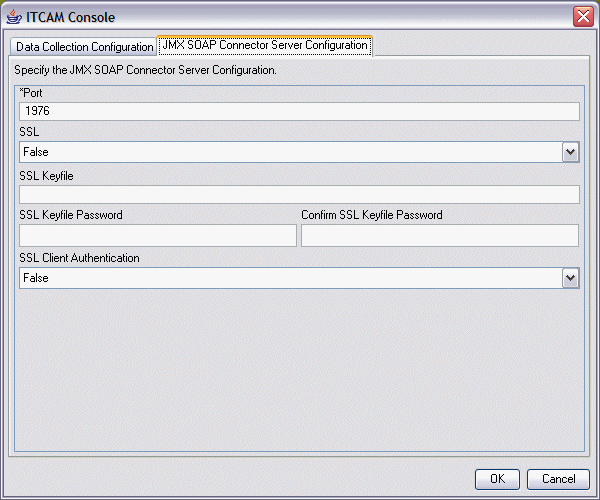
- Specify the JMX SOAP Connector Server configurations.
- (Optional): When installation is complete, the InstallShield Wizard Complete window opens.
- Click Finish.
- When the installation is complete, proceed to Verify installation of Response Time monitoring agents.