Creating a high availability group
You can set up a high availability group by using the New Web Console
Before you begin
Before you can create an HA group, you must configure the appliances that you want to group. For more information, see Configuring the hardware for high availability.
About this task
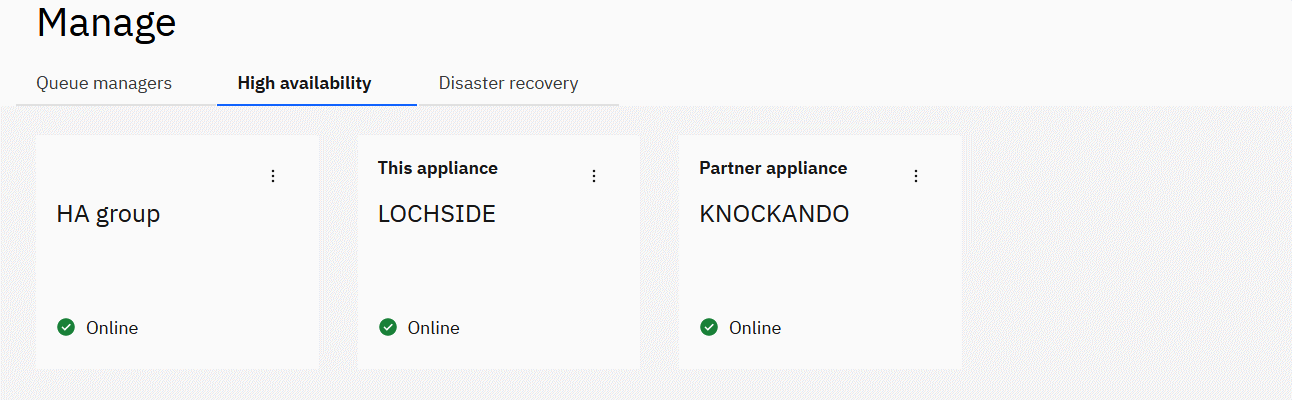
The HA group controls the availability of the queue managers within the group, determining where the queue managers run. You must create the HA group before you can create HA queue managers to run in the group. After you create the HA group, you can view the status of the group. You can also view which queue managers are in the HA group.
To create an HA group and generate unique keys for communication between the appliances in the group, you must work on both appliances in the group. You must have the IP addresses of the Eth13 interfaces on both appliances.
Procedure
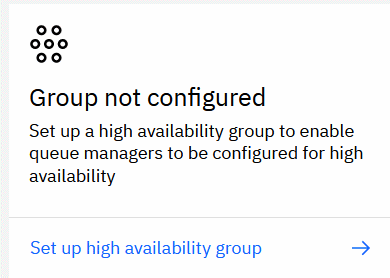
- Select the High Availability tab in the Manage view.
-
Click the Set up high availability group link: .
-
Enter the IP address of the HA primary interface on the second appliance in the group. You must
specify the IP address using ip v4 dotted decimal notation (for example,
192.0.2.8
). -
Click Next. A generated key is displayed and you can click the copy
button
 to copy it.
- In the console of the secondary appliance in the group, select the High Availability tab in the Manage view and click the Set up high availability group link.
-
Enter the IP address of the HA primary interface on the primary appliance in the group. You
must specify the IP address using ip v4 dotted decimal notation (for example,
192.0.3.8
). - Enter the key that was generated on the primary appliance in the Enter temporary key field and click Next. The HA group is created (which might take some time).
Results