Installing a drive in the 8335-GTB system
Learn how to install a drive in the IBM® Power® System S822LC (8335-GTB) system.
About this task
You can install disks with the system powered on and running.
Procedure
- Determine the slot in which you want to install a disk drive. The disk drive
slots are in the front of the system.
The following illustration shows the disk drive locations; positions 5 and 6.

- Remove the front cover. For instructions, see Removing the front cover from an 8335-GTB system.
- Attach the electrostatic discharge
(ESD) wrist strap. Attention:
- Attach an electrostatic discharge (ESD) wrist strap to the front ESD jack, to the rear ESD jack, or to an unpainted metal surface of your hardware to prevent the electrostatic discharge from damaging your hardware.
- When you use an ESD wrist strap, follow all electrical safety procedures. An ESD wrist strap is used for static control. It does not increase or decrease your risk of receiving electric shock when using or working on electrical equipment.
- If you do not have an ESD wrist strap, just prior to removing the product from ESD packaging and installing or replacing hardware, touch an unpainted metal surface of the system for a minimum of 5 seconds.
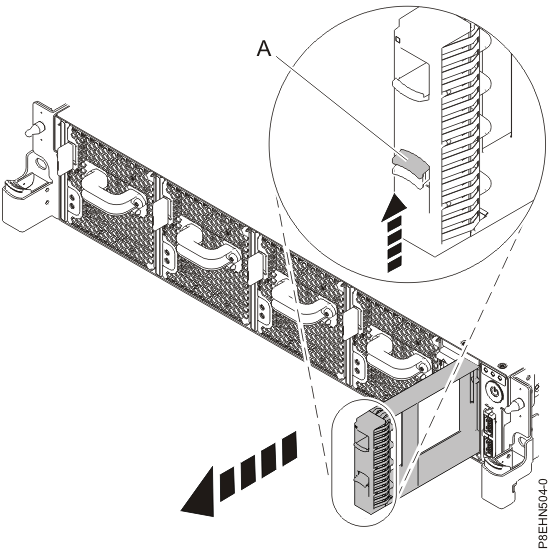
- If the slot you want to use contains a drive filler, remove the drive filler from the
slot.
- Push the lock (A) on the handle of the filler. See Figure 1.Figure 1. Removing a disk drive filler from a system.

- Hold the handle and pull out the filler from the slot.
- Push the lock (A) on the handle of the filler. See Figure 1.
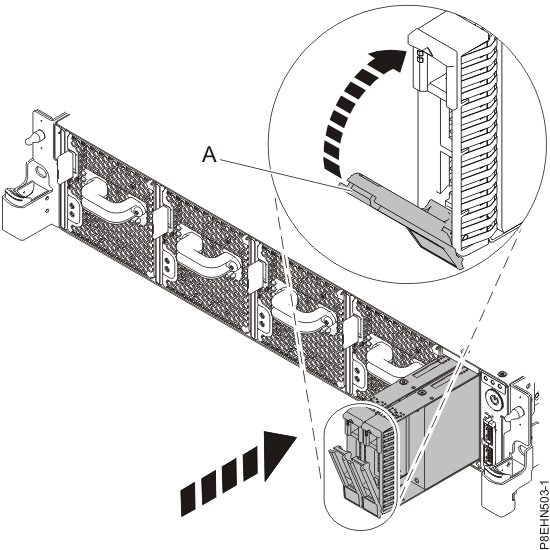
- Hold the drive by the top and bottom edges as you position the drive, and insert it into the
drive slot. Important: Ensure that the drive is fully seated and is all the way into the system.
- Lock the drive bay handle (A) by pushing in the handle release. See Figure 2.Figure 2. Disk drive lock detail

- Configure the installed drive for your environment. After you insert the new drive, you need to rescan for the device.
- Ubuntu Linux operating system: To run the rescan-scsi-bus command in
the Ubuntu Linux operating system, log in to the system as the root user, and run the following
command:
rescan-scsi-busThe rescan-scsi-bus tool is available in the scsitools package; install the package by using the following command:sudo apt-get install scsitools - Red Hat Enterprise Linux (RHEL) version 7.2: To run the rescan command in the REHL
version 7.2 operating system, log in to the system as the root user, and run the command:
rescan-scsi-bus.sh -aThe rescan-scsi-bus tool is available in the sg3_utils package; install the package by using the following command:yum install sg3_utilsYou may also want to refer to: Adding a Storage Device or Path
Verify that the new drive is active with the following command:lsscsi - Ubuntu Linux operating system: To run the rescan-scsi-bus command in
the Ubuntu Linux operating system, log in to the system as the root user, and run the following
command:
- Load or restore data from your backup media.