Creating a New Dialog and Specifying the Dialog Properties
To create a new custom dialog:
- From the menus choose:
This will launch the Custom Dialog Builder for Extensions, which is an interactive window that allows you to design and preview a custom dialog.
Figure 1. Custom Dialog Builder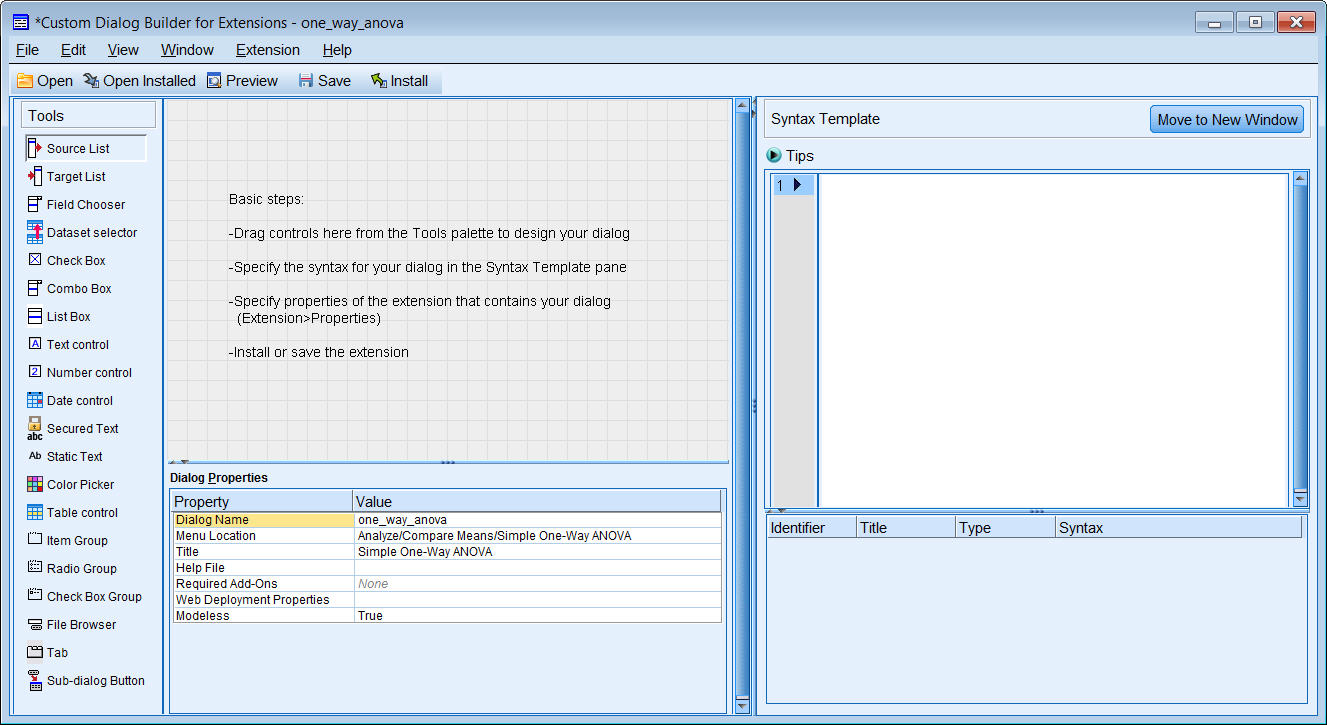
The Dialog Properties pane allows you to specify a number of properties for your new dialog.
- Enter one_way_anova for the Dialog Name. The Dialog Name is the identifier for the dialog and is a required property.
- Enter Simple One-Way ANOVA for the Title. The Title property specifies the text to be displayed in the title bar of the dialog box.
- Click the ellipsis (...) button in the Value column for the Menu Location property
to specify the location of a new menu item for your dialog.
Figure 2. Menu Location dialog box
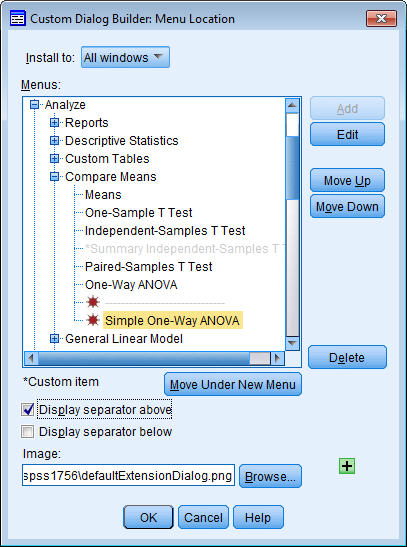
The Menu Location dialog box allows you to specify the name and location of a new menu item for your dialog. Since we're creating a custom version of the One-Way ANOVA procedure, we'll add a new menu item to the Compare Means sub-menu of the Analyze menu.
- Expand the items for the Analyze menu and the Compare Means sub-menu.
- Choose One-Way ANOVA on the Compare Means sub-menu.
- Click Add to add the new item and then enter Simple One-Way ANOVA for the name of the item.
- Click Move Down to position the new menu item at the bottom of the Compare Means sub-menu.
- Select the Display separator above check box and then click OK.