Selecting Cases in Nodes
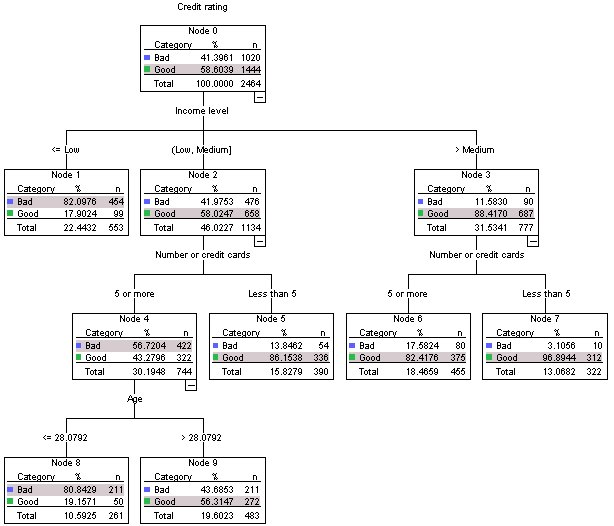
Let's look at the cases in node 9 to see if the data reveal any useful additional information.
- Double-click the tree in the Viewer to open the Tree Editor.
- Click node 9 to select it. (If you want to select multiple nodes, use Ctrl-click).
- From the Tree Editor menus choose:
Figure 2. Filter Cases dialog box 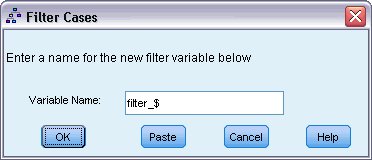
The Filter Cases dialog box will create a filter variable and apply a filter setting based on the values of that variable. The default filter variable name is filter_$.
- Cases from the selected nodes will receive a value of 1 for the filter variable.
- All other cases will receive a value of 0 and will be excluded from subsequent analyses until you change the filter status.
In this example, that means cases that aren't in node 9 will be filtered out (but not deleted) for now.
- Click OK to create the filter variable and apply the filter condition.
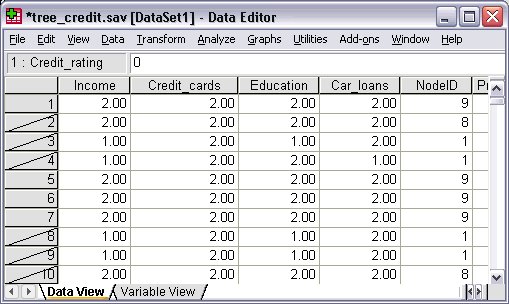
In the Data Editor, cases that have been filtered out are indicated with a diagonal slash through the row number. Cases that are not in node 9 are filtered out. Cases in node 9 are not filtered; so subsequent analyses will include only cases from node 9.