Express installation
If you are a trial user of IBM Cloud Pak® for Integration, or you are creating a proof-of-concept deployment that doesn't require a sustained workload, express installation gets you up-and-running quickly.
Requirements
You can use express installation if your deployment meets the following requirements and criteria:
Cluster requirements
- Your Red Hat OpenShift cluster has access to the internet to pull images
- You are installing with the OpenShiftonsole.
- You have cluster admin privileges to perform the installation.
- You are installing Cloud Pak for Integration for Integration on a cluster running on OpenShift Container Platform version 4.6 and later. If you don't already have a license to run OpenShift, you may be able to use an OpenShift trial entitlement. For more information, see Get started with OpenShift.
- The minimum install size for Cloud Pak for Integration requires the following
resources to be available on your cluster:
- 32 CPU units
- 128 GB of memory
The available resources can be spread across one or more worker nodes. If you have a trial scenario in mind, and need to size the cluster for workloads with specific capabilities, see Table 1. Note: These requirements are intentionally scaled down and simplified so that you can get started quickly. For details on sizing, see Compute resources for development environments. For details on environment requirements, see Operating environment.Note: The trial license does not entitle you to IBM support.
If you wish to use a different type of deployment (one that does not meet the requirements for this procedure), see Installation options.
Storage requirements
The capabilities and runtimes in Cloud Pak for Integration have varying storage requirements. At a minimum, you require a storage class that supports the RWO access mode. For other capabilities in Cloud Pak for Integration (Asset Repository, Operations Dashboard, App Connect dashboard, Aspera HSTS, and MQ), you also need a storage class that supports the RWX access mode.
The recommended storage providers are:
-
OpenShift Container Storage version 4.2 or above
-
Portworx Storage, version 2.5.5 or above
-
IBM Cloud Block Storage and IBM Cloud File Storage
Adding the IBM CatalogSource object by using the OpenShift web console
Add the IBM operators to the list of operators you can install.
- Go to the OpenShift web console
- In the top banner, click the plus (+) icon to open the Import YAML dialog box.
- Paste the resource definition into the dialog
box:
apiVersion: operators.coreos.com/v1alpha1 kind: CatalogSource metadata: name: ibm-operator-catalog namespace: openshift-marketplace spec: displayName: IBM Operator Catalog image: 'icr.io/cpopen/ibm-operator-catalog:latest' publisher: IBM sourceType: grpc updateStrategy: registryPoll: interval: 45m - Click Create.
Installing the Cloud Pak for Integration Operator
- Go to the OpenShift console.
- Make sure you have selected the Administrator view.
- Click Operators > OperatorHub > Integration & Delivery.
- Search for and click the tile for the IBM Cloud Pak for Integration operator.
- Click Install.
- In the Install Operator pane:
- Select the latest update channel.
- Select the option to install Cloud Pak for Integration in one namespace or for all namespaces on your cluster. If in doubt, choose the All namespaces on the cluster installation mode, and accept the default Installed Namespace.
- Select the Automatic approval strategy.
- Click Install.
Obtaining your entitlement key
Obtain an entitlement key from IBM Container Library. You will use this key in the next section.
-
Click Get an entitlement key.
-
Copy the entitlement key to a safe place so you can use it in Adding the pull secret to a namespace.
- (Optional) Verify the validity of the key by logging in to the IBM Entitled Registry using a
container
tool.
docker login cp.icr.io --username cp --password entitlement_key
Adding the pull secret to a namespace
To install Cloud Pak for Integration in its own namespace, create a docker registry
secret named ibm-entitlement-key, using the following command. In the third line,
replace entitlement_key with the value of your entitlement key from the previous
section, and in the last line, replace target_namespace with the name of your
target namespace:
oc create secret docker-registry ibm-entitlement-key \
    --docker-username=cp \
    --docker-password=entitlement_key \
    --docker-server=cp.icr.io \
    --namespace=target_namespace
Deploying with the OpenShift web console
- Go to the OpenShift web console.
- In the left navigation panel, click Operators > Installed Operators.
- In the list, find and click IBM Cloud Pak for Integration Platform Navigator.
- In the center pane, click the Platform Navigator tab.
- Click Create PlatformNavigator.
- Change Project to your project name. To do so, click the drop-down arrow
and select your project name from the list. The project name in the example screen below is
"cp4i".
 Note: Project is the same as the Kubernetes term namespace. You may encounter both terms in the UI or in the documentation. They are interchangeable.
 - In the Name field, enter a name for the new instance.
- Accept the terms of the terms of the license agreement:
- Under "Full licenses", click the link that matches your version of Cloud Pak for Integration. See Licensing for details about what license to select. The License information page opens.
- Review the license agreement.
- Click I agree or I do not agree.
- Return to Form view and next to License, click the arrow to expand the license acceptance section.
- Set License Accept to true.For more information, see Licensing.

- For License LI, click the arrow to open the drop-down list, and select a license. For details about specific licenses, see the "License versions" section in Licensing.
- Specify the Storage class. Click the arrow to expand the
Storage pane, then click the arrow arrow for Select Storage
Class and select a file storage class.
 Note: If you do not see any storage class options listed, you must create a storage class. See the Requirements section for more information.
 - Set any other configuration values as appropriate.
- Click Create.
Your instance of Platform Navigator is added to the list of instances in the current project (namespace).
Getting the admin password
- Log into the OpenShift web console with admin credentials. Make sure the
Administrator view is selected.
- In the navigation panel, click Workloads to expand the selections, then select Secrets.
- Switch to the
ibm-common-servicesproject: At the top of the Secrets pane, click the arrow to expand the Project list, and selectibm-common-services. - Enter
platform-auth-idp-credentialsin the search box (optional) and clickplatform-auth-idp-credentialsin the list. - Scroll down to the Data pane.
Click Reveal Values and copy the value for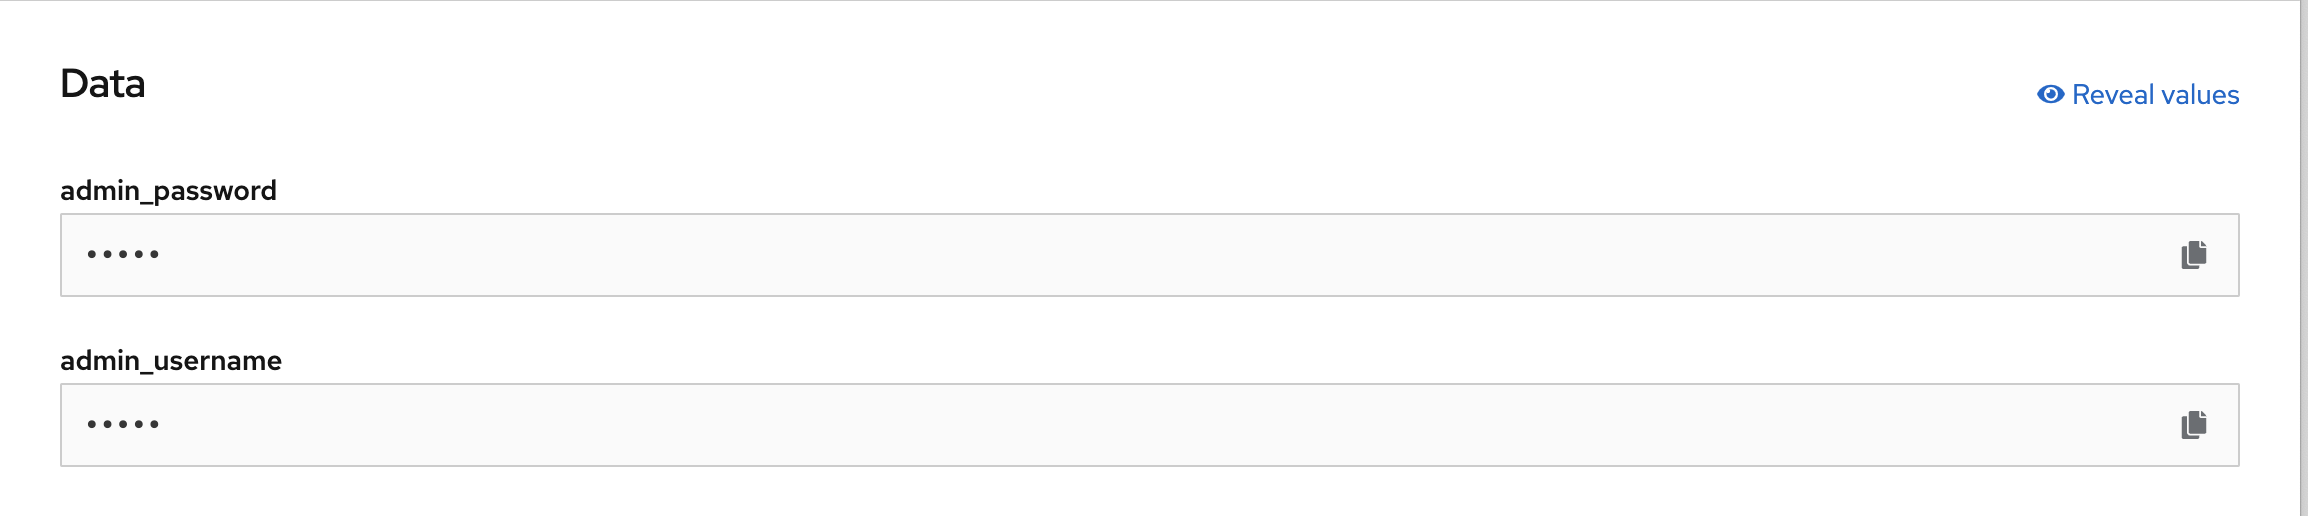
admin_password. - Save the password to use when logging into IBM Automation.
Logging into IBM Automation
When the Platform Navigator status changes to Ready, you can log into IBM Automation to access Cloud Pak for Integration
functionality.
- Go to the OpenShift web console.
- In the navigation panel, click Operators > Installed Operators.
- In the Installed Operators pane, click IBM Cloud Pak for Integration Platform Navigator.
- Click Platform Navigator.
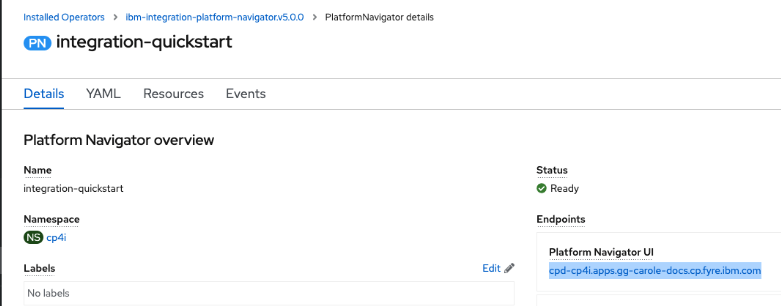
- Click the installed instance link from the list, then click the link under Platform
Navigator UI.
- At the login screen, click IBM provided credentials (admin only).

- For Username, enter
admin. For Password, enter the IBM admin password you obtained in Getting the admin password. - Click Log in.