Automation assets deployment
IBM Automation Foundation assets (Automation assets) is a capability in IBM Cloud Pak for Integration that allows the user to store, manage, and retrieve integration assets.
For information about upgrading Automation assets, see Upgrading Automation assets.
Overview
Automation assets let you share integration assets across capabilities and runtimes in Cloud Pak for Integration. Storing assets—such as JSON schemas— within this repository allows them to be accessed directly within the user interface of certain Integration capabilities. For example, an OpenAPI specification asset stored in the repository can be directly imported within the IBM API Connect user interface.
Assets can be located in remote repositories, such as Git. This allows users to take advantage of the versioning capability offered by the remote repository. Assets stored in a remote repository are read-only. See Remotes for more information.
Planning for installation
Automation assets is designed to be a single place for sharing assets across the whole of your Cloud Pak installation. To better support this sharing, starting with Automation assets 2021.1, users are guided to have a single Automation assets installation per instance of IBM Cloud Pak for Integration. Before Automation assets 2021, it was possible to have multiple installations of the product in multiple different projects. Moving forward the following considerations apply:
You must locate your Automation assets installation in the same project as your Platform Navigator. Any new Automation assets installations in different projects are treated as separate Cloud Pak installations and create their own instance of underlying components, such as foundational services or IBM Automation assets.
You should only have a single instance of Automation Assets. Attempts to create another instance of the new Automation assets asset_repo_platform_navigator_ready rejected
If you are upgrading from an installation where multiple namespaces were used or you had multiple instances of Automation Assets, then you should use the following guidance to migrate to a single, co-located installation - see Upgrading Automation assets.
Installing
Prerequisites
You must meet the following dependencies before you create an Automation assets instance. A Integration Specialist should carry out these tasks.
Install the
ocOpenShift CLI tool. This is required for tasks such as creating custom keys and credentials. For more information, see Getting started with the CLI in the Red Hat OpenShift documentation.Install the operator for Automation assets. See Installation.
A project must exist for this instance. You can install the Automation assets in a namespace also used by the Platform Navigator.
If you are using the IBM Entitled Registry, a pull secret must exist in the namespace containing an entitlement key. See Applying your entitlement key.
You must provide two different types of storage class for use by the Automation assets:
Asset data storage - This requires a File RWX volume. For IBM Cloud File the
ibmc-file-gold-gidstorage class must be used (specifically thegidvariant).Asset metadata storage - This requires a Block RWO volume that meets POSIX requirements and has other characteristics as required by CouchDB persistence storage. For IBM Cloud Block, the
ibmc-block-goldstorage class must be used.For more information on storage classes in OpenShift, see Understanding persistent storage or Cluster storage.
Installing Automation assets from the Platform Navigator
Load the Platform Navigator.
Click View Capabilities.
Click Create Capability.
Click Automation assets.
Configure the Automation assets using the form.
Available options:
Field name Description Advanced Name The name you want your instance of Automation assets to have False Namespace The namespace where your Automation assets should be installed False License acceptance Read through and accept the license agreement before installing Automation assets False License LI The code for the license that you have purchased False Asset data storage An RWX file storage class to be used for asset data. For full details of storage requirements, see Prerequisites. False Asset metadata storage An RWO block storage class to be used for the asset metadata. For full details of the required storage characteristics, see Prerequisites. False Version The version of Automation assets that is used to create an instance. This can be a specific version, such as 2020.3.1-0, or a channel, such as 2020.3.1. Selecting a channel enables auto-upgrade for all fix versions. The channel 2020.3.1, for example, auto-upgrades to 2020.3.1-1. When an operator that supports a new fix version is installed, it automatically upgrades any existing Automation assets operands (deployed versions of the operator) to the new version.Important: latestis no longer a supported channel. Any existing Asset Repositories usinglatestwill update to version 2020.3.1-1.Deprecation alert: Automation assets versions 2020.2.1.1 and 2020.2.1-0 are both deprecated, and may no longer be reconciled by future versions of the operator. See the version matrix page for more information on operator and resource version compatibility.False Automation assets API image The docker registry location for pulling the Automation assets API image True Automation assets UI image The docker registry location for pulling the Automation assets UI image True Image pull policy Configure whether you want images to be pulled every time, only if they're not present, or never True Image pull secrets Configure the secret used for pulling images. If you're using the Entitled Registry and have created a secret for that, you should use that secret here. True Replicas Number of replicas that each service has. The default is 3. Note: Couch replicas are fixed during the first installation of your Automation assets. Changes to replicas after installation will only affect the UI and API services. True Annotations Additional annotations to be added to Automation assets pods. True Node Selector If you wish to assign the pods to a subset of the nodes of your cluster, you can use multiple Node Selectors. See here for more information. Note: This setting only applies to Automation assets UI and API pods. CouchDB pods aren't affected. True Resources Use the Resourcessection to override the default resource request and limit values. You can set limit and request values for the Automation assets API and UI pods, and for the containers in the CouchDB pods. Any values you don't configure here will default to the values listed below. For more information about request and limit values, see the Kubernetes documentation. Important: For a given resource, if you wish to set the request, you must also set the limit, and if you wish to set the limit, you must also set the request. Default values: The values below are the defaults for each resource. The request and limit values are the same for each resource. Note: You cannot create an Automation assets with values smaller than these:Automation assets API CPU:200mAutomation assets API Memory:150MiAutomation assets UI CPU:200mAutomation assets UI Memory:150MiCouchDB Search CPU:50mCouchDB Search Memory:300MiCouchDB DB CPU:200mCouchDB DB Memory:300MiCouchDB Mgmt CPU:50mCouchDB Mgmt Memory:100MiTrue You can also use the YAML editor to configure Automation assets.
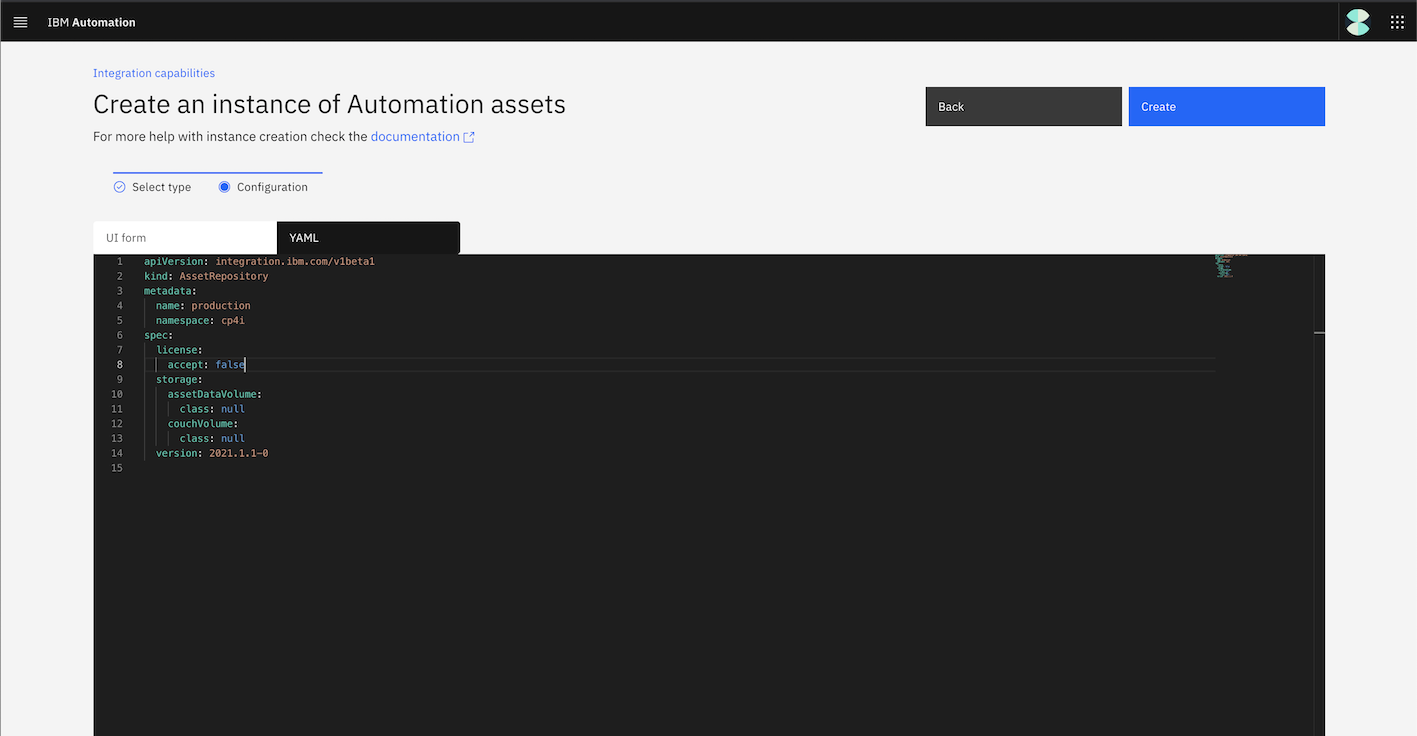
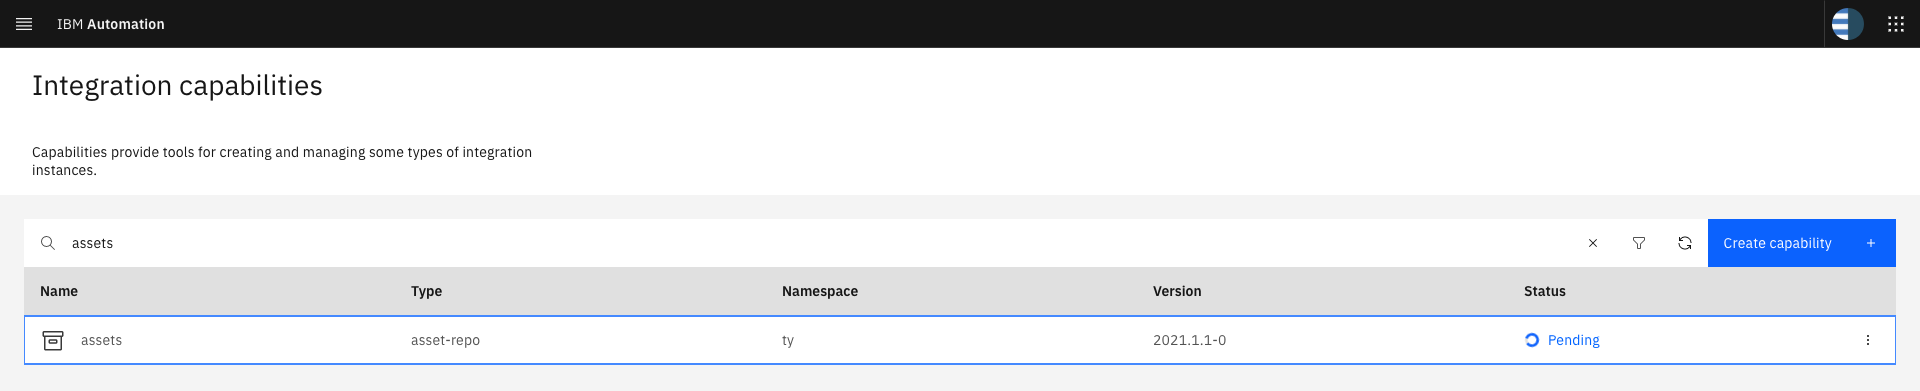
To disable runtime checks, add the annotation
com.ibm.cp4i/disable-webhook-runtime-checks: trueto the Automation assets YAML:metadata: annotations: com.ibm.cp4i/disable-webhook-runtime-checks: trueAutomation assets starts installing and is initially in the Pending state. Wait for it to enter the Ready state.

You are asked to initialize the Automation assets with your teams (if applicable) on the next screen.
Your Automation assets is now ready to be used.
Using Automation Assets
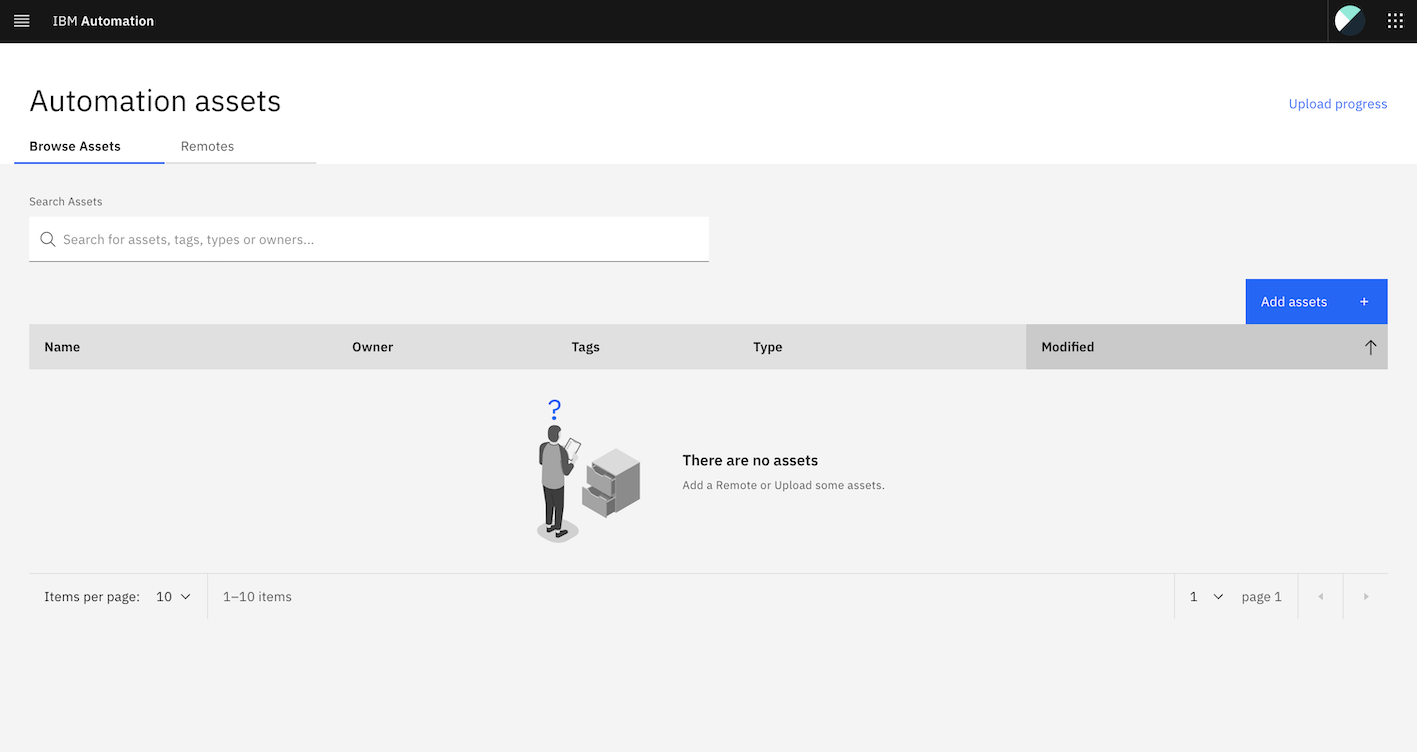
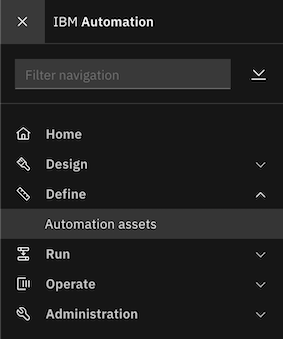
You can access the Automation assets through the home page of the Platform Navigator, or by clicking the overflow menu (3-line icon) in the Automation banner, then clicking Define.
To add assets, select the Add Assets button on the Platform Navigator home page. You then get a prompt to add an asset from your machine.
File-type viewers
Built into the Automation assets is support for viewers corresponding to different file types. Files are automatically opened in their associated viewer when selected from either the scroll view or the assets table.
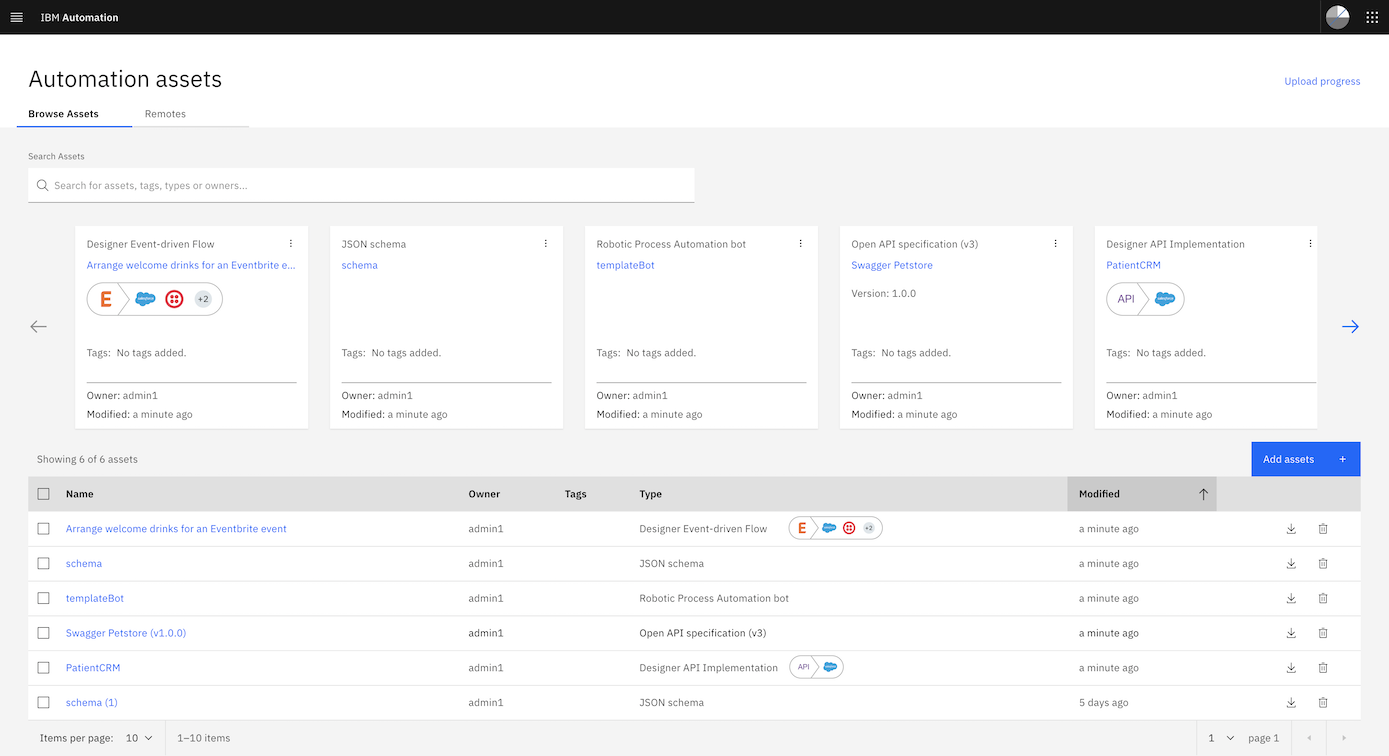
All nonbinary text files have an option to view the associated text underlying the file. If the asset type does not have additional viewer support, the default text viewer is presented. However, if there is additional viewer support, the text view can be triggered by selecting the Code button.
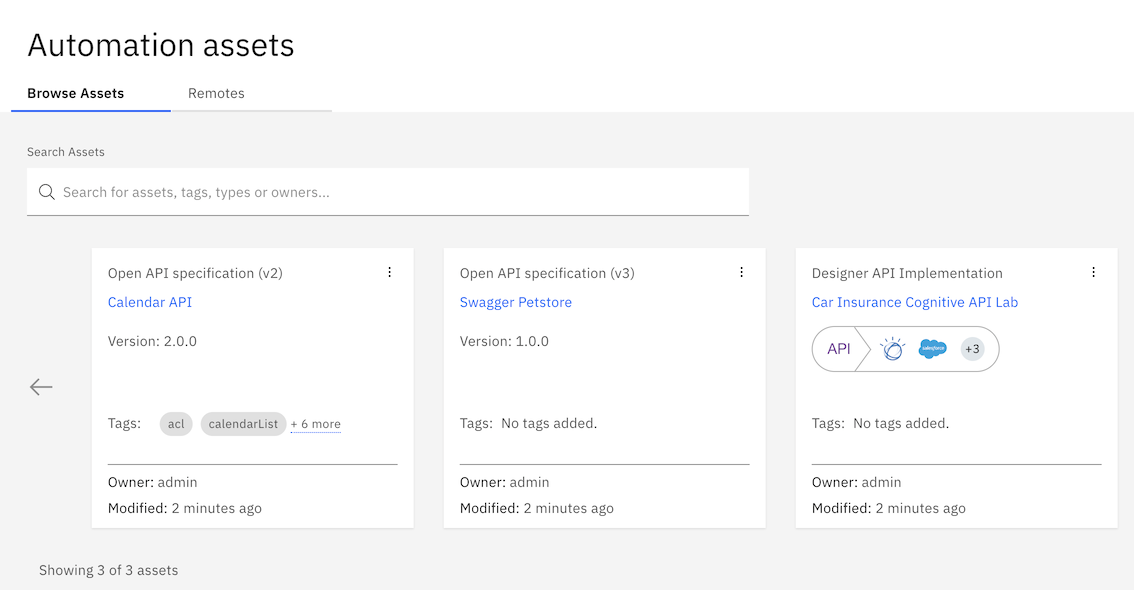
Below are asset types that have additional support:
Open API - Explore the details of an Open API specification asset stored in the repository. Click any particular call to see further details. Click Code to see the actual code.
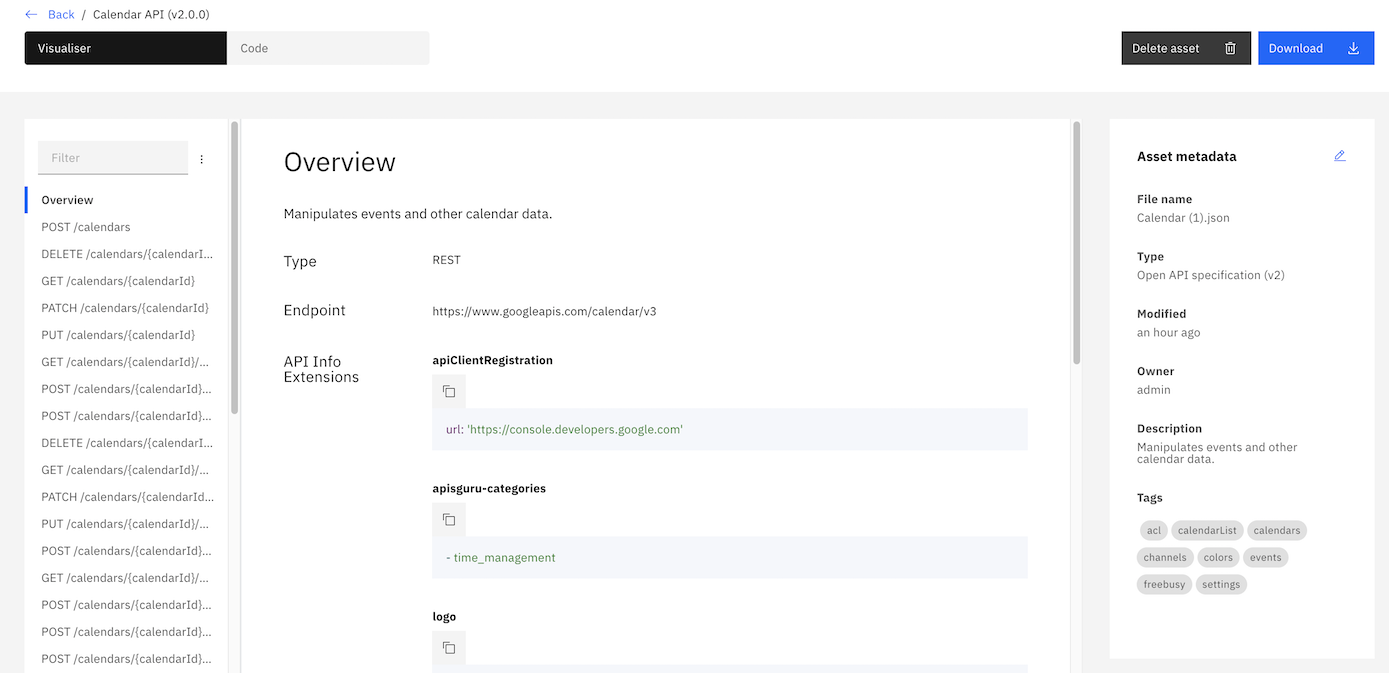
JSON Schema - Explore the details of a JSON schema by selecting a particular field. Click Code to see the actual code.

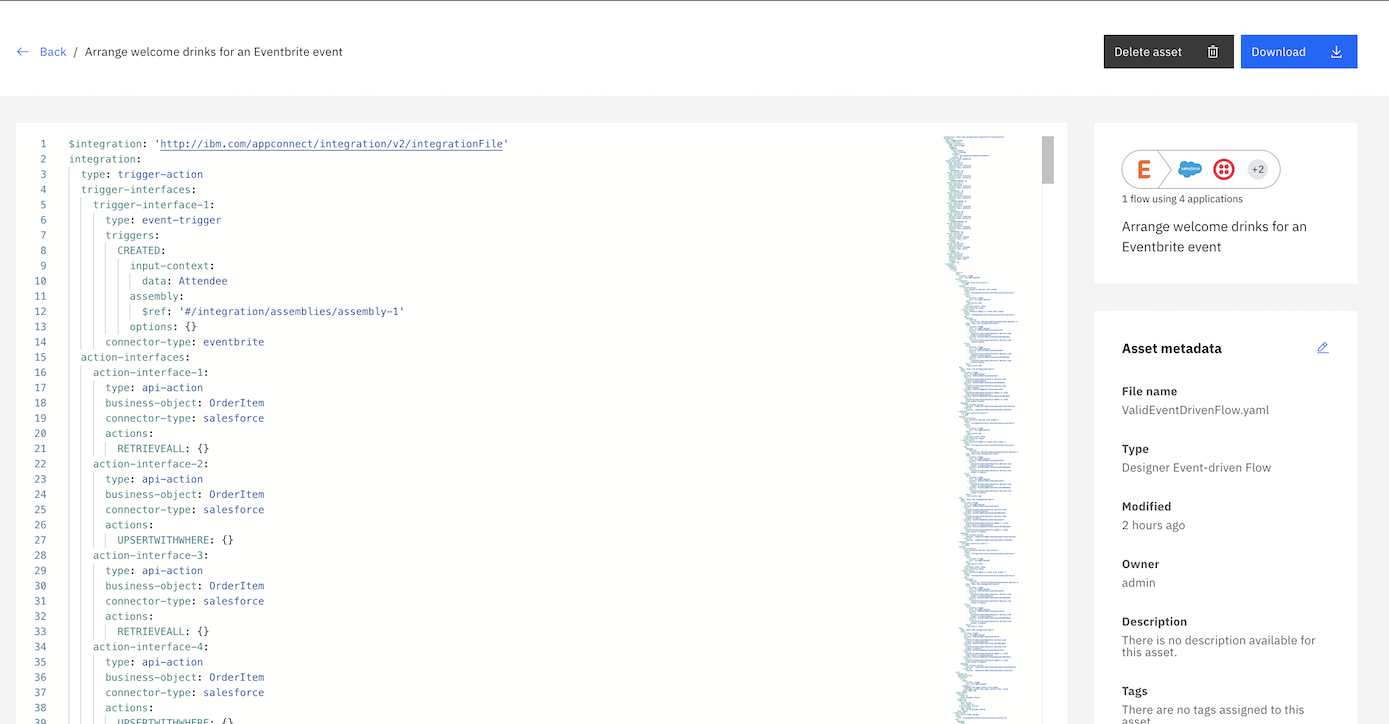
Designer API Implementation and Designer Event Driven Flow - The viewer lets you review the contents of the given asset and it also presents cards presenting either the API or the event connections between different triggers.
PDF - The visualizer lets you to review the contents of a PDF file.
Image - The image viewer lets you to view image files, provided they are of one of the supported types listed above.
Avro Schema - The visualizer validatingwebhookconfigurations you to see JSON records for Avro schemas.
Robotic Process Automation Bot - The visualizer lets you to see the associated contents of the Robotic Process Automation Bot.
Remotes
The Automation assets can include assets in a remote Git repository. Any Git implementation can be used, as long as it supports one of the following:
No authorization
SSH key authorization
Assets stored in a remote repository are read-only.
Click Remotes on the Automation assets. The Remote listing page appears.
To add a new remote repository, click Create Remote. A blank configuration page appears. Complete the fields as needed. The Git URL is automatically tested.
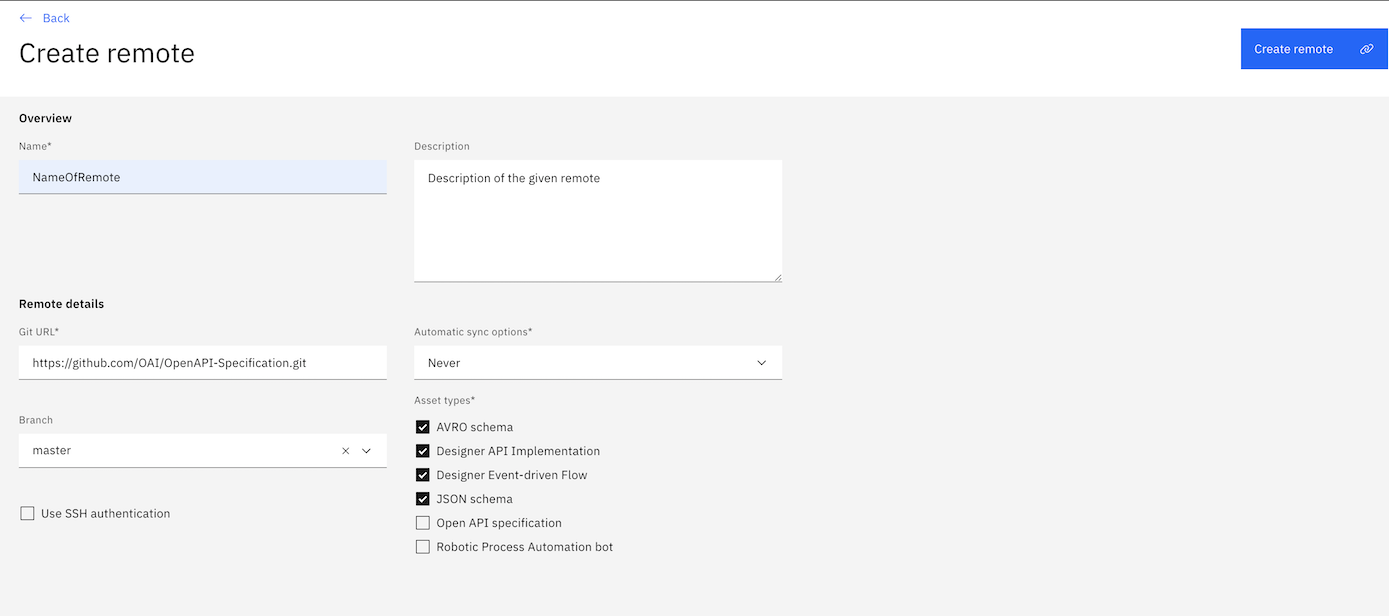
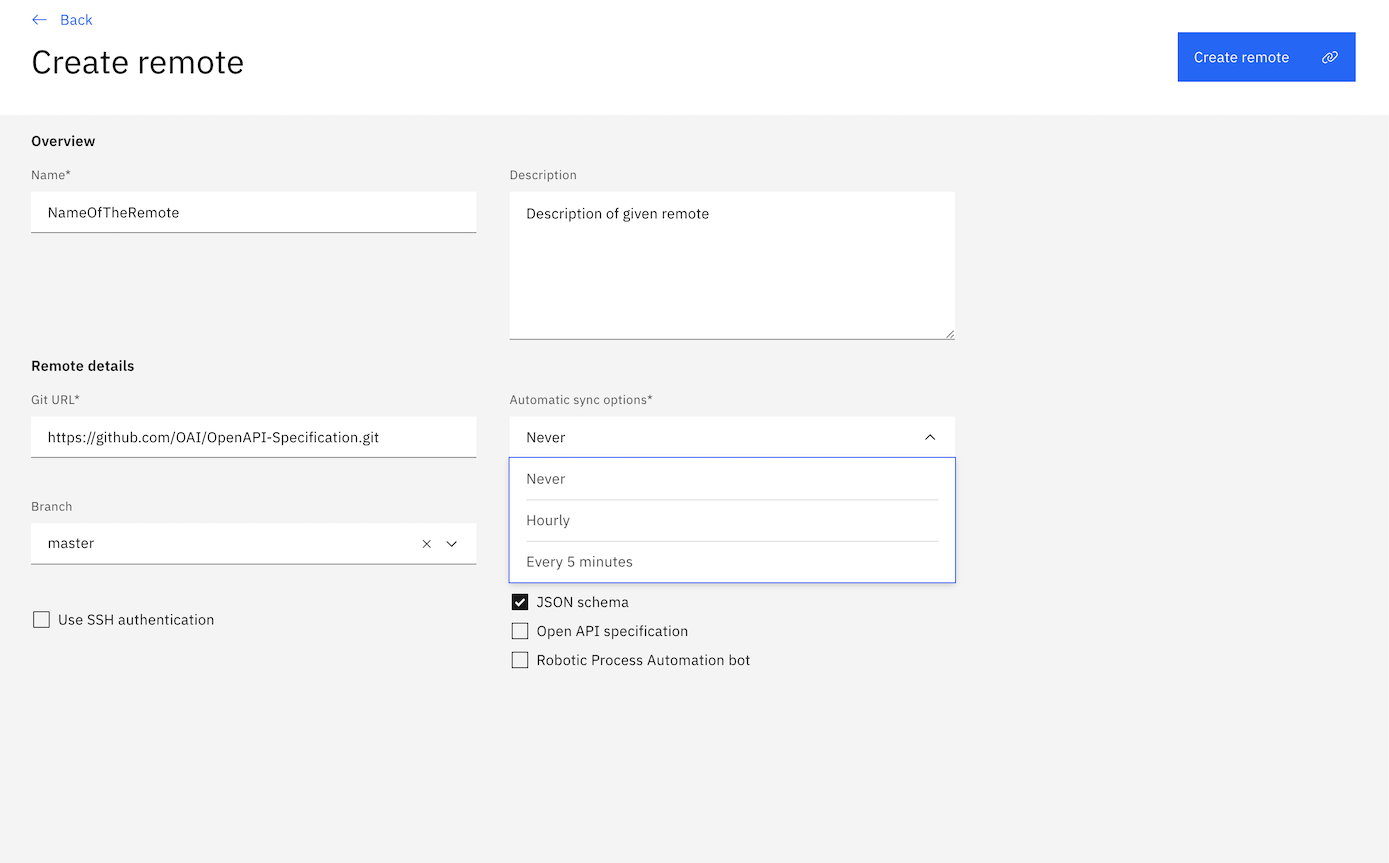
Sync Options
When creating a remote you can select the interval at which remotes are synchronised. This can be done by selecting the dropdown menu under the Automatic sync options tab, and select from one of the possible intervals.
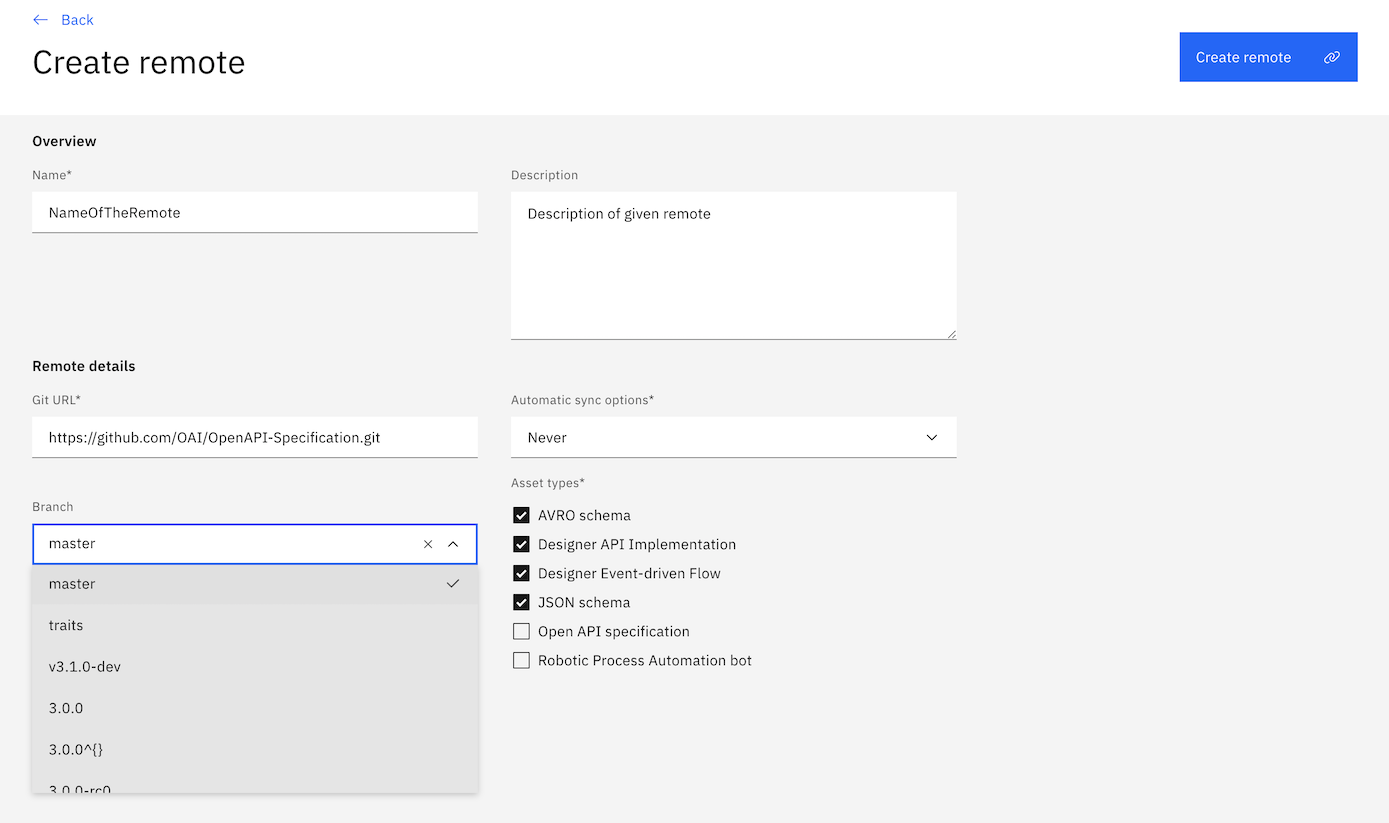
Branch Selector
After adding the remote URL, you can select a remote branch by selecting the branch from the drop down menu under the Branch label.
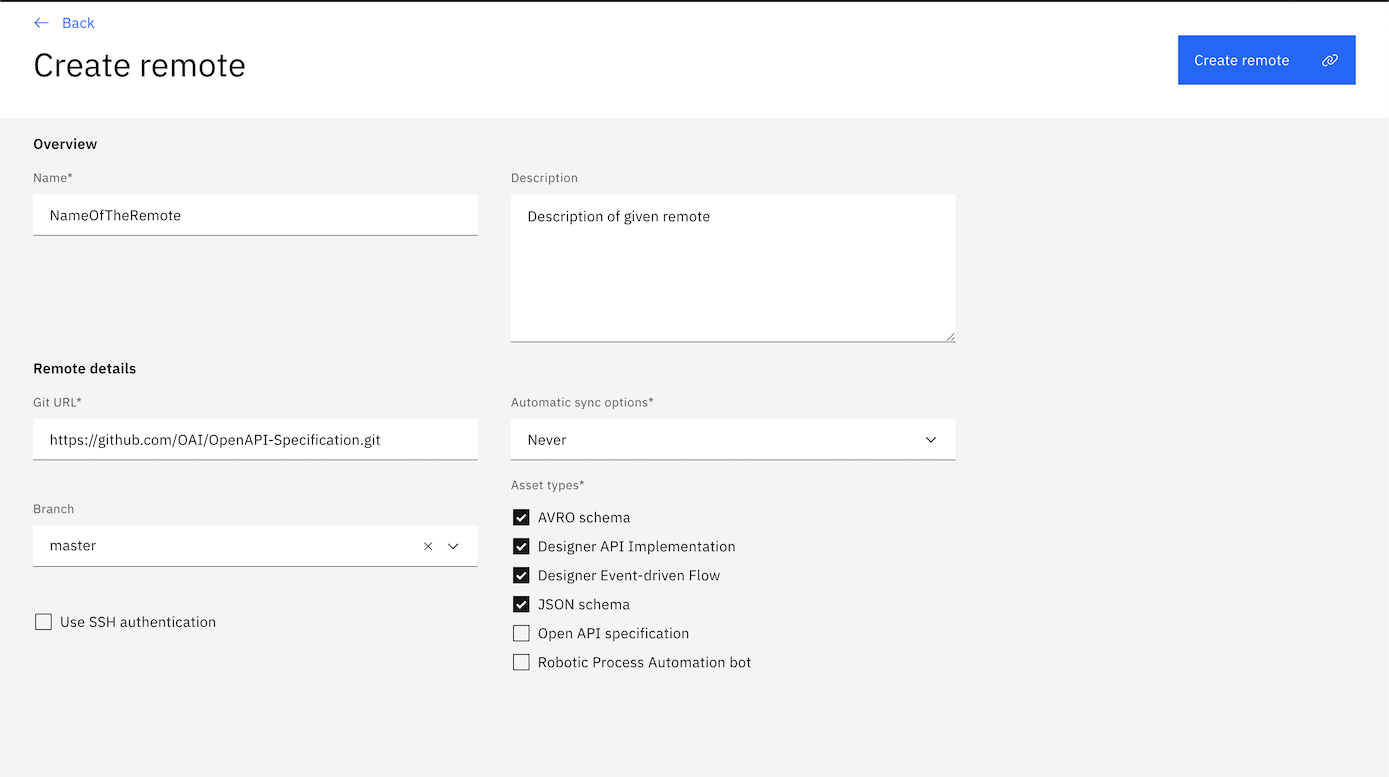
Type Selector
When creating a remote you can select which type of assets are imported from that given remote. This can be done by selecting from one of the supported asset types, below the Asset Types label.
SSH Key Auth
You can use an SSH key to access the remote repository. To use SSH, follow these steps.
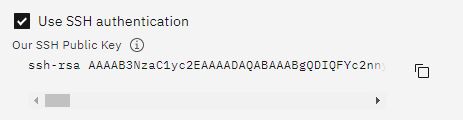
Select Use SSH authentication.
Copy the key presented in the dialog.
Configure your Git repository to use the copied key. For Github, see Github help.
Set the Git URL to the correct address. For a Github repository, this address begins with
git@github.com.
Click Create Remote. Once the synchronization completes, you see the remote listed.

The Automation assets automatically resynchronizes with the remote repository at the interval you set, at the point of adding the remote. Click the Edit icon to set the synchronization interval.
Employing user-supplied keys
You can employ user-supplied SSH keys rather than the default. Take the following steps to use your own keys.
Locate or generate the SSH keys you want to use. This must be an RSA key, with no newline or whitespace characters.
Make sure the remote repository is configured to use this keypair.
Log in to the cluster using the oc login command.
Change to the namespace used for the Automation assets.
Edit the secret containing the Automation assets keypair.
oc edit secret <operand name>-ibm-integration-asset-repository-ssh-keypairSet
data:id_rsato the base 64 encoded private key anddata:id_rsa.pubto the base 64 encoded public keyEnable the secret changes to take effect with the following command.
oc scale deployment/<operand name>-ibm-integration-asset-repository-api --replicas=0
oc scale deployment/<operand name>-ibm-integration-asset-repository-api --replicas=3
If you configured Automation assets to automatically synchronize with the remote repository, take these additional steps:
Click Remotes to see the list of available remote repositories.
Click the
  Edit icon for the remote you want to edit.
 Edit icon for the remote you want to edit.Select
Neverin the Automatic sync options field.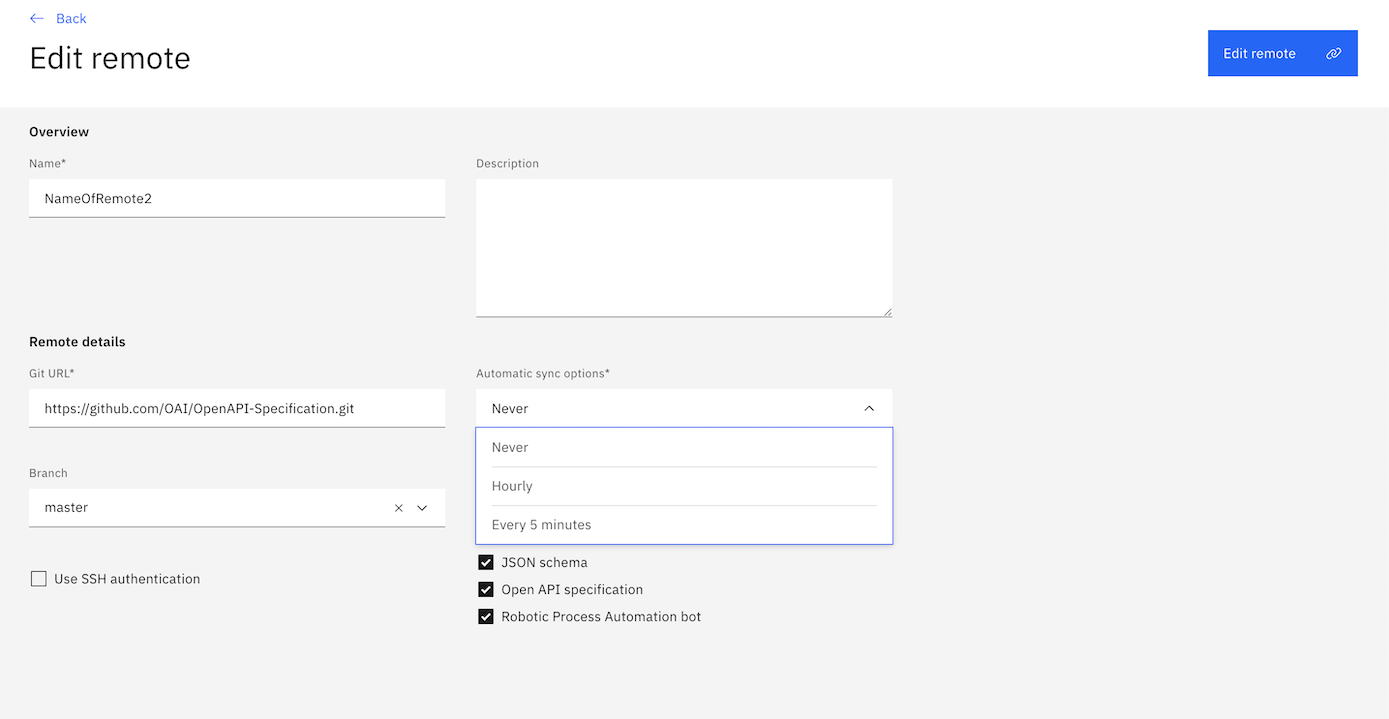
Click Edit Remote. The screen will return to the list of available remotes.
Click the
 Edit icon for the remote you want to edit.Select the previously set value in the Automatic sync options field.
Click Edit Remote. The screen will return to the list of available remotes.
The new keys are used. Repeat this process for each remote you want to use new keypairs.
Supported file types
To prevent the upload of malicious files, only the file types specified below are supported in Automation assets:
Any non-binary text file
Code files:
.json,.yaml,.yml,.avsc,.walText files:
.zip,.pdfImages:
.svg,.png,.jpg,.webp,.bmp,.gif,.avif
Changing CouchDB credentials
If you need to change the password used by the Asset Repository API to talk to the Couch asset metadata store, follow these steps:
Edit the secret c-<operand name>-ibm-integration-asset-repository-m, changing the admin_password key to a base64 encoded password of your choice
oc edit secret c-<operand name>-ibm-integration-asset-repository-mRestart the Couch pods to pick up the new password
oc scale statefulset/c-<operand-name>-ibm-integration-asset-repository-m --replicas=0
oc scale statefulset/c-<operand-name>-ibm-integration-asset-repository-m --replicas=3
Cluster-scoped permissions required by the Automation assets operator
The Automation assets operator requires the following cluster-scoped permissions:
Manage admission webhooks: The Automation assets operator uses admission webhooks to provide immediate validation and feedback about the creation and modification of Automation assets instances. The permission to manage webhooks is required for the operator to register these actions.
API Groups: admissionregistration.k8s.io
Resources: validatingwebhookconfigurations
Verbs: create, delete, get, list, patch, update, watch
Manage namespaces: When installing the Automation assets operator namespace-scoped, a label is applied to the namespace to ensure that the Automation assets webhook only validates Custom Resources in that namespace.
API Groups:
Resources: namespaces
Verbs: get, list, patch, update
Note: API Groups is empty because it's a core resource.
List storage classes: This allows the Automation assets operator to identify and validate that the specified storage classes selected by the user exist.
API Groups: storage.k8s.io
Resources: storageclasses
Verbs: get, list, watch
List cluster versions: The Automation assets operator requires access to the cluster version so it can detect what version of OpenShift the user is running and give guidance on version compatibility.
API Groups: config.openshift.io
Resources: clusterversions
Verbs: list, get
Uninstall procedure
Before uninstalling, make sure that all of the manually uploaded assets that you would like to keep a copy of have been downloaded, as they will not be recoverable after the uninstall is complete.
Uninstall your Automation assets by deleting your AssetRepository custom resource. This can be done in one of three ways:
Cloud Pak for Integration Platform Navigator UI
To delete your AssetRepository CR using the Platform Navigator UI, navigate to your Platform Navigator instance's UI.
To navigate to the Platform Navigator instance's UI from your Automation assets instance, click the options menu (3-line icon) in the Automation banner, and under Administration, click Integration capabilities.
At the end of the Automation assets table row you need to uninstall, click the overflow menu (3-dot icon).
Click Delete in the dropdown menu.
Enter your Automation assets instance name and click Delete.
Your AssetRepository is uninstalled.
RedHat OpenShift Console UI
To delete your AssetRepository CR using the OpenShift UI, navigate to Installed Operators in the OpenShift Console. To get here, expand the Operators section in the navigation bar on the left and select Installed Operators. Ensure you have selected the namespace that contains the Automation assets you are uninstalling.
Click IBM Automation Foundation assets.
Click the Asset Repository tab.
At the end of the Automation assets table row you want to uninstall, click the overflow menu (three-dot icon), then click Delete Asset Repository.
Click Delete in the confirmation dialog.
Your Automation assets is uninstalled.
RedHat OpenShift CLI
To delete your AssetRepository CR using the oc CLI, run:
oc delete assetrepository <instance-name> --namespace=<namespace>