Studio basics
Studio provides an environment called a Workspace in which you can design and configure your integration projects. The Toolbox is the area next to the Workspace where multiple tabs contain components that you use to build an integration project; components such as endpoints, schemas, orchestrations, style sheets, transformation, WSDLs, activities, variables, and functions.
Toolbar icons
- New Project:
 Create
Project
Create
Project - Open Project:
 Opening a Project
 - Save Project:
 Saving a Project
 - Close Project:
 seeSaving a Project
 - Undo:
 Allows
you to undo previous actions.
Allows
you to undo previous actions. - Redo:
 Allows
you to redo previously undone actions.
Allows
you to redo previously undone actions. - Cut:
 Removes
an entity and saves a copy of the entity in the clipboard that can
be used later by a paste action. For example, from an orchestration
you can remove and store an activity to the clipboard. For more information,
see Working with activities in an orchestration
Removes
an entity and saves a copy of the entity in the clipboard that can
be used later by a paste action. For example, from an orchestration
you can remove and store an activity to the clipboard. For more information,
see Working with activities in an orchestration - Copy:
 Saves a copy of the selected entity into the clipboard that
can be used later by a paste action.
Saves a copy of the selected entity into the clipboard that
can be used later by a paste action. - Paste:
 Copy the stored entity from the clipboard.
 - Delete:
 Removes the entity. The activity is not saved in the clipboard.
 - Validate Project:
 Validates all the orchestrations in the project. If an orchestration
is invalid the invalid orchestration icon
Validates all the orchestrations in the project. If an orchestration
is invalid the invalid orchestration icon  is displayed next to the orchestration in the Project tab.
If the orchestration is invalid, click the orchestration to view the
errors in the Validation Results window.
is displayed next to the orchestration in the Project tab.
If the orchestration is invalid, click the orchestration to view the
errors in the Validation Results window. - Publish Project:
 Opens the Publishing a Project dialog
box. From the Publish Project dialog box, you can publish a project
to an Integration Appliance
Opens the Publishing a Project dialog
box. From the Publish Project dialog box, you can publish a project
to an Integration Appliance - Export Project:
 Opens the Save dialog box. From the Save dialog
box, you can save all the orchestrations, endpoints, schemas, and
other objects associated with the project, into a single file that
ends in the .par extension.
Opens the Save dialog box. From the Save dialog
box, you can save all the orchestrations, endpoints, schemas, and
other objects associated with the project, into a single file that
ends in the .par extension. - Project Documentation Generation: Generates and saves project documentation as an HTML file.
- Preferences:
 Opens the Preferences dialog box. You can specify Project,
Orchestration, Flat File Properties, SSL/Kerberos, Session Login,
and XML Schema preferences from the Preferences dialog box.
Opens the Preferences dialog box. You can specify Project,
Orchestration, Flat File Properties, SSL/Kerberos, Session Login,
and XML Schema preferences from the Preferences dialog box. - Help:
 Opens the Studio help. You can also connect to the WebSphere
Cast Iron Community by selecting the option from the main Help
menu.
Opens the Studio help. You can also connect to the WebSphere
Cast Iron Community by selecting the option from the main Help
menu.
Orchestrations and the Workspace
When you select an orchestration a tab view of the selected entities is displayed in the upper half of the Workspace. For example, if you double-click an orchestration in the Project tab, a graphic view of the orchestration is displayed as a tab. An orchestration or workflow contains the logical flow of your integration. Drag-and-drop activities from the Activity tab onto the orchestration to visually define the logical flow of your integration. For a list of other entities configurable from the top half of the Workspace, see the Project tab.
The lower half of the Workspace is where you define or configure the activities you added to the orchestration. It is referred to by different names, depending on what you are doing at the time. If you are creating a map, this area is called the Mapping Editor. If you are configuring endpoints or configuring an activity, it is referred to as the Properties pane.
Toolbox tabs
Project tab
- Endpoints
- Specifies the connection information required to connect to the various external systems. The Integration Appliance supports connecting to endpoints of many types including FTP, SFTP, HTTP, HTTPS, Email (SMTP, POP), SAP, MQ, Web Services, and many commercial database systems.
- Flat File Schemas
- Defines the content and structure of a Flat File. Flat Files are any non-XML text data, such as comma and tab-delimited files and EDI or industry-specific textual formats, such as the Health Level 7 (HL7) format for the healthcare industry.
- Orchestrations
- Contains a sequence of activities that performs a specific business process. Orchestrations are the central entity of any integration project.
- Stylesheets
- Defines how to transform XML data from one format to another. You can upload an XSLT Stylesheet into Studio and add an Apply XSLT activity to your orchestration that starts the XSLT Stylesheet during run time.
- Transformations
- Contains stand-alone maps that represents a set of one or more mappings between source and destination nodes.
- WSDLs
- A WSDL is an XML document that describes a Web Service. It defines how to access a Web Service and the operations available for the Web Service.
- XML Schemas
- Defines the content and structure of XML data. XML Schemas are typically stored in files that end with the .xsd extension. When you upload an XML Schema into a project, you can use that XML Schema to create variables used by the activities of an orchestration.
- New Orchestration:
 Click to create an Orchestration.
 - New Endpoint:
 Click to create an Endpoint.
 - New Flat File Schema:
 Click to create a new Flat File Schema.
 - New Standalone Map:
 Click to create a Standalone map.
 - Add Document:
 Click to upload a file into the current project.
 - Revalidate Project:
 Click to validate the orchestrations in the
current project.
Click to validate the orchestrations in the
current project.
- Select from the Studio toolbar menu. The Preferences dialog box displays.
- Select the Show the entities of the Project tab as a list check box.
- Double-click the entity in the Project tab
- Select the entity in the Project tab and press Return.
, and the Validation Results window opens
next to the Project tab. Click the error message
in the window to open the appropriate panel to fix the error.To rename or delete an entity in the Project tab, right-click the entity and from the list select Rename or Delete.
- Select an entity in one of the folders in the Project tab.
- To copy the entity, enter the key sequence: CTRL+C.
- To paste the entity, enter the key sequence: CTRL+V. A copy of the entity displays in the Project tab.
To view the entities of the Project tab as a list, select the Show entities of the Project tab as a list check box in the Preferences pane of Studio. For more information, see Setting Preferences.
When the Project tab opens, a Dependencies pane shows by default in the Project tab. Selecting an entity in the Project tab shows the entities that are directly dependent on this entity in the project, which entities in the project would be incomplete if this entity was removed.
For example, if you had FTP endpoint that was used by the FTP Poll Directory and FTP Put File activities of the BatchOrder orchestration, clicking the FTP endpoint in the Project tab, displays the BatchOrder orchestration in the Dependencies pane because the endpoint is used by the orchestration. If you deleted the FTP endpoint, the BatchOrder orchestration would be incomplete. If you select the BatchOrder orchestration, you would not see the FTP endpoint listed in the Dependencies pane because you can delete the BatchOrder orchestration without affecting the FTP endpoint.
By default, the Dependencies pane appears underneath the Project tab. You can hide the Dependencies pane, by clearing the Show dependant project nodes check box for the Project in the Preferences pane. To view the preferences for a project, select from the toolbar menu and then select Project in the left pane. The preferences for the project display.
Activities tab
- Transform
- Logic
- Utilities
- Archives
- Cryptoservice
- Database
- Data Quality
- Domino
- Force.com Bulk API
- FTP
- HTTP
- JDE
- JMS
- MQ
- NetSuite
- PeopleSoft
- SAP
- Salesforce.com
- ServiceMax
- Siebel
- STS
- Web Services
- Workday
Variables tab
Variables are tools for orchestrations. They are used to bind data sources to orchestrations and pass or operate on data values as they pass through the orchestration. The Variables tab provides an area where you can create and edit variables.
Functions tab
Functions are tools used in the Mapping Editor. Use the tools to specify how to transform data as it passes through an orchestration. If the functions provided in the Functions tab do not meet your needs, you can create your own custom functions.
Memory usage and garbage collection
If the Show memory usage in status bar option is selected in the Preference dialog box, a memory bar and trash can icon is displayed as shown in the following figure. This memory bar displays how much memory is currently used by Studio, compared to the total memory that is currently allocated to Studio (520 MBytes) from the Operating System, as shown in Figure 1:

To request that Studio attempt garbage collection, reclaiming any unused memory inside of Studio, click the trash can icon located to the right of the memory bar. Clicking the garbage collection trash can icon might reduce the amount of memory Studio is currently using internally, potentially increasing the performance of Studio when working with a large project. Clicking the garbage collection trash can does not reduce the memory used by Studio from the operating system, the size of this memory remains constant to the 520 MBytes size initially allocated to Studio.
Entity tabs
- Close: Close the tab that you right-clicked on to open the menu.
- Close Other Tabs: Close all the open entity tabs except the entity tab that you right-clicked to open the menu.
- Close All Tabs: Closes all the entity tabs currently open.
- Close All But Current Tab: Close all the open entity tabs except the entity tab that is currently selected.
To navigate to hidden entity tabs, when many entitles
have been opened from the Project tab, the
hidden tabs icon  is displayed as shown in Figure 2.
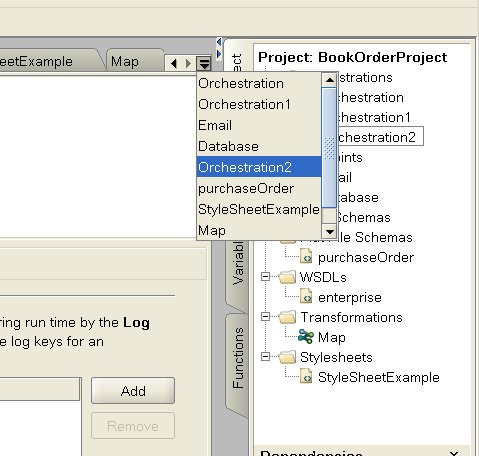
To access the hidden entity tabs, click the hidden
tabs icon . A list of all the currently opened tabs is displayed. Select
one of the tabs from the menu.
