Creating the expenses plan
To create the expenses plan, add a view that already exists to the Expense input sheet.
This video illustrates the steps described below:
Procedure
-
Click
 to show the tree.
 -
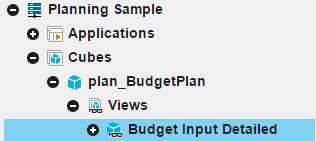
In the tree, expand .
-
Drag the Budget Input Detailed view onto the Expense input sheet.
Tip: You can also find and add this view to the sheet by typing view budget input detailed in the intent bar:

-
Click the Budget Input Detailed view. Resizing handles appear around the
edges.
 .
.
-
Go to the tree, and expand dimension in the tree.
Tip: You might need to scroll down the tree to find it the dimension. A dimension has this icon:
 and then click
 to see Sets, Levels, and
Members
to see Sets, Levels, and
Members -
Expand Sets.
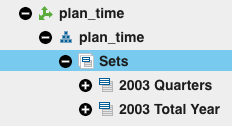
Sets are selections of members in dimensions that you can use for focusing on smaller groups of members.
-
Find the Current Desc Year Qtr Month set and drag it on top of the
plan time tile on the Expenses input sheet.
This set replaces the plan time dimension with the Current Desc Year Qtr Month set.
Tip: The plan time tile turns yellow when the Current Desc Year Qtr Month set is in the correct position to replace it.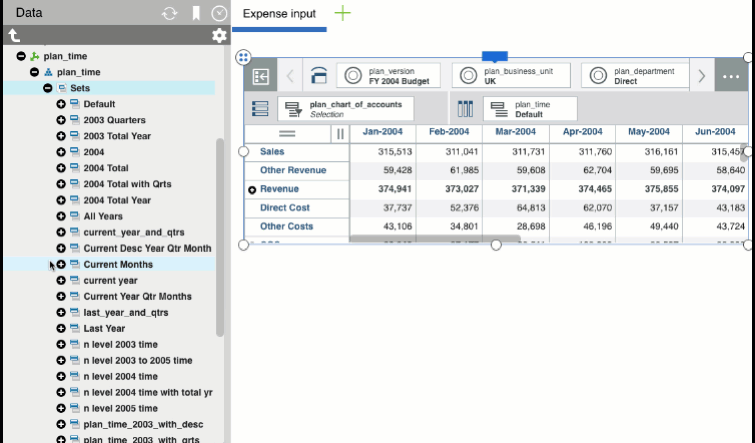
-
Click the plan chart of accounts tile, and then click
 to open the set
editor.
to open the set
editor.
-
Click the bullet icon
 and then click Children.
This option means that when you select a member for insertion into the Current Set list, the member's children are also selected.
- Click
 to expand Operating Expense.
 - Click the plan_department tile and then click to open the set
editor.
- Click Display aliases
and select one of the aliases, for example, Department_English. Then click Apply and close. Notice that the members in plan_department change from numbers to text in the language of the alias that you selected.

-
Click the pencil
 to leave edit mode.
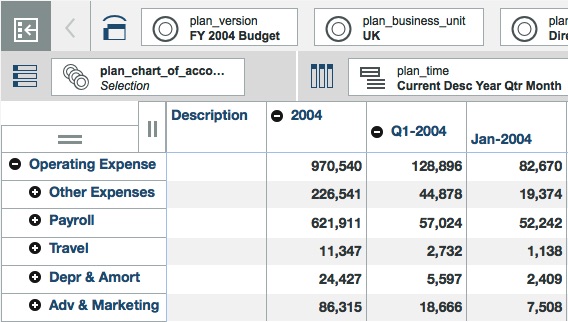
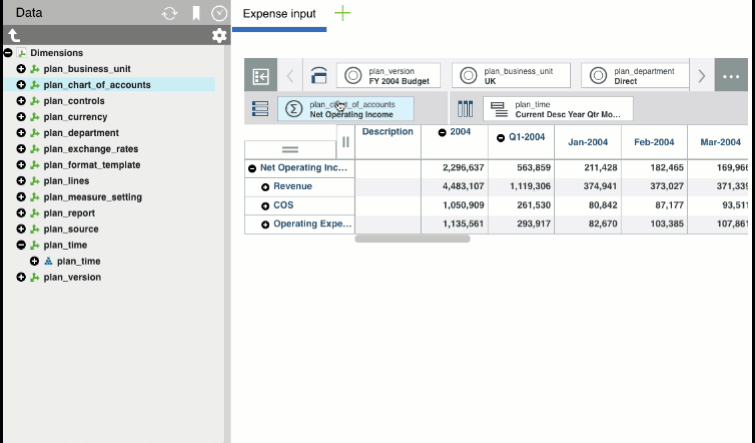
Results
Your view should look similar to this image (the numbers might be different):